
Ring Sizing Tips and Tricks
Ask a seasoned bench jeweler how many rings he or she has sized and they'll probably give you a figure in the quadruple digits. The following is a compilation of tips and tricks to help you perform this mundane task better and faster.
7 Minute Read
Ask a seasoned bench jeweler how many rings he or she has sized and they'll probably give you a figure in the quadruple digits.
The following is a compilation of tips and tricks to help you perform this mundane task better and faster.
First Things First
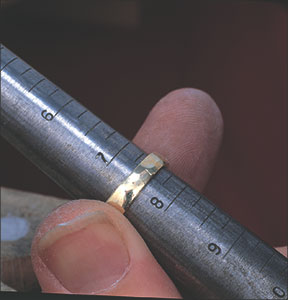
- To ensure you've got the size right, try this trick from Brad Simon of B.W. Simon in Spartanburg, South Carolina: Purchase several sets of plastic ring sizers for use at take in and organize them by finger size. Measure the customer's finger and place the correct sizer in the job envelope with the ring to be sized. Now the bench jeweler can be certain that he is using the same dimensions as the person who measured the customer's finger.
- Before sizing a ring, check to see if it has been sized before. If it has, you'll have to saw through the solder joint (if it has been sized down) or through both solder joints (if it has been sized up). Also, check the size and roundness on your ring mandrel; rings that are out-of-round often appear to be smaller than they are.
- When possible, avoid cutting on the karat stamp, trademark, or any special engraving. For plain bands, the location of the cut should be 90 degrees from the karat stamp or trademark.
- Remember: The hardest grade of solder that can be used without melting the shank is always the best choice for sizing.
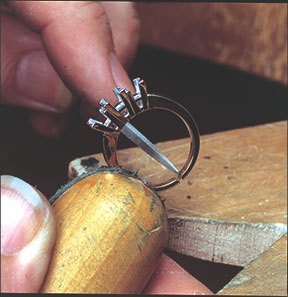
Using a Butt JointThe most common joint used in the sizing of rings is a butt joint. When executed properly, it provides a seamless finish, leaving no evidence that the ring was ever sized. The basic steps of this process include cutting through the bottom center of the shank and either removing metal (to size down) or adding sizing stock of the appropriate length (to size up). Tips for performing this process accurately, as demonstrated in the MJSA Press book At the Bench by Gregg Todd and Greg Gilman, include: | |
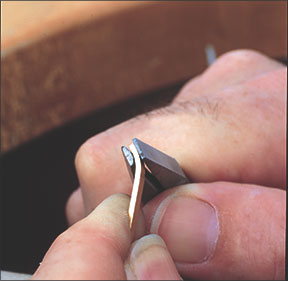 | Use sizing stock that is slightly wider and thicker than the shank — about 0.2 mm wider and 0.1 mm thicker will do. |
 | After measuring the stock with dividers, saw along the outside edge of the scribed line to ensure that the piece being added is the correct length. |
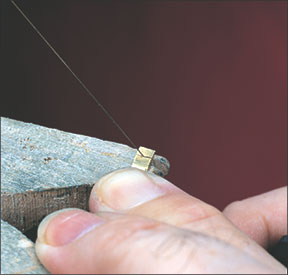
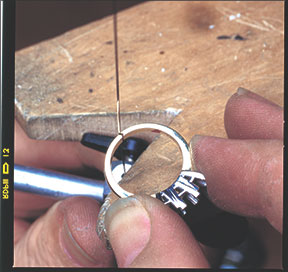
 | When you slide the ring up the mandrel to the desired stock and insert the sizing stock, the joints should fit precisely. If they don't, fit one side of the joint precisely by gently sawing through the cut again, using the saw blade as a file. |
 | After firecoating the ring and fluxing the joint, apply hard solder and flow one joint. Then you can bend and adjust the other joint into position more accurately. |
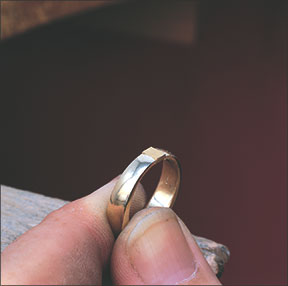
 | Once the butt joint is soldered in place and has been filed, sanded, and smoothed, slide it onto the mandrel and round it out with a non-marring mallet. Double check to make sure the size is correct. To avoid tapering the interior surface of the shank, reverse the ring on the mandrel and repeat this step. (Note: This step should be done when sizing any ring, regardless of the type of joint used.) |
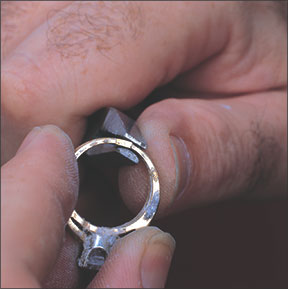
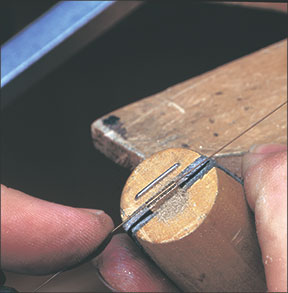
Using a Dovetail JointWhile dovetail joints take longer than butt joints, they offer an additional measure of support to a sizing. There are two types of dovetails generally used: V-notched and rounded. In this procedure, a V-shaped groove is filed on each side of the shank (V-notched), or the shank is cut open to the desired size and rounded at each end with a barrette needle file (rounded). A corresponding piece of sizing stock is then cut and grooved accordingly, fit, and soldered into place. Tips for performing this process accurately, as demonstrated in the MJSA Press book At the Bench, include: | |
 | When filing a V-shaped groove into the shank, use a square needle fire and work on the inside of the shank first. This provides greater stability and a better cut. |
 | Make sure the V-shaped groove in the sizing stock is equal to half its thickness. (For example, if the sizing stock is 1.5 mm thick, saw to a depth of 0.75 mm.) |
 | If after inserting the grooved plug into the shank you find that it doesn't fit well, true the joint by gently sawing through the V-shaped cut, using the saw blade as a file to reshape the cut. |
Sizing a Ring with a Laser
Just as with traditional soldering, you can use either a butt joint or a V-notched joint when sizing a ring using a laser welder. The key here is using the correct voltage, time, and beam diameter on your laser welder. "If you use too small of a beam diameter for the core weld when sizing a ring, it will often result in pitting or holes," says Giles Pope, director of education for LaserStar Technologies in Riverside, Rhode Island. "The jeweler should increase voltage, milliseconds, and beam diameter to enable the weld to penetrate at least 51 percent to the core of the ring being welded. If the welder being used cannot achieve 51 percent penetration with a butt joint only, the jeweler can use a V-notched joint and backfill, followed by an overlapping core weld." In an overlapping core weld, the laser shots create flat metal puddles along the surface.
Once the core weld is in place, Pope advises the jeweler to readjust the laser welder's total parameters (voltage, time, beam diameter, hertz rate) to lay the filler wire with a hammering and smoothing process. "If the beam diameter is not widened for filling and smoothing, the laser energy will be too strong and consequently splash the alloy around, resulting in an insufficient weld."
Cool Sizing Tricks
- Have you considered intentionally sizing a ring so it's 1/8 of a size too small? Simon encourages you to — and, in some shops, this is standard operating procedure. After soldering, clean the joint on the inside of the ring only. Place the ring on the mandrel and hammer across the solder joint until the ring reaches the correct size. To finish the job, clean up the outside of the ring by filing and polishing. The idea behind this approach is that it's better for the ring to be a bit on the small side than on the large side. "If you are a little too large, you will need to resize," says Simon. "In addition, this [process] will work harden the sizing area, making a stronger joint, and [making] finishing and polishing easier."
- When sizing down a ring, you will have to apply pressure to it after you've cut the excess. To keep your pliers from marring the ring while you apply pressure to it, wrap the jaws with several layers of masking tape, says Jurgen Maerz, technical consultant for Platinum Guild International in New York City. Also, be sure to rotate the pliers around the circumference of the ring, and try to keep it as round as possible.
- Alan Revere of the Revere Academy of Jewelry Arts in San Francisco offered this tip for stretching a ring you don't want to cut and add more metal to, such as a ring with an outside pattern that you don't want to ruin, in 101 Bench Tips for Jewelers: Use a file as a hammer! That's right, as absurd as it may sound, you can effectively stretch a ring by hammering it with the side of a file. Prepare an old, large, heavy fat file by grinding the teeth off of one side; bring it up to at least a 240-grit finish. Now place the ring on the mandrel and brace the mandrel firmly. Place the file/hammer on the mandrel, with the finished edge against the ring.
- Now slide the file/hammer to the small end of the mandrel and, with a bit of force, quickly bring it back down against the ring, pushing the ring up the mandrel. It is amazing how much force the file applies and how effectively you can move metal. When finished, you need only to touch up and resurface the edge of your enlarged ring.
Editor's Note
The following is an excerpt from "The Ultimate Repair Guide" that appeared in the June 2011 issue of MJSA Journal, which also featured sections on retipping and chain and findings repair. To order a copy of the complete guide, contact MJSA at 1-800-444-6572, ext. 3038.
![]()
In association with
![]()
The award-winning Journal is published monthly by MJSA, the trade association for professional jewelry makers, designers, and related suppliers. It offers design ideas, fabrication and production techniques, bench tips, business and marketing insights, and trend and technology updates—the information crucial for business success. “More than other publications, MJSA Journal is oriented toward people like me: those trying to earn a living by designing and making jewelry,” says Jim Binnion of James Binnion Metal Arts.
Click here to read our latest articles
Click here to get a FREE four-month trial subscription.
Related Articles

Goldsmith’s Goldsmith: Pat Flynn
Hydraulic Press Safety Precautions

Changing Rules

Charles Lewton-Brain Exhibition


The All-In-One Jewelry Making Solution At Your Fingertips
When you join the Ganoksin community, you get the tools you need to take your work to the next level.

