
Rebuilding Bezels with a Laser Welder
1 Minute Read
Steve Satow

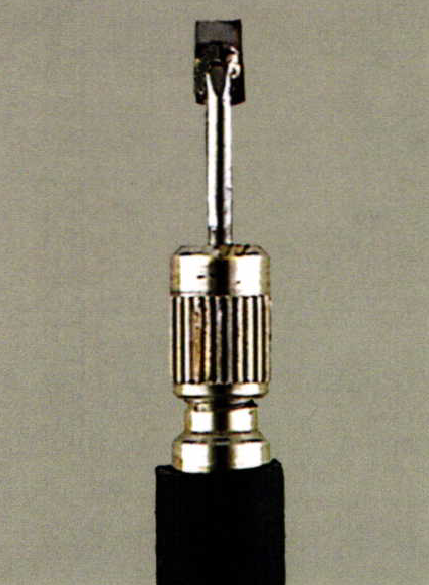
I have found this to be a most useful tool to use when rebuilding a bezel using a Laser Welder. It is made from a watchmaker's screw driver and is used to d eflect the excess energy reflected at a sensitive stone to prevent damage to the stone's surface. This view of the finished product shows 1.5mm X 2mm piece of fine silver welded to the blade tip.
You can remove the tip from the screw driver and solder it with regular silver solder, or leave it in the handle and laser weld it using white gold wire. I used fine silver for the shield because it reflects 90% of all light striking its surface. Fine silver also has great heat dispersion. Any light not reflected is passed on up the screw driver blade into the brass plated handle. I suggest at least one layer of heat shrink tubing to be added to the handle to keep your fingers comfortable.
Very little heat is transferred to the stone as the beveled end of the shield is the only area in contact with the stone.
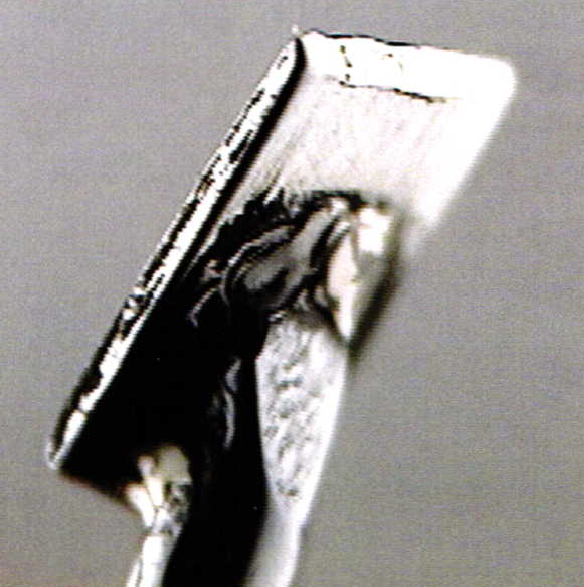
This close up top view of the tip ofthe shield shows how the beveled end allows it to get close to the bezel you're rebuilding. It is important that no gap exists between the two.
Any one who has tried to weld sterling silver knows how difficult it is to weld and fine silver is even more difficult. The only way I have found to accidentally weld the shield to the bezel is to splash the metal from the bezel on to the silver shield. To prevent this, keep your beam on the bezel and let the tool only catch the reflection. If you move it along next to the beam as you move down the edge it reflects all the stray light.
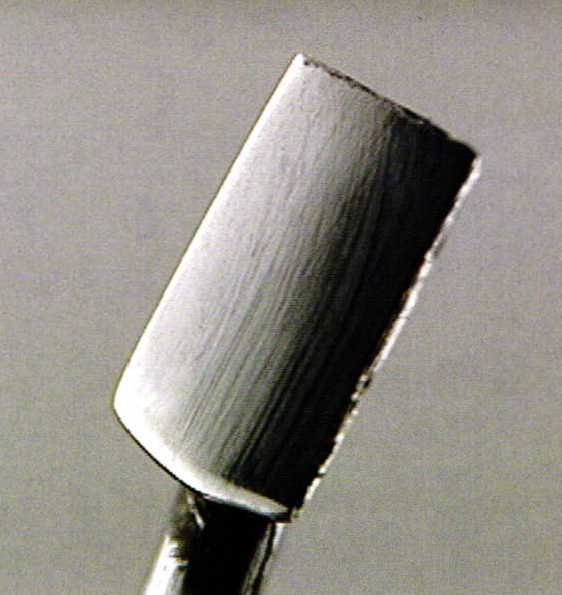
This is the polished bottom side. I like to keep both sides polished to optimize their light reflecting properties. This allows it to be used on both sides in case one angle isn't comfortable for you to hold.
I have several more with different shaped tips to get into other tight spots. I would suggest making several with rounded tips at different angles. It's easiest to shape the tips once the tool is assembled. A separating disc will easily grind it to any shape you want.
Related Articles

Ronda Coryell’s Foredom Micromotor K.1050

Heimerle + Meule: Innovation as a Factor for Success

Customized Light Box & Bench Shelf

Engraving Methods and Techniques


The All-In-One Jewelry Making Solution At Your Fingertips
When you join the Ganoksin community, you get the tools you need to take your work to the next level.
