
Prong Setting & Ring Sizing Tips
7 Minute Read
I'm going to do something different in this issue. Instead of taking you through the steps involved in putting a new piece of jewelry on the market, I'm going to share some bench tips that I've been taught, or developed, through the years. See if some of these tips help with the jewelry that hits your bench this week.
Now, if you're a jeweler in Nashville, TN, you can stop reading right here and go to the next article. There's nothing here for you. I'd hate to waste your time revealing several of my trade secrets to the competition. But, I'm a giving person, so if you feel you must, go ahead and read further.
Flashing on Prongs
When you set a stone into a prong setting the hardest part of the finishing process is getting those little flashings that are right against the stone. If you try too hard you can scratch the stone and cost yourself a bunch of money. I've tried files, razor blades, and saw blades to get the flashings off of the stone, until I figured out how to eliminate them entirely.
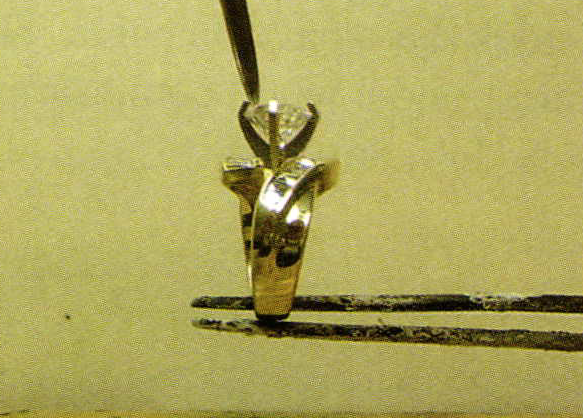
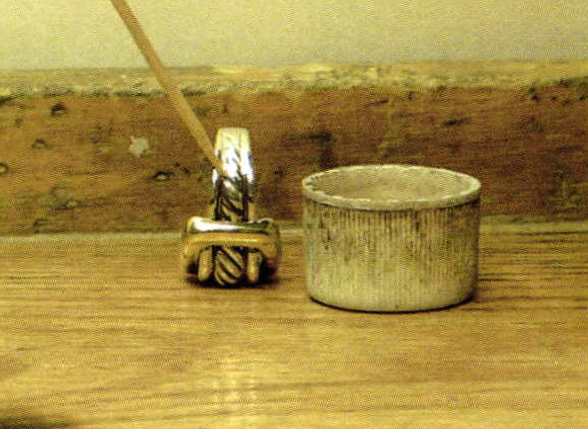
Look at the photo with the 2 ct. diamond in the semi mount. Using your optivisor, look carefully at the prong on the right. Notice how it's bent over the stone, mostly in place, but it hasn't been driven yet. There is a gap between the tip of the prong, and the crown facets of the stone. The prong on the left is being filed before the prong is in its final resting position, tight against the diamond. Filing the prongs, right before the final tightening, allows you to get to the bottom of the prong.
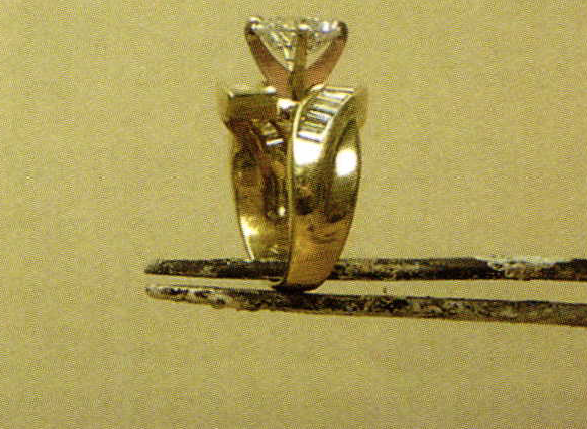
The next photo shows the prongs in their final position, flashing free! I spent at least ten years wrestling with that problem before I developed this method. I'll never set a stone another way. Let me know if it helps.
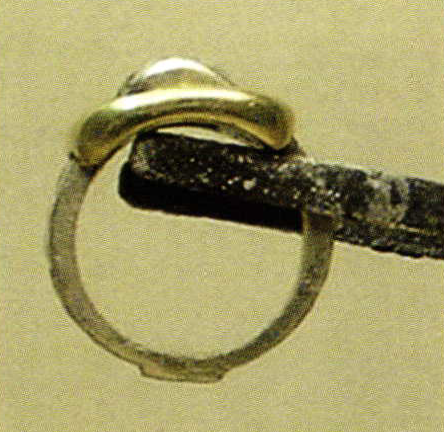
Sizing a Silver Ring with a Stone
I know you don't like to size sterling silver rings. There's no money in it. It's too hard to do. The solder doesn't flow right. You have to remove the stone or it will burn up. You're wrong on all accounts. I'm going to show you how to do it.
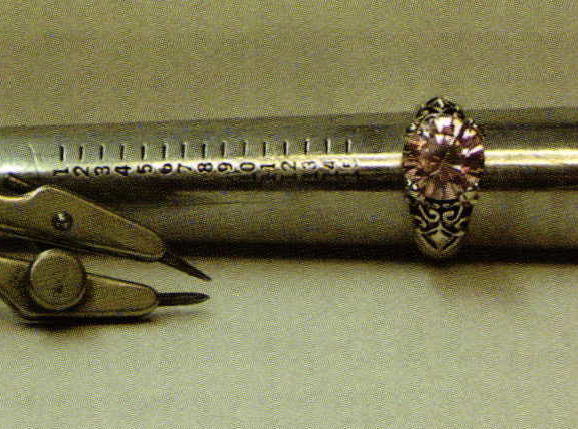
The ring I'm going to size is sterling silver with a pink stone that will burn upif I'm not careful. The ring is a size 7, and it's going to be sized down to a 5. Look at the photo that shows the ring on the mandrel, with the dividers. Have you ever noticed the sizing gauge on your mandrel? I used this particular mandrel for about 13 yean before someone pointed out what those numbers were. If you've never noticed it before, it's an invaluable tool. Just place your dividers between the 5 and the 7, and BAM that's your measurement. Transfer those marks to the ring with the dividers and remove the metal between the marks. How cool is that?
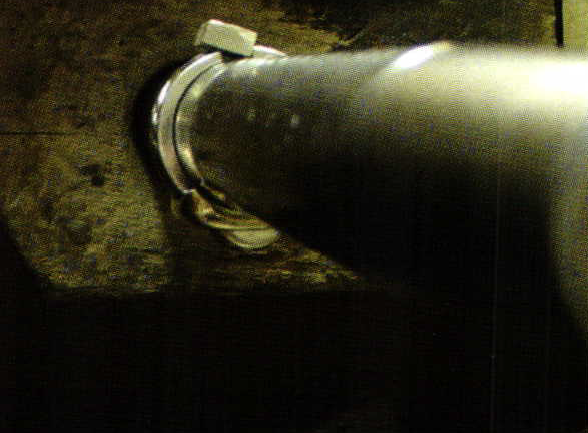
Now, here's the real trick. Look at the photo with a green lid with something that looks like mud in it. In the middle of the mud, using your optivisors, look closely and you'll see the bottom of the shank exposed. The top of the ring, and the stone, is buried in the mud, safe from heat.
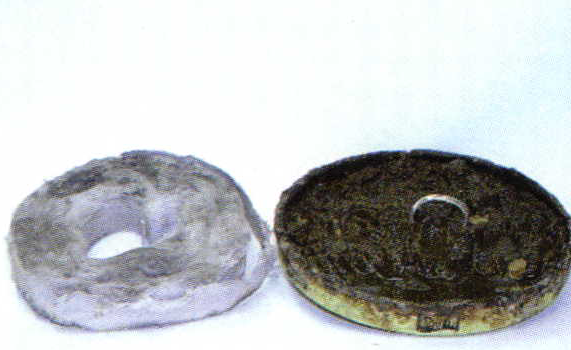
Look at the left of the photo and see if you recognize that white, round thing. It's what's left of a circular, coiled soldering pad, available from all supply houses. I just uncoiled some of it and tore it into tiny pieces and placed them in a metal jar lid and added water. It has enough consistency to hold the ring in any position, but allows you to easily move it at will. You'll need to use an extra hot flame, due to the heat sink you've created with the mud, but once you finish with the soldering, simply push the ring over into the mud, and it will instantly cool. and protect the stone. When you're finished with the mud, just set it aside and it will dry out. When you need it again, just add water.
Now that you know how to get around not removing the stone, what about that pesky problem of the solder not flowing? Simply use paste flux! The biggest mistake jewelers make is the selection of flux for sterling silver. The green, self pickling flux on every jeweler's bench DOES NOT work for sterling silver! Spend $ 10, and buy a jar of the "creamy" silver brazing flux, available in every catalog, and use it instead. Also, only use sterling silver easy flow solder. The heat requirements are very extreme with this method, so you need your solder to flow at the lowest possible temperature. Sterling silver easy flow will begin to flow around 1,300 degrees. If you heat it any hotter than that you're going to start burning up the stone that is buried in the mud.
Silver has a different thermal transfer rate than gold so it requires a much hotter flame than gold. Put your biggest tip on your torch, and get a really hot flame. Then, apply the cream flux to the exposed shank, and apply the solder and hold your torch in real tight until the solder flows. Now, use your solder pick to lay the ring over into the mud and cool it off.
Remove the ring from the mud — hold your breath — and look at the top of the ring. See, you can breathe normally now because the stone is in perfect condition. Magic!
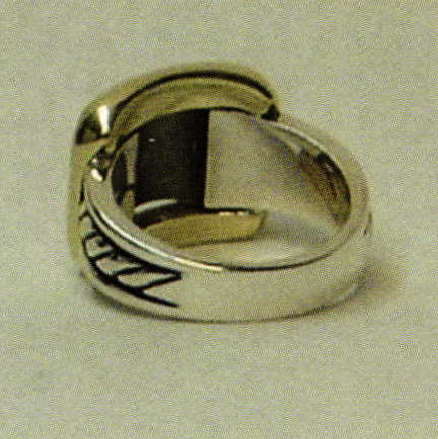
Sizing a Yurman Ring
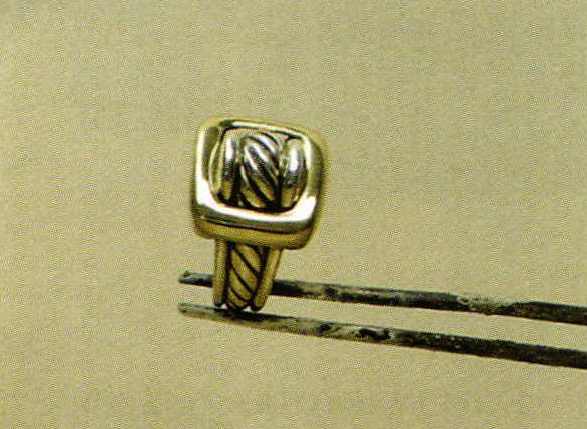
The photo shows the ring that I'm going to size. It's a sterling silver David Yurman ring with a 14K accent on top. It's a size 5 112 and it needs to go to an 8. This ring has a very heavy shank, and it's going to be difficult to get a piece of stock shaped to fit. Also, the oxidation in the grooves is going to be destroyed during the process due to the high heat involved. Here's how you do it.
The photo shows the piece of sterling silver sizing stock sitting on top of the ring on the mandrel. You'll notice that the sizing stock is about 3mm too wide for the job. The first inclination would be to file the sizing stock to fit the opening created by forcing the ring up to a size 8 on the mandrel.
Here's the trick: don't adjust the stock to fit the gap, adjust the ring to fit the sizing stock' Since it is so hard to hold and manipulate the small pieces of sizing stock, I like to cut a bigger opening in the ring to lit the piece of stock that I have on hand. The ring is much easier to hold, and it won't compromise the structural integrity to do it this way.

Next, the photo shows how I bent the ring to make it fit the piece of stock. Notice, I didn't bend the sizing stock to fit the ring. I'm making the ring lit the sizing stock. The main reason I'm doing it this way is because the thickness of the shank makes bending the stock almost impossible.
Once the sizing stock is soldered in place, using the creamy flux and sterling silver easy flow solder, I grind and file the inside to match the contour of the ring. Then I take my raw hide mallet and hammer the ring round, and force the sizing stock to bend into the shape I need.
The photo shows that now that the ring is round, the inside has been filed to fit. All I need to do now is file the outside of the ring to match the rest of the shank. Then, just clean and polish. That's all there is to getting the ring to the correct size.
Next let's deal with the oxidation that was on the ring. I've found that the Vigor Silver/Gold Oxidizer (part # 45-0331), found at most supply houses works the best for re-oxidizing these types of rings.
The photo shows how I pour some of the solution into the cap and, using a toothpick, I carefully apply the solution into the grooves.
As soon as I finish applying the oxidizer, I immediately run the ring under cold water to wash any excess solution away. The oxidizing reaction is immediate, so you're only washing away excess solution. Next, take a good silver polishing cloth and polish all the high points on the ring, and any areas that accidentally got oxidized by mistake.
The last photo in the series shows the shank of the ring after sizing, and the oxidation that has been replaced.
That wasn't so hard! I'll have more for you next time.
Related Articles

Fabricated Reversible Pearl Pendant

Carat Gold Solders for Jewellery Making

The Best Flux For Soldering Jewelry: How To Choose The Right One For Your Project

Avoiding Melting Soldered Seams


The All-In-One Jewelry Making Solution At Your Fingertips
When you join the Ganoksin community, you get the tools you need to take your work to the next level.
