
Platinum Granulation Process
5 Minute Read
Granulation, a process dating back a lot longer than I can remember, is clearly one of jewelry histories most prominent techniques for artistry and decoration. The traditional technique of granulation consists of fusing or soldering minute soherical grains of metal to a metal surface.
The form of decoration first occurs in the Near East at the ancient Mesopotamian city of Ur, (modern day southern Iraq), around the century of 2600 BC. The art of granulation was later perfected by the Etruscans, (approx. 800 BC -100 BC), and has rarely been duplicated since. Between the time of the ancient Greek Empire and the 20th century there was no one doing granulation, they simply did not know how. It has only been in the last 30 years or so, (with some individual exceptions) that the processes used by the Etruscans have been determined and duplicated accurately enough to begin producing pieces that are at least as good or better than the ancients.
If there is one thing I have learned about methods and techniques in the jewelry industry; it's to never say something cannot be done, or for that matter, to say that something has never been done. I will say, however, that I don't know of a way to perform Platinum Granulation without a laser welder. I was shown the Platinum Granulation process described below by a good friend and colleague, Mr. Ralf Sonnet, of Rofin-Bassel (Germany).
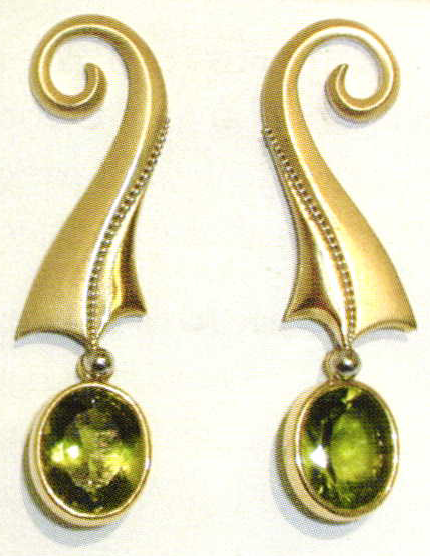
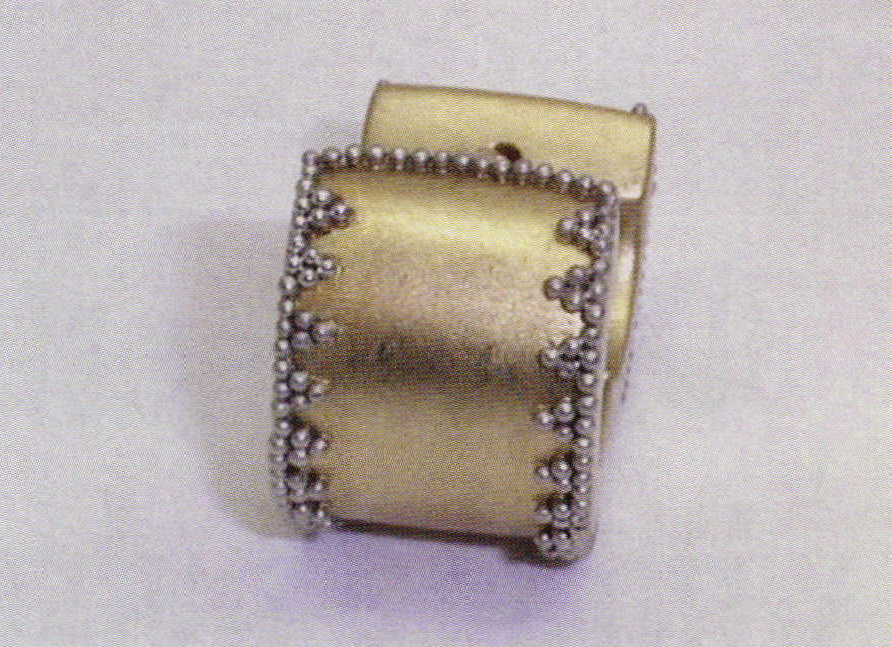
Since then, I have been demonstrating it with the laser welder at various trade shows around the country and my wife, Mirjam, of Mirjam Butz and Brown Jewelers has been incorporating it in some of her jewelry designs, as shown here. As I discuss the Platinum Granulation process I will be talking about various parameters and features used when laser welding jewelry. For anyone not familiar with laser welding, you are welcome to contact me for more information at 619-239-5842, or email me at lasers@mantech.info.

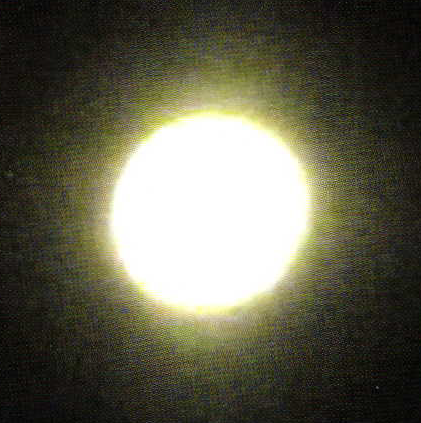
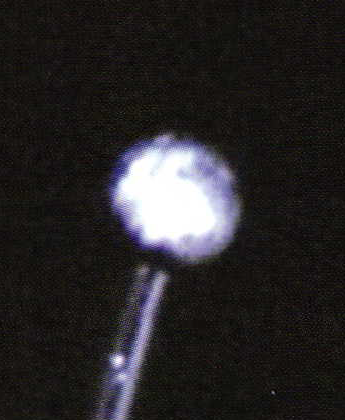
The process starts by making a granule on the end of a 30 gauge platinum wire. The wire is held by hand with the wires blunt end up, in the focal plane of the laser beam and microscope, and centered in the microscope crosshairs. The beam diameter should not be too small to prevent the energy from aggressively penetrating the wire and granule. A larger diameter beam also makes it easier to hit the end of 30 gauge wire.
A relatively low voltage is used because deep physical penetration into the end of small platinum wire would tend to splatter the wire, rather than melt it. After selecting the beam diameter that is comfortable for the operator, one must decide how big the granule should be. The size of the granule is regulated primarily by the pulse duration, usually expressed in milliseconds. The pulse duration combined with the voltage determines how much energy the granule is exposed to.
As the granule grows in size from pulse to pulse the mass of the growing granule eventually absorbs all the energy of the laser pulses and stops growing, regardless of the continued laser pulses. Through a series of laser tests the operator can determine the correct energy to create the desired granule size at the selected beam diameter. Granule size can range from extremely small to relatively large depending on the selected energy in relation to the selected beam diameter.
Voltage creates a physical force that penetrates into the metal, while pulse duration results in a melting effect under and around the spot where the laser beam contacts the metal. The operator must chose a pulse frequency that he or she is comfortable with, keeping in mind that with a faster frequency of pulses, heat will stay in the granule between pulses causing the granule to grow faster. After performing a series of tests to make the correct size granule, the desired parameters should be stored in the machine's memory for easy recall.
 |  |
 |  |
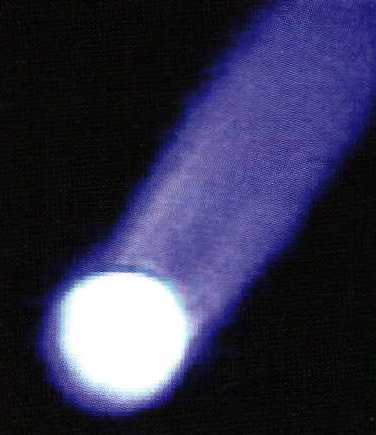
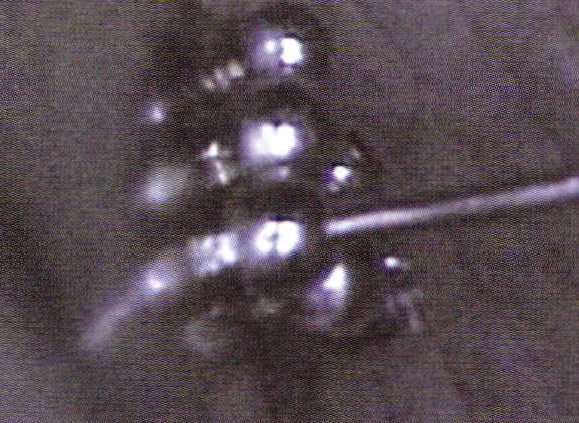
Now we have a platinum ball at the end of our 30 gauge wire. The next step is to weld this ball to the surface of the desired item. Because of the acute angle between the granule and the piece, one must use the smallest diameter laser beam possible in order to reach the small surface area between the ball and the piece, without affecting the sides of the granule or the surface of the piece.
Current Laser Sweet Spot Technology is extremely useful in areas like this, because of enhanced beam quality. One must select pulse duration long enough only to gain adequate fusion between the granule and the piece. Too long od a pulse duration will melt a larger area and could distort the metal outside of the small weld joint. Voltage is selected to give the laser pulse adequate physical penetration between the ball and the piece only to allow the pulses brief duration to fuse the two together.
Pulse frequency is again selected at the comfort level of the operator keeping in mind that the faster the laser pulses, the more heat stays generated. If adequate parameters are selected for this welding process, the granule only needs to be fused in one place to gain adequate fusion exactly where the granule and the piece meet. After a few trials the correct parameters should be stored in the machine's next chronological memory location from the previous set of stored parameters.
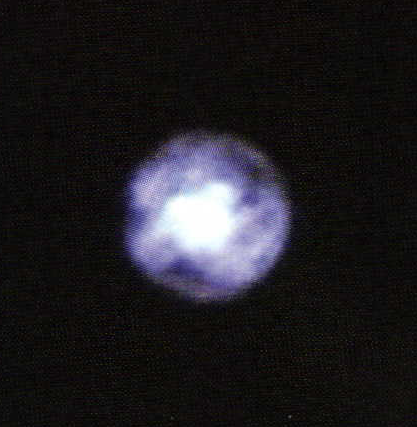
After separating the wire from the granule with a sharp pair of diagonal cutters, the top of the granules must be smoothed out where the wire was removed. This is accomplished by spreading the energy into a wider area by increasing the diameter of the laser.
Physical penetration (voltage) must only be enough to create a surface effect so that the duration of the pulse can lightly melt the top of the granule to flow the metal over the top and create a nicely polished and round granule. If the granule is slightly out of position, it can be nudged into position with a pushing tool. A granule can be removed with a sharp flat graver. This smoothing set of parameters also works well for removing tool marks after re-positioning of the granule. Pulse frequency is, again selected at the comfort of the operator. This is the third and final set of parameters to be stored in the machines third chronological memory location after the previous two.
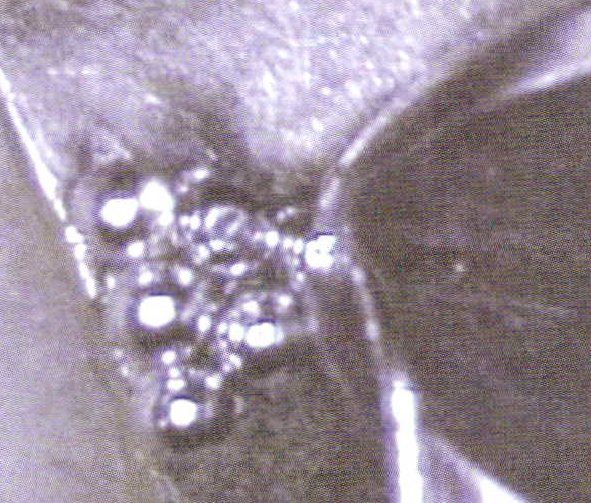
After determining the correct parameters and storing them, the operator can get into a production mode simply by scrolling through the first two memory locations of making the granule and welding it on. The third step of smoothing out the surface can be performed all at once. Once the operator gets the parameters correctly set to the machines memory and develops a little hand eye coordination, the process goes rather quickly.
Related Articles

950 Palladium: Superior White Color

Granulation Using Fusion Welding

How To Avoid Destructive Tack-Welds

Laser Platinum Fabrication


The All-In-One Jewelry Making Solution At Your Fingertips
When you join the Ganoksin community, you get the tools you need to take your work to the next level.
