
Some Notes on Custom Made Jewelry Findings
1 Minute Read
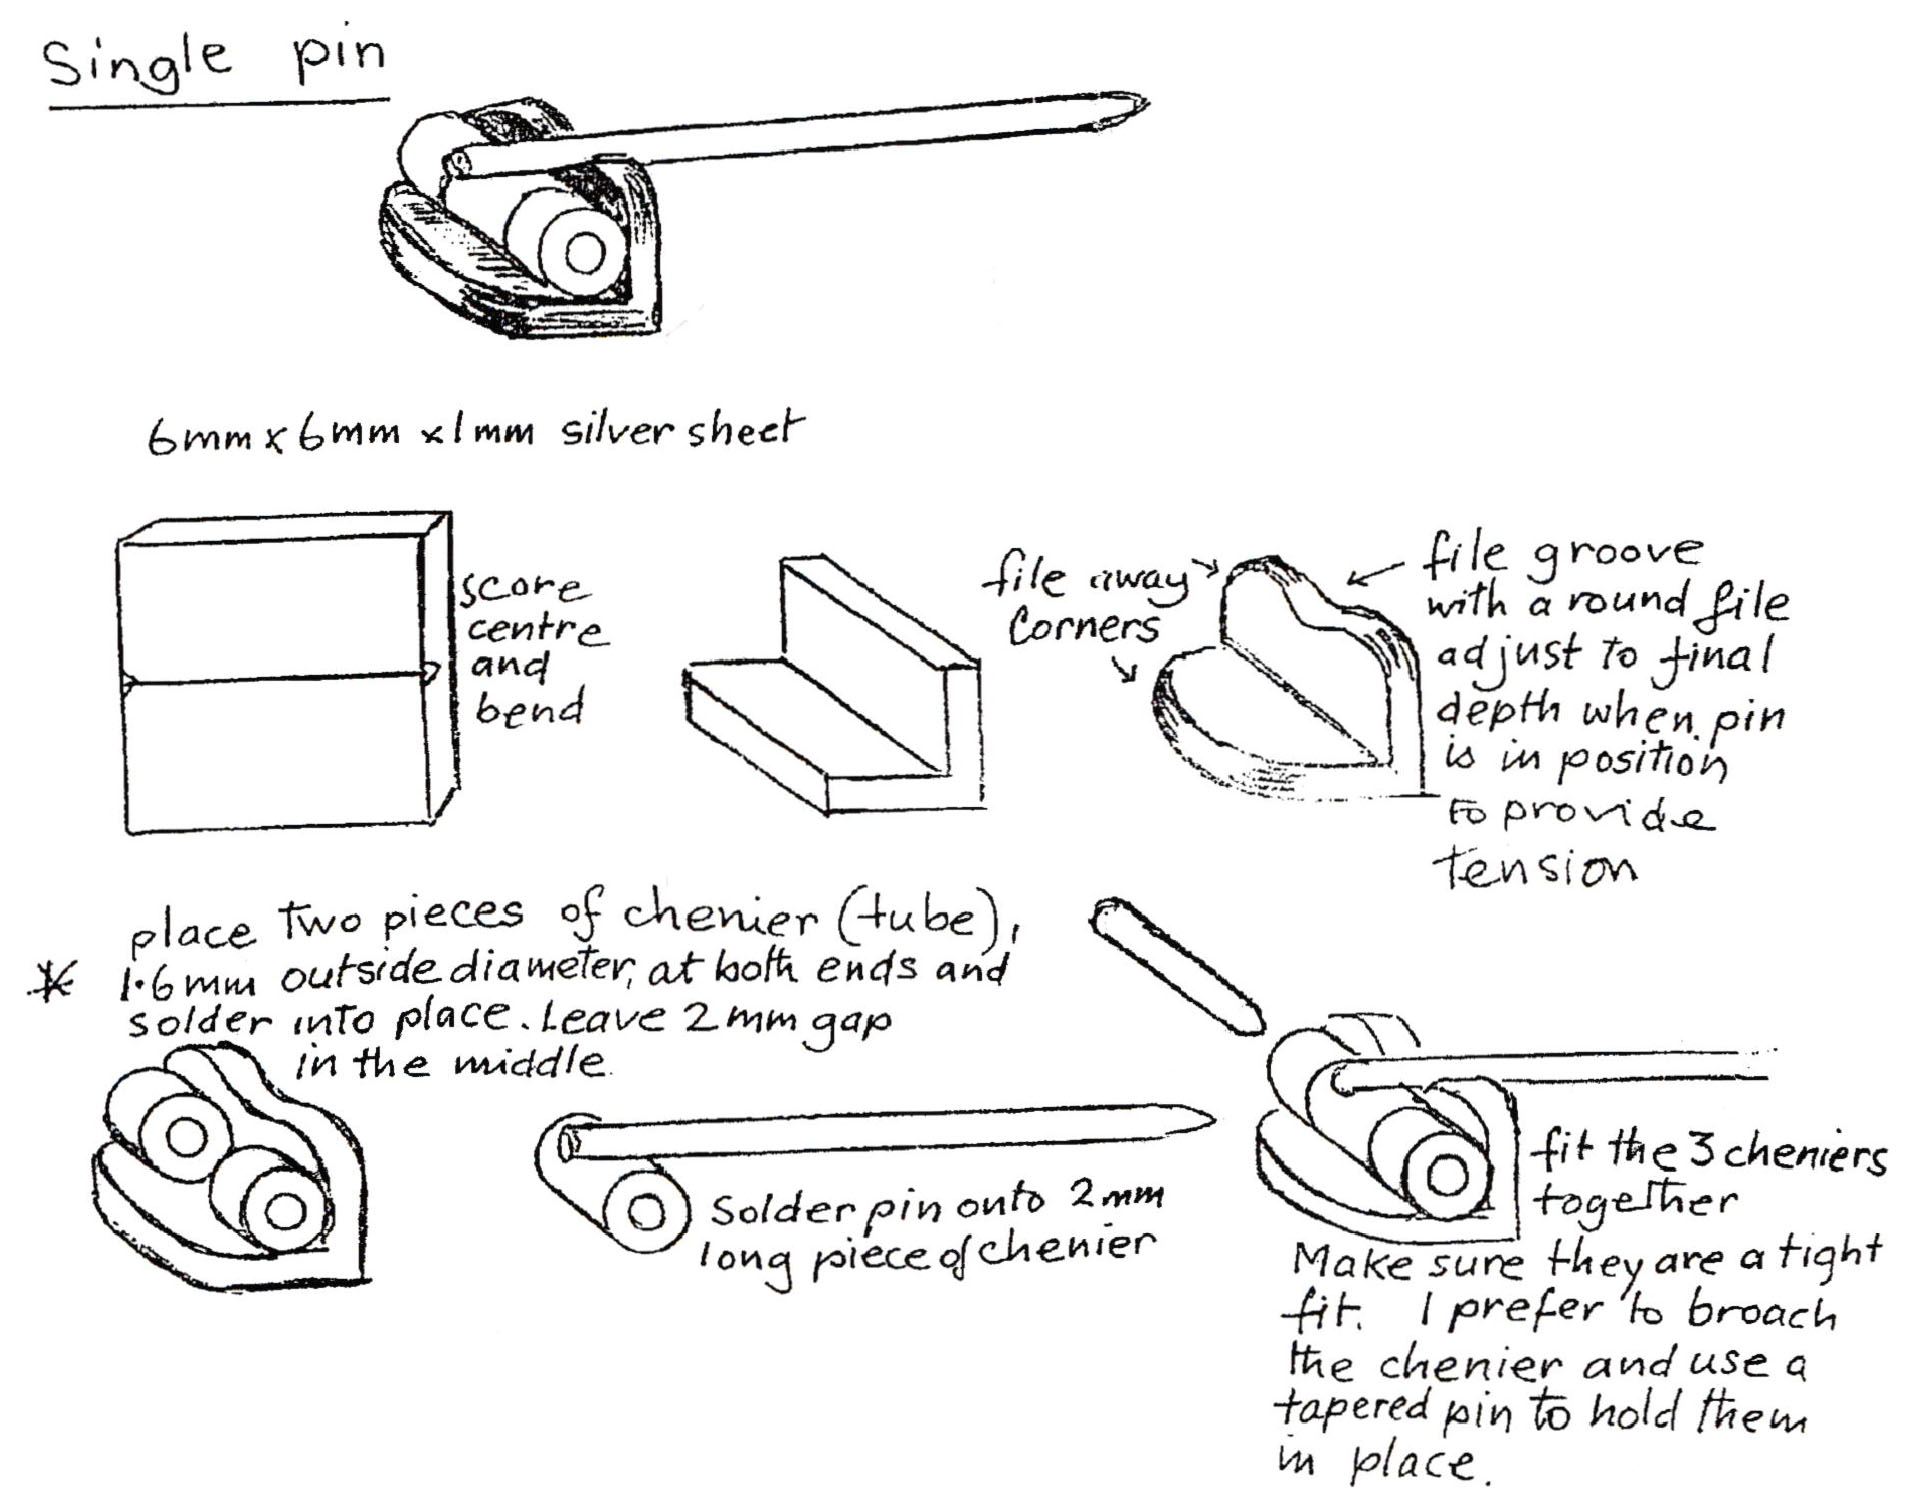
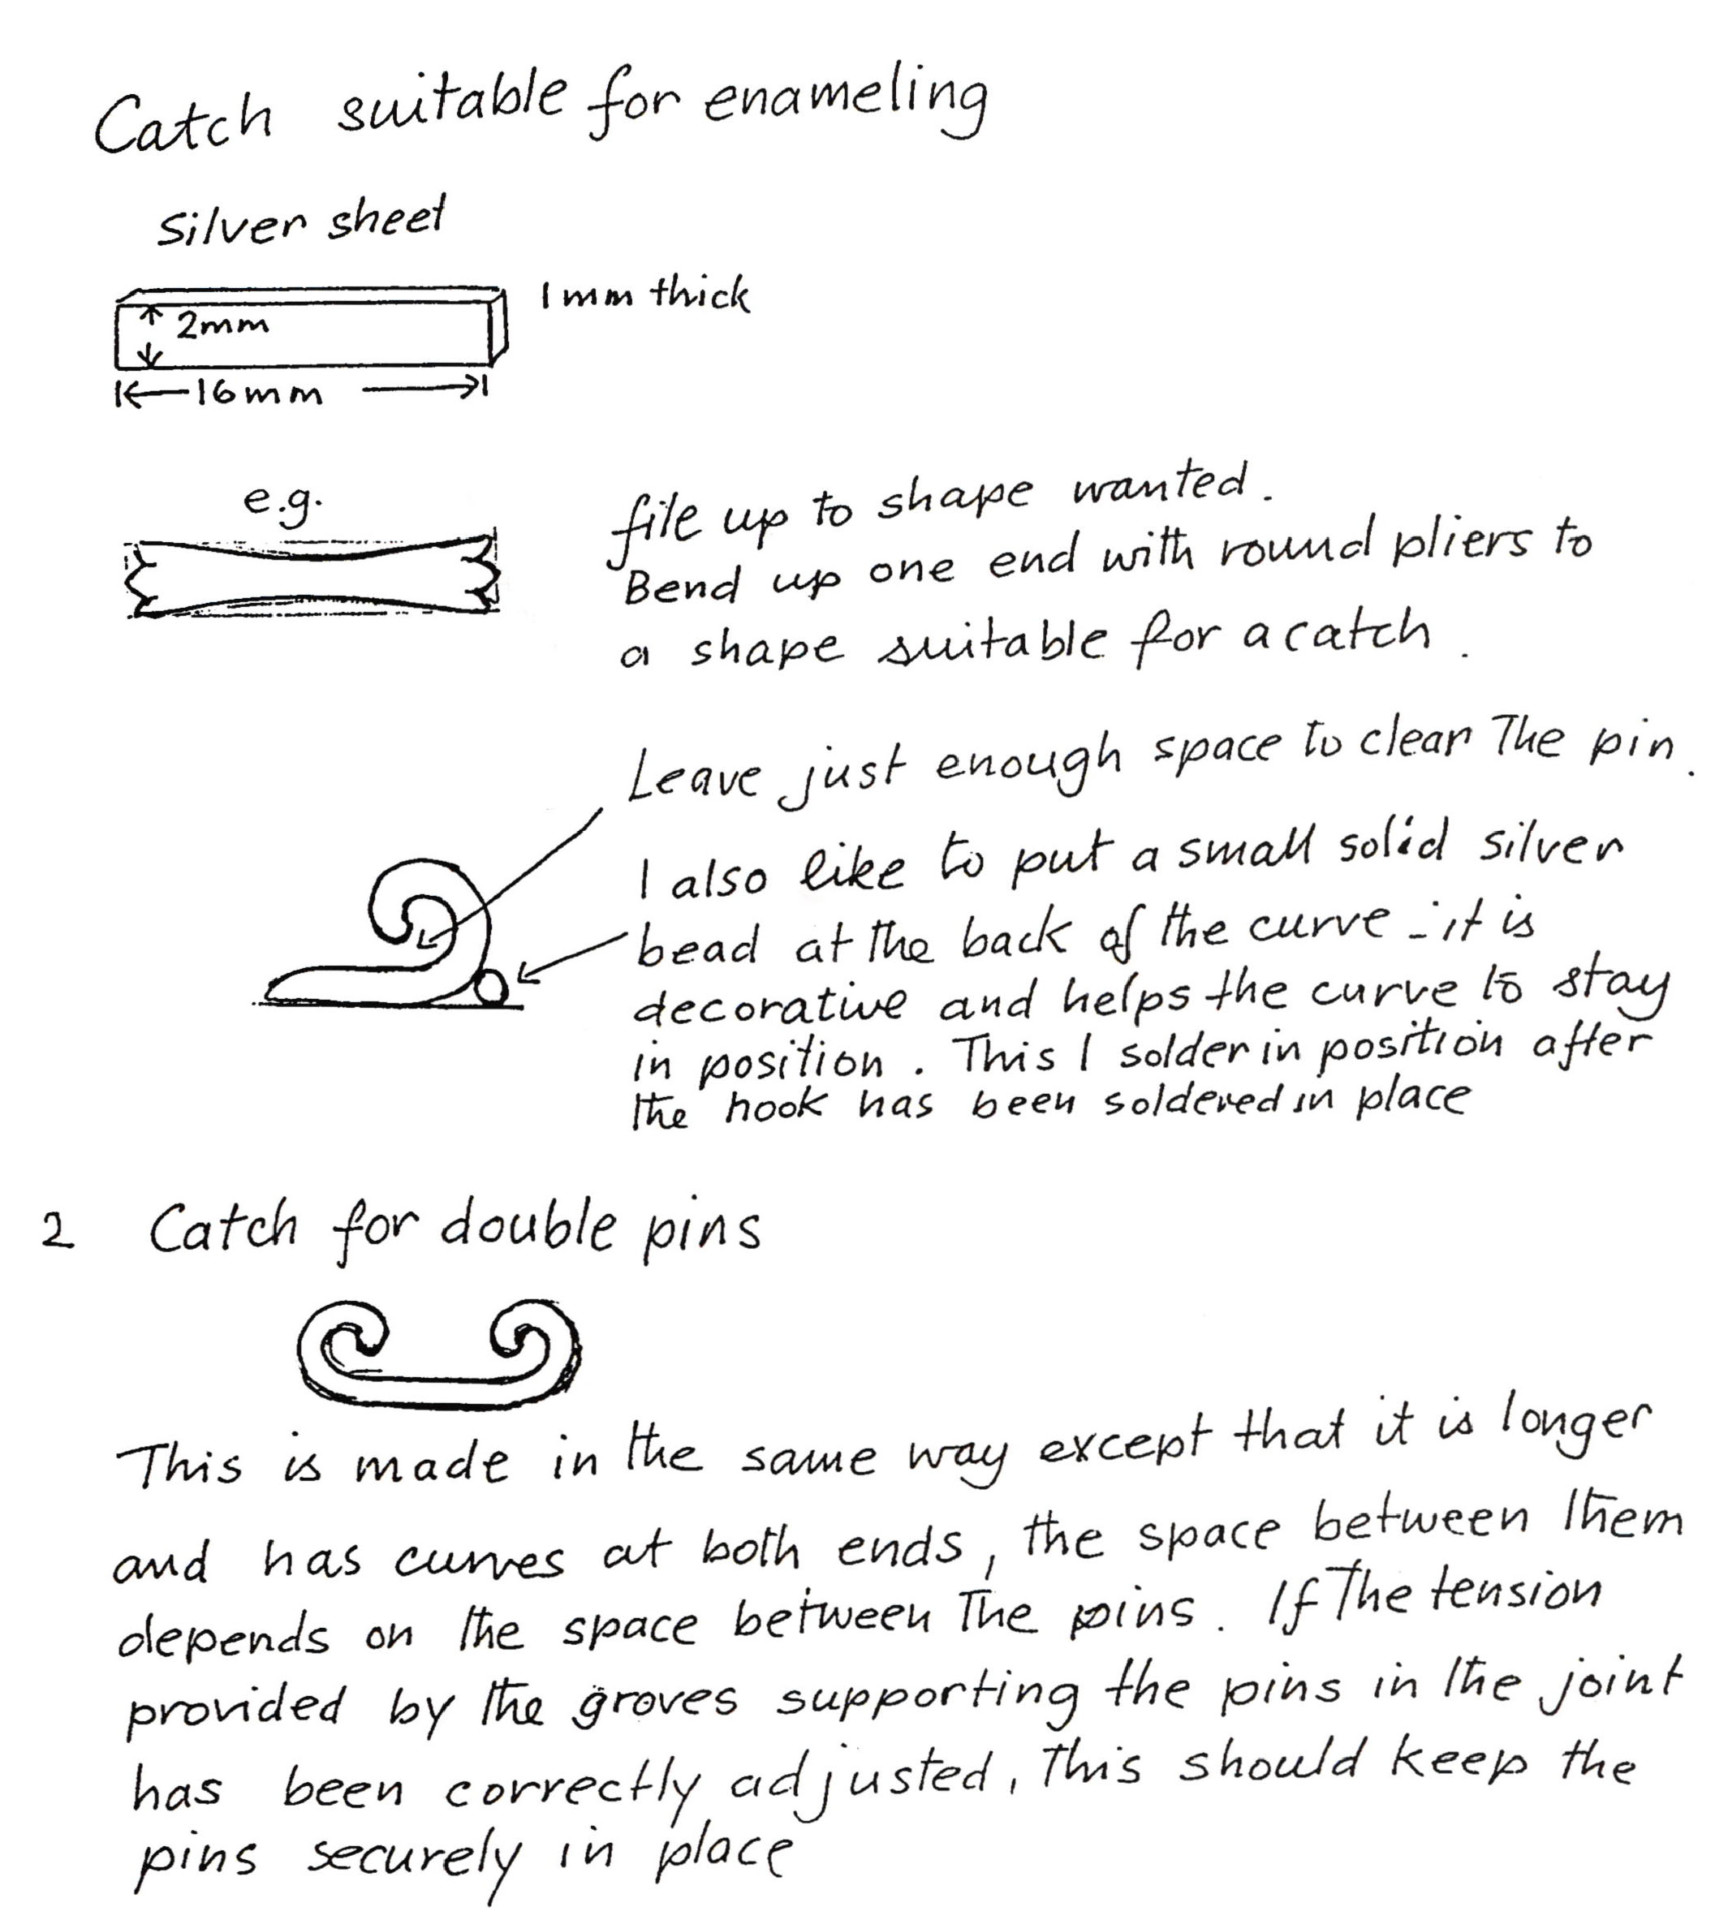
In the December 2003 issue of Glass on Metal there was an excellent resume by Florentina Nichols of the Guild of Enamellers Conference, held at York in England, [pp 112-113, 118]. This resume included, towards the end, a brief overview of some of the points demonstrated in the Masterclass, presented by the jeweler-enameler Hali Baykov. The way of making some of the fittings, including double pins and the use of a 'gallery' to ensure there is good support and alignment with the brooches was summarized briefly. Hali Baykov here offers some diagrams and notes, to clarify the basic steps in making these specialized findings, as these are important aspects for such quality of jewelry work. [Full, edited notes will accompany the video of the April 2003 Masterclass, which will be available at a later date.]
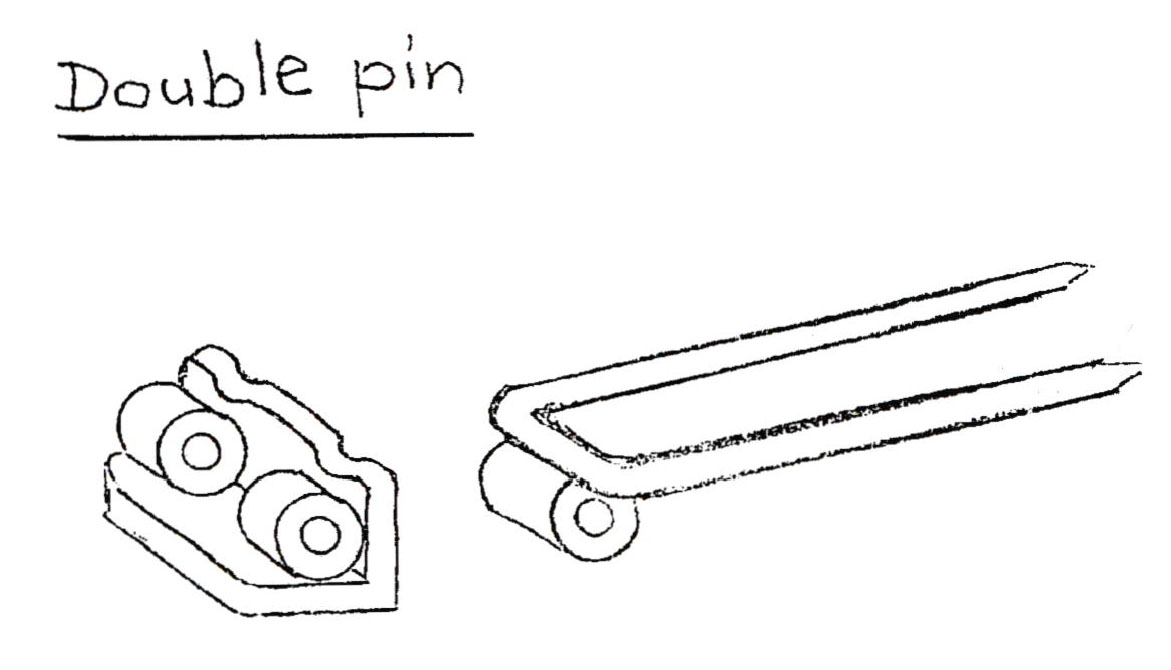
The procedure is similar to the 'single pin' above, except that the supporting block for the chenier is wider as it is the chenier in the middle that supports the double pin. Instead of a groove in the middle, there are two at the side; these provide the spring for the pins.
* I like to use 1.6mm chenier (tube) but some people prefer 2mm chenier.
All sizes are approximate as much depends on the size and style of the brooch.
Gallery
- Look where support is needed.
- See where it will look good.
- Decide where the findings are going to be.
- How are the enameled parts to be fixed together?
Next shape work and make the gallery. This is usually made with 1mm square or round wire. Roughly shape the wire to the piece to which it is to be attached, but solder one end only - adjust to the exact shape, then solder as it is shaped to the work.
With more complicated shapes, cut out of 1mm sheet a piece slightly larger than the final size wanted, and shape to the work where a gallery is desired. Using double-sided cello-tape, stick under the piece, and scribe the outline onto the sheet. Remove the work and cut up to the scribed line.
With dividers, scribe a line 1mm to 1.5mm from the edge, and saw up to the line. Then carefully file up to the inside line, and solder into place.
Related Articles

Waste Not, Want Not

Harold Hasselschwert: Materialization of the Exotic

Metalsmith ’93 Summer: Book Reviews

Enameling Safety Issues You Should Know About


The All-In-One Jewelry Making Solution At Your Fingertips
When you join the Ganoksin community, you get the tools you need to take your work to the next level.
