
Laser Repair: Emerald and Diamond Bracelet
2 Minute Read
Updated on
This article by Steve Satow describes the procedure for repairing an emerald and diamond bracelet using laser technology.
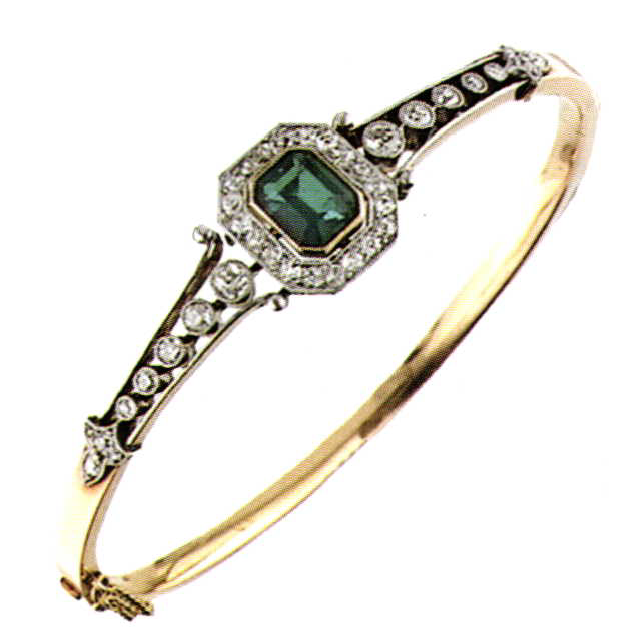 |
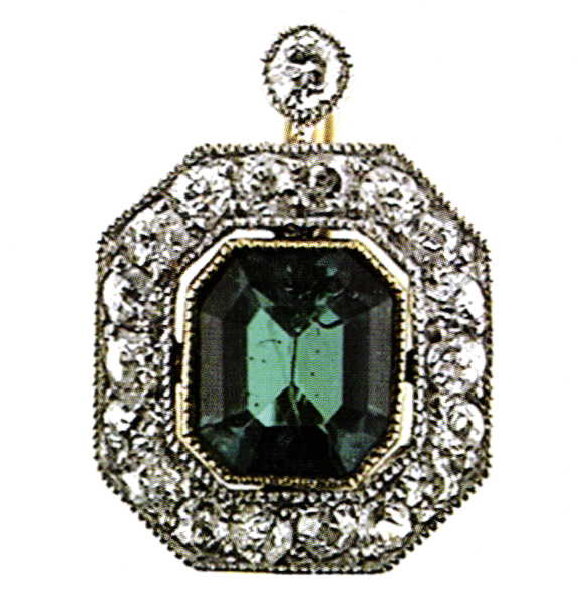
| Top view picture of damaged antique two toned emerald and diamond bracelet. |
Repairing an emerald and diamond bracelet using laser technology | |
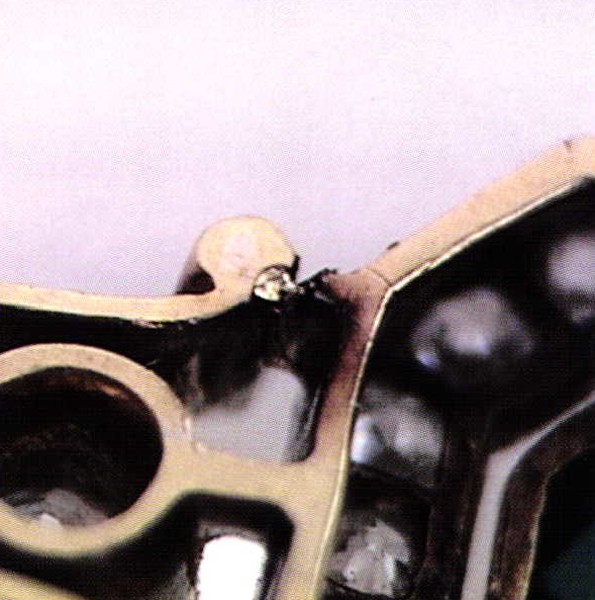
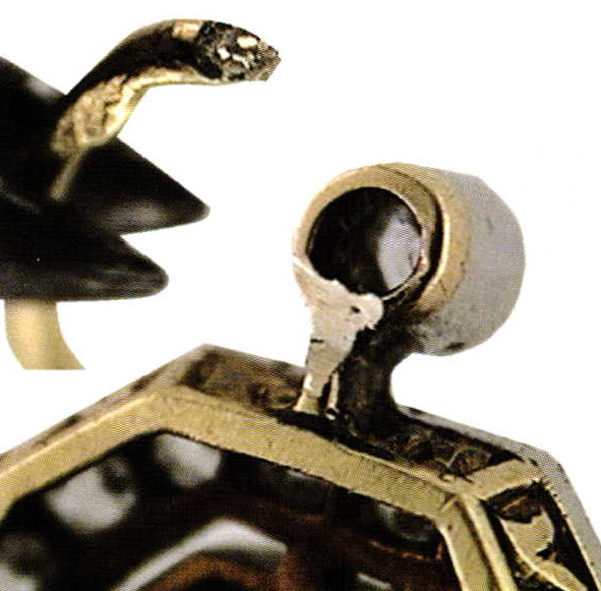
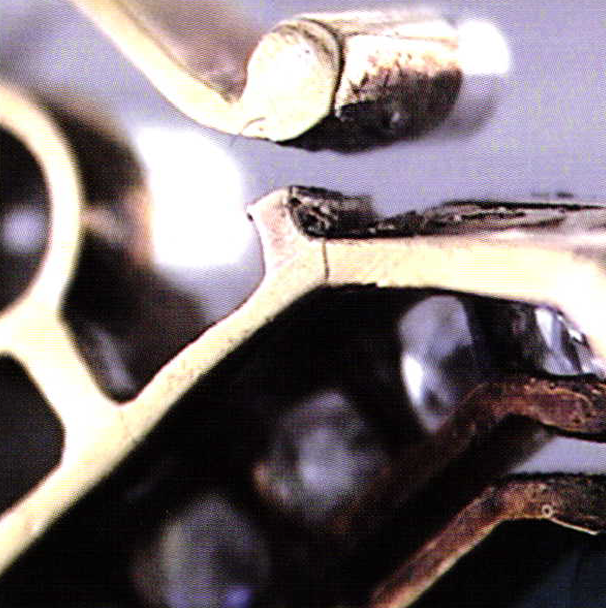 | Close up bottom view of broken side rail where it attaches to center head area. |
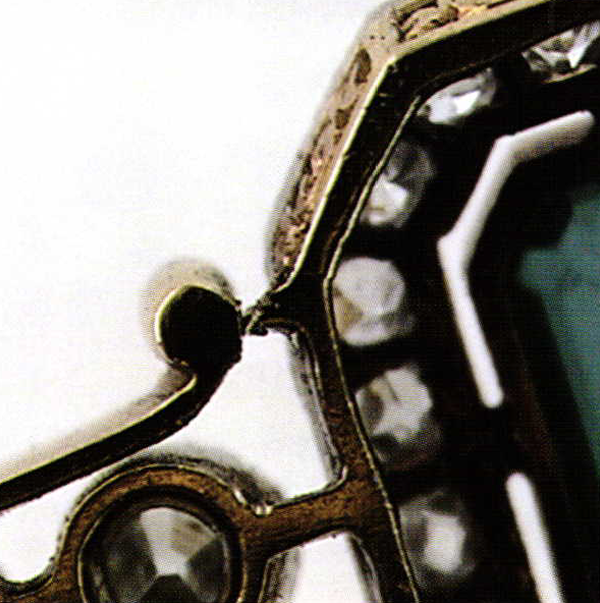
 | Close up top view of broken side rail where it attaches to center head area. |
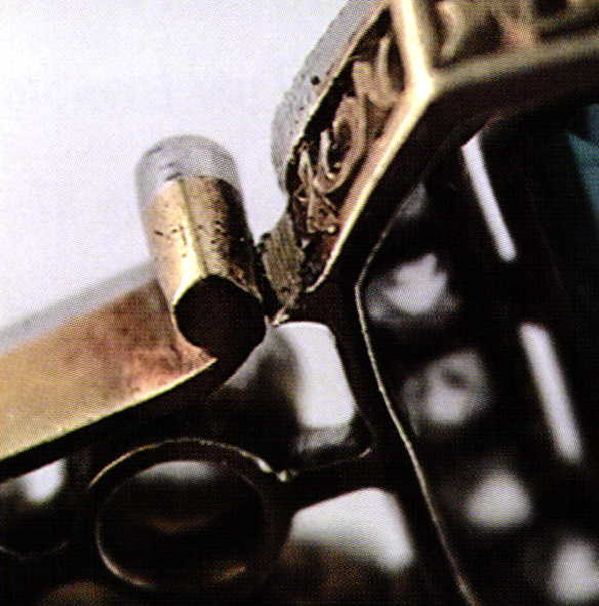
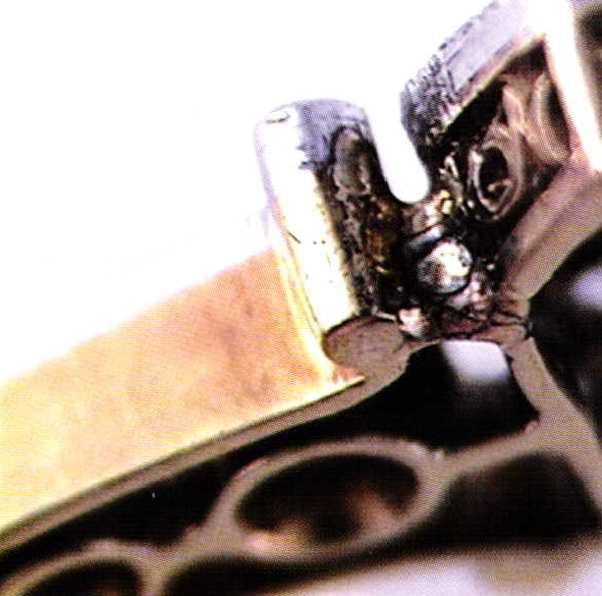
 | Piece of broken top rail attached to center head is beveled to make a channel to laser full with gold wire. The joint is tacked with laser on bottom. |
 | The entire joint is welded from one side without adding wire, at the bottom of the bevel to achieve full penetration with the weld. The next weld seam will include added wire to start filling the channel. Additional weld joints with wire will be added with the laser until the original thickness of the joint is achieved. |
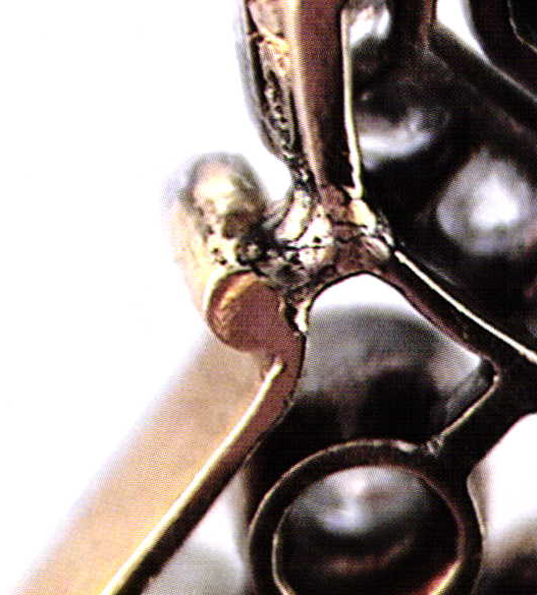
 | The back of the joint has one layer of weld added because the bevel was cut on the other side of the joint where it had easier access for filling, trimming, and polishing. After the one layer is added the beam is widened and the joint is smoothed out and polished with the laser in the hard to reach area. |
 | Now that the joint is completely filled the outside seam is now smoothed and polished with the laser. |
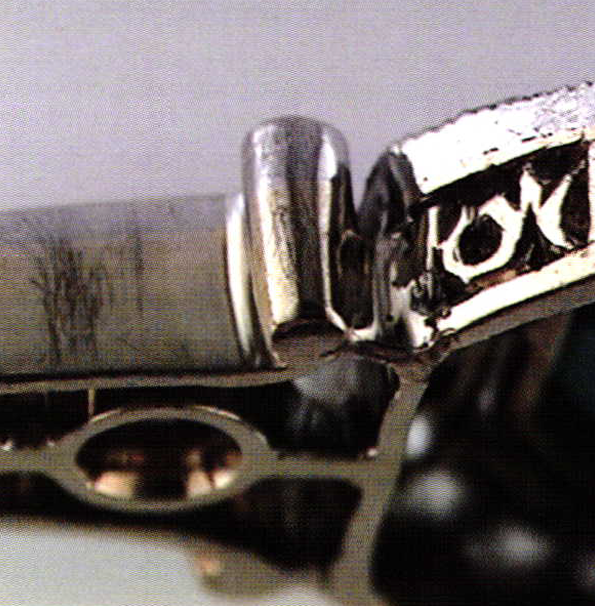
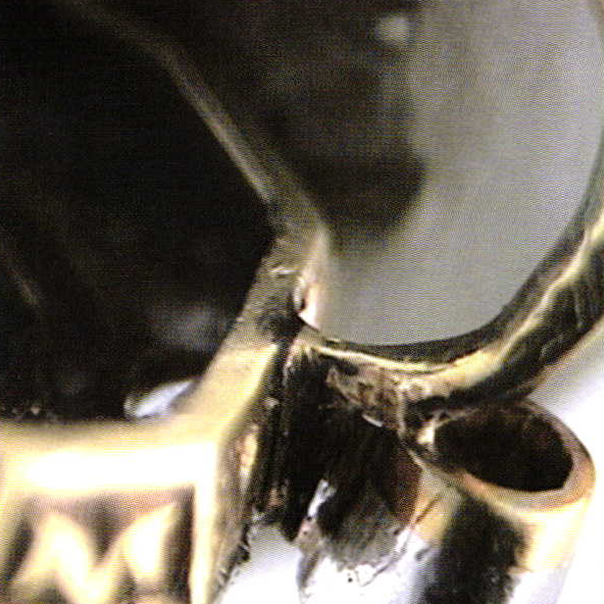
 | Bottom view of polished joint. |
 | Completed repair. The bracelet is left with slight wear still apparent so not to ruin the antique appeal. |
 | Broken pieces of matching emerald and diamond earring. The broken post shows where the old solder joint failed. |
 | Solder is ground offand a deep "V" is ground on the end to be filled with solid wire during laser welding. With the "V" coming to a point, the seam can be welded with full penetration from one side and can be verifiedvisually. |
 | Old post is tacked in place with the laser. After correct position is verified and any adjustments made the other side of the joint is inspected to verified full laserpenetration. The joint is now welded from both sides assuring full penetration in a solid joint. |
 | Side view of completed joint, after two layers of wire added to each side. |
 | Completed joint smoothed and polished with the laser. |
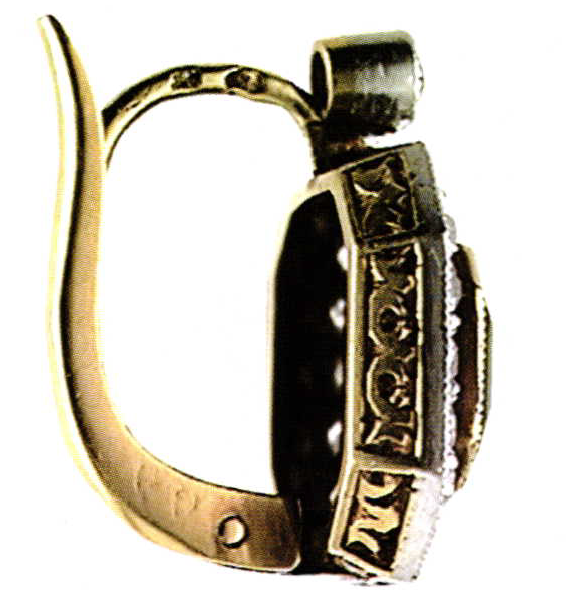 | Side view of finished piece, showing correct part alignment. |
 | Top view of finished piece showing correct part alignment. |
By Steve Satow – © Bench Magazine
In association with
BENCH Magazine is devoted to the Bench Jeweler in retail jewelry stores and small trade shops.
______________________________
Steve Satow is owner of GEM SERVICES & IMAGING and is a graduate of Bowman Tech School Class of 76 and GIA trained. He has 25 years experience in repairs and custom fabrication, wax carving, stone setting, custom tool design & manufacturing. You can reach him at: goldmakerT@aol.com
Related Articles

The Contemporary American Custom Goldsmithing
About five years ago, Robert Fairbank, John Reynolds and I created a "living entity" called Goldsmiths 3 in Concord, Massachusetts....
Read More

Pulse Shaping: Energy Over Time
Laser technology is still so new to
our industry and there is still so much
to discover. Fortunately, I believe...
Read More

Pulse-Arc-Welder: Box Clasp Tongue Repair
This 14-karat yellow gold heavy bracelet chain has a broken tongue at its critical springy location. An ideal method for...
Read More

Laser Platinum Fabrication
It is becoming common practice to do more and more platinum fabrication with a laser welder. For this project, you...
Read More


The All-In-One Jewelry Making Solution At Your Fingertips
When you join the Ganoksin community, you get the tools you need to take your work to the next level.
