
Jewelry Designs: Titan Pendant
9 Minute Read
Welcome to Stacey Rhodes Jewelry Designs, where we will detail all of the steps involved in adding a new piece of jewelry to our line. In this issue will we will be working with our latest design. I'll take you through every phase of production, from the idea to the showcase.
TITAN, Inspired by Greek Mythology, evoking power and strength. Its simplistic design is classic and elegant. We choose to honor our own Tennessee Titans with gemstones representing their colors for the very first piece.
The Idea
Let's start with the sketch. This is how almost every piece we produce begins.
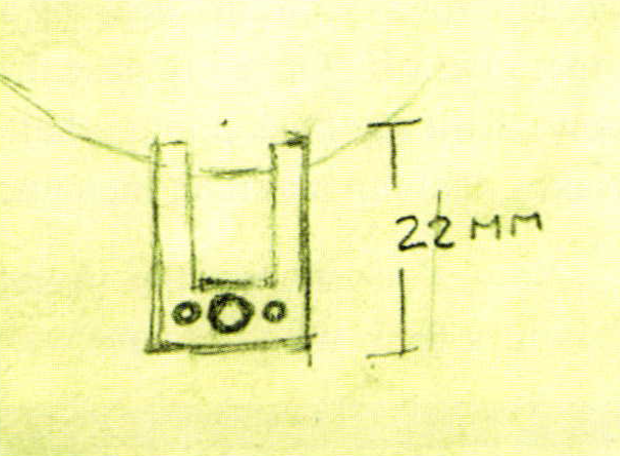
A couple of features I notice immediately about the sketch are that it will contain three faceted stones: two faceted sidestones, and a larger faceted center stone and Stacey has the chain actually passing all the way through the pendant. Looks pretty easy, right? That's what I thought too! The size we determine will be 22mm tall. The width is still unclear, but we decide to just go with whatever looks balanced once we start carving the wax pattern.
Let's Carve A Wax
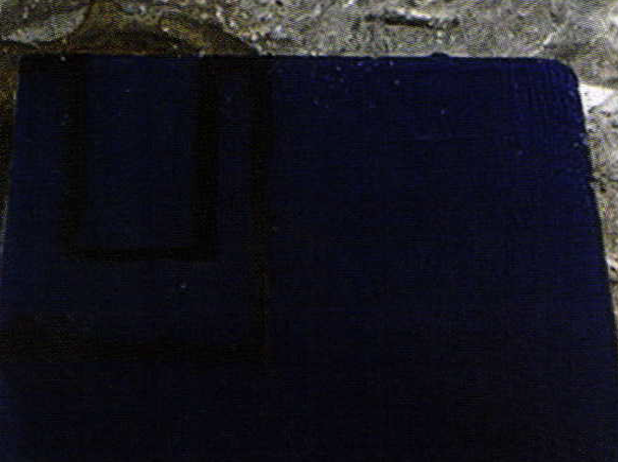
First thing I like to do when carving a wax is to file the top of the wax smooth. I have never figured out why they can't do that at the factory. The wax bars always have a rough bark texture that makes it really difficult to draw or write on. I then measure and mark 22mm on the wax blank. I have Stacey sketch the pendant on the wax. Ittakes two or three times before she's happy with the proportions. The photo shows the final, albeit rough drawing.
Next, I take a wax saw blade and cut the pattern free. I file to remove excess material just up to the sketch lines, while still leaving them exposed. Here is where we need to determine the stone sizes. Using a handful of CZ's of all different sizes, I have Stacey play with all of the different combinations until she settles on the sizes pictured. She likes a 5mm center, and two 3mm side stones.
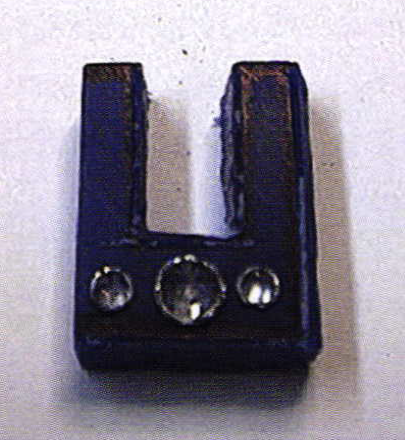
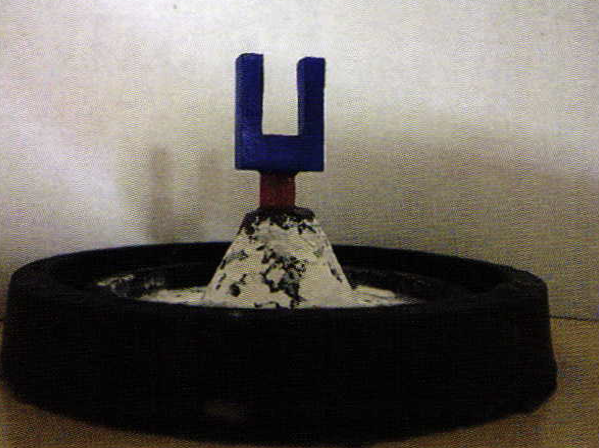
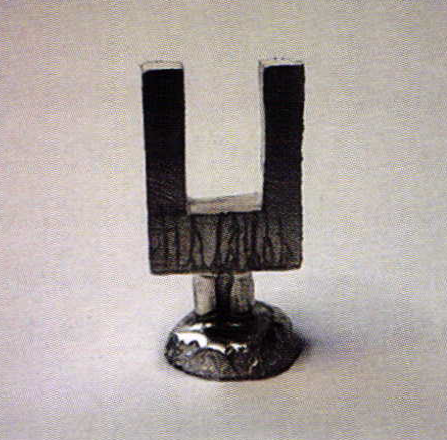
Now knowing all of the proportions, I can finish carving the pattern. This is where the difficulty of making this particular pendant reared its ugly head.Square features, straight lines,90-degree angles, and matching sides, all equal hours of work until everything matches. It was way more difficult than I first envisioned, but I did prevail. This photo showing the pattern sprued on a rubber base proves I won.
Determining Metal Weight
The amount of precious metal needed tocast any particular flask,has to be determined at this stage. If there istoo much molten metal it will go flying across the room at break neck speed. If there is too little molten metal you will end up with half of a casting.
There is a direct ratio between the weight of wax and the weight of precious metals. This ratio is apply named the "Conversion Factor" with a gold ratio of 14 and a silverratio of 12. This means that if your wax weighs I dwt., then it will take 14 dwts of gold, or 12 dwts of silver, to complete the casting. You always weigh the wax with the sprue attached, since it is an integral part of the casting.
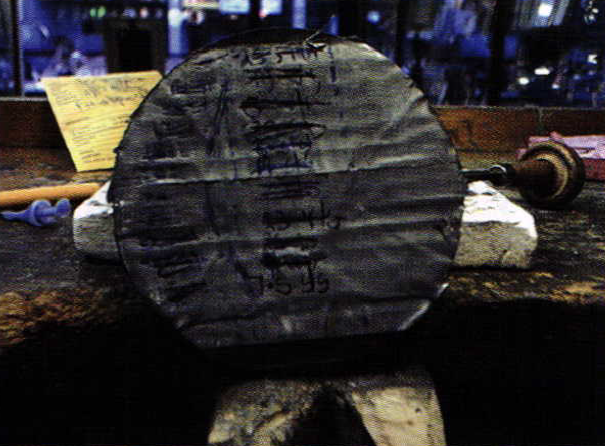
My wax, with the sprue, weighed.6 dwts. This means I will need 7.2 dwts of silver. You can see in the photo, that I wrote "7.5 S/S" on the bottom of the flask. It's very common for me to cast yellow gold, white gold, and sterling silver in the same casting run, so I always write the weight, and the type of metal I'm casting. The photo of the finished casting shows that 7.5 dwts was the correct amount to use in casting the pendant, the sprue, and the button on the bottom.
Question: See those marks on the casting in the area where the stones will be set? I have no idea what causes that I see it pretty often in castings. I just don't know what causes it, and how to avoid it. If you know the reason, will you please email me at "koehlerc@bellsouth.net" with the answer?
Investing A Flask
Investment is like a high heat form of plaster of paris. It's pretty simple to understand; you mix some investment powder with water and wait for it to harden. But … it's not really THAT easy. After following the manufacturer's specifications for the proper amounts of water and investment mix, here's the procedure for filling your flask with investment, or "Investing your Flask". The most important thing to remember is the time is exactly 9 minutes. Finishing before nine minutes is acceptable, finishing any later is a lost casting. I've been investing flasks for over 20 years, and not one time have I ever done this procedure without setting a 9-minute timer.
When the water hits the powder, turn on your timer. I stir the two ingredients together for 3 minutes. Then I place the bowl under the vacuum dome of my vac-u-cast, and turn on the machine. The investment will soon begin to bubble and rise in the bowl. This side of the machine has the table set on 4 springs. Get very aggressive with pounding on the table to shake loose any air trapped in the mixture. You can't really hurt anything at this stage. About the only thing you need to watch out for is turning the bowl over and spilling your investment inside the dome. I usually vacuum for 2-3 minutes, leaving about 4 minutes before the timer goes off. Once I release the vacuum and remove the bowl, I fill my flask about a half-inch over the top of my waxes, leaving about an inch and a half from the top.
Now, I re-vacuum the investment. This time, since it is in a flask with delicate waxes, be very gentle when hitting the shaker table. You are only trying to dislodge any air that is trapped around the waxes. The investment will bubble and rise about an inch. That is why you need to leave that inch and a half of room at the top. Vacuum for about 2 minutes, and then release the vacuum. Now, move the flask to a secure, stable location where it won't be bumped or disturbed for an hour and fifteen minutes. Then top offthe flask to about 3mm from the top, and wait for the buzzer, which should be going off any second now. Reset the timer for an hour and fifteen minutes and you have successfully invested a flask.
Determining Stone Replacement
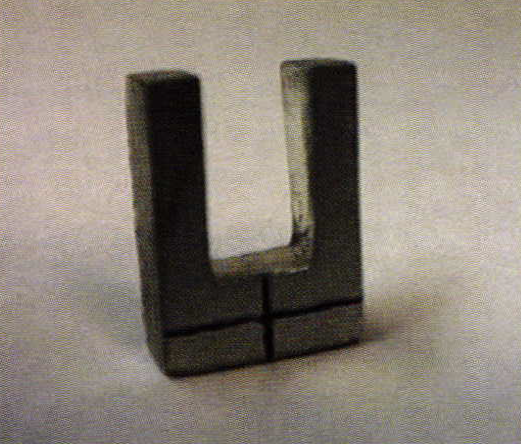
The center of the pendant is the first order of business. Using dividers and a sharpie pen, the photo shows the crossed lines that mark dead center.
What's left is to decide where to place the side stones. I place the stones I used earlier on the horizontal line, and center up the middle stone. I now have Staceyspend some time moving theside stones left and right tillshe's happy with their placement. Once she has themwhere she likes them, I take a sharpie and make a mark just above and just below the approximate center and then remove the stones.
Next I join my lines, and using a small roundbur, I cut an indentation at the junctions. I now have permanent location markers for the stones.This will make setting the stones in the production pieces much easier.
Determining Chain Placement
Knowing approximately where the chain is going to pass through the pendant, I drill a small hole through both tops of the pendant. When I hang the pendant on a fine wire, it hangs crooked. Using my sharpie, I draw arrows to tell me which way the holes need to be moved.
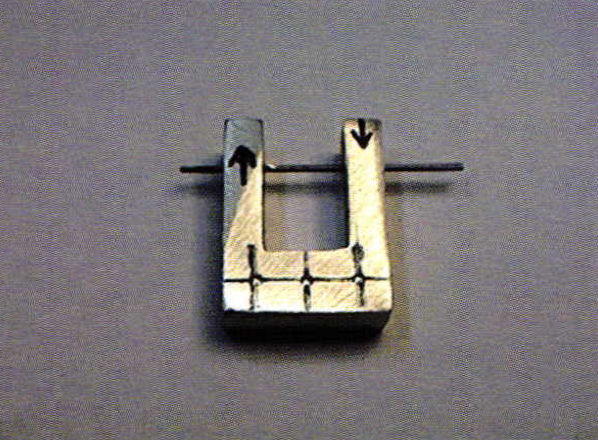
Stepping up to a slightly larger drill bit, I cheat the holes in those directions. I rub off my old marks, and re-hang the pendant. I do this about 4-5 times until I have the pendant hanging properly. I always start with a fine drill bit, and move up gradually to accommodate the chain I'm using. This allows you to move and adjust the location of the holes. Now installation of the chain in the production pieces will be a snap.
The First Mistake
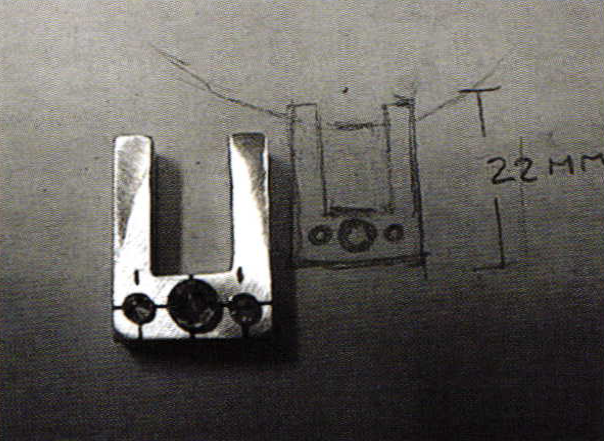
I made a rubber mold and cast a few pieces. Every single one had the same problem. There were voids at the very top, above where the chain passes through the pendant. I was using a single sprue rod on the first production run. It was not heavy enough to fill the top. The photo of the original wax, and the first casting, shows that I used a double sprue. When I cast my second run, I doubled up the sprue and had a perfect casting.
The First Piece
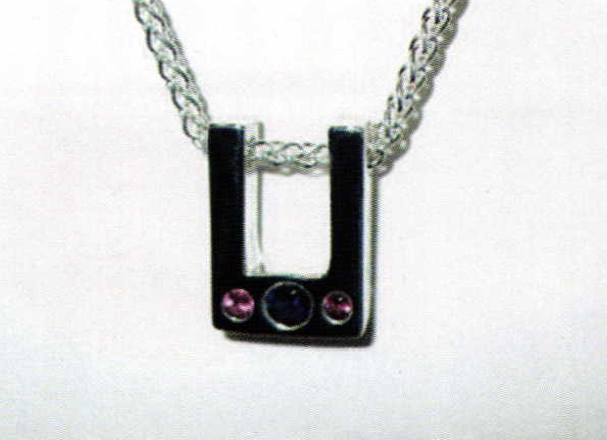
We chose a 5mm Iolite, and two 3mm Pink Tourmalines, and a l.5mm, 16″ wheat chain. I set the stones, installed the chain, and cleaned and polished the piece. The photo shows the first Titan completed. It was during this whole process that I found another problem.
The Second Mistake
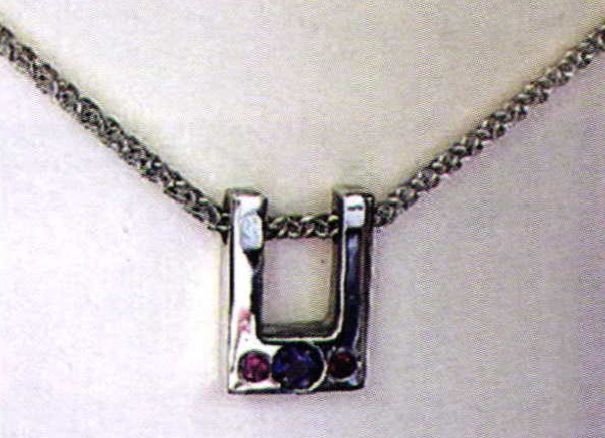
The center stone is too big. By the time I cut the seat for the center stone, it seriously encroaches the side stones. You can see in the photo that there is very little space, if any, between the center and the side stones. I decide on rather low-tech solution to this problem. I change the size of the center stone from a 5mm to a 4.5mm. Perfect! Now all we need is a few hundred people to come in and buy one!
In Summary
I thought this pendant was going to be easier to make. There is an optical illusion that occurs when you work with straight lines. What measures straight sometimes looks crooked. Case in point: The grills on all Rolls Royce auto mobiles are curved. When you are 5 feet in front the car, the grill is perfectly straight. When you are one foot in front in front of the car, looking closely, the upright portions have a slight curve. The designers chose to use the optical illusion to their advantage to create that really cool looking grill.
I have a policy I adopted at least a decade ago about this phenomenon; I callit "Optically Correct"measurements. When I make, or repair jewelry I don't spend a whole lot of time worrying about the exact measurement. I measure closely, then after that, I do what looks the best. Yes, if you put a leverage gauge on something I repaired, you may find the deviation. But… if it looks correct, why would you need to measure it in the first place? If it looks wrong, but measures right, it's still wrong, isn't it? But in looking at the Titan pendant I still think it looks skewed from some angles, and straight from other angles. Go figure.
I used the wrong size sprue, but that was easily corrected. I always remove the sprue from the rubber mold when I detail my wax anyway, so that wasn't too big of a deal. The problem with the center stone could have been a lot more difficult. If the smaller stone didn't look right, I would have had to go back and make some pretty serious changes. Fortunately, I got lucky. Like they say, I'd rather be lucky than good!
Related Articles

950 Palladium: Finishing Procedures

Ed Levin: 40 Years of Craft Jewelry

Tony Snodgrass: Flower Ring

Customized Stock Earrings


The All-In-One Jewelry Making Solution At Your Fingertips
When you join the Ganoksin community, you get the tools you need to take your work to the next level.
