
How to Make a Bezel
3 Minute Read
There are several ways to make a "box-setting" for enameled work pieces. This is one way on how to make a bezel.
The piece you are setting should be finished, because every piece gets a bit larger during enameling. Don't make sharp angled pieces, it is difficult to bend the bezel over the corners. If you must make a sharp angled piece, give the corners a radius.
For the bezel, I use fine silver strips about 0.3-0.4 mm thickness. The width depends upon the form and/or the thickness of your enamel piece. With this thickness, it's easy to bend over the enameled pieces. Thicker bands are much more difficult to bend tight over the enamel.
You can buy fine silver strips or, if you have a goldsmith roll, you can make them yourself. Also suitable are so called "Galleries." The Galleries are very easy to bend over the enameled piece.
How to Make a Bezel | |
 | For the length of the "bezel," measure the circumference, or the length and width of the enameled workpiece. Add about one centimeter to the measured length and cut this length from the strip-coil. Place the strip tight around the workpiece. Mark the point where the strips overlap and cut the excess off. Fit the ends really close together and solder it with a hard silver solder. |
 | To bring the bezel in form, push it careful from above over the workpiece. The rim shall enclose narrow but not too tight. If it is too tight, try to file the rim of the enameled form. |
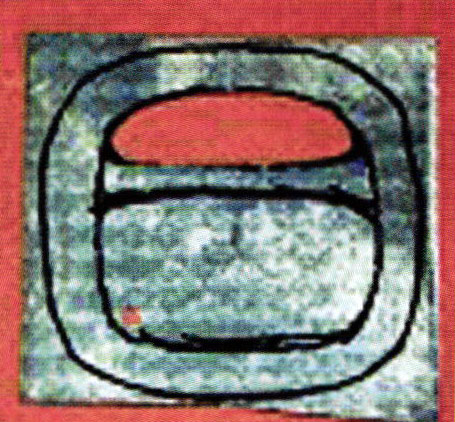 | From a 0.5-0.7 mm thick silver sheet, cut out a piece about 5 mm larger than the outside of the bezel. To save weight and material costs, you can cut out the middle or parts of the sheet. |
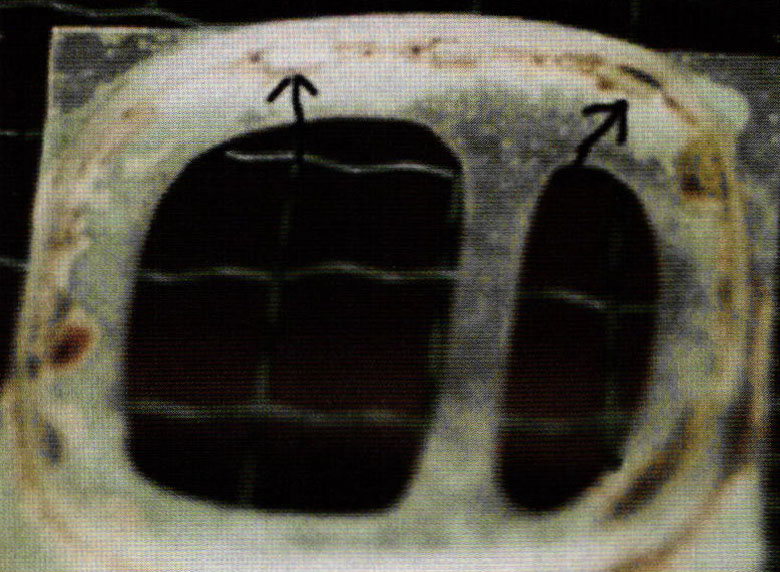  | Level the back plate and bezel very carefully then lay the bezel on top of the back plate. It is very important, that the bezel doesn't get bent in any way during this working cycle! Add soldering agent and lay from the inside of the rim (see little arrows in the photo to the left and sectional view below) little snips of silver solder. If you lay the solder from the inside of the bezel, little solder will flow to the outside. You get a very clean solder seam which, after polishing, is nearly invisible. |
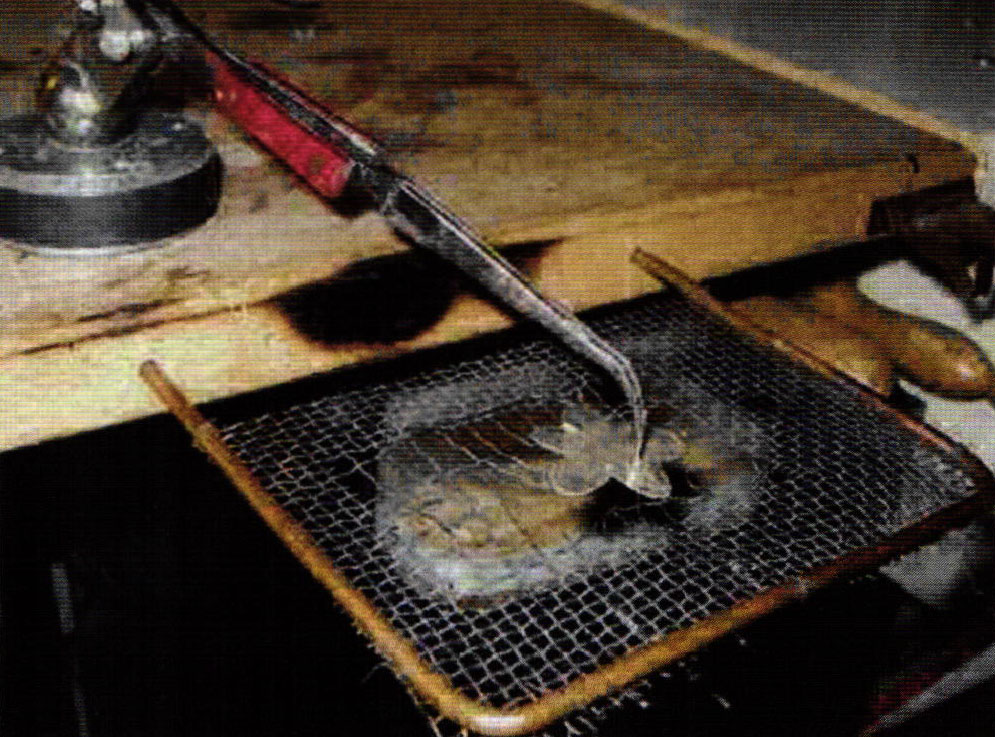
| NOTE: Many students had problems with soldering, especially soldering the thin bezel stip, ear posts or the findings posed problems. They had trouble steering the heat of the torch properly so often the strip or the findings burnt away. So we made a little "helper." With this tool you can do all soldering from the back, because the torch's heat goes to the greater and heavier part of the workpiece . The tool is made from a copper wire frame in which a stainless steel net is fastened. In the workbench arc two small holes which holds the frame. This has helped very much. | |
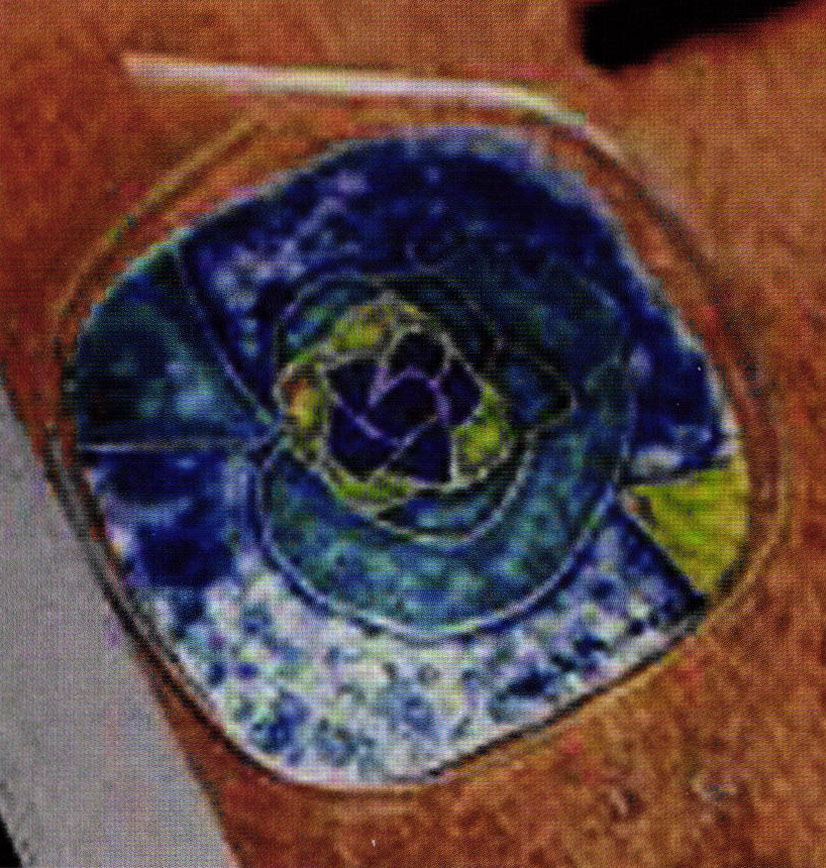
 | Check whether the enameled piece fits well in the bezel. If not, the edges of the piece must be stoned-off. The bezel should not wedge. Never press the piece by force into the bezel. Remove the enamel piece and saw away the excess around the bezel. After the findings are soldered, the piece is now pickled. Now, grind and polish the completed silver piece and set the enamel tile into the bezel. |
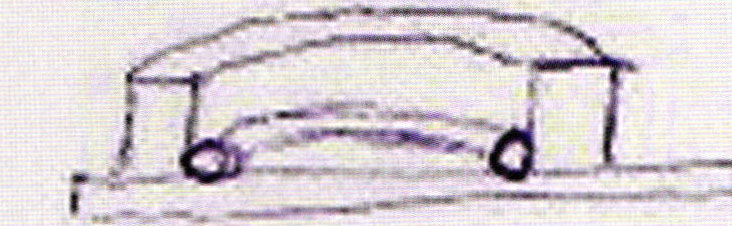
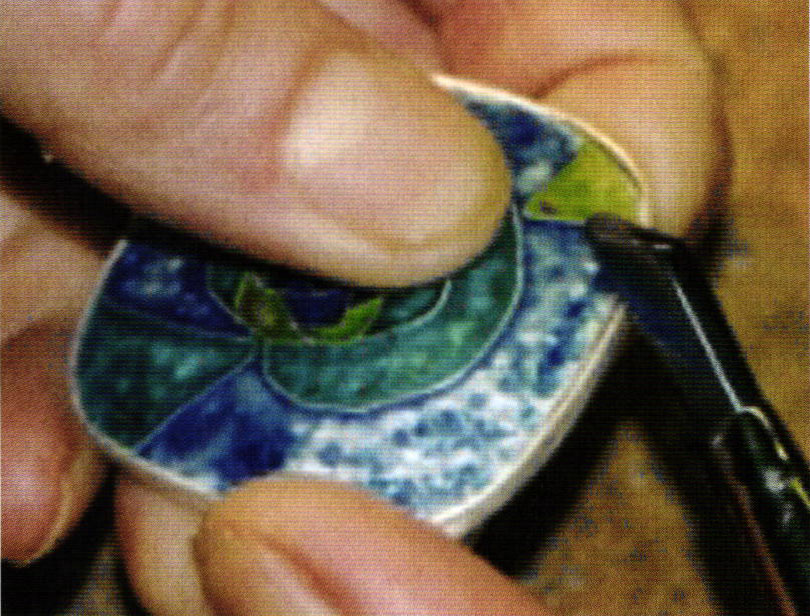 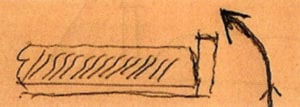 | Push over the bezel gently with a bloodstone or agate burnisher. Don't try to push the bezel over in one step. Push over from below with a tilt motion, only small amounts at a time until the bezel is tight. (See sketch for direction.) The bezel should fit well, with good pressure around the top. There should be no gaps between enameled piece and bezel. |
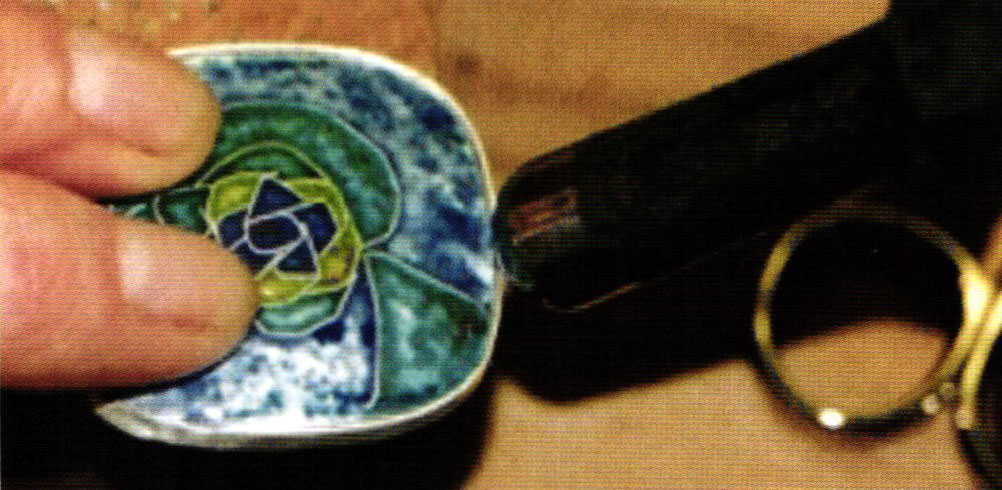 | You should not make a gloss cut, since the bezel cross section is very thin. Fasten the needle to the back and polish the silver again. Don't forget the bezel! You get very shiny silver and a very clean enamel surface if you tumble the finished piece in a tumbler with stainless steel balls and a bit of curd soap. But this is not a must. |
Visit Youtube and search for "Making a bezel" and you'll find five short videos about bezel setting. I think it is worth a look.
Related Articles

Enamels in Medieval Galleries

Book Review – Beginner’s Guide to Enamelling

Unconventional Enameling Projects

Radial Bristle Discs Excites Jewelers


The All-In-One Jewelry Making Solution At Your Fingertips
When you join the Ganoksin community, you get the tools you need to take your work to the next level.
