
Flush Mount Diamond Setting
5 Minute Read
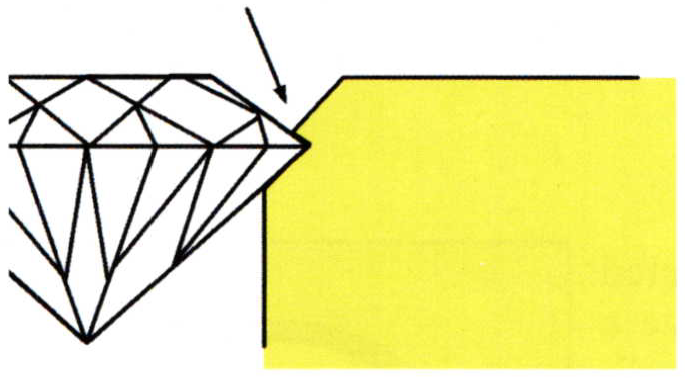
Flush setting, or "gypsy setting" as it is sometimes known, is a somewhat exacting and delicate setting technique. The main reason it is called flush setting, and the key to the whole process, is that the table of the gemstone must be flush with the surface of the metal. Give it any name you wish, but there it is - Flush! Nothing more and nothing else describes it so easily.
For this setting style you will need a l56C under-cutting or a 45 degree angled bur. I find that the teeth of the 156C are much more closely situated than the high-speed steel 90 degree angled bur which has a tendency to rip into the metal and not give the setter a clean definite seat. You will also need a Right Sided Onglette Graver #2 or a#39 Flat Graver, for bright cutting the inside of the finished setting. Clean off your bench top and your inside bench drawer should be clean, in case you drop any stones! Lay out the burs in front if you as well as your 'push-over' tools and gravers.
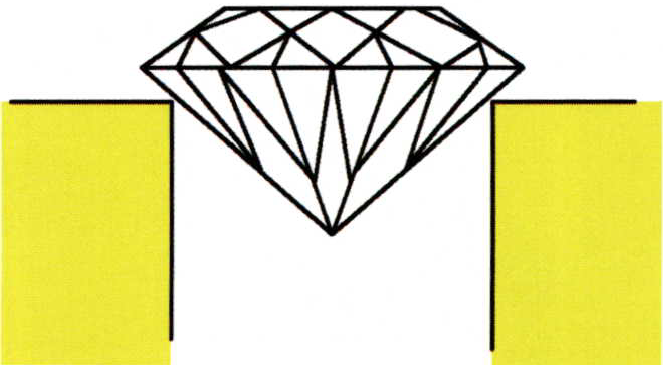
I start the setting process by drilling a hole with a twist bur (or rounding out a pre-cut hole from a wax casting so that it is no longer oval). I then use a round bur that is approximately 85% of the size of the diamond to be set. The other 15% will be sitting inside and under the remaining metal. With the jewelry being securely positioned into a clamp, use your pre-selected round bur and just drill the hole larger on the top most part.
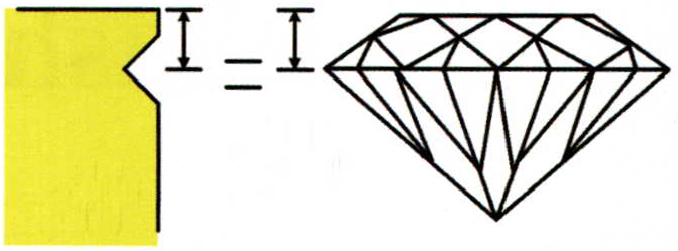
The l56C bur must not be any larger than 50% of the size of the stone to be set. At a depth in the metal of 1/3 + of the thickness of the diamond (the ratio from the table to the girdle) create a seat IN the wall of the hole. Do not drill too far into the metal or the stone will not sit tight, and will take greater effort to get it tight.
With your selected bur begin to groove a seat around the wall, starting with 1/3 increments, that is drilling only 1/3oftheway around the hole at a time. Closely examine the groove as you go along check if the groove is parallel with the surface. Remember the l5%? That's all we have to worry about right now Drill in just enough to have the stone sit in the hole and be level.
Next do the same for the remaining 2/3's of the hole. Make certain the groove is cut at the very same height and at the same depth as where you started initially. Now check the entire cut for any misguided cutting. Try and place the stone into the hole - does it fit? If it does, leave it. Does it sit straight? Is the table facet flush with the surrounding metal? After a few of these settings procedures, these little questions will come naturally to you and the answers will be equally routine. Always use your l0x power loupe to check your work.
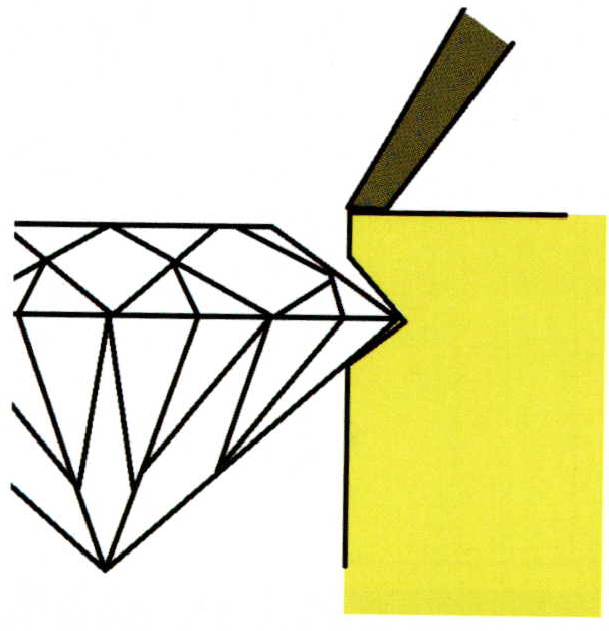
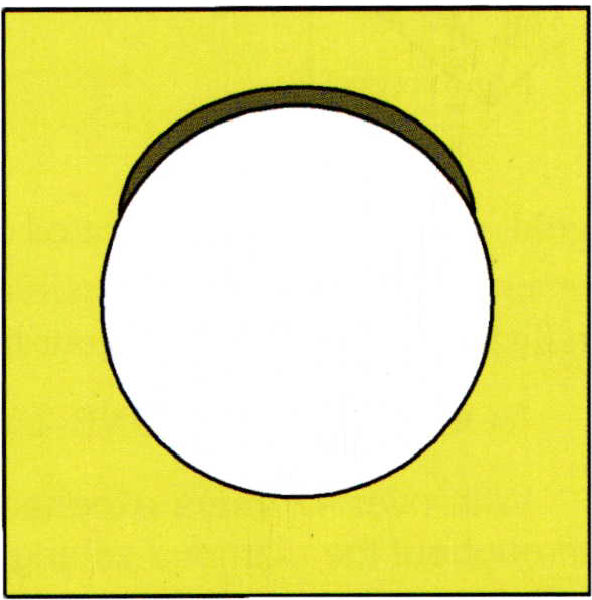
For gold you would probably be safer with a soft metal pusher-over tool; this will prevent little markings on the surface of the metal. The soft metal pusher consists of either brass or copper with a slightly serrated edge; this will grip and hold secure as you are pushing the metal over and around the stone. You do not want a wide faced pusher, as you must always be able to see just where and what you are pushing over! I also suggest using a softer metal pusher because when you are pressing down the metal the very front of the pusher will not damage the stones' facets. This can be the case with fragile genuine stones, such as emeralds, blue zircon, aquamarine, opals, garnets, … to name just a few! When you attempt to push the metal over be very careful that the pusher is nowhere near the facets. As you are bending the metal over, you are slowly compressing it onto the stone and it will spread. This 'spreading' will do the remainder of the metal pushing for you so you won't have to actually touch the stone. - Let the spreading do the final work for you.
The metal you are now pushing over must be fully ON THE STONE with no spaces between the facets and the rim of the metal…NONE!
Filing of the surface can be done by using a #4 cut Triangular 20 cm. file. Do not let the metal be worn away too fast in this operation. You must always leave as much metal as you can, prior to polishing. I prefer to use a flat edged pumice wheel to clean up the residual marks around the bezel of the stone caused by filing.
As for the "inside cleanup" I will use either the #39 flat graver or the right- sided onglette #2 to do the real fine-tuning of bright-cutting around the inside of the bezel. Choose whichever tool is more comfortable for you. Being comfortable with everything you do is as important as the process itself.
As my teacher/mentor once said, "Do anything you wish, just as long as the results are the same and most acceptable". Do not at any time 'angle too far back' into the gold, with either of the selected cutting tools. Always maintain a spherical or a round cutting edge inside of the bezel. Use emery paper as little as possible, just enough for a general clean up of ANY marks. Leave as little as possible to the polishing stage - if it's in your hands, leave it clean!
YOU ARE NOW DONE; enjoy the finished stone you just set!
With over 42 years experience as a stone setter, Gerald N. Lewy, president of Gemz Diamond Setting, is known throughout the diamond setting community as Gerry the Cyber-Setter. Gerald Lewy started his 9-year apprenticeship with a jewelry manufacturer and tutored by a gentleman 'setter', in Haddon Gardens, London England. Gerald has redeveloped himself into more than a master setter; his purpose is now to be a teacher of the art as well. lf you have any questions on Diamond / Stone Setting you can contact him at gemz @ ican.net or log onto: www.gemzdiamondsetting..com
Related Articles
Diamond Setting Applications

Fancy Color Diamonds

A Crowning Achievement Part 2
Diamond Setting Hints


The All-In-One Jewelry Making Solution At Your Fingertips
When you join the Ganoksin community, you get the tools you need to take your work to the next level.
