
Fish Tail Setting
5 Minute Read
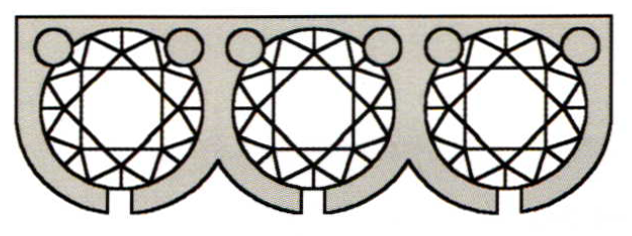
This wonderful style of setting has been around the world of stone setting for many, many years. As you can observe in the picture, the simple but ornate way the initial layout is formed is the whole clincher to this intricate setting design.

Two small, but very secure beads and two "pushed-over" sections of metal on the girdle of the diamond form the basis of the setting style.
…No, not another fish story!
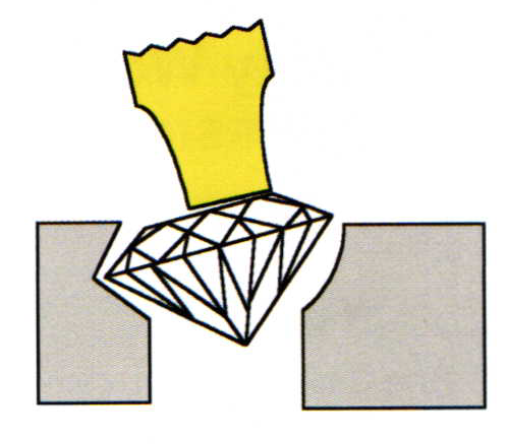
The normal height in bead setting diamonds is usually "Table to Metal" height, i.e. having the table facet exactly the same level as the surrounding metal. You will need to lower the diamonds further into the metal for fish tail setting.
How much lower? Glad you asked!
You need to have enough metal to push over the out- side surrounding edge of the metal as in a partial bezel-set style. You will also need enough metal to bright-cut the inner hand-made circle of metal. You must be rather careful in positioning the diamond flat, straight, and not too far into the two "half circular" bezels. You need all of the metal you can save for later use.
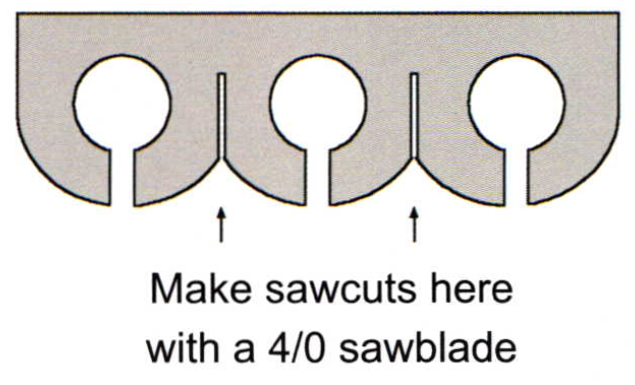
To begin, initiate a saw blade cut, with a f4i0 saw blade width only, as you do not want to remove too much of the metal. Cut and separate from the outside double-curved edge halfway up to the soon to be beaded area of the diamond.
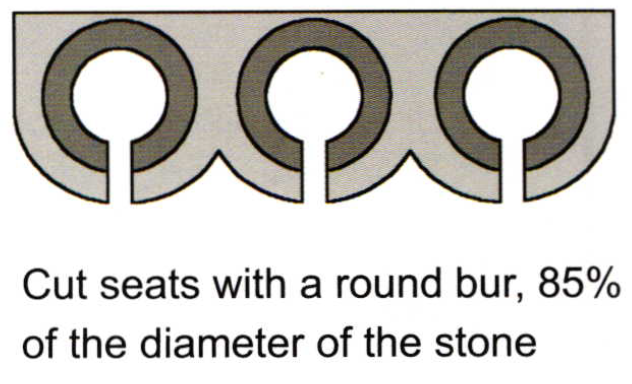
Drill a hole ALMOST to the size ofthe diamond. Why? You want to have the diamond snap into the hole. Cut with a round bur a hole about 85% of the size of the circumference of the girdle, but don't place the stone in it yet.
Now obtain a 156C under-cutting bur. DO NOT USE A HIGH SPEED BUR, because the teeth on the high speed bur are placed too far apart and might not enable you to get a clean, intricately made groove for the stone.
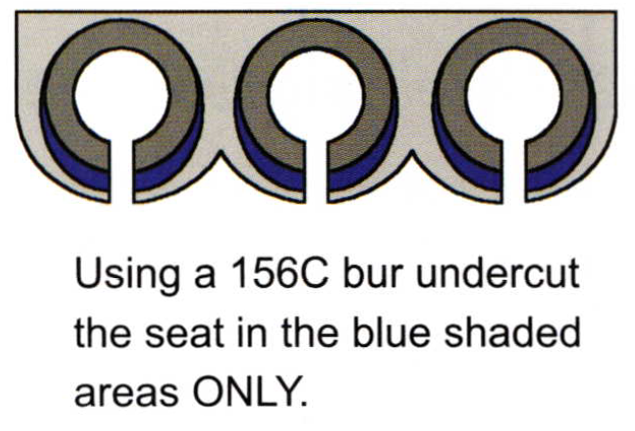
Select a bur size that is half the size of the diamond. Now using a slower than normal speed of your flex-shaft motor, cut a slight bearing-cut directly into the outside circles of metal. You must cut just halfway around the hole.
Now at this point, place the diamond into the hole, and press it in with a brass or copper pushing tool. Do not use a steel pusher as it might damage the diamond.
Next, raise two beads on the inside edge over the diamond. Remember that these two beads MUST form a line for the other stones to be set. THIS IS VERY IMPORTANT! All beads MUST have a definite arrangement. Symmetry is the most important thing to watch out for in this type of setting.
Now that the diamond is almost securely set, attempt to push over the outside metal with a metal pusher. Use a pusher that has a serrated edge, so the pusher won't slip away, while forming the metal over the stone. The thick- ness and shape of this particular pusher should be thin. The reasoning is that you must always see just where the pusher is actually being situated while it is on the metal. Work the pusher around the two sides of the semi-circles, making sure that all ofthe metal is even and over the stone's girdle!
Burnish down the two beads, making sure that the beads are actually touching the diamond. It's going to be a lot easier to burnish the beads now rather then later. The other beads will interfere with your finishing touches.
Start filing using only all4 cut Triangular file, 20 cm. in length. The tooth separation of this file will be just right to give the appropriate texture on the gold. A #2 cut is too brutal on the metal and will leave deep markings that cannot be easily removed. Trust me on this!
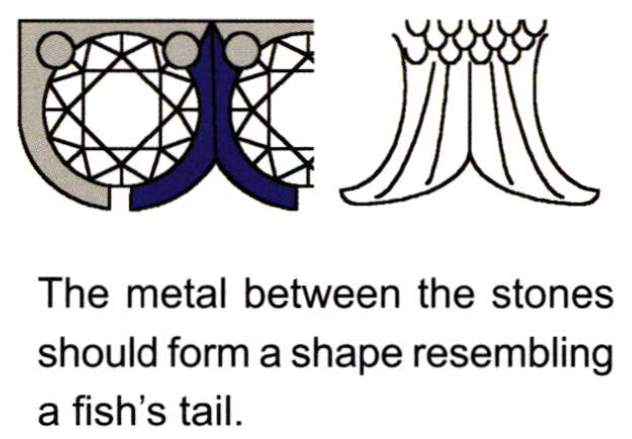
File in a semi-circular motion twist action with your right wrist as well as your ring clamp so that you create a full, half-round curve in the out- side of the metal. You must start the filing process on the far outside of the areas you just pushed over. This is to remove the pressure point markings of the pusher. You can, and should, use a file now to separate the one groove that is open and showing the girdle of the stone. File right into the saw blade cut that you made earlier. Do you see a fishtail appearing?
For the two beads use a very thin Onglette #l or a thinned out #2 to separate the two beads. From just where the diamond is, cut from the diamond to the metal, but only to the inner metal.

You can at this juncture of this procedure, bright-cut from the top ofthe bead and swing down to the bottom of the semi-circle. Also try and bright-cut the metal between the beads; if you can't, at least keep the beads separated, as it will look more professional. A thinned out #39 flat graver suits the bill in bright-cutting the full semi-circle cut. You should use only one run of cutting. Why? The result is one continuous flow of metal with no faceting in its appearance. Start at the very top of the bead and swing right into the bottom of the bottomed opening - ONE LONG DELIBERATE CUT! This is one of the more delicate final steps necessary in the finish of a fish-tail setting.
For the very last stage in this setting procedure, use a tapered edged pumice wheel. Go over any and all of the contacts made by the file. Leave nothing for the polisher to enhance. The polishing stage must only be a touch-up ofthe final product.
I hope that I have made this rather delicate and difficult setting explanation easy for you to follow. If you wish that I might come to your office or shop and show you other setting styles in person, please call me toll free at 1-877-850-0003. My fees have been made more inviting to you all. I hope to share more interesting aspects of this setting trade as the months progress…click onto www.gemzdiamondsetting.com
- Gerry, The Cyber-Setter
Related Articles

Step by Step Guide to Single Row Pave Settings

Diamond Gemstone Properties
Diamond Setting Applications

Flush Mount Diamond Setting


The All-In-One Jewelry Making Solution At Your Fingertips
When you join the Ganoksin community, you get the tools you need to take your work to the next level.
