
CAD 3D Mesh Models
10 Minute Read
3D mesh models can add dimension and originality to your Matrix designs. Resources for finding and building 3D mesh models are as vast and varied as their uses. For example, Matrix provides a builder to transform your 2-D art into a 3D relief mesh surface.
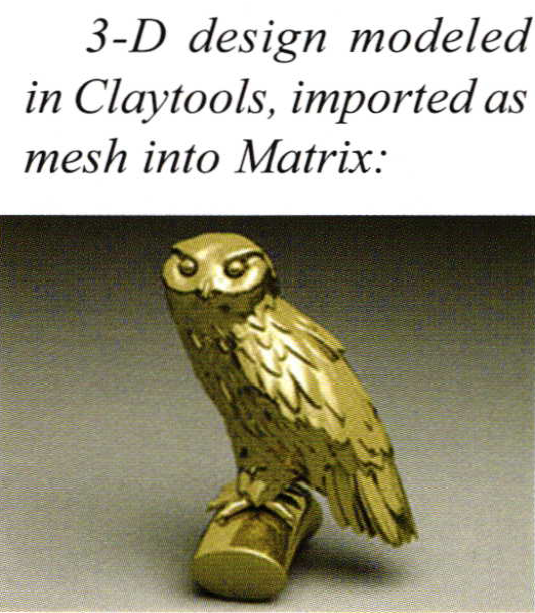
The new ClayTools for Rhino software by Sensable technologies allows you to sculpt virtual "clay" models and import them as meshes into Matrix. Programs such as Poser allow you to build and arrange 3D human mesh figures from a library of anatomical features, clothing, and accessories. Finally, a huge resource of online 3D models is available to download either for free or for a nominal fee.
Any 3D mesh model can be imported into Matrix as long as it is of a compatible file format. Go to File > Import and pull down the File of Type drop-down menu to see all of the possible file types. There are too many to list here and include the most widely-used file types for 3D modeling. The imported model can then be modified with any of the Transform tools (Scale, Twist, Bend, Taper, etc.) found in Matrix. The imported 3D mesh can then be rendered and milled alone, or it can be used as a design element on apiece ofjewelry modeled with any of the traditional methods in Matrix and then rendered and milled as a part of that model.
Before working with meshes in Matrix, you should be aware that mesh objects cannot be used in Boolean or Split operations and plan your modeling strategy accordingly. This is due to a limitation that Rhino is planning to improve in its next version, Rhino 4. Currently, a W.I.P. (Work In Progress) version of Rhino 4 is available for current Rhino users to download from their website. Operations like MeshBoolean and MeshSplit work between mesh and mesh; mesh and surfaces; and even mesh and poly surfaces. You can preview this version "at your own risk", and it will run side-by-side with Rhino 3 and Matrix.
Building 3D Models from 2-D Art
Matrix users can create 3D "relief" meshes from their own 2-D artwork, from traced artwork, or from a digital image using the 3D Trace Builder currently found in the program. An updated version of this builder, called Matrix Art, will be available in the next release of the software, which is scheduled to be previewed to the public for the first time in October of 2005. MatrixArt is a fully interactive version of 3D Trace Builder, complete with a more intuitive, user-friendly interface and heightened functionality.
Both the old and new builders work on the same principle: create closed, planar curves in the Looking Down viewport that trace the shape of the mesh you wish to create. Import these curves into the builder and adjust various features of the mesh. For instance, you can change the cross-section shape of the mesh from a chiseled, angular look to a puffier look.
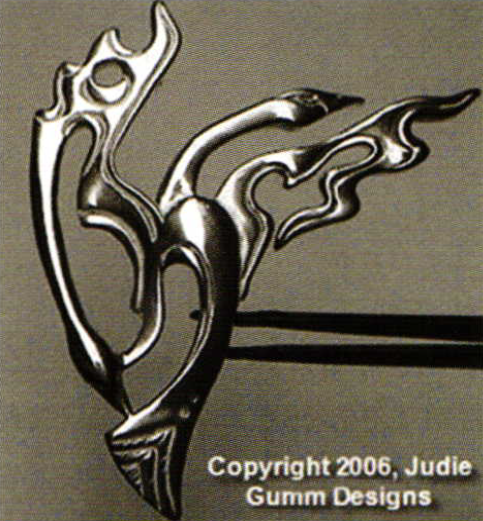
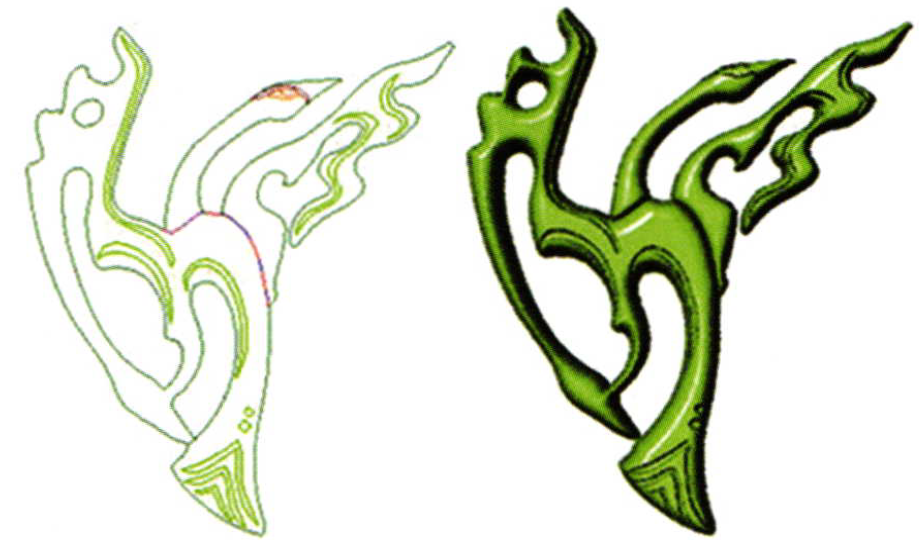
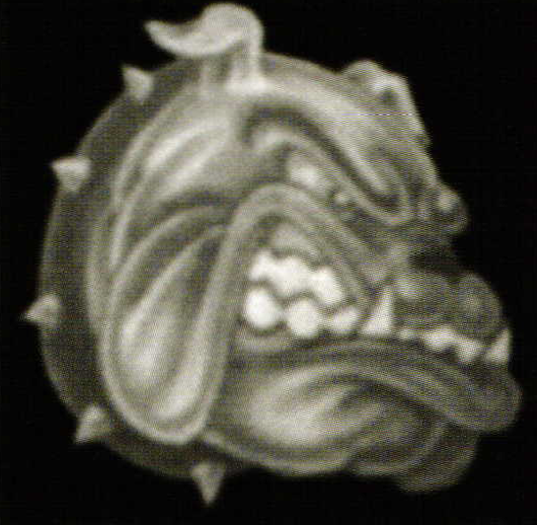
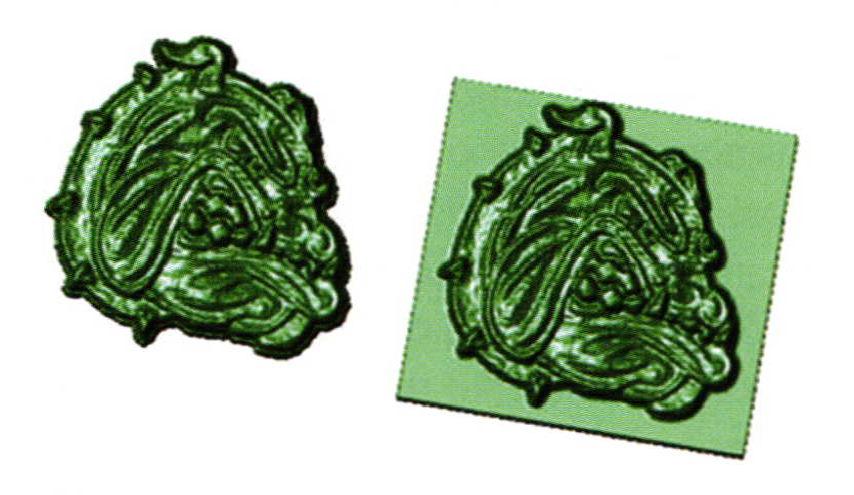
In this first example, the original bitmap provided below by Judie Gumm Designs was placed in the Looking Down viewport and traced with the Interp Curve tool. Notice in the second illustration that all the curves are closed and planar (meaning flat), and that the Layers Menu colors were used to differentiate between design elements such as the eye, beak, tail feathers, and wing designs. The curves were input into the 3D Trace builder and the cross-section of the mesh was adjusted to create the softly curved surface.
Matrix model: (l) curves created using Place Back- ground Bitmap and Interp Curve to trace bitmap in Looking Down viewport; (r) mesh model made with 3D Trace builder:
Using this builder, you can also adjust the relationship of each portion of the mesh to its neighbors: mesh parts can "cut through", "trim", "build up on", and "apply to" one another, allowing the user to define the contour of the mesh surface. This functionality is dependent upon the layer structure of the program, so that mesh made from curves on "higher" layer colors will appear over that made from curves on "lower" layer colors.
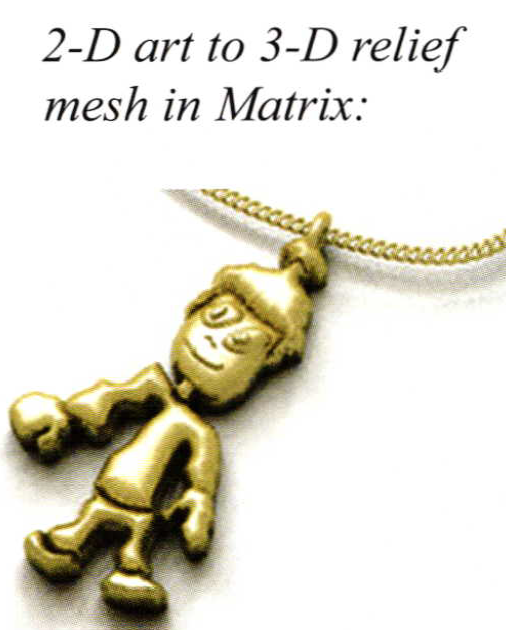
In the second example, a child's drawing was placed in the Looking Down viewport and traced using the Interp Curve tool. This time, higherparts of the mesh (eyes, hair, and shirt) were placed on higher layer colors and "built up on" the lower layer colors below them to create the higher parts of the mesh:

Mesh models created by 3D Trace builder or the new MatrixArt builder can be enhanced with texture or built entirely of texture thanks to the Bitmap function found in this builder. For best results when applying a bitmap image to the mesh surface, the bitmap should be a high-quality, high-resolution image to start with. It is fine to use an illustration or a photograph for the bitmap, as long as the image is clear and of high quality.

Preparing the Bitmap
"Height field from bitmap modeling", which is the technology used in this process, raises up a surface from a 2-D bitmap image using the colors of the image to define the shape of the surface: lighter colors appear as higher parts of the surface and darker colors appear as lower parts of the surface. Think of the bitmap as a topographical map, and you'll be able to tell which parts of the resulting surface will be high (the lighter colors) and which parts will be low (the darker colors).
Consequently, you'll want to inspect your image to make certain that the color scheme corresponds with the resulting surface you want to achieve. If it does not, there are still ways to correct this in Matrix.
However, for best results, bring the raw image into a 2-D editing program, such as Adobe Photoshop Elements or Gemvision's Digital Goldsmith, and perform any necessary changes on the bitmap in that program first, as outlined below:
- First, change the image to a Gray-Scale (black and white) image to preview how the builder will "see" it in the program. Remember: where the shades of gray are lighter, the surface will be higher. Where they are darker, the surface will be lower. If you need to, you can then Invert the image to reverse the high and low points in order to achieve the desired look.
- Next, for a smoother, less "choppy" look to your mesh, use a Blur Filter in the 2-D program and reduce the Contrast of the image. If the lighter and darker parts of the image aren't as contrasted, and if they flow more smoothly into one another, the details of the 3D mesh will be more smooth and uniform.
- Finally, Trace out the background if it is not going to be used as part of the design and crop and paste the image onto a true black background. Any details in the bitmap that are in true black can be "trimmed" out in the Matrix builder to appear "clear", so that the mesh surface is only created where the traced image appears.
- Use Place Background Bitmap to place the image atthe size you want it in the Looking Down view- port in Matrix. If you will use a very small mesh for your model, it is a good idea to make the image larger than necessary and then Scale it down in size after creating the mesh. This will create a higher-resolution mesh even if the size in your design is very small.
- Trace around the entire bitmap using the Rectangle tool and import this into the builder. To raise up any additional parts of the bitmap, trace them with the Interp Curve tool, being careful to make curves that are closed and flat in the Looking Down viewport. Import all curves into the 3D Trace builder and apply the Bit- map to the surface in the second screen of the builder. In the Bitmap part of this builder, it is possible to place a single image or to "Tile" an image to add texture to a design. When selecting "Tile", the builder will copy the same image at the size you indicate until it fills the mesh surface. Finish your work in the builder by adjusting the profile shape of the surface and the relationship of the mesh layers. Then, create the mesh.
In the new MatrixArt builder due out in the next version of Matrix, you'll find interactive functionality in the Bitmap portion of the builder that can adjust Contrast, Height, Rotation, and even Trim and Invert the bitmap "on the fly" in real-time, simply by adjusting the interactive controls. Another feature it will offer is a powerful new "Paint" tool that can pull or push the mesh to carve on it in real-time as the cursor is dragged over the surface.
Further Resources for 3D Mesh Creation
Other programs, such as ClayTools for Rhino by Sensable Technologies, allow the user to literally sculpt 3D models on-screen the way an artist does in real-life. The user creates simple shapes, known as "primitive objects", and then carves or sculpts them using tools such as "tug", "smudge", "smooth", "attract", "groove", and "wirecut".
This program works via a haptic device manipulated by the user with a pen-shaped stylus that is easy and intuitive to hold and use. Moving the stylus around in air causes the cursor to move on-screen. The forced-feedback functionality of this device allows the user to "feel" the 3D object, known as "clay", on-screen as the cursor touches it. The resistance of the virtual clay is tangible to the user through this device during sculpting or carving operations.
Primitive objects can be prepared in Matrix or in ClayTools, and they can be easily exported and imported as mesh files from one program to the other and back again with absolutely no loss of detail or scale. Start with a simple ring or portion of a ring modeled in Matrix, import it into ClayTools, and model away. Once imported back into Matrix, the 3D mesh retains its scale and location and can be modified with the Transform tools, rendered and produced on a mill together with the rest of the model. Gems and other parts of the model that will not be modeled as "clay" can be imported into ClayTools as "reference items" to aid in designing.
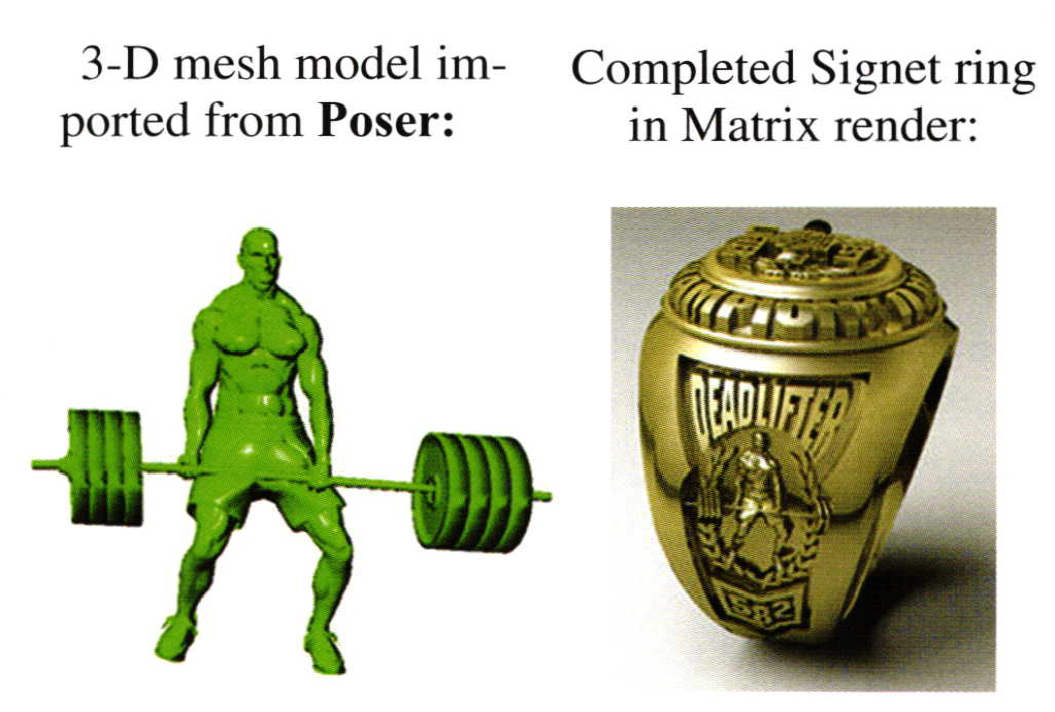
Programs such as Poser allow users to build human figures with realistic features, clothing, and props. These human figures can be outfitted with virtual clothing, modified in terms of physical features such as hair and body type, and then posed in whatever configuration the design requires. They can then be exported as meshes (.STL files) and imported into Matrix with ease. Once backin Matrix, transform yourposermodel using the Scale tools and use it as a design element on a piece such as a signet ring. In this example, note the detail in the weight lifter's facial features, musculature, and clothing: right down to the laces on his shoes!
If you don't use 3D mesh models in your designs often enough to justify purchasing either of the two programs mentioned above; or if you are looking for just the right 3D mesh model to work with your design and you don't have the time or patience to build it, there is a wealth of 3D mesh models you can find online for free or for a relatively small fee.
A huge web community of 3D artists post models on sites such as 3D Cafe that can be downloaded for little or no money. Many more sites like this one can be found online, some with better-quality models than others. Usually, the better-quality models must be acquired for a fee; however, a determined search can often turn up a useful model that can be downloaded free of charge. Many of these artists have made their creations widely available to the public domain. Most of the sites are searchable, as well.
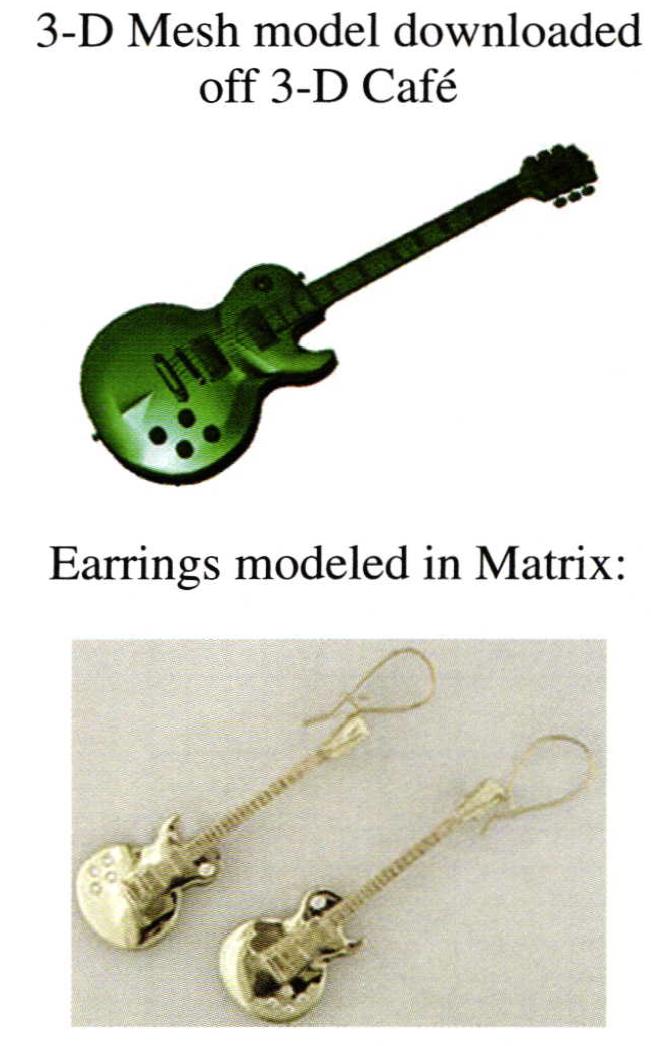
In the following example, a 3D mesh model of a guitar was acquired free-of-charge from 3D Cafe. As you'll recall, mesh objects cannot (yet) be used with Boolean and Split operations, but, in this particular case, the designer used the mesh as a reference and built surfaces to recreate the guitar as a Nurbspolysurface that can be easily used with Boolean and Split operations. He placed diamonds and cutters where the knobs on the guitar had been, hollowed out the back of the model, and milled the final model to create attractive earrings:
So, whether you create a 3D design from your 2-D artwork in a Matrix builder, purchase a stand- alone program from which you can import 3D meshes into Matrix, or search the internet forjust the right pre-made 3D model to enhance your design, 3D mesh models can quickly and easily add interest and originality to Matrix models.
Related Articles

CAD/CAM: Modeling Project in JewelSpace

Reinventing Retail with CAD

Low-Cost Rapid Prototype Systems

CAD Repair Programs for Unprintable Files


The All-In-One Jewelry Making Solution At Your Fingertips
When you join the Ganoksin community, you get the tools you need to take your work to the next level.
