
Blacksmith Enameling
3 Minute Read
February 21 - 22, 2004 was another high point in our enameling career. Irmgard and I travelled to the John C. Campbell Folk School to take a workshop - Blacksmith Enameling - taught by Mitchell Latsch, assisted by his wife Jane. It was reminiscent of my first enamel workshop in 1950, taught by Kenneth Bates. At that time, I had worked in industrial enameling for almost 15 years and was about to be exposed to art enameling. What the artists did in that workshop, using material very similar to that used for stoves, refrigerators, bathtubs, etc., was absolutely magic.
I had the same experience in Mitchell and Jane's workshop. What the blacksmith artists did, using enamel normally fused to copper, silver and gold, was absolutely magic. Jane has enameled copper for several years. Using Jane's procedures, reading the Thompson Enamel Workbook, plus other literature, and many hours of trial and error, Mitch has developed a very viable system.
His original intent was to discover and develop a method of applying colored enamels to forged iron forms without having to purchase additional expensive equipment. He started with the common propane torch available from hardware and building supply stores, firing small, thin iron pieces. The volume of heat was insufficient for larger and thicker pieces, even when MAPP gas was substituted for propane. This led to an adaptation of his gas forge. A gas forge looks something like a five-gallon bucket laying on its side with the opening facing you. Gas burners enter the side, shooting a flame, centrifugally, around the inside. He placed a sizable iron pipe, closed at one end, into the forge. The closed end went in first, leaving the open end facing you. The result was an improvised gas furnace with an iron pipe muffle to keep the combustion gases from the enamel during the firing. A long-handled set of tongs or a fork was used to insert and remove the pieces.
For the workshop, a hand-me-down furnace (kiln) from the enamel workshop was used. The pyrometer did not work, so firing was by eye.
The forged iron pieces were cleaned with a wire wheel brush running at 3450 RPM. A coat of Klyr-Fire was brushed on prior to sifting a coat of 2030 Clear, which was used as a ground coat. Various colors were applied and fired in subsequent coats.
We asked why a normal ground coat for iron and steel was not used. He had tried it early on, and found it required a higher fusing temperature, producing blisters which, when broken, exposed bright, shiny metal. The ground coat used contained about 5% clay, which is normal for good wet application. The clay increases the fusing temperature slightly. We have sent Mitchell some without clay, as well as a lower fusing ground coat, without clay, for his evaluation. In addition to 2030, he found five other colors which he could use as a first coat on his iron: 1360 Green, 1150 Brown, 1050 Mat White, 1750 Orchid, and 1870 Red. Other colors, most opaque, tested required the 2030 first coat.

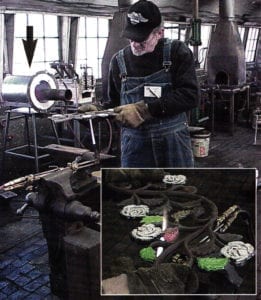
Figure 1 shows a cast iron, floral design being fired with acetylene and oxygen. Patience is required to heat the piece slowly and not reach an excessive temperature. The largest available torch tip would probably help. To the left of the piece being fired is a gas forge, adapted for firing enamel. This was improvised using what could be found in the shop. Otherwise, a piece of square tubing would be used and cut a few inches shorter. With practice, good ware can be produced with this adaptation.
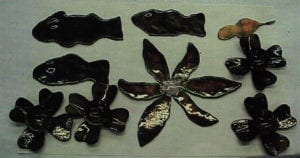
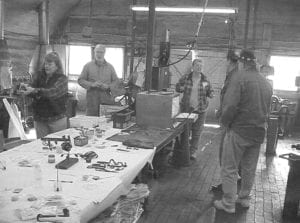
There were ten students for this workshop, about one and one-half days in length. Most had never enameled before. All left happy and wiser with a multiple of colorful enameled forged iron pieces.
Related Articles
Plique-a-Jour Russian Soldering Method

Enamelists Make Plique-a-Jour Souvenirs

The Enamelware of Bev Yokley
Cloisonne Primer – History of Cloisonne Technique


The All-In-One Jewelry Making Solution At Your Fingertips
When you join the Ganoksin community, you get the tools you need to take your work to the next level.
