
Anodizing Update
7 Minute Read
Bill Seeley is an independent metalsmith with an M.F.A. from the University of Kansas in metals, particularly titanium. He is also a supplier of reactive metals to artists and the trade.
Although the basic principles involved in anodizing the reactive metals have been discussed in the past, a deeper insight into the process can aid the artist in solving some of the technical problems encountered. The publication of my thesis, "Studio Preparation and Coloring of Titanium" (available from the Society of North American Goldsmith's Book Department), along with three years of research involving numerous departments at the University of Kansas have led to the development of a power supply, an electrolyte and a number of application approaches that will both lower the cost and increase the capabilities for the artist working with these metals.
High Voltage Breakdowns As the anodizing process is pushed into the higher orders of color (75 to 200 volts) there is encountered a point at which the process appears to break down. This is particularly true when an applicator (brush or sponge) is being used to manipulate the electrolyte. The breakdown is usually marked by steam rising from the applicator and the appearance of dull brown spots. The anodizing process has reverted to electrolytic etching and the anodic coating has begun to tear itself apart.
In general, anodic etching will begin to occur at any time that the electrolyte reaches a temperature above 90°F (32°C). The causes of this overheating are; excess current and/or the use of an alternating current (ac) power source. The cure, which will allow anodizing, in some cases, to over 200 volts, can be administered in three ways: 1) the use of a direct (dc) current power supply, 2) the addition of current limiting circuitry, 3) controlled concentration of the electrolyte. And, in this case, the application of all three is the best cure.
Before continuing, it is necessary to define voltage and current (amperage) and their relationship to the anodizing process. In its simplest terms, the flow of electrons called electricity can be compared to the flow of water running under pressure through a hose. Here, voltage is the pressure being supplied to the line and current is the volume of the hose.
While the voltage/pressure may remain the same, more material (electrons) will flow through a large-diameter hose than a small-diameter hose. That's why a toaster and electric iron (drawing high current) has a larger diameter cord then, say, a table lamp (drawing low current). Current, then, is the number of electrons in motion through the line at a given voltage.
Theory of Anodizing
It is generally understood that the colors produced by the anodizing process are generated by a transparent layer of oxide. The colors vary according to the thickness of the oxide, which in turn is proportional to the voltage applied. While this sounds fairly simple, the theory behind the process is more complex and little understood.
The most accepted theory states that the oxide layer produced on a reactive metal grows from the inside out. That is, the oxide is generated at the metal/oxide interface. In order for the oxygen being liberated in the electrolyte to migrate to the metal surface, pressure must be applied. The more pressure, i.e., voltage, the deeper the oxygen can penetrate to combine with the metal to form more oxide.
In the meantime, the speed at which the oxide is produced is dictated by the number of electrons in motion. The higher the current available, the faster the oxide is generated, and most importantly, the more heat produced. Just as the flow of gases to a torch must be adjusted to match the tip size, current must be regulated to match the size of the applicator and the voltages applied.
When current is unregulated, a tiny #0000 artist's paintbrush will have the same number of electrons forced through the solution on a few hairs as would pass through a house painter's four-inch brush. The four-inch brush will anodize slowly and cooly as the reactions are spread over a relatively large area. While at the same voltage steam may rise from the artist's brush and brown etched spots may occur. It follows then that the smaller the applicator and surface area and the higher the voltage, the lower the current necessary to achieve the desired effect. While with low voltages and large applicators, more current is needed to produce the effect in a reasonable amount of time.
Current Limited Power Supply
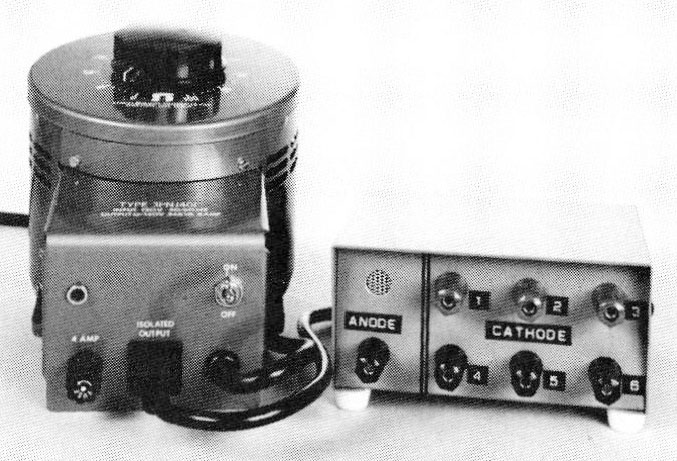
The power supply (Figures 1 and 2) produces pulsating direct current with current limiting. Voltage is controlled by an isolated variable transformer which is an exclusive product of the Staco Energy Products Company, 301 Gaddis Ave., Dayton, OH 45403 (approximately $125).
The output of a variable transformer is in the form of alternating current (ac). It can be used as is for most bath anodizing and low voltage brush applications, but is self-limiting. Alternating current, as the name implies, changes polarity or direction of flow 60 times per second (U.S.). This stop/reverse/start process generates additional heat and tends to strip masking material off the metal surface.
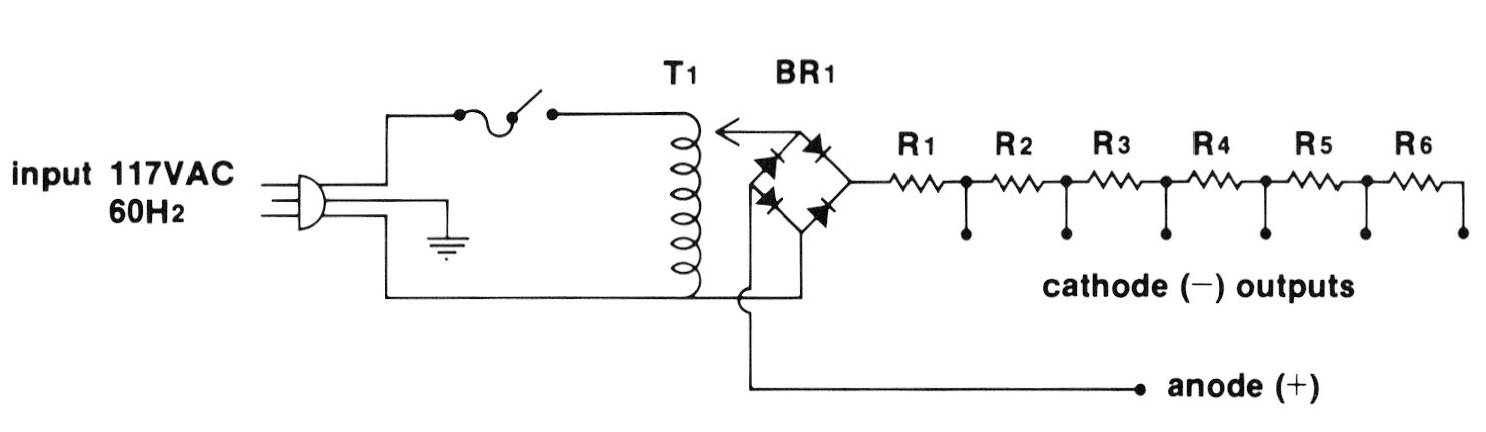
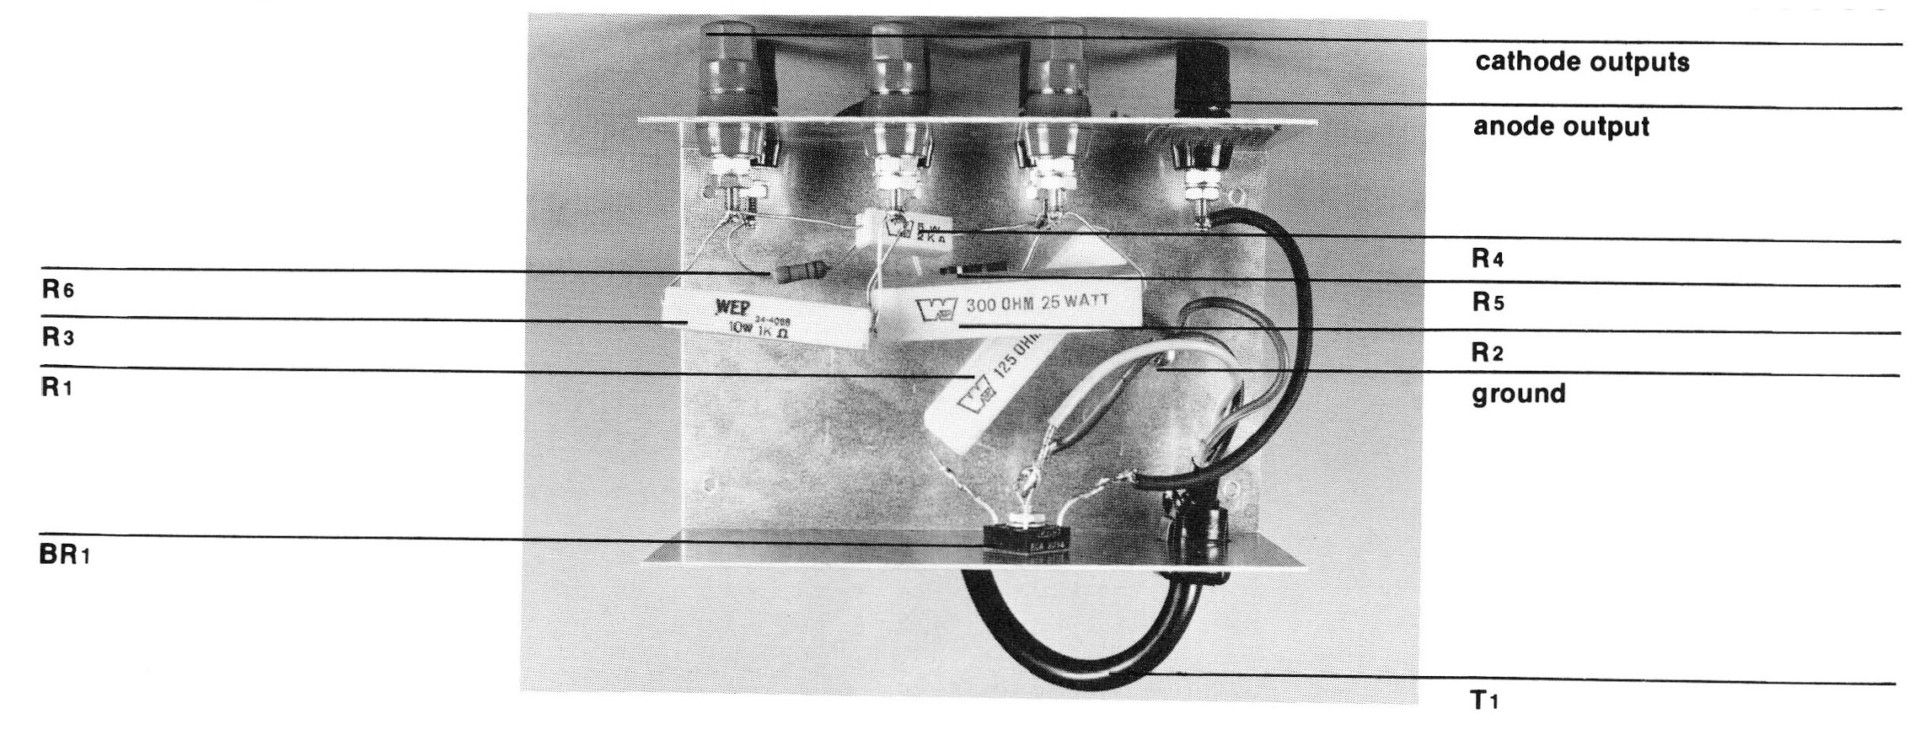
An ac power source can be polarized (see Figures 2 and 3) to produce pulsating direct current (dc) by the addition of a full wave bridge. This consists of four diodes (silicon rectifiers) which effectively pass current in only one direction. It is a one-way valve.
Current limiting can then be achieved by simply placing a resistor of the proper size in series with the output of the power supply. Or, a series of resistors of varying size can be mounted in a box to provide a choice of current settings. Resistors in this circuit act as a faucet and effectively control the speed of the anodizing process in relation to the applicators and voltages being used.
This simple rectifier and current limiter with six outputs can be built from readily available parts for well under $50. Parts can be obtained from a local electronics supply house or even your neighborhood TV repair shop.
Electrolyte
The electrolyte can also be used to control current. Pure, distilled water will not carry any current. The more impurities that are added to water the more current the solution will carry. While a solution with a 100% chemical additive works well at low voltages, a 3% or less solution should be used when attempting brush applications in excess of 70 volts. The idea, again, is to match the current-carrying capabilities of the electrolyte to the voltage, applicator and speed required.
A less expensive and easier to find electrolyte can be made with Tirsodium Phosphate (Na3 PO4. 12H2O) better known as TSP. TSP can be purchased in most hardware and paint stores. It is used for cleaning woodwork prior to painting. It should be mixed by weight with distilled water and makes a clear electrolyte. Tap water is not recommended. The chlorine content of city water and excess minerals in well water can adversely effect the solution and the results.
The most widely applied resistive medium now being used is tape. While electrician's black tape and even Scotch "Magic Transparent" tape can be used for some applications, Scotch "Electrical Tape #5" is specifically suited for anodizing. It is transparent, you can see it seal and it can be baked on for permanent applications. It is a polyester tape with a very aggressive adhesive designed to withstand 5,000 volts. It can be ordered through 3M distributors in widths from 1/16 to 16 inches on rolls 72 yards in length.
Application Tips
When bath anodizing, mask both the anode hangers, baskets, etc., and the cathodes lo below the water line. Mask the back side of the cathode.
Do not let other metals, i.e., clip leads, copper wires, etc., to come in contact with the electrolyte.
When bath anodizing, use hangers, baskets and clips of the same metal you intend to anodize, i.e., titanium with titanium, niobium with niobium, etc.
Use nylon brushes like Grumbacher's "Erminette"; they carry current better and last longer than brushes with natural bristles.
Permanently lead solder a wire to the metal ferrule of your brushes and then coal all the way to the brushes with plastic. PDS Air Dry Plastic Coating used to dip tool handles works well and is available from hardware stores and supply houses.
When brush anodizing, do not let the electrolyte run onto untreated areas or the back of the work. The current will always be drawn to the unanodized area.
EVER HOLD BOTH LEADS FROM THE POWER SUPPLY AT THE SAME TIME! The old electrician's habit of keeping one hand in a pocket should be cultivated at all times. There is no way to make the equipment used for anodizing sale and have it function well. The dangers can not be over emphasized.
Related Articles

The Secret Life of Solder

Carat Gold Solders for Jewellery Making
Cupric Nitrate Patination of Metals

Toolmaker’s Tools of the Trade


The All-In-One Jewelry Making Solution At Your Fingertips
When you join the Ganoksin community, you get the tools you need to take your work to the next level.
