
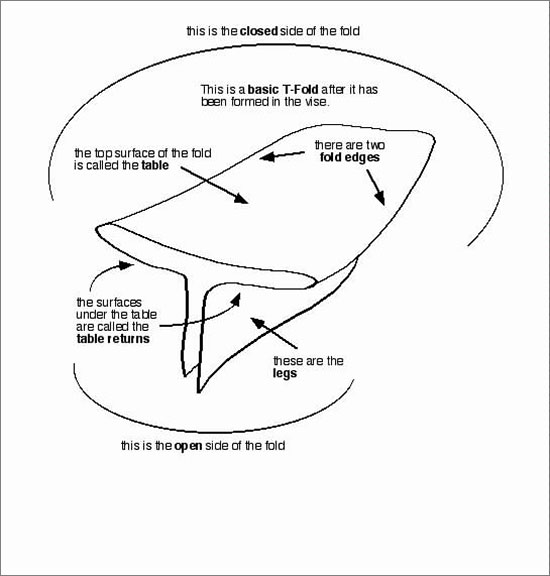
Steps on Making a Basic Wedge T-fold
This page describes the steps to making a basic wedge T-fold
1 Minute Read
Updated on
This page describes the steps to making a basic wedge T-fold.
 | To begin with a loop is made from a rectangular piece of sheet metal. |
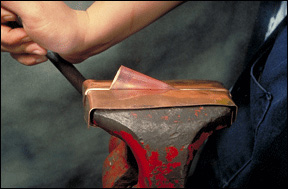 | The loop is placed into the vise and the jaws clinched tight onto the loop. You can see the angle the loop is tilted to in the vise. Vary the angle to alter the results. Note this is also a very quick way of making a conical form in metal |
 | The end of the loop is now malleted down, 'confirming' the position of the table relative to the legs. Clinching the end first leaves a hollow shape to the rest of the loop. This is called a pillow, and is used to chase into or otherwise work with. For a basic Wedge T-fold it is simply flattened. |
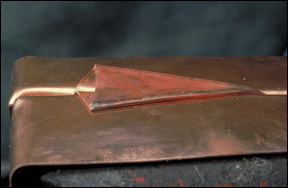 | Here is what the Wedge T-fold looks like after flattening down to the top of the vise. Note the protective vise jaws of copper which protect the fold being made. Other vise jaw materials such as plastic or wood can be used instead. |
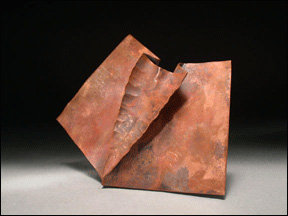
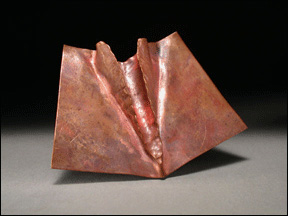
 | This is another type of wedge T-fold using a narrow rectangle and a more extreme angle in the vise. The change in shape and position leads to different forming options. Each change you make in the procedure results in variations in form. |
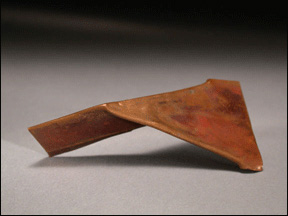
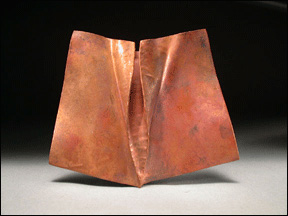
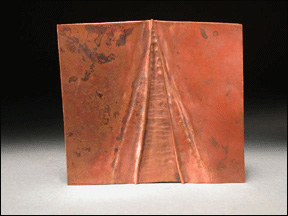
 | Here is what a basic T-fold looks like after annealing. The table has been left standing high in this picture. |
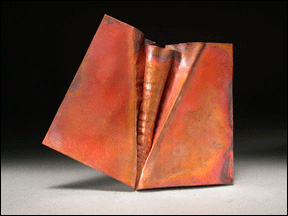
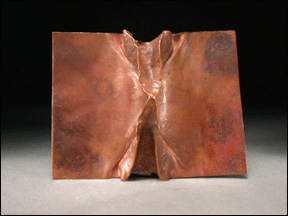
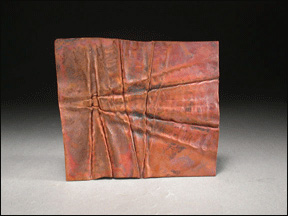
 | Here is an example where the table returns have been unfolded, arching over the table surface. |
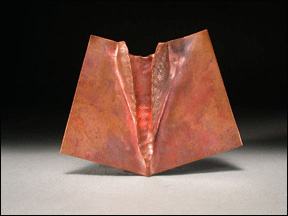 | Another Wedge T-fold with the table returns unfolded over the table. |
 | A back view of the basic wedge T-fold. |
 | A Wedge T-fold with the table returns unfolded over the table. |
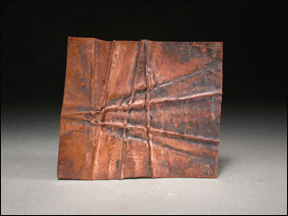
 | This is a wedge T-fold which has had the table returns completely unfolded, and then been flattened 'confirming' the two fold edges from the table sides, making them into line folds. |
 | A view of a flattened wedge T-fold. Fold edges as line folds. |
 | A double wedge T-fold, where a fold has been made from each side of the loop towards the middle. |
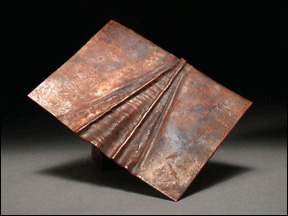
 | Repeated wedge T-folds layered over each other. |
 | Back view of the layered multiple T-folds. |
By Charles Lewton-Brain – © Brain Press Publications – 2008
All rights reserved internationally. Copyright © Charles Lewton-Brain. Users have permission to download the information and share it as long as no money is made-no commercial use of this information is allowed without permission in writing from Charles Lewton-Brain.
 |
Purchase your own copy of “Foldforming (Hardcover)” today. |
Related Articles

Steps on Making a Basic T-fold
This article describes the steps to making a basic T-fold, one of the main categories of fold-forming. Numerous variations are...
Read More

Steps on Making a Chased Wedge T-fold
This article describes the steps to making a chased wedge T-fold. To begin with a loop is made from a...
Read More

Scoring and Bending Procedures
Silicon carbide separating discs are superb for scoring metal for bending, particularly when the metal sheet is less than 4...
Read More

Fold Forming Tool List
These are the jewelry-making tools you'll need for fold forming.
Read More


The All-In-One Jewelry Making Solution At Your Fingertips
When you join the Ganoksin community, you get the tools you need to take your work to the next level.
