
Preparing 3D Acrylic Photopolymer Patterns
13 Minute Read
Editors Note: This article is excerpted from "A New Method for Preparing 3D Acrylic Photopolymer Patterns for Investment Casting," a paper by James Binnion that was published in the proceedings of the 2016 Santa Fe Symposium on Jewelry Manufacturing Technology.
The difficulty of obtaining consistent, high-quality castings from a 3-D printed resin pattern is well known. And with the recent proliferation of 3-D printers in the jewelry industry, this problem is becoming more and more pronounced. In an effort to achieve better castings from my resin models, I started experimenting with the steps I took to fully harden and prepare the models before casting. From my experiments, I discovered a process that greatly reduces issues of investment degradation during burnout, resulting in much better surface finish in the resulting castings.
Why Defects Occur
To understand the process I used to obtain better castings, it is first necessary to explain why defects occur when casting these materials. Unlike wax, the photopolymer material used with many of the 3-D printers available to the jewelry industry doesn't melt when heated during the casting process. Instead, the materials remain solid until heat is applied in the range of 300°C-400°C (572°F-752°F), when they begin to decompose. As the resin decomposes, some of the polymers that make up the material will remain behind as a solid char residue. To remove that residue, flasks typically require a burnout schedule with a long dwell at a temperature near the breakdown point of gypsum investment.
But subjecting the flasks to such high temperatures for extended periods of time contributes to a persistent burnout problem: mold-surface degradation that leaves a raised, positive defect on the surface of the casting. Ranging from a significant roughening of the surface and loss of detail to just occasional bumps where the face of the mold is spalled away, this degradation appears to result from a resin-mold reaction that is affected by the burnout schedule and how well the model was cured post-grow. If you invest and burn out a pattern that has only been rinsed to remove the uncured resin from the surface, the results will be a very degraded casting surface. The more complete the curing of the pattern, the less this type of defect occurs.
Although there are several theories on why this occurs, I believe that what is happening is that the uncured and under-cured resin is impregnating the investment where it meets the model. It starts when the model is exposed to water in the investment during the mixing and setting process and the initial stages of burnout. I also believe the vacuum applied during the investing process is helping to draw the uncured resin out of the pattern. During burnout, as the investment is dried out and the temperature begins to rise, the resin-impregnated investment is essentially cemented to the model. With the rising temperature, the pattern will eventually begin to shrink as the volatile compounds escape. This shrinking then pulls the investment off the surface of the mold cavity, resulting in the positive surface defects on the cast pieces.
One of the reasons this occurs is because resin models produced on 3-D printers are not fully cured by their exposure to blue/ultraviolet light during the printing process. The models are cured just enough to have the strength to retain their shape and allow them to be pulled off the growth surface. It's recommended then that models be post-cured after printing. This is often done in one of two ways: ultraviolet light or heat.
Post Curing with UV
Resin manufacturers typically recommend curing printed models with UV-emitting lamps, but there are a couple of problems with this. Oxygen inhibits the resin's ability to polymerize, resulting in an under-cured model surface layer that extends to a depth of several microns. Additionally, the resin has components that limit the penetration of the UV light. These components allow for the production of high-resolution models, but also limit the penetration of UV into the model for post-curing, leaving some areas (thicker sections, those less exposed to the UV) under-cured.
Post Curing with Heat
Alternatively, models can be heated for post curing. After heat curing, the models are harder and don't have the tacky surface common on UV-cured patterns. However, heat-cured models exhibit a weight loss from the post print to the cured state of up to 3 percent, while UV-cured prints lose only around 0.5 percent. Another drawback to using heat is that greater strain appears to be placed on the models during the process. As the resin cures, it shrinks. If the heating rate is too great, a shrinking outer shell is strained by trying to compress the less cured core of the print. This strain can result in cracks or crazing of the model's surface, rendering it unusable for casting. The heating rate must be controlled to avoid this issue.
Finding a Better Way
In an effort to fully cure the resin in the models without the danger of cracking, I decided to try to remove the uncured resin by a combination of evaporation and low heat. When air pressure is dropped, the boiling point temperature decreases and there is a greater evaporation rate of volatile materials. For my experiments, I used the boiling point and vapor pressure of methyl methacrylate as starting points. Methyl methacrylate is the most basic form of acrylic resin and all the acrylic resins used in the industry are derived from it.
I placed a cleaned post-grow pattern in the chamber of a vacuum oven and began pumping it down. The rate of pressure decrease flattened out at around 300 microns, indicating that the model was releasing vapor. After a period of 1.5 hours, the pressure had dropped to around 20 microns, with the temperature stabilized at 93°C (199°F). I brought the oven back up to atmospheric pressure and removed the pattern to examine it. It appeared to have similar hardness to a heat cured pattern and no tacky surface. When it was cast, the results were better than those of patterns post-cured by either UV or heat. The casting displayed no indications of investment breakdown.
The Patterns
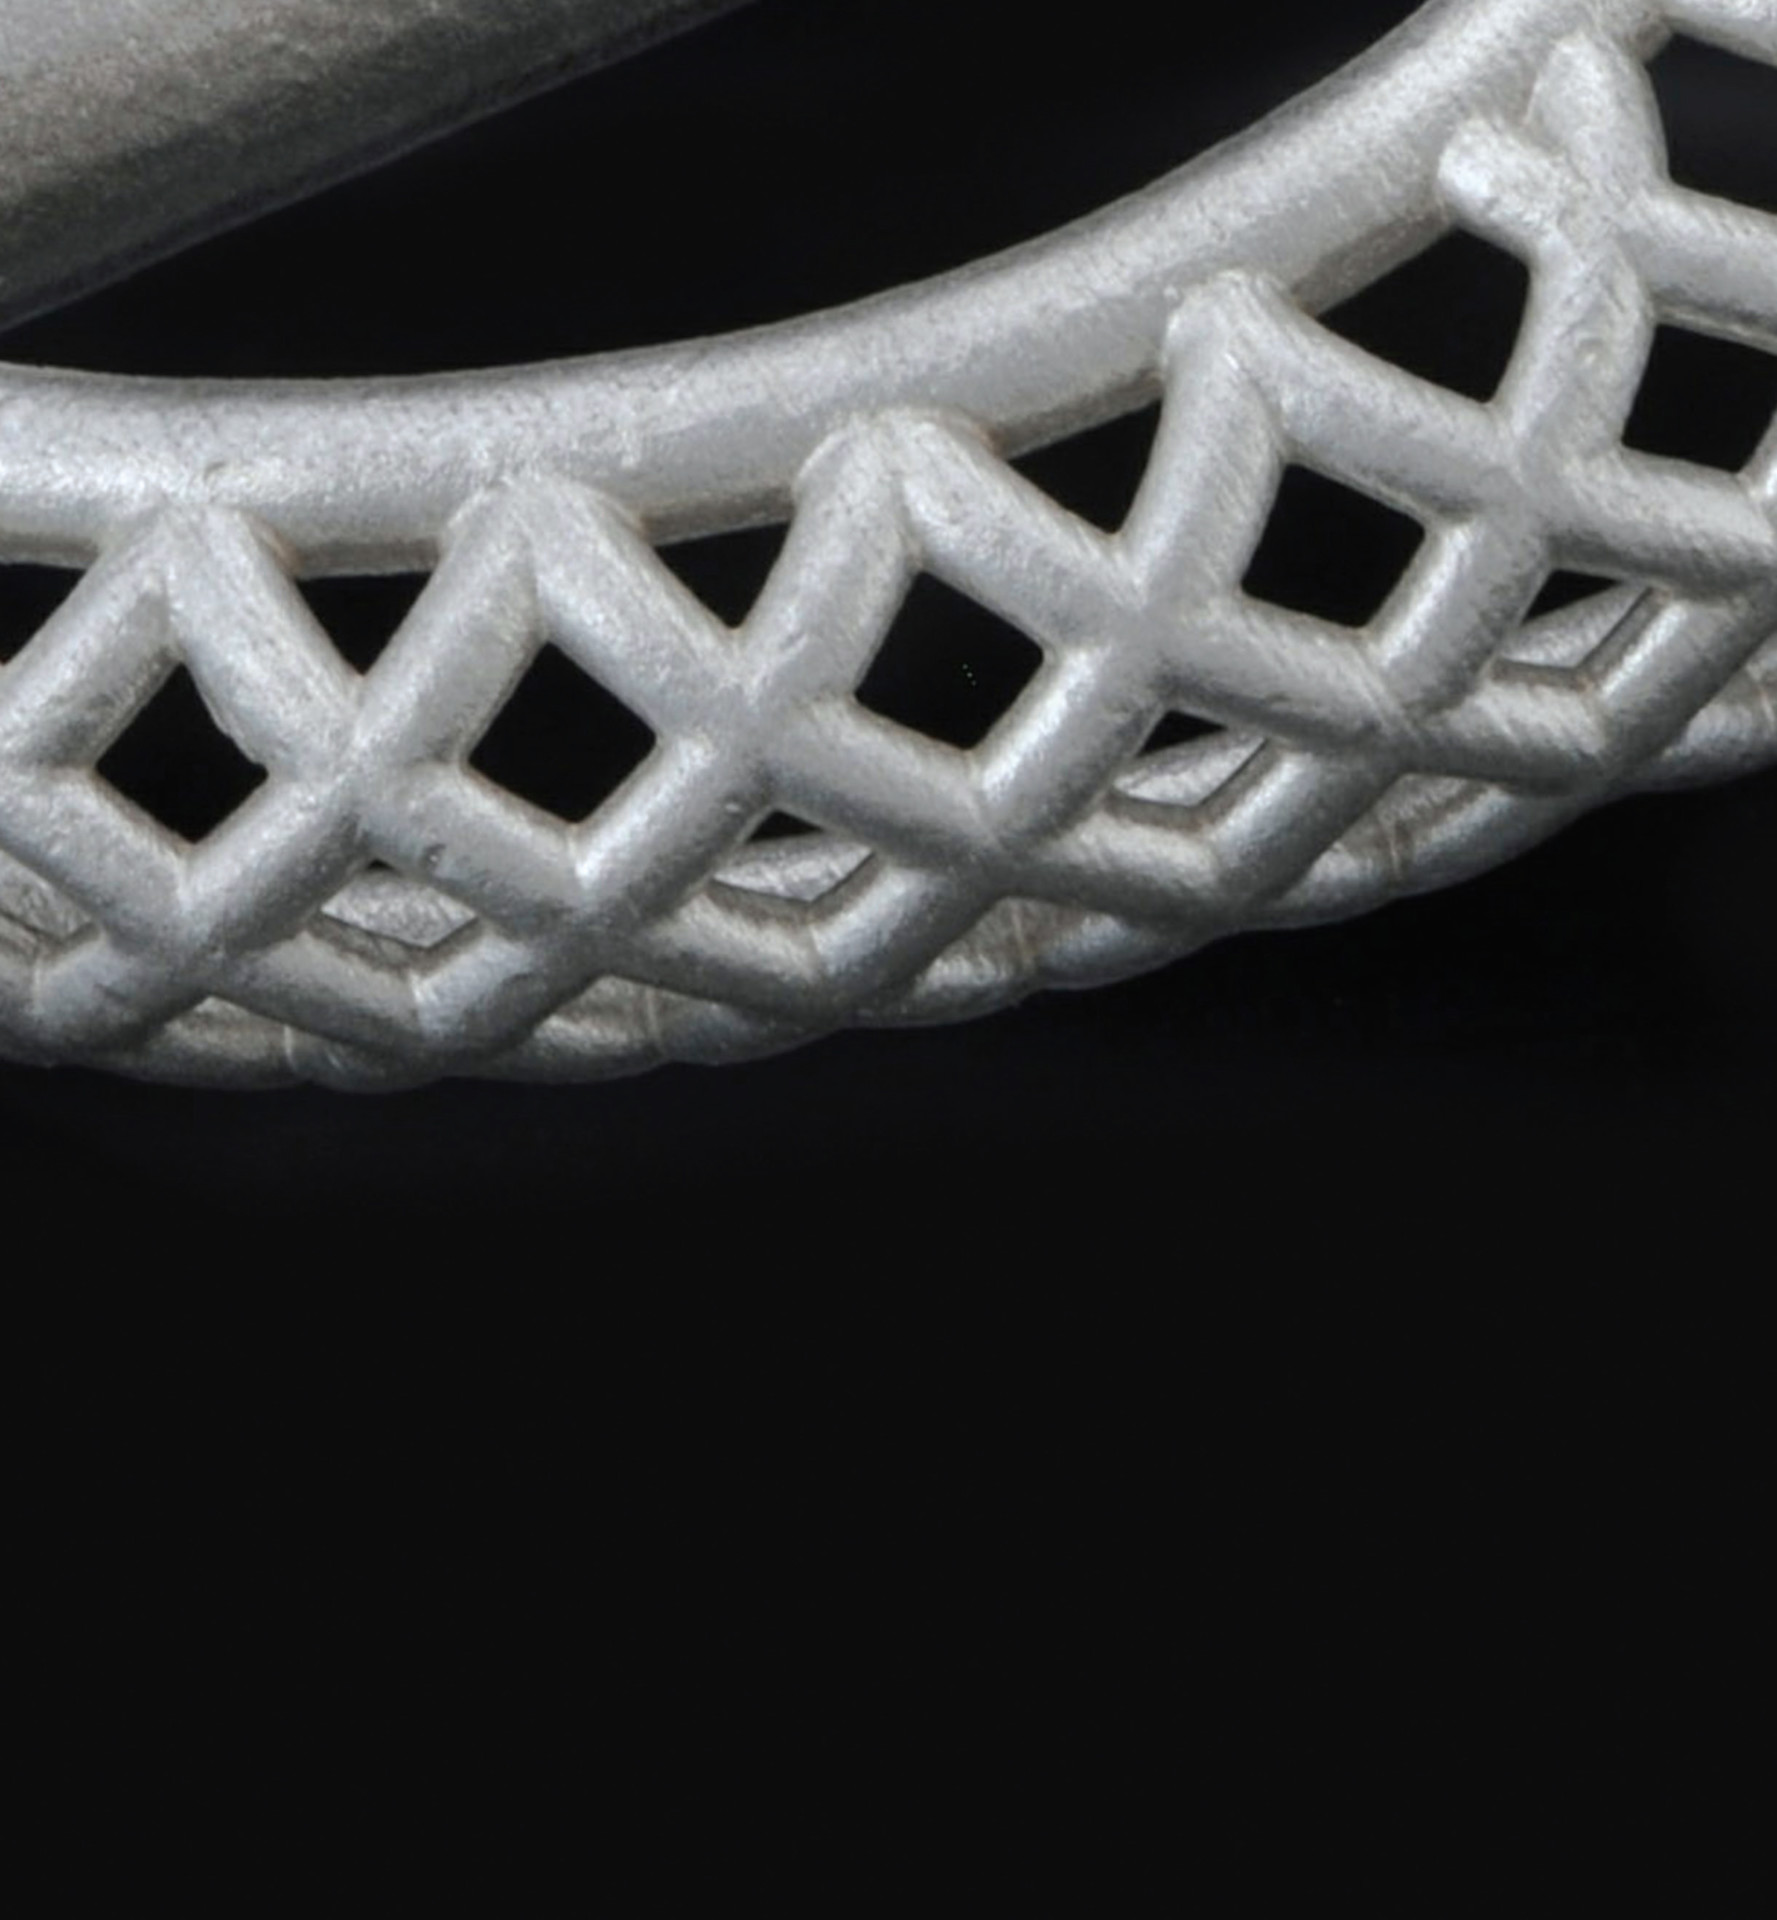
Two sets of patterns were grown for testing. The first was a signet ring with a range of textures and lettering on the surface, to provide a heavy-section piece with some fine detail. The second group of patterns was a mix of light to heavy sections and simple to complex designs. The first set of patterns was post cured as individual pieces, while the second set were processed as a group on a single base. Patterns were grown and processed by three post-grow curing methods: UV, heat, and vacuum/low heat.
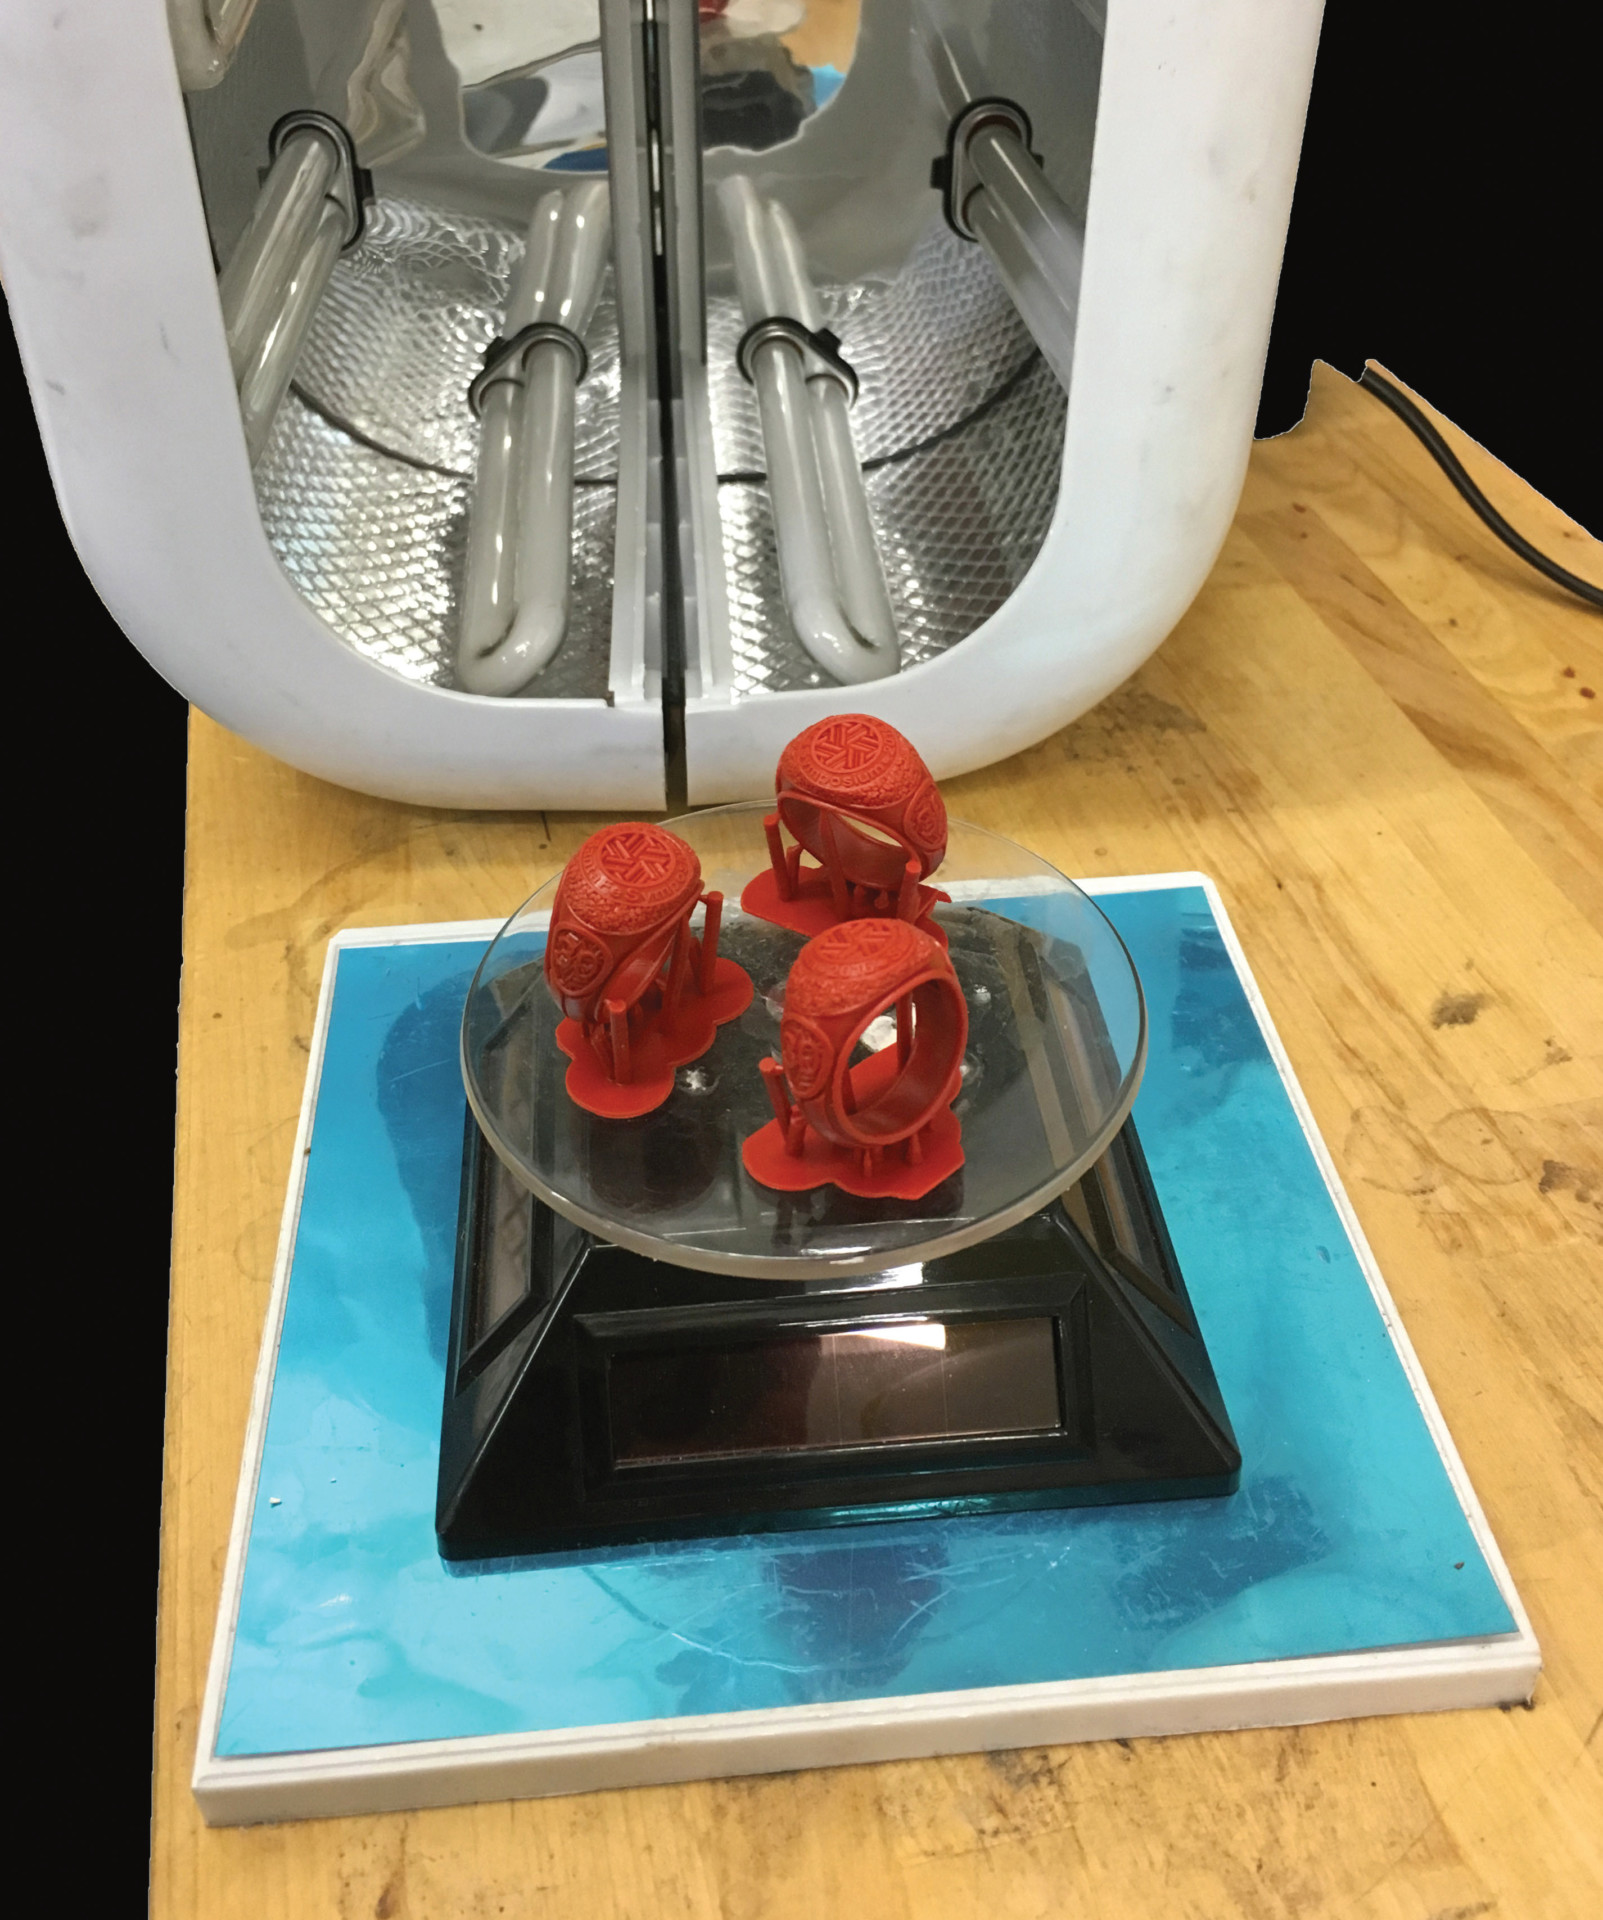
UV Cure Tests
The UV curing was performed in a chamber with eight 365 nm 9-watt fluorescent tubes arrayed around the models, which were placed on a solar-powered turntable that kept the parts in continuous motion to provide for even illumination of their surfaces. The models were cured for times ranging from 30 minutes to 2 hours. After curing, all of the patterns retained a slightly tacky surface. I weighed the models before and after curing and discovered that they exhibited little weight loss from the curing process. (I cured the models in air, as per the resin manufacturer's recommendations. I have tried curing models with UV using both argon and water; this produced good models with hard surfaces but they were not fully cured and did not eliminate the casting issues.)
Heat Cure Tests
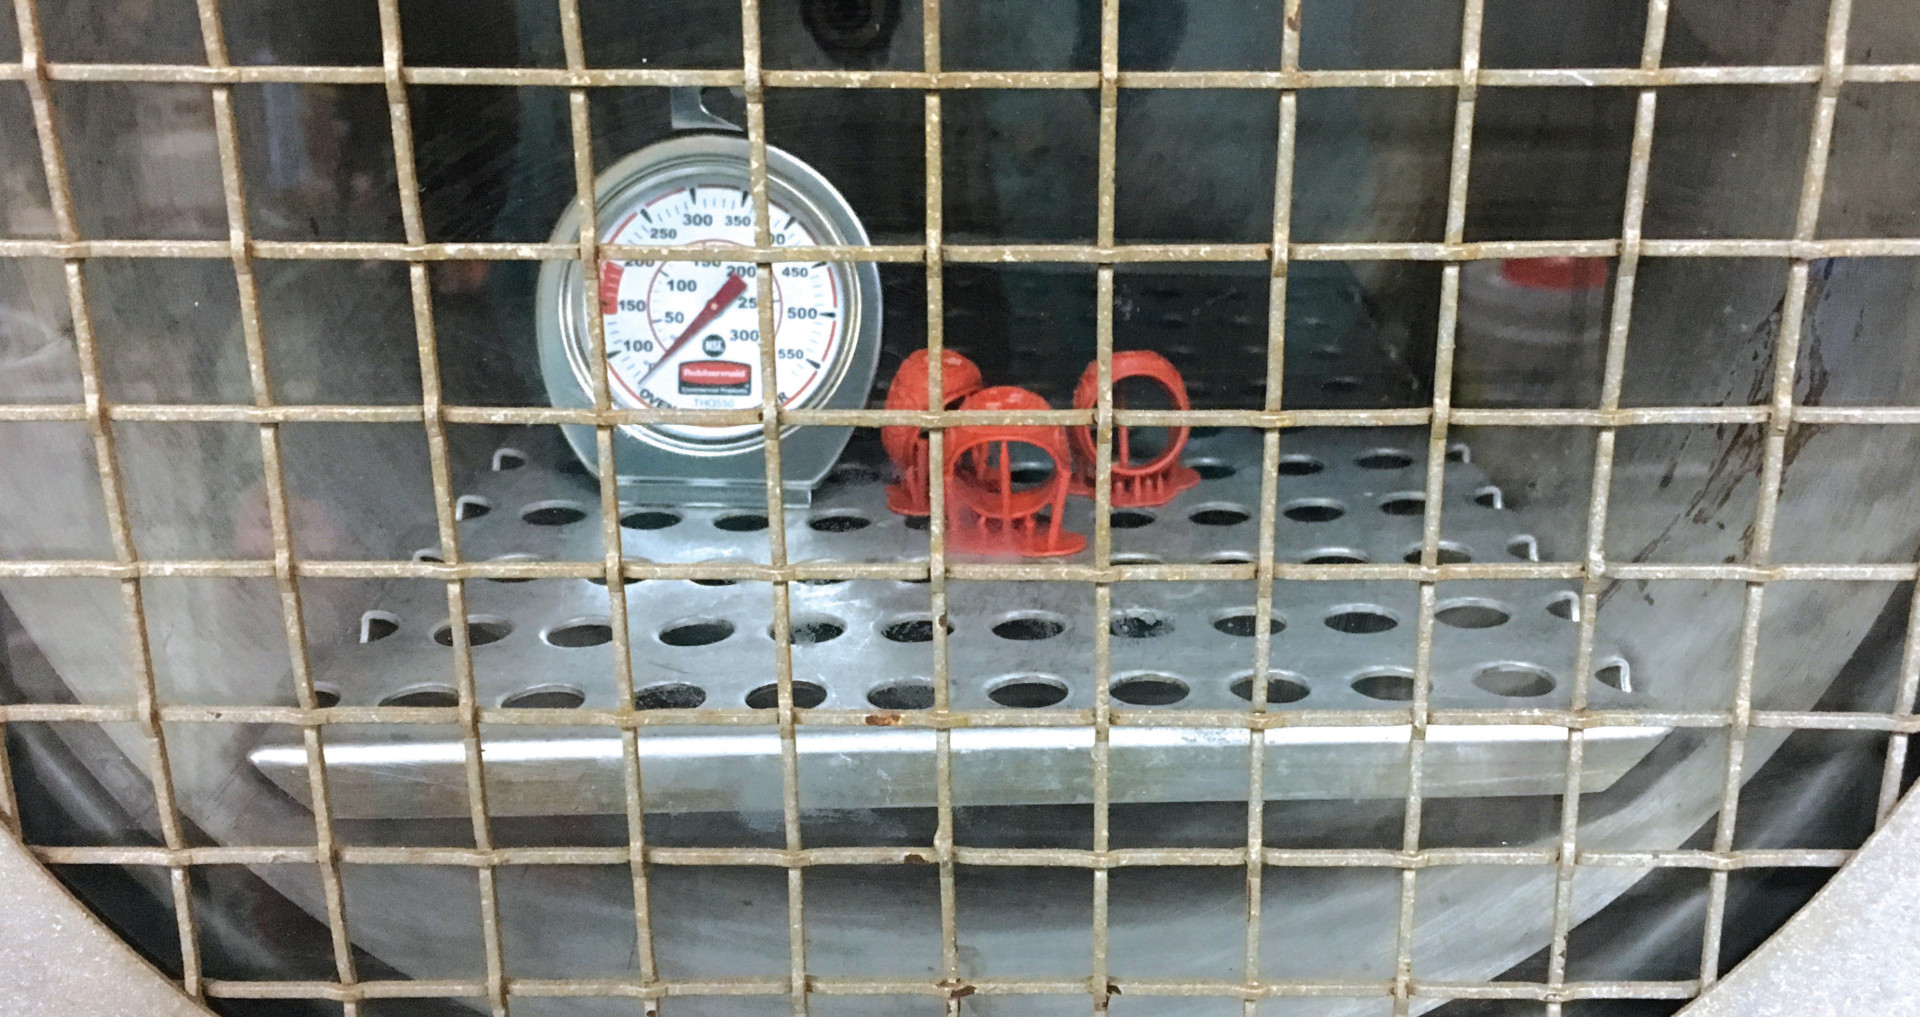
I conducted the heat-curing tests using a countertop convection oven that had been fitted with a digital PID temperature controller and type K thermocouple to measure and control the oven's temperature. Patterns were placed on a metal sheet that sat on the oven rack. Initial tests used a three-step temperature ramp of 50°C (90°F) for 15 minutes, 100°C (180°F) for 15 minutes, and 150°C (270°F) for 15 minutes. By the end of the treatment, all of the models were crazed and cracked. To try to mitigate this problem, I changed my method of cleaning the models. During testing, I found suggestions online that patterns left for too much time in the isopropyl rinse after printing were more prone to cracking. I switched to giving the models a brief rinse in isopropyl before immersing them in water with a bit of detergent, followed by a rinse in clean water. While this process greatly reduced the cracking that occurred during heat curing, thick sections of the models were still prone to cracking if heated too rapidly.
In contrast to the UV cure, the models that underwent the heat curing experienced an average weight loss of 2.5 percent, with higher temperature and longer heating times resulting in greater weight losses.
Vacuum/Low-Heat Cure Tests
The vacuum/low-heat cure tests were performed in a vacuum oven, with the patterns placed in the center of the oven while at room temperature, which seems a necessary step as patterns placed directly into the vacuum oven when it was hot can occasionally result in cracking. For this technique, a processing time of 1.5 hours seemed to be adequate to produce a low enough level of uncured resin in the testing patterns for a clean casting. Although leaving the models in the oven longer can result in the removal of additional volatile components, the longer times can also cause cracking.
The models from this test experienced a roughly 2.5 percent weight loss. As with the models in the heat cure tests, exposure time and temperature played a part in the amount of weight loss.
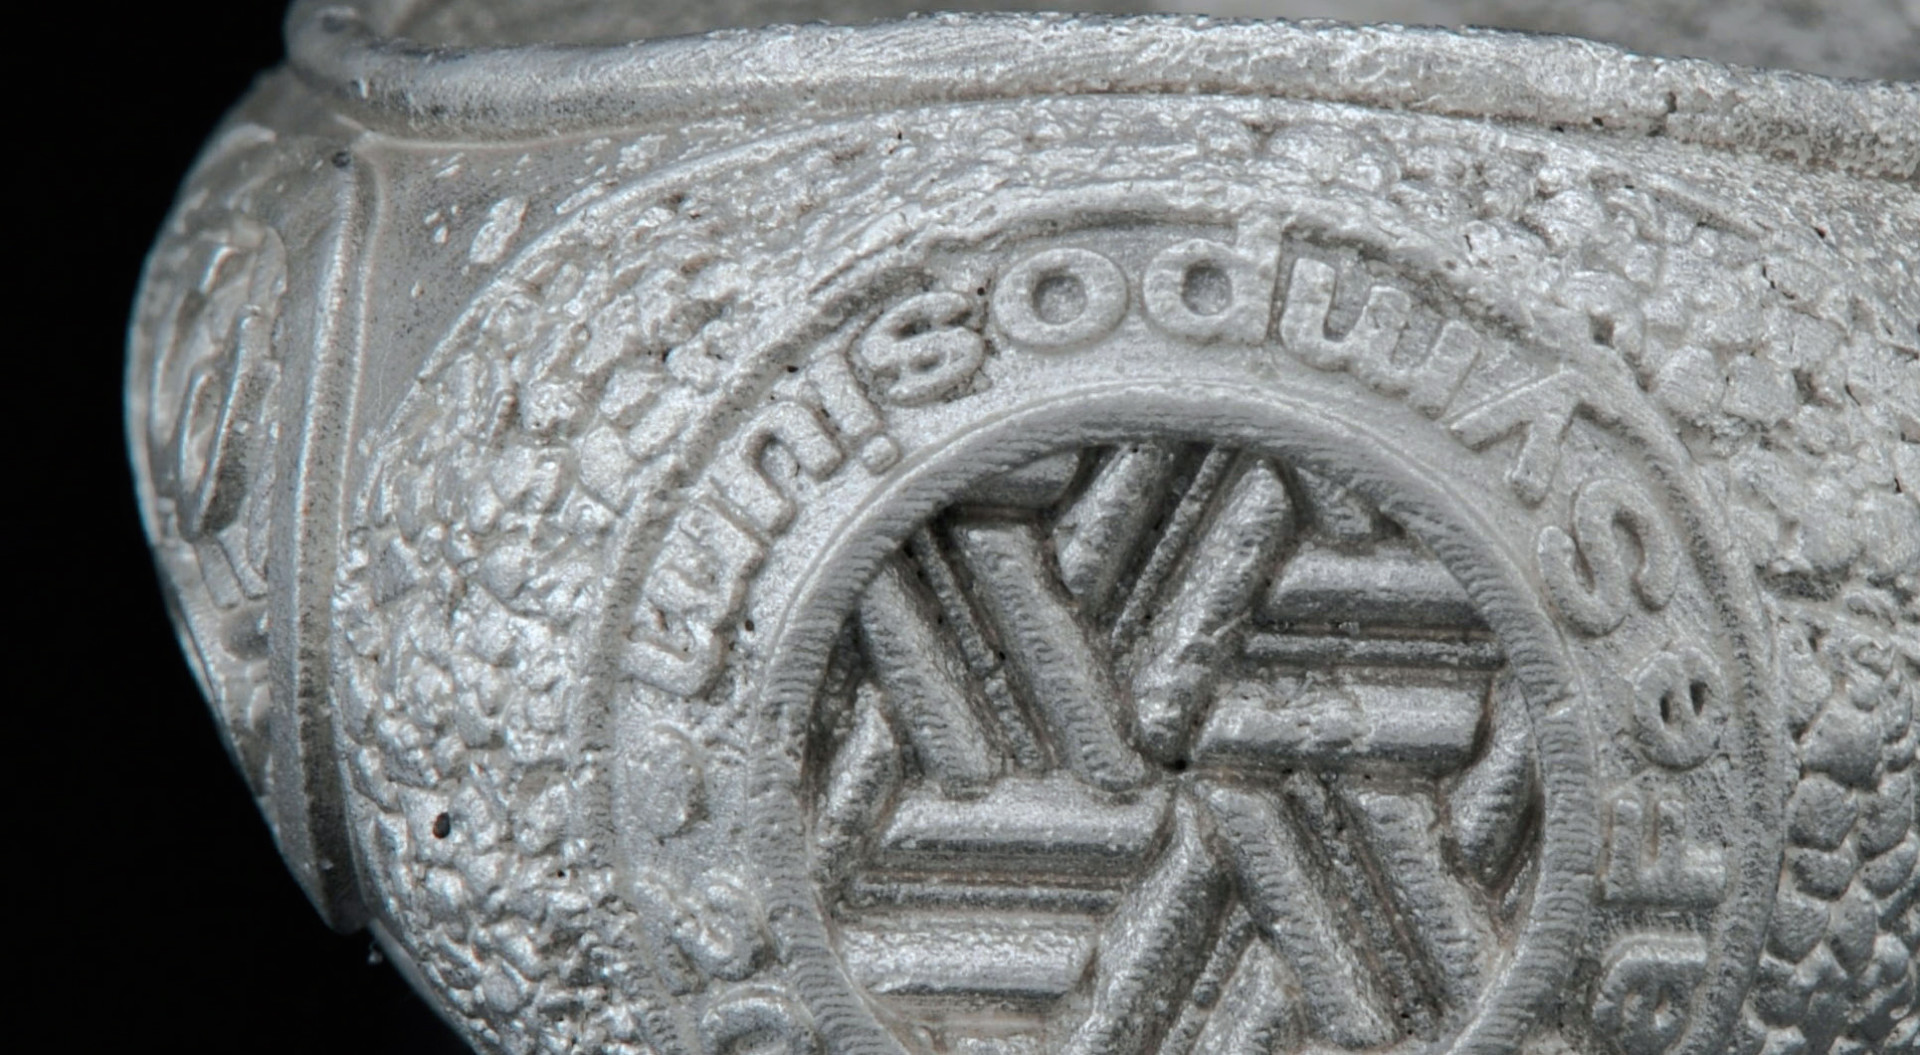 Figure A Figure AUV-Cured Signet Ring | 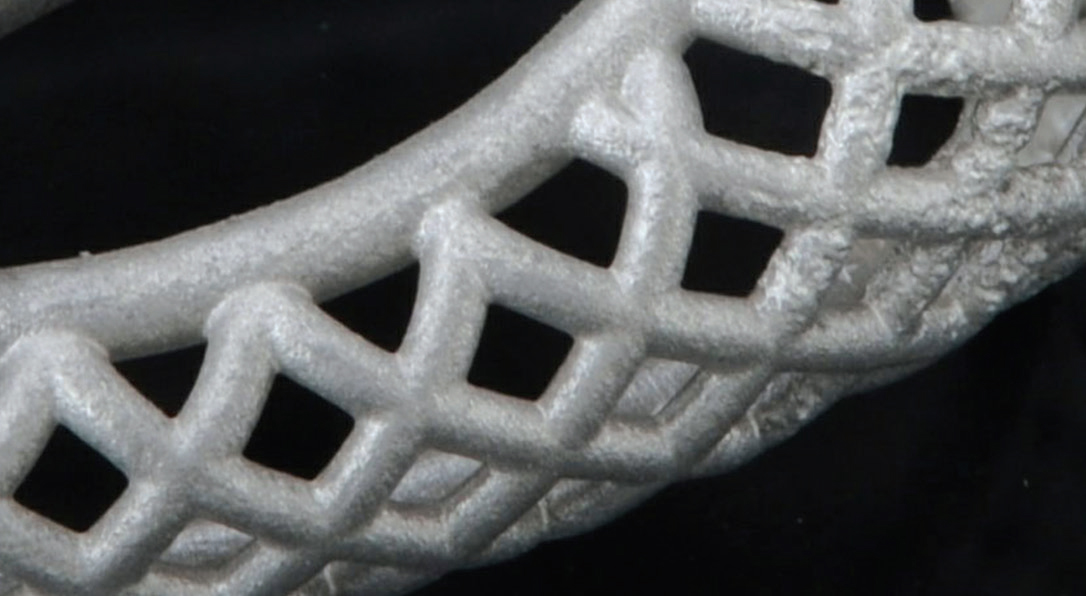 Figure B Figure BUV-Cured Cage Ring |
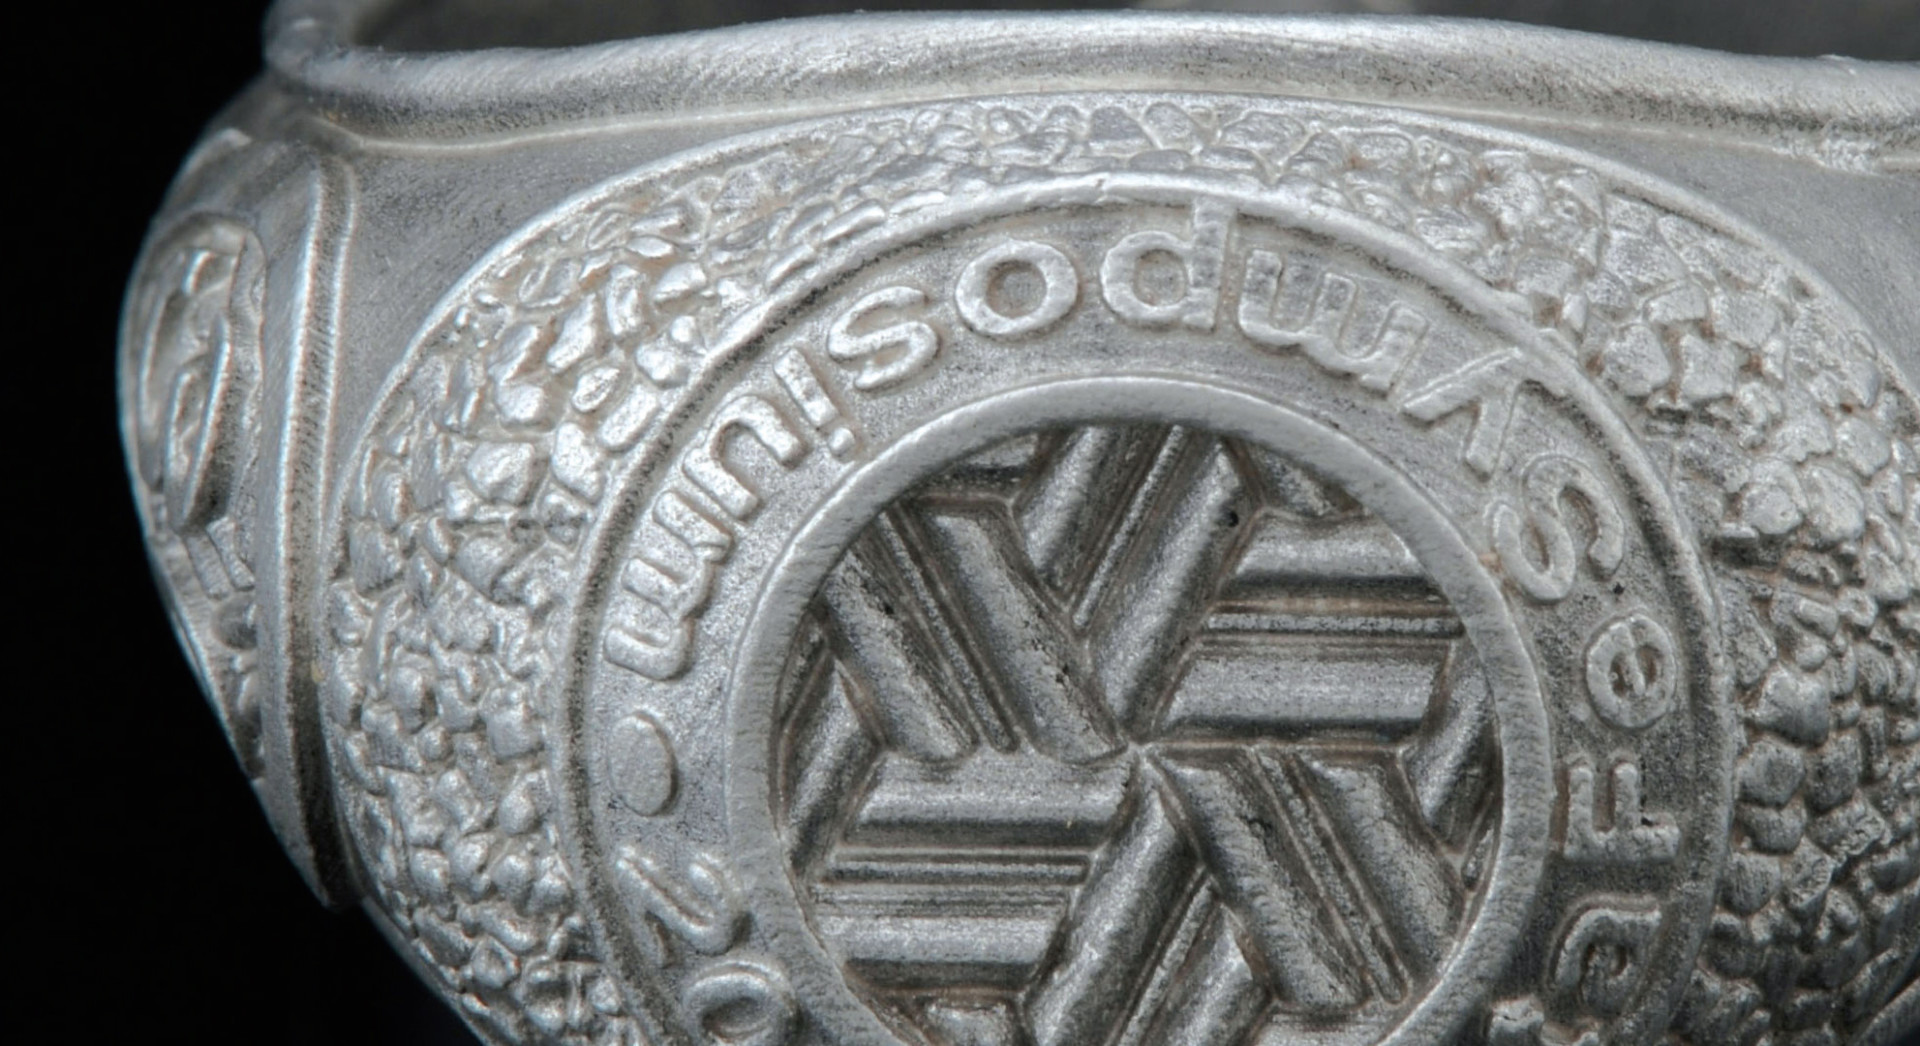 Figure C Figure CHeat-Cured Signet Ring | 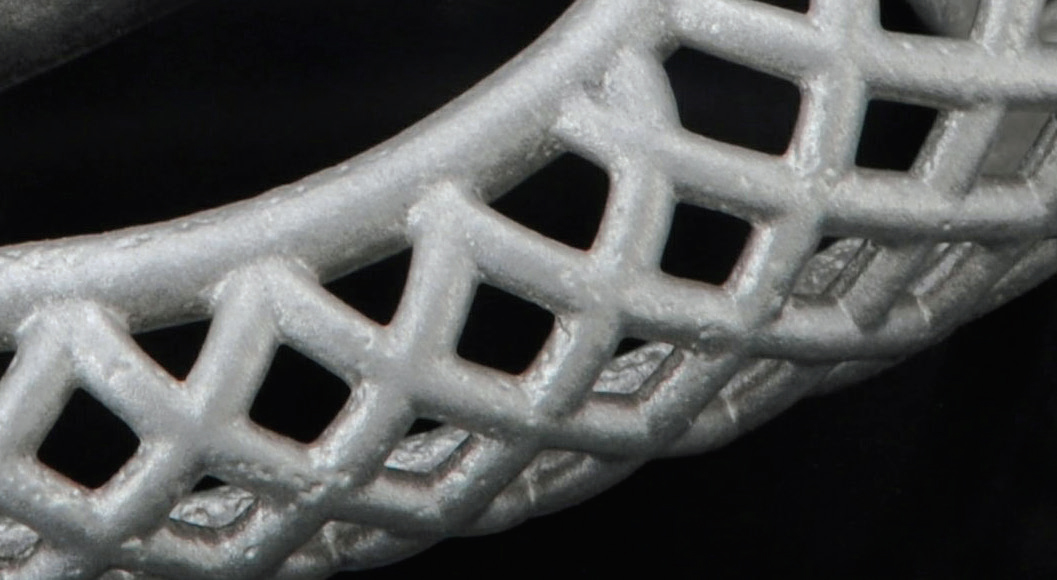 Figure D Figure Deat-Cured Cage Ring |
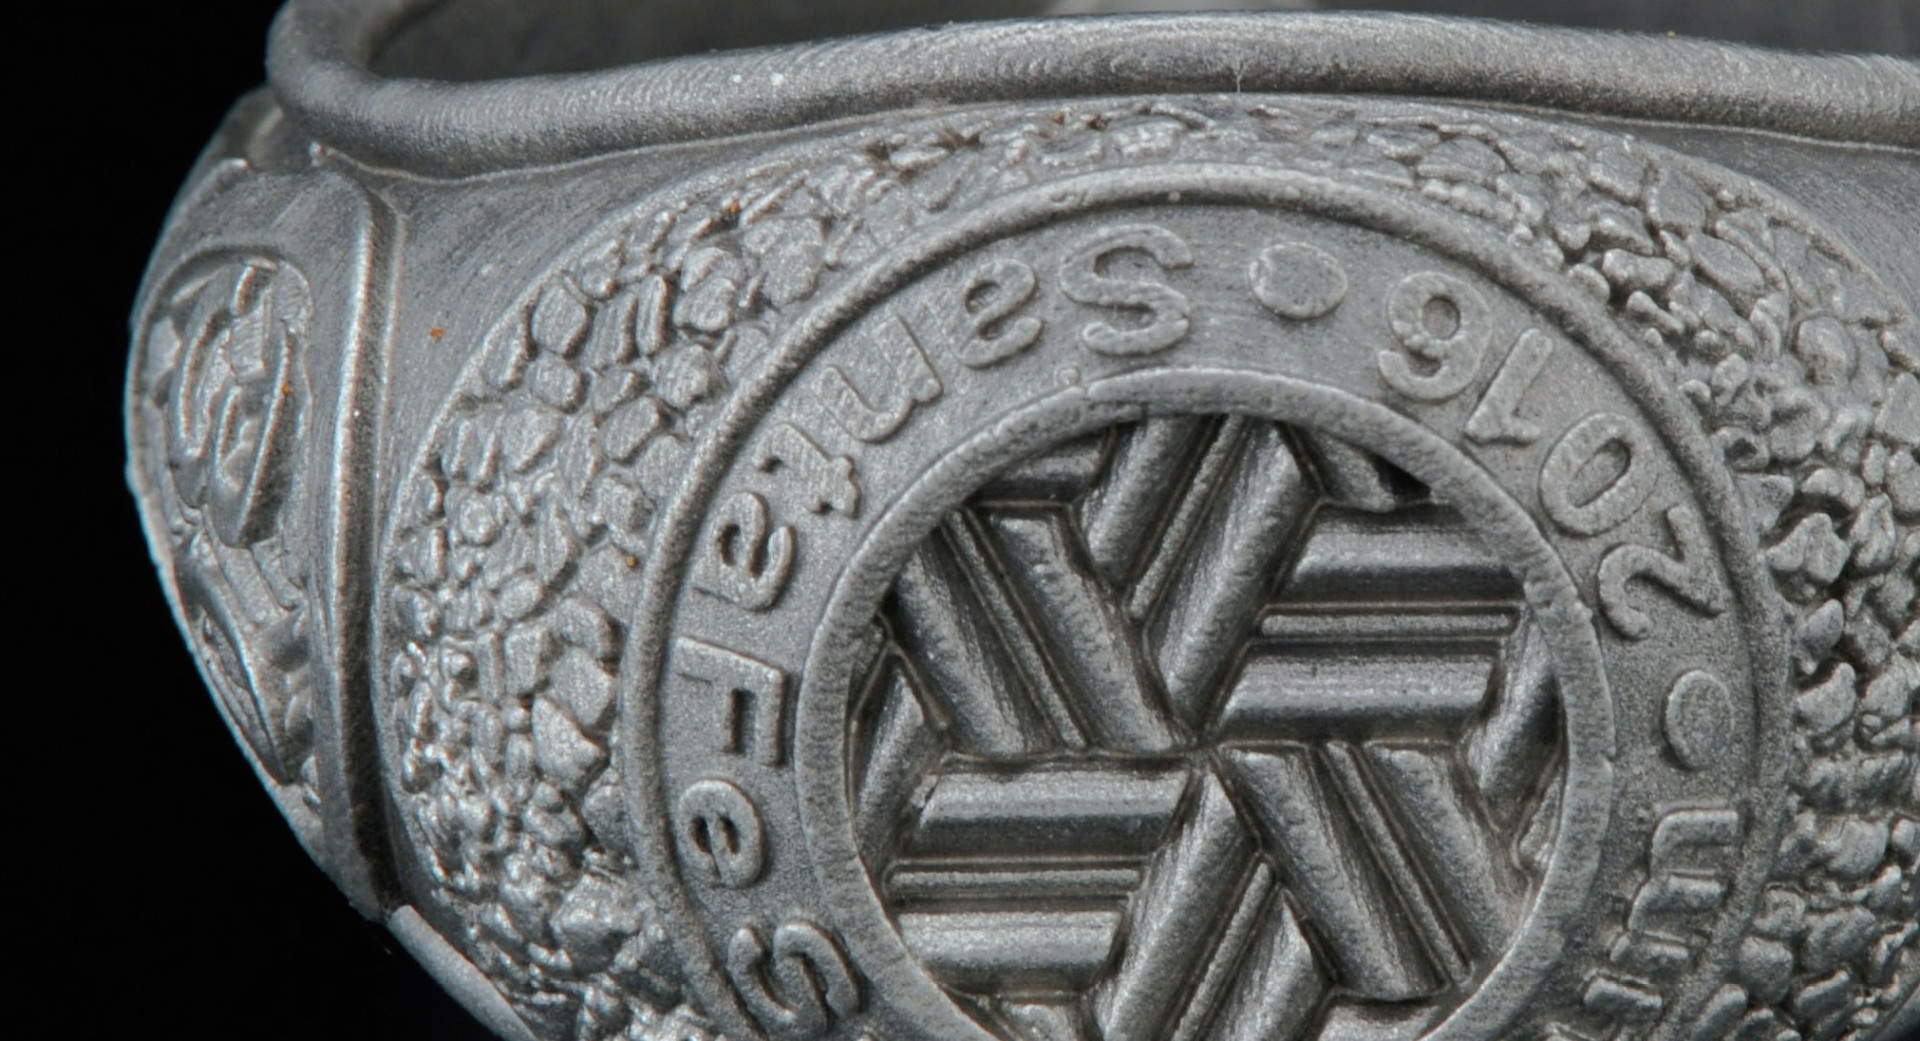 Figure E Figure EVacuum/Low Heat-Cured Signet Ring |  Figure F Figure FVacuum/Low Heat-Cured Cage Ring |
Shrinkage
In addition to experiencing a slight weight loss, both heat curing and vacuum/heat curing caused a slight amount of volumetric shrinkage in the models. Heat alone resulted in approximately
0.3 percent shrinkage while vacuum/heat resulted in approximately 0.5 percent shrinkage. UV curing showed negligible shrinkage but does not alleviate the mold degradation problem that we are trying to solve. (For more information on why decreases in weight occur but with only minimal shrinkage, see the complete paper, available for download at santafesymposium.org/papers.) In many cases the shrinkage is small enough that no effort to eliminate it is needed, but it can easily be removed by scaling up the model before printing in the event it is deemed necessary.
The Casting Tests
For each of the casting tests, five models were printed. After printing, the models were briefly rinsed in isopropyl alcohol for 30 seconds or less, then placed in a stainless steel beaker filled with water and a small amount of detergent. I placed the beaker in an ultrasonic cleaner, which I ran for 30 minutes.
The models were then rinsed in clean water and placed in a water-filled beaker in the ultrasonic. After cleaning, they were blown dry and put in an oven at 55°C (131°F) for 10 minutes to further remove any water. The patterns were then weighed and recorded.
The patterns were cured in one of the following ways:
- UV exposure, 1 hour (in air)
- UV exposure, 1.5 hours (in air)
- Heated in a convection oven at 93°C (199°F), 1 hour
- Heated in a convection oven in steps: 80°C (176°F) for 30 minutes, 95°C (203°F) for 30 minutes, 110°C (230°F) for 30 minutes, 125°C (257°F) for 30 minutes, 150°C (302°F) for 30 minutes, and 175°C (347°F) for 30 minutes
- Vacuum oven at 93°C (199°F), 1.5 hours Following the curing, the patterns were cast using a gypsum- bonded investment designed for plastic models, which was allowed to set for at least three hours. I then used the following burnout schedule:
- Ramp room temperature to 100°C (212°F), 50 minutes, hold for 2 hours 20 minutes
- Ramp 100°C to 177°C (212°F-351°F), 50 minutes, hold for 2 hours 20 minutes
- Ramp 177°C to 760°C (351°F-1,400°F), 6.5 hours, hold for 3 hours
The flasks were then allowed to cool to 537°C (999°F) before being cast. To ensure enough oxygen for the complete burnout of the patterns, I modified the electric furnace door to allow for more airflow, and a small air pump was used to introduce a constant stream of fresh air. Each test flask was invested and burned out separately, with each flask placed in the same location in the burnout oven to ensure the same amount of air flow and heat. The models were cast using sterling silver that was melted in a graphite crucible electric melting furnace with a digital temperature control set to 982°C (1,800°F). Flasks were poured with vacuum-assist casting, cooled, and the cast parts removed from the investment.
The Results
After clean up, the models were examined to gauge the surface quality for each curing method. As seen in Figures A and B, the models that were post cured with UV exposure were uniformly of poor quality. The pieces post cured via heat alone (Figures C and D) were quite a bit better than the UV models. Although each piece had some amount of surface degradation, it mostly could be repaired with a bit of finishing.
The patterns post cured via vacuum and heat cast with uniformly cleaner surfaces than the two other methods, as seen in the examples in Figures E and F.
Conclusion
My experiments have led me to believe that uncured resin in the model is responsible for the mold surface degradation that plagues the direct burnout of 3-D printed patterns. If my theory is correct, the more uncured resin present in the pattern, the more this type of defect will be present. To avoid these problems and achieve the highest quality castings from 3-D printed models, the post-print curing of the resin must be as complete as possible while avoiding any cracking or crazing. Based on my test results, I believe that using a vacuum oven to remove the uncured resin is the most rapid and effective means of producing a pattern that will consistently produce defect-free castings.
Necessary Equipment
Want to cure your resin models using this vacuum/ low-heat procedure? Be aware that the equipment you already have on hand in your shop may not be up to the task.
The vacuum quality and the type of pump and gauge needed for processing photopolymer models are different from what's normally found in a casting shop. The vacuum gauge on casting equipment reads in inches of mercury. This resolution is fine for the normal tasks completed in a casting shop but it is not precise enough to measure the vacuum needed to remove the uncured resin. The type of gauge required is one that reads in absolute units and is calibrated in microns of mercury, as we need to be able to read pressures as low as 20 microns of mercury. There are several types of gauges capable of this, but a thermistor gauge is the best type for this purpose; it is a rugged type of sensor that is less likely to be affected by the vapors from the models as they evaporate and can be easily cleaned as needed. Thermistor gauges are used in the air-conditioning service industry and can be found from manufacturers who sell equipment for this use.
In addition to a micron vacuum gauge, you'll need a vacuum pump. While you may have one on hand already in your casting shop, the typical shop vacuum pump is unlikely to be in good enough condition given how they are typically used. I would recommend investing in a new 2-stage vacuum pump that can produce vacuum pressures of less than 25 microns.
You'll also need a well-sealed vacuum oven chamber capable of holding vacuum pressures in the range of 10-15 microns. For instructions on how to make a vacuum oven, visit MJSA Online (mjsa.org).
![]()
In association with
![]()
The award-winning Journal is published monthly by MJSA, the trade association for professional jewelry makers, designers, and related suppliers. It offers design ideas, fabrication and production techniques, bench tips, business and marketing insights, and trend and technology updates—the information crucial for business success. “More than other publications, MJSA Journal is oriented toward people like me: those trying to earn a living by designing and making jewelry,” says Jim Binnion of James Binnion Metal Arts.
Click here to read our latest articles
Click here to get a FREE four-month trial subscription.
Related Articles

Intro to Enameling: Cloisonne Pendant

Creating Beading Pliers Accessory Bezel Settings

Revising Milled CAD/CAM Models

Ryan Roberts’ First CAD Design


The All-In-One Jewelry Making Solution At Your Fingertips
When you join the Ganoksin community, you get the tools you need to take your work to the next level.

