
Jewelry Designs: Steeplechase Pendant
6 Minute Read
As a traditional symbol of good luck, this piece is inspired by the horseshoe. It is dedicated to the power and grace of the race horse including those of our very own Iroquois Steeplechase.
Welcome to Stacey Rhodes Jewelry Designs, where we detail all of the steps involved in adding a new piece of jewelry to our line. In this issue we are going to approach things a little differently. Instead of concentrating on generating the original model, we are going to concentrate on the first manufacturing run.
The Idea
As usual, we start all of our pieces with a rough sketch. Stacey wanted to design a piece of jewelry around our annual horse race here in Nashville called "The Steeplechase".
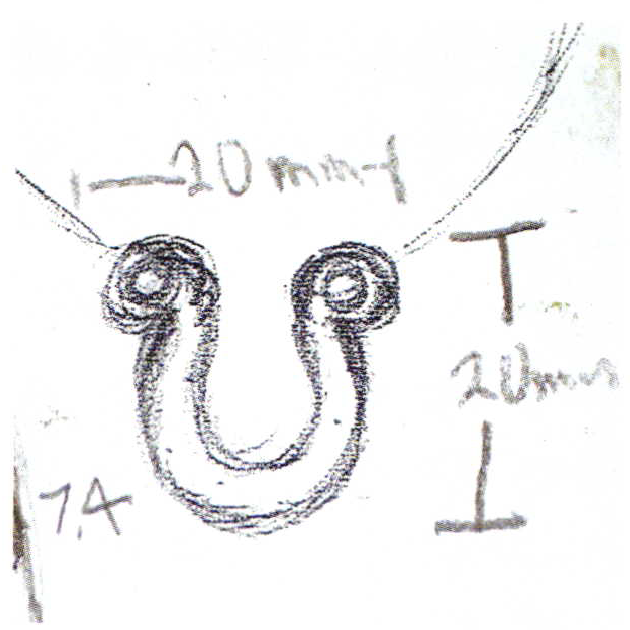
There is a lot of jewelry currently based on the shape of the horseshoe, so we wanted to design a piece of jewelry that would give the horseshoe a new look. The sketch shows the first drawing of her idea.From this sketch an original model was made from wax, cast, and a rubber mold made using the methods described in previous articles.
The First Production Run
The rubber mold worked the first time, so we're ready to make a few pieces for the show case to sell. I've decided to make four pieces for my first run, so let's get started and shoot some waxes.
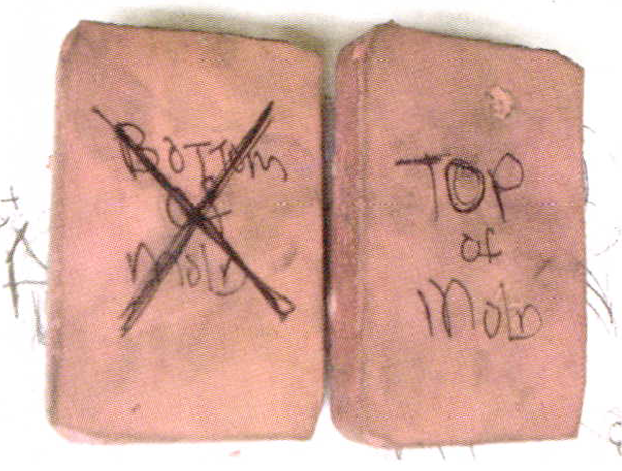
The Rubber Mold
I always write on my molds which is the top of the pendant and which is the bottom of the pendant so that I know my orientation. I also draw an X" on the half of the mold I want to remove first. Sometimes it's obvious which half to remove first, other times you have to shoot a few waxes, removing each half first a couple of times before you know.
On this mold, I found that pulling the bottom of the pendant gave me a more consistent result. There are two pins that stick out on the back ofthe pendant to accommodate the chain, and when I pulled the mold the other way, these pins broke off about half the time.
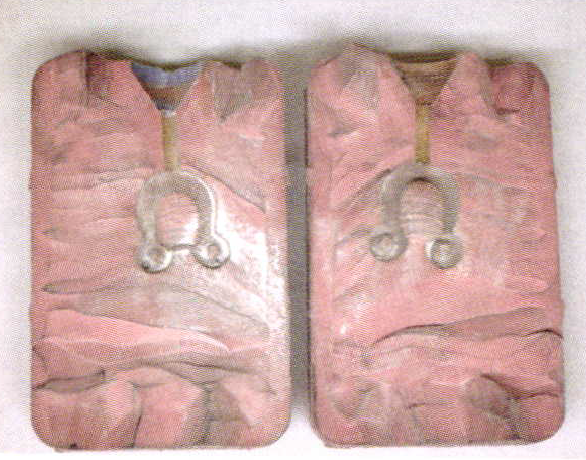
To introduce wax into the cavity of a rubber mold, you have to displace the air in the mold. In order to give the air an escape route, I use talcum powder on both halves of the mold. The photo shows the amount of powder Ishake onto the mold. Next, I clap the two halves together 3-4 times to remove the excess and to even thedistribution of the powder. Talcum or cornstarch powder creates just enough of a separation between the two halves of the mold to allow the air to escape, without affecting the wax pattern.
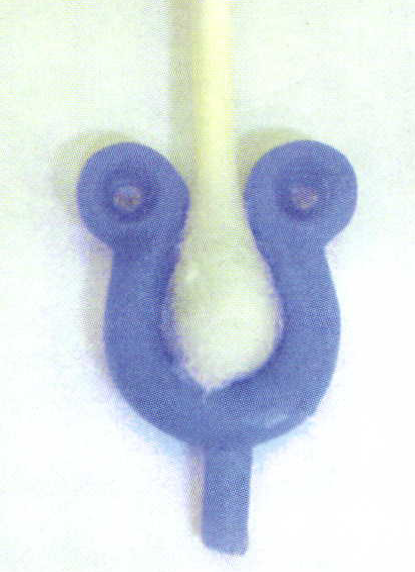
The First Four Wax Patterns
I always detail and clean my waxes more than most jewelers. I find that 10 minutes in wax saves 30 minutes in metal. In the photo you can see the mold lines on the side ofthe pendant. I lightly file all ofthe mold lines, filling in with a hot wax pen where needed.
Next, I like to polish the wax patterns. There are countless products and opinions about how to approach this step. My personal routine is to use Q-Tips, Viva paper towels, and Zippo lighter fluid. The fluid lightly melts the wax, and the paper towel or Q-Tip polishes and removes scratches. This method works well if the wax doesn't have any engraving or delicate detail that could be destroyed. If I have a piece with filigree or engraving, I'll skip this step and do all of the clean up and polish in the metal. Next, I sprue and invest the patterns.
Setting the Stones
The casting and clean up went just as expected, so we are ready to set the stones. As there are two stones in each pendant, we need to set a total of 8 gemstones. The style of setting that Stacey has decided upon is called Gypsy Setting or Flush Setting. All of the stones are exactly 4 mm in Diameter. Instead of using a traditional stone setting bur to cut the seat. I use a round bur.
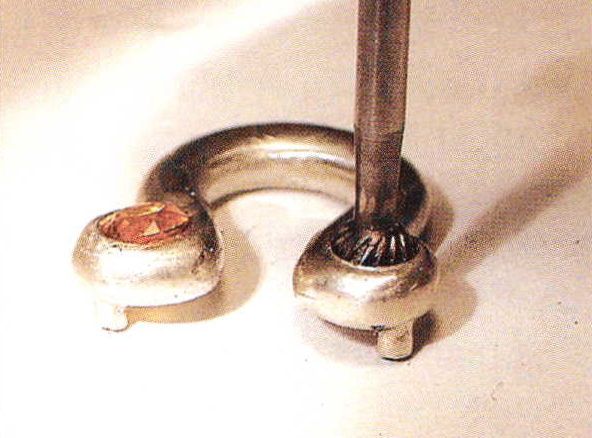
I begin with a 3.8 mrn round bur and cut down until about 70 o/o of the bur has cut into the metal. If you look at the photo you'll see how deep I cut with the bur. and that a 4 mm stone will almost drop into the hole. Next, using a 45 degree undercut bur, I cut a small seat just below the surface, allthe way around the hole. (Imagine cutting a seat into a channel set ring. You cut the seat just below the channel without disturbing the surface. This is the same principal, except you are cutting the seat in an entire circle, instead of into the two channels.)
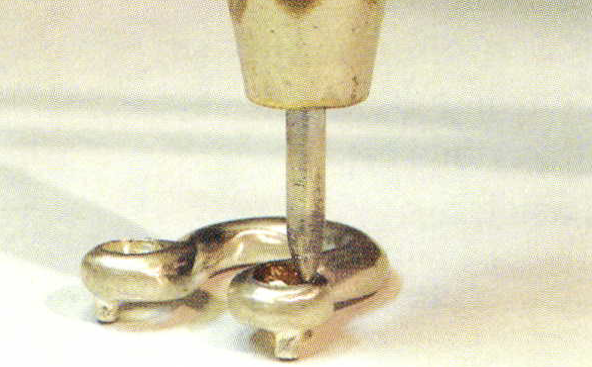
Next, just like channel setting, snap the stone into place. Once in place, burnish the metal rim over the stones to secure it in place. I use the shank from a broken bur that I ground to a moderate point, polished, and installed it in a pin vise. Slowly and carefully, just start circling the stone, with downward pressure until you've burnished a nice smooth, round setting. This style of setting takes a lot of practice and a lot of patience, but once you've mastered it,it's beautiful.
Installing the Chain
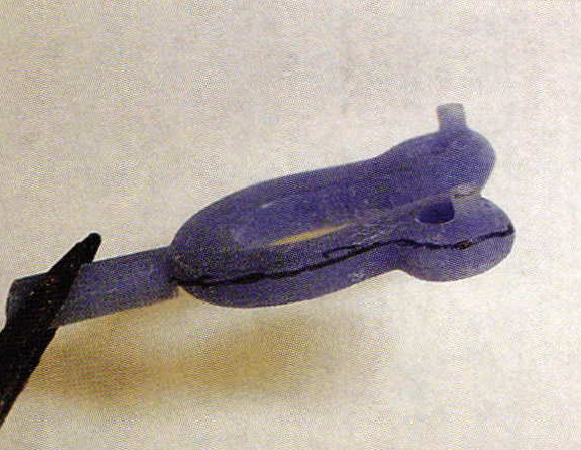
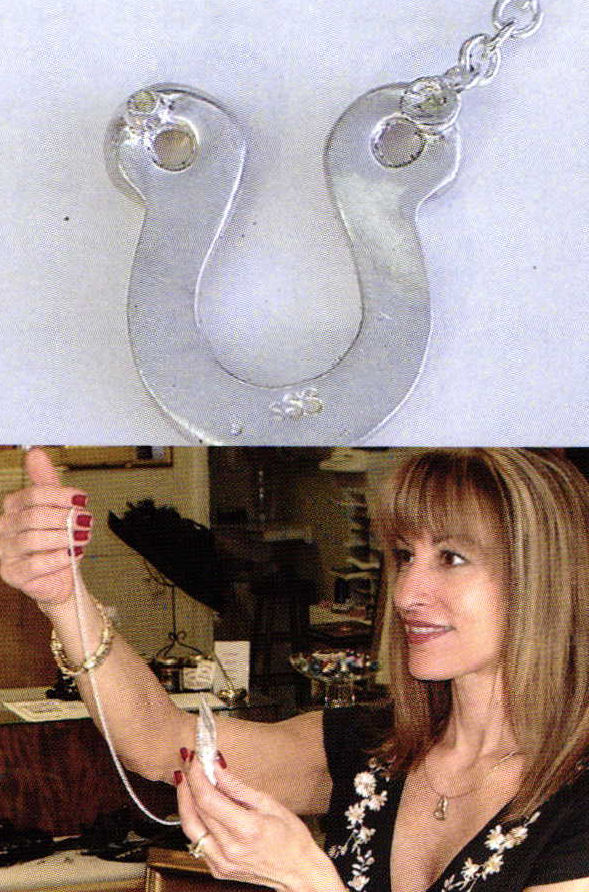 Stacey and I always like to come up with new, innovative ways to suspend a pendant from a chain, and we have decided on a rivet method for this pendant. Mostly, what we try to accomplish is for the clasp to remain at the back of the neck, and the pendant to hang straight. In the photo, look at the pin that protrudes out of the back of the pendant. We decided, since we were going to be using a round link chain, to use a rivet. On the left sideo f the photo you can see the pin that was installed on the original mode. On the right side of the photo, you can see where I slipped the chain link over the rivet and flared and burnished it over the link.Using this method, we feel confident that the pendant will hang properly, and the clasp will always be at the back of the neck. After viewing the first rivet procedure, Stacey was very happy with our invention.
The Final Four

Stacey and I always like to come up with new, innovative ways to suspend a pendant from a chain, and we have decided on a rivet method for this pendant. Mostly, what we try to accomplish is for the clasp to remain at the back of the neck, and the pendant to hang straight. In the photo, look at the pin that protrudes out of theback of the pendant. We decided, since we were going to be using around link chain, to usea rivet. On the left side of the photo you can see the pin that was installed on the original mode. On the right side of the photo, you can see where I slipped the chain link over the rivet and flared and burnished it over the link. Using this method, we feel confident that the pendant will hang properly, and the clasp will always be at the back of the neck. After viewing the first rivet procedure, Stacey was very happy with our invention.
I set a Blue Topaz, a Mexican Fire Opal, an Amethyst, and a Pink Tourmaline for the first run. After setting the stones and riveting the chains, all I needed to do was just a quick clean up and polish. They came out very nice. Stacey is thrilled, once again, by seeing her idea become a new piece in our line. The Steeplechase crowd heard about the new pendant, and bought these four within a week. We've since made and sold another dozen. I guess it's a success.
If you have any questions or comments, feel free to contact us through our website at "www.staceyrhodes.com"
Related Articles

CAD/CAM: Creating a Class Ring – Part 1

Jewellery in Transition

Beam Path Check

The Work of Georg Bunz


The All-In-One Jewelry Making Solution At Your Fingertips
When you join the Ganoksin community, you get the tools you need to take your work to the next level.
