
Online Enamel Art Gallery
17 Minute Read
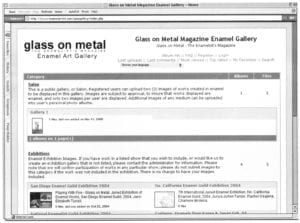
Glass on Metal Magazine is excited to announce the development of an online enamel art gallery, located on the internet at http://www.glass-onmetal. com./gallery/. Our online gallery offers enamelists the opportunity to display their work in enamel in a Salon-type area of the Glass on Metal website, and also work in any medium in their own personal gallery section.
Participation in the gallery is free for all; the only requirements are access to a computer connected to the internet, an e-mail account to confirm registration, and digital files of the images to be displayed. Accounts can be set up quickly using an easy-to-use online registration form. Registered individual users are provided with one Megabyte of web space to upload images, which is enough web space to feature several high-quality pictures of work Enameling guilds and organizations are encouraged to create accounts to display work by their members; Glass on Metal will increase web space to 2.5 MB for any recognized guild or organization who wishes to create a gallery for it's membership; please contact us for details on Guild accounts. Space can be maximized by optimizing images for web use, using photo manipulation software such as Adobe Photoshop, or using a free online image optimizing website.
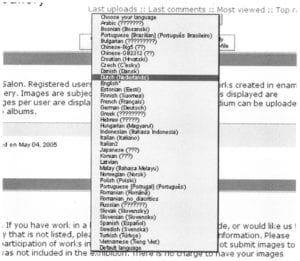
Features of the gallery include the ability to post comments and rate images, send E-Postcards to the email addresses of colleagues, friends and family, add images to a 'My Favorites' file, and the ability to create personal web galleries. Navigation links are supported by 37 different languages, so non-English speaking users can navigate the site in their native tongue.
Below is a step-by-step description of navigating the gallery, creating an account and uploading images.
Getting Started
Point your web browser to http://www.glass-onmetal. com/gallery/. On this page, you will find a brief description of the gallery, a link to the gallery site (this link will open another browser window; the gallery is hosted on a separate web site), a link to the gallery FAQ (Frequently Asked Questions), and links to free image optimizing websites. You will want to start by visiting these links and preparing your images for display on the web. Once you click the link to the gallery, you will see a drop down menu box below the main navigation bar, prompting you to choose your language. Thirty-seven language modules have been installed. Scroll down and to select your language choice. Language modules support navigation features only; category, album and image descriptions will remain in the language posted by individual users.
Navigating the Gallery
Making your way around the gallery is a fairly straightforward process; to view a category's main page, click on the category title. To view an album, click on the album title. To view an individual image, click the thumbnail image for the picture you wish to view. The top navigation bar will also help you browse the site; 'Album List' takes you to the main index page, 'My Gallery' will take you directly to your personal gallery page, 'FAQ' brings you to the Frequently Asked Questions area, 'Admin Mode'/ 'User Mode' toggles between these two sections, 'Upload Files' to the upload section, and 'Logout[username]' will log you out of the system. The bottom navigation bar has links to the last uploads, last posted comments, most viewed images, and top rated images. On the main page, clicking a thumbnail will either open an album, such as with the Salon, or will directly open an image, such as thumbnails in the Last Additions category.
Gallery Registration
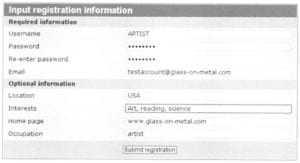
On the main page of the gallery, you will find a navigation bar near the top of the page. Click the link marked 'Register' to begin. You will be asked create an account name, choose a password, and enter your email address. Entering your correct e-mail address is important; users are required to respond to an automated e-mail sent by the gallery to confirm registration. If the e-mail is not confirmed, the account will not be created. Note: E-mail addresses cannot be shared by more than one account. If you are creating an account for your guild or organization, you must use a different e-mail address to create the guild account than the e-mail used to create your personal account.
During registration, you can also enter additional information about yourself if you choose, but this information is not required. After submitting the registration form, you will receive an e-mail containing a link to confirm your registration. Click the link provided in the e-mail to complete your registration. Note: If you do not respond to the e-mail by clicking the provided link, the registration will not be complete, and your account will not be created.
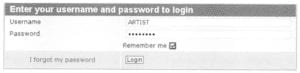
Once you have confirmed your registration, you can then login to the gallery using the 'Login' link on the top navigation bar. During login, you will be presented with an option to "Remember Me". Check this box if you wish to avoid logging in to your account every time you visit the gallery. This is not recommended for users accessing the site using a public computer terminal, such as those found in a library or coffeehouse.
Public and Personal Galleries
You have two options for placing your images on the web site; Public and Personal galleries. Public galleries, such as the Salon, are open to anyone wishing to include their work, provided they meet the gallery requirements. Typically, images intended for placement in public galleries are subject to approval, to ensure images posted in these sections meet the requirements specified. For example, the Salon section requirements are 1) all works in the Salon must be created using enamel; and, 2) only two images from each registered user can be posted to the Salon. If work is uploaded for display in a public gallery, it will not be included in the gallery until it is approved by an administrator.
Personal galleries, or albums, on the other hand, do not require approval, and images uploaded to these sections will be immediately available for viewing by visitors to the site. Registered users are free to upload any type of photograph they wish to display; artwork, workshop photos, snapshots of friends and family, etc. The only requirements for personal galleries/albums is that the user cannot upload more images than allotted web space allows.
Creating Personal Albums
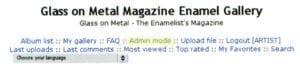
While users do not have to create personal albums, and can choose to upload only to one of the public galleries, you may wish to create one or more personal albums to organize your images. This is done in the 'Admin Mode' section of the user's account. To create a personal album, click the 'Admin Mode' link in the top navigation bar. Figure 5, below, shows the top navigation bar, with the 'Admin Mode' link highlighted.
'Admin Mode' allows you to make any modifications you choose to your albums or images, as opposed to 'User Mode,' which only allows for viewing and uploading of images. 'Admin Mode' allows you to add titles, descriptions, and keywords to your albums and images after they have been created or uploaded, as well as an option to delete them. These modifications can only be performed in 'Admin Mode'; if the options are not available to you, make sure you are not in 'User Mode.'
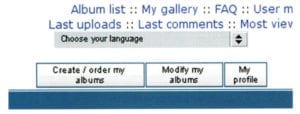
Once you have entered Admin Mode, you will see a new toolbar, located below the language selection box. This toolbar has links allowing you to create and order personal albums, modify existing albums, and edit information in your profile. To create a new album, click the box on the left, marked 'Create/Order My Albums' to begin the album creation process (Figure 6, below).
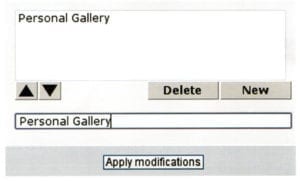
A window will open containing an album creation box. If you have existing albums, they will be listed here; if not, the box will be empty. Click the 'New' button below, and an album titled 'New Album' will appear. Click this album title, and change the title of the album in the text box below (see Figure 7). Once you have made your changes, click the 'Apply Modifications' button. If you have created more than one album, you can also change the order in which your albums appear, or delete unwanted albums.
By using the 'Modify My Albums' link after creating albums, you can add descriptions and keywords, and include links to websites and e-mail addresses.
Preparing Your Images for Upload
Optimizing your images is a critical step which should not be omitted. Optimizing your images compresses the file size, while maintaining image quality, so download time for viewers is minimized. A compressed file will load on a viewer's screen several times faster than an file that has not been compressed, which means your image will be displayed much quicker, and visitors with slower dial-up connections are more easily able to view your work. More importantly, compressing your images will allow you to upload more images to your allotted web space in the gallery. If, for instance, a compressed image is one-fourth the size of a non-compressed image, you will be able to upload four times as many equally-sized images to your personal web space, as compared to non-compressed images.
To optimize your images using a free online service, follow the instructions on the web page of the service you choose. If you are comfortable with manipulating your own digital images, and have access to photo editing software (such as Adobe Photoshop), you can use the tools found in these programs to reduce the file size of your images. Since there is a variety of photo editing software, we will not go into lengthy detail about using these programs. In Adobe Photoshop, for instance, the process to optimize for the web is relatively straightforward. With your image open in Photoshop, and after you have sized, cropped, and/or color-corrected your image, click the FILE menu, and select SAVE FOR WEB… to open the image optimizer. Typically, image optimizers will provide different options for web images, such as file type, image quality, etc. For photographs, the best file format to use on the internet is .JPG. An option during optimizing is image quality; medium setting is usually all that is required for most web images. A medium quality setting is usually quite acceptable for use on the internet, and will allow for a smaller file size than the high quality setting, allowing for upload of additional images.
If you use a photographer or photo lab to transfer your slides to digital files, you can ask them to provide web-ready .JPG files. Even if you have your photographer or photo lab provide you with the proper file format, you may still wish to run your images through an image optimizing program or web site, to insure the smallest possible file size without sacrificing image quality.

Uploading Images
Once your account has been created and you have logged in, you can begin to upload your optimized images to the gallery. If you have not created any personal albums, images can only be uploaded to one of the public galleries of the website. If you wish to place images in a personal album, first follow the instruction above for creating a personal album.
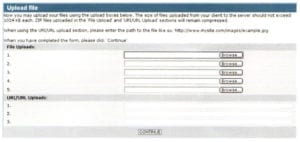
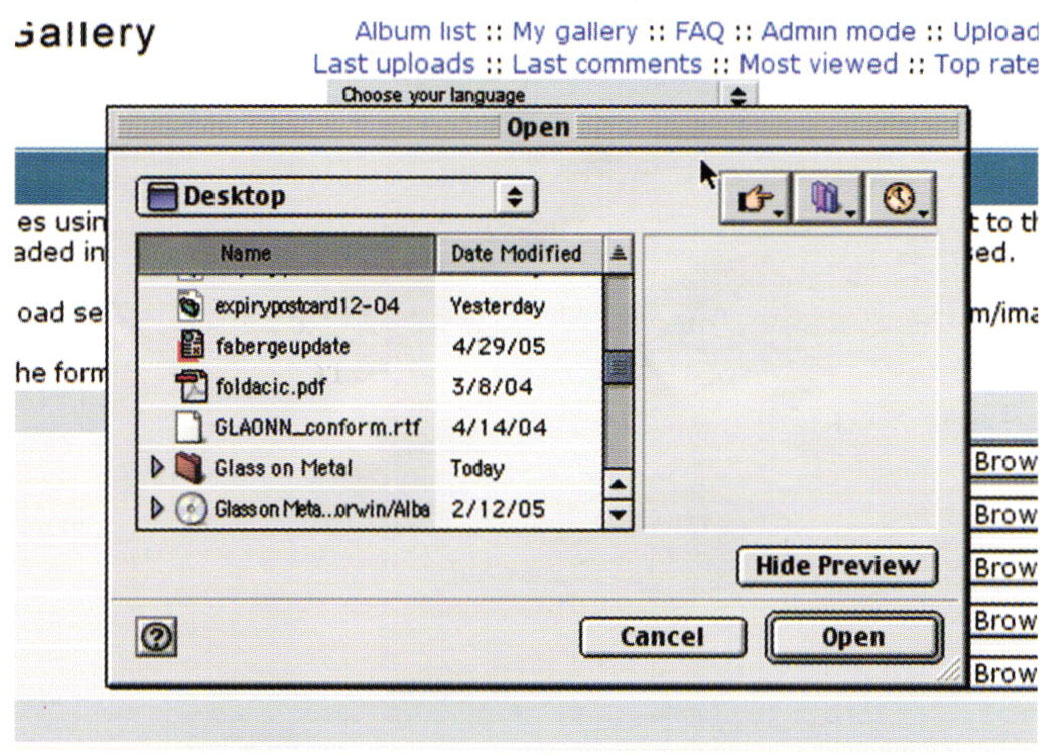
In the top navigation bar, click the 'Upload Images' link to begin the uploading process. A window will open containing upload boxes and URL (Universal Resource Locator) boxes, Figure 8. Upload text fields allow you to place images to the gallery directly from your computer, while URL fields allow you to upload images that are elsewhere on the internet. Note: By uploading images from your personal computer, it is assumed the user has rights and permissions over the images to be displayed. Before uploading content from elsewhere on the internet using the URL upload boxes, please be sure permission has been granted to use these images. Gallery Administrators will delete any images that appear to be copyright infringement, or have been brought to our attention as an infringement of another's copyright.
To upload directly from your hard drive, click 'Browse' next to one of the upload text boxes, search for and select your file, and click 'OK'. This will place the direct path to your file in the text box. Users can upload up to five files at one time; for additional files, begin the process again. To retrieve and upload files located elsewhere on the internet, type, or cut and paste, the direct URL into the text box located in the URI/URL upload section. Up to three URLs can be listed for upload at one time. To upload more than three URLs, repeat the process. Once you have listed all the files to be uploaded, click the 'Continue' button.
After clicking the 'Continue' button, there may be a slight delay as the images are being passed to the website. Please wait patiently as the files are uploaded. If the transfer is successful, a screen will appear stating, "Successful Uploads," and will include the number of files uploaded, and directions to again click the continue button. If uploads were not successful, you will be given information why they did not load. The most common problems are too large of file size, and incorrect file type. If file size is too large, you should optimize your images to ensure they are less than 1MB (megabyte) in size. If the gallery will not recognize the file type, be sure to save your images in either .JPG, .GIF, .TIF, or .PNG format, with .JPG the preferred format for photographs displayed on the web.
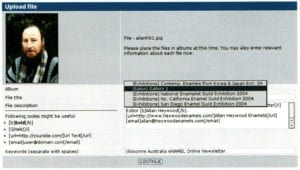
Once you have received confirmation of successful upload (Figure 9, page 57), click the continue button. You will be taken to a screen displaying a thumbnail image of your first picture, along with several text boxes. In our example, we have uploaded a photograph of our friend, Allan Heywood (Figure 11, above). On this screen, you will select which album you wish to place your image. For our example, we have chosen to place our image in Gallery 1 of the Salon. If you have created personal albums, these will be available in the drop down list. Ensure you are placing your image in the proper album, as this choice cannot be undone by the user. If an image is uploaded to a public gallery where it does not belong, it will either be placed by an Administrator in a Salon Gallery (if applicable), in one of the user's personal albums, or it will be deleted if a personal album has not been created.
This screen will also give you the opportunity to provide additional information about the image; title, description, and keywords. BBCode can be used in the description box to create hyperlinks to outside websites, e-mail links, and to modify text appearance, such as bold and italic text. Once you have finished choosing an album and including appropriate descriptions and titles, click the 'Continue' button. If all of the information is in order, and the file successfully transferred, the next screen will inform you it is in place. If the image has been uploaded to a personal album, it will be available for immediate viewing. If the image has been uploaded for display in a public file, you are notified that it will be available for viewing once it has been approved by an Administrator.
Now that your first image has been uploaded, you can proceed to upload additional images to the gallery, by repeating the steps listed above.
Additional Gallery Features
Additional features are included in the gallery to make visits an interactive experience. Visitors can view images in a slideshow format, rate individual images, using a system of 0 to 5 stars, post comments for individual images (including a set of emoticons - smilies), and send e-postcards of images on the site to friends and family.
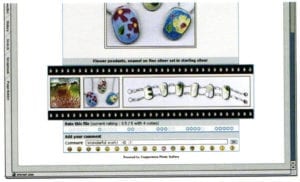
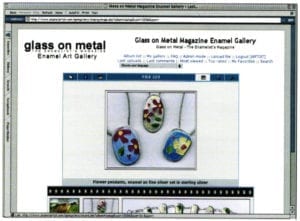
To access additional features, click on the thumbnail of the image you wish to view. Once the image is opened up to full size, icons will appear in a toolbar above the image. Below the image, a filmstrip of thumbnails shows the next images in the current category, additional information about the current image (if selected), and areas to rate and post comments about the selected image.
The toolbar above the image contains several icons allowing you to navigate the images. From left to right, the tools are as follows.
![]() File Folder Icon - Click this icon to return to the thumbnail gallery of the current category.
File Folder Icon - Click this icon to return to the thumbnail gallery of the current category.
![]() Information Icon - This blue circle with an 'i' inside is the information icon. Click this icon, and additional information about the image appears below the picture, such as size and dimension of the file, file owner, direct URL to the image, number of views, ratings and comments, and also a link to add the image to your 'My Favorites' file.
Information Icon - This blue circle with an 'i' inside is the information icon. Click this icon, and additional information about the image appears below the picture, such as size and dimension of the file, file owner, direct URL to the image, number of views, ratings and comments, and also a link to add the image to your 'My Favorites' file.
![]() Clapboard Icon - Click the clapboard icon to view a slideshow of the current category. Images appear for five seconds before continuing on to the next photo. Slideshow can be stopped by clicking the link below the image while the show is in progress.
Clapboard Icon - Click the clapboard icon to view a slideshow of the current category. Images appear for five seconds before continuing on to the next photo. Slideshow can be stopped by clicking the link below the image while the show is in progress.
![]() Envelope Icon - Use this tool button to send the current image as an e-postcard to any recipient with an active e-mail address.
Envelope Icon - Use this tool button to send the current image as an e-postcard to any recipient with an active e-mail address.
![]()
![]() Left and Right Arrows - Use these arrows navigate the previous and following images the current category.
Left and Right Arrows - Use these arrows navigate the previous and following images the current category.
Below the image, you will find a filmstrip containing thumbnails of the next five images in the current album's queue. Click on any image to open to full size.
Ratings and Comments
Below the filmstrip is the rating and comment section, which apply to the current image in view. To rate an image, click the desired star ranking icon; images can be rated from 0 to 5 stars. Below the rating section is the comment section; type in any comment you wish to make about the above image. Emoticons (smilies) can be inserted into comments; click the appropriate emoticon to add it to your comment. Previous comments about the current image are shown below the comment box, with newest comments on top. Note: Comments are screened for appropriateness. While constructive criticism is welcome, inappropriate comments will be deleted by the Administrators if they are found to be potentially offensive, or if complaints are received about particular comments. Please be considerate of your fellow artist's work and do not post comments that may be construed as mean or spiteful.
Postcards
An e-mail postcard feature allows you to send a digital postcard of any of the posted works. The feature uses a server-side e-mail protocol, so it is not necessary to open your e-mail client to send a postcard.
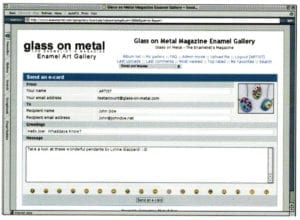
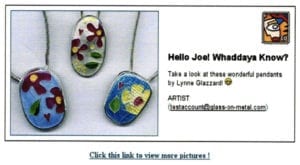
To send a postcard, first choose an image you wish to send. From that image's page, click the 'envelope' icon. The icon is shown in Figure 13, highlighted in white. Once the icon is clicked, a window will open containing a form to fill, Figure 14. Complete the form information, paying particularly close attention to the recipient e-mail address. Postcards will not be delivered to incorrect e-mail addresses. A personal message can be added to the postcard, as well as BBCode, to modify the look of text and to include additional links to other web sites or additional e-mail addresses you wish to send to the recipient. A sample postcard, as it appears to the recipient, is shown in Figure 15, above.
Now that you are familiar with the operation of the gallery, we invite you to take some time to create an account and upload images of your work. While certain areas of the gallery are reserved only for images of enamel works, we encourage users to place pictures of any type of work in their personal albums, such as jewelry and metalwork, painting, ceramics, photography, or snapshots of family, friends, workshops, exhibition openings; whatever you desire to post and share with others. Feel free to use your gallery for personal or professional use. We look forward to seeing your photos online soon!
The Glass on Metal Online Enamel Gallery is located at http ://www. glass-on-metal.com/gallery/.
Related Articles

Rebekah Laskin: Material Voice

Great Minds Take Jewelry Design to New Heights

Bruce Metcalf: Between Darkness and Light

James Metcalf


The All-In-One Jewelry Making Solution At Your Fingertips
When you join the Ganoksin community, you get the tools you need to take your work to the next level.
