
Bezel Setting Cabochon Stones
5 Minute Read
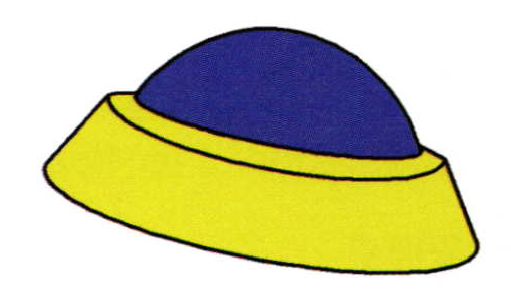
One of the most basic designs in stone setting is Bezel Setting. It is rudimentary in its concept, and it is very pleasing to the eye in its simplicity. This concept blends with the smooth vertical shape of the stone. There are no sharp corners, only gradual flowing lines to conform to the stone. Let's delve into this different style of setting.
In an earlier article in Bench Magazine I showed how a round bur is re-shaped to have the same contours of the cab stone. This particular half-round/round bur, along with a proper execution, will enable you to perform and overcome any difficult bezel setting procedure.
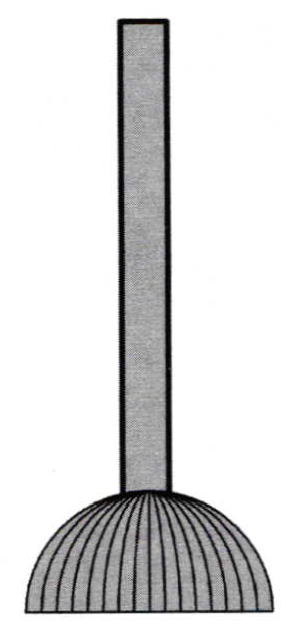
The tools you will need are: a very secure ring clamp, a steel ring-mandrel, a 3 ounce hammer with a 10 inch length handle, a steel hand held punch of 3 inches in total length and a copper or brass hand pusher. In addition you will need a pillar file of #2 and #4 cuts, flat edged pumice wheels of #180 grit, and #39 or a #40 Flat graver.
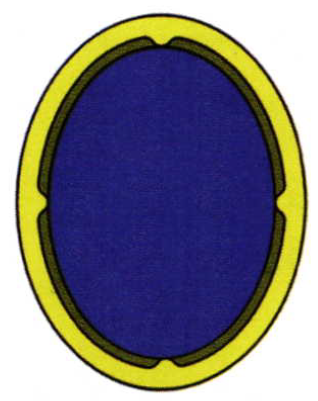
We will now demonstrate the simplest version of a cabochon setting. It will make it easy to see what we are working with if we use a 5x 7mm to 8x6mm stone.
Tightly secure the ring into your ring clamp. I use a hammer to hit the clamp-peg tighter into the clamp. This will ensure a tight fitting, non-moving ring as we start this setting process. With your #2 cut pillar file ascertain that the bezel walls are flat and not higher on one side than the other. Overall and equal bezel height is very important at this juncture.
Briefly examine the internal areas of the bezel base for any little extra bits of gold that might be from a mistake in casting or a defect. Remove them with a small round #006 bur. Place your cabochon stone on the top of the bezel wall. Is it over shadowing the metal in width and length? If so, this is the next stage in preparation. I use a rounded surface of a metal punch and ream open the bezel walls to allow the stone to gently fall into place. With your finger on the stone, turn over the ring and with a loupe view if the stone is fitting against the base of the bezel. There should be no space between the base of the stone and the bezel frame. This is very important!
If there is, you might have a stone that is crooked or held up by a little bur of gold. If there is a little bur of gold underneath the stone when hammer setting, there will be lots of stress on this stone and then you might end up with a chipped stone.
Using my half-round/round shaped bur, with the same overall equal dimensions or nearly the same contour as the cab, starting at the base of the bezel wall, scrape the surface at equal increments. At each 1/4 turn dig into the gold a tad deeper. I will have at my disposal many sizes of these modified burs. I will gauge each bur against the correct angle of the stone. This bur should not be used at a high rate of motor speed. Check often using your 10x power loupe at how you are progressing. Place the cab into this bezel recess.
Here are some questions for you now!
- Is the stone secured in the bezel?
- Are the walls of equal height?
- Are the walls of equal thickness?
- Is the stone properly aligned to the overall shape of the bezel opening?
If these 4 basic questions are answered favorably, you can now proceed to the next stage of setting.
I would like to underscore the reason to use a copper or brass metal pusher. If you are going to full bezel an opal or soft stone, you shouldn't be having any movement of that stone. I would have you use these two selected pushers to just carefully press over the tip of the bezel. This way you will secure the metal to the surface. If you use a steel pusher and slip off the gold, you will definitely scratch the surface of the stone. Copper and brass are a lot softer and do not mark the stone.
If you are not sure about using a softer metal pusher, I have two other methods to hold the stone still while hammering the bezel down into the stone. The first is to use an elastic band around the ring mandrel and the stone. This will hold the stone in place while you secure it with the bezel. The other method is to use a touch of fast acting glue. This glue method will be used only as a stop-gap measure and is not intended as the best way of cabochon setting.
With the ring firmly placed on the steel ring mandrel hold your 3 inch metal punch firmly in your hand and proceed to hit this punch with great care using your hand held hammer. Do not hit hard, but only tap! Hold your punch at a 45 degree angle AWAY from the stone. When you see the metal start to press against the stone, STOP! Turn the ring around and start the hammering of the other side of the bezel. You are now starting to have the walls grip to secure the vertical sides of the stone.
Once this is done and the stone is feeling tight, remove the elastic band and begin the setting of the ends of the oval bezel setting.
As you work your way around the stone carefully make sure all of the walls are nicely holding the surface and that there are no spaces between the metal and the stone. You can now just tap to even-off the walls to make a smooth, even surface on the hammered section of the bezel wall.
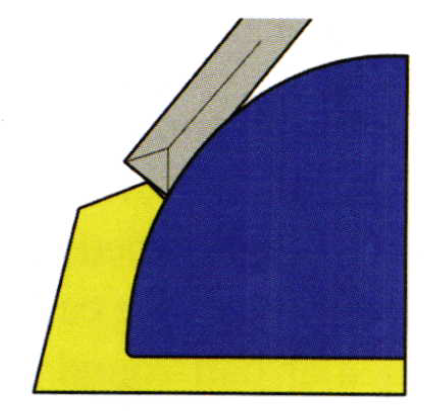
I will now use my flat graver to give a bright-cut to the very inside of the bezel wall. This gives the ring a clean and professional appearance. You should make sure that your graver is sharp and bright. This will leave a smooth inner surface cut, against the stone, at testing to your higher setting abilities.
As this cutting is now completed, you should use either a triangular #4 cut or your pillar file #4 and smooth file the areas where your hammer touched. In a smooth flow of filing, rotate or file in a semi-circular fashion on the bezel wall tips only. Keep in mind that you have two surfaces to be considered; the vertical wall and the 45 degree angle hammered facet. Make sure you acquaint yourself with the #180 grit, flat faced pumice wheel, as it is an important tool to be familiar with.
Holding the ring in your hand, allow the slow rotating wheel to only remove the marks left by your pillar file. Do not let this pumice wheel touch your soft stone, as it will mark or destroy the surface you are so diligently trying to keep scratch free!
Related Articles

Tanzanite Gemstones

Turquoise Gem Properties

Gems of Interest – Other Gem Materials
The Furor Over Feldspar


The All-In-One Jewelry Making Solution At Your Fingertips
When you join the Ganoksin community, you get the tools you need to take your work to the next level.
