
Securing Curved Stones for Easy Drilling
3 Minute Read
Securing curved stones when drilling can be a bit difficult. I use recycled ceramic china, beach pebbles, sea and river glass, and pottery shards in many of my cold connected pieces, which means I need to drill holes— a lot of holes. Very often, pebbles, glass, and ceramic shards are curved, making it a challenge to securely hold them and drill a straight hole without cracking them.
Here is a quick method for securing hard materials during drilling under water. In addition to helping you avoid cracking the stone, it can prevent hand fatigue, slipping, and broken drill bits.
For this project, you will need a shallow Pyrex dish, Dop wax or a high beeswax candle, a lighter, a very fine diamond drill (1 to 1.5 mm at most), a flex-shaft with #30 handpiece, assorted diamond attachments in a range of diameters and grits, water, goggles, and patience.
Securing Curved Stones for Easy Drilling | |
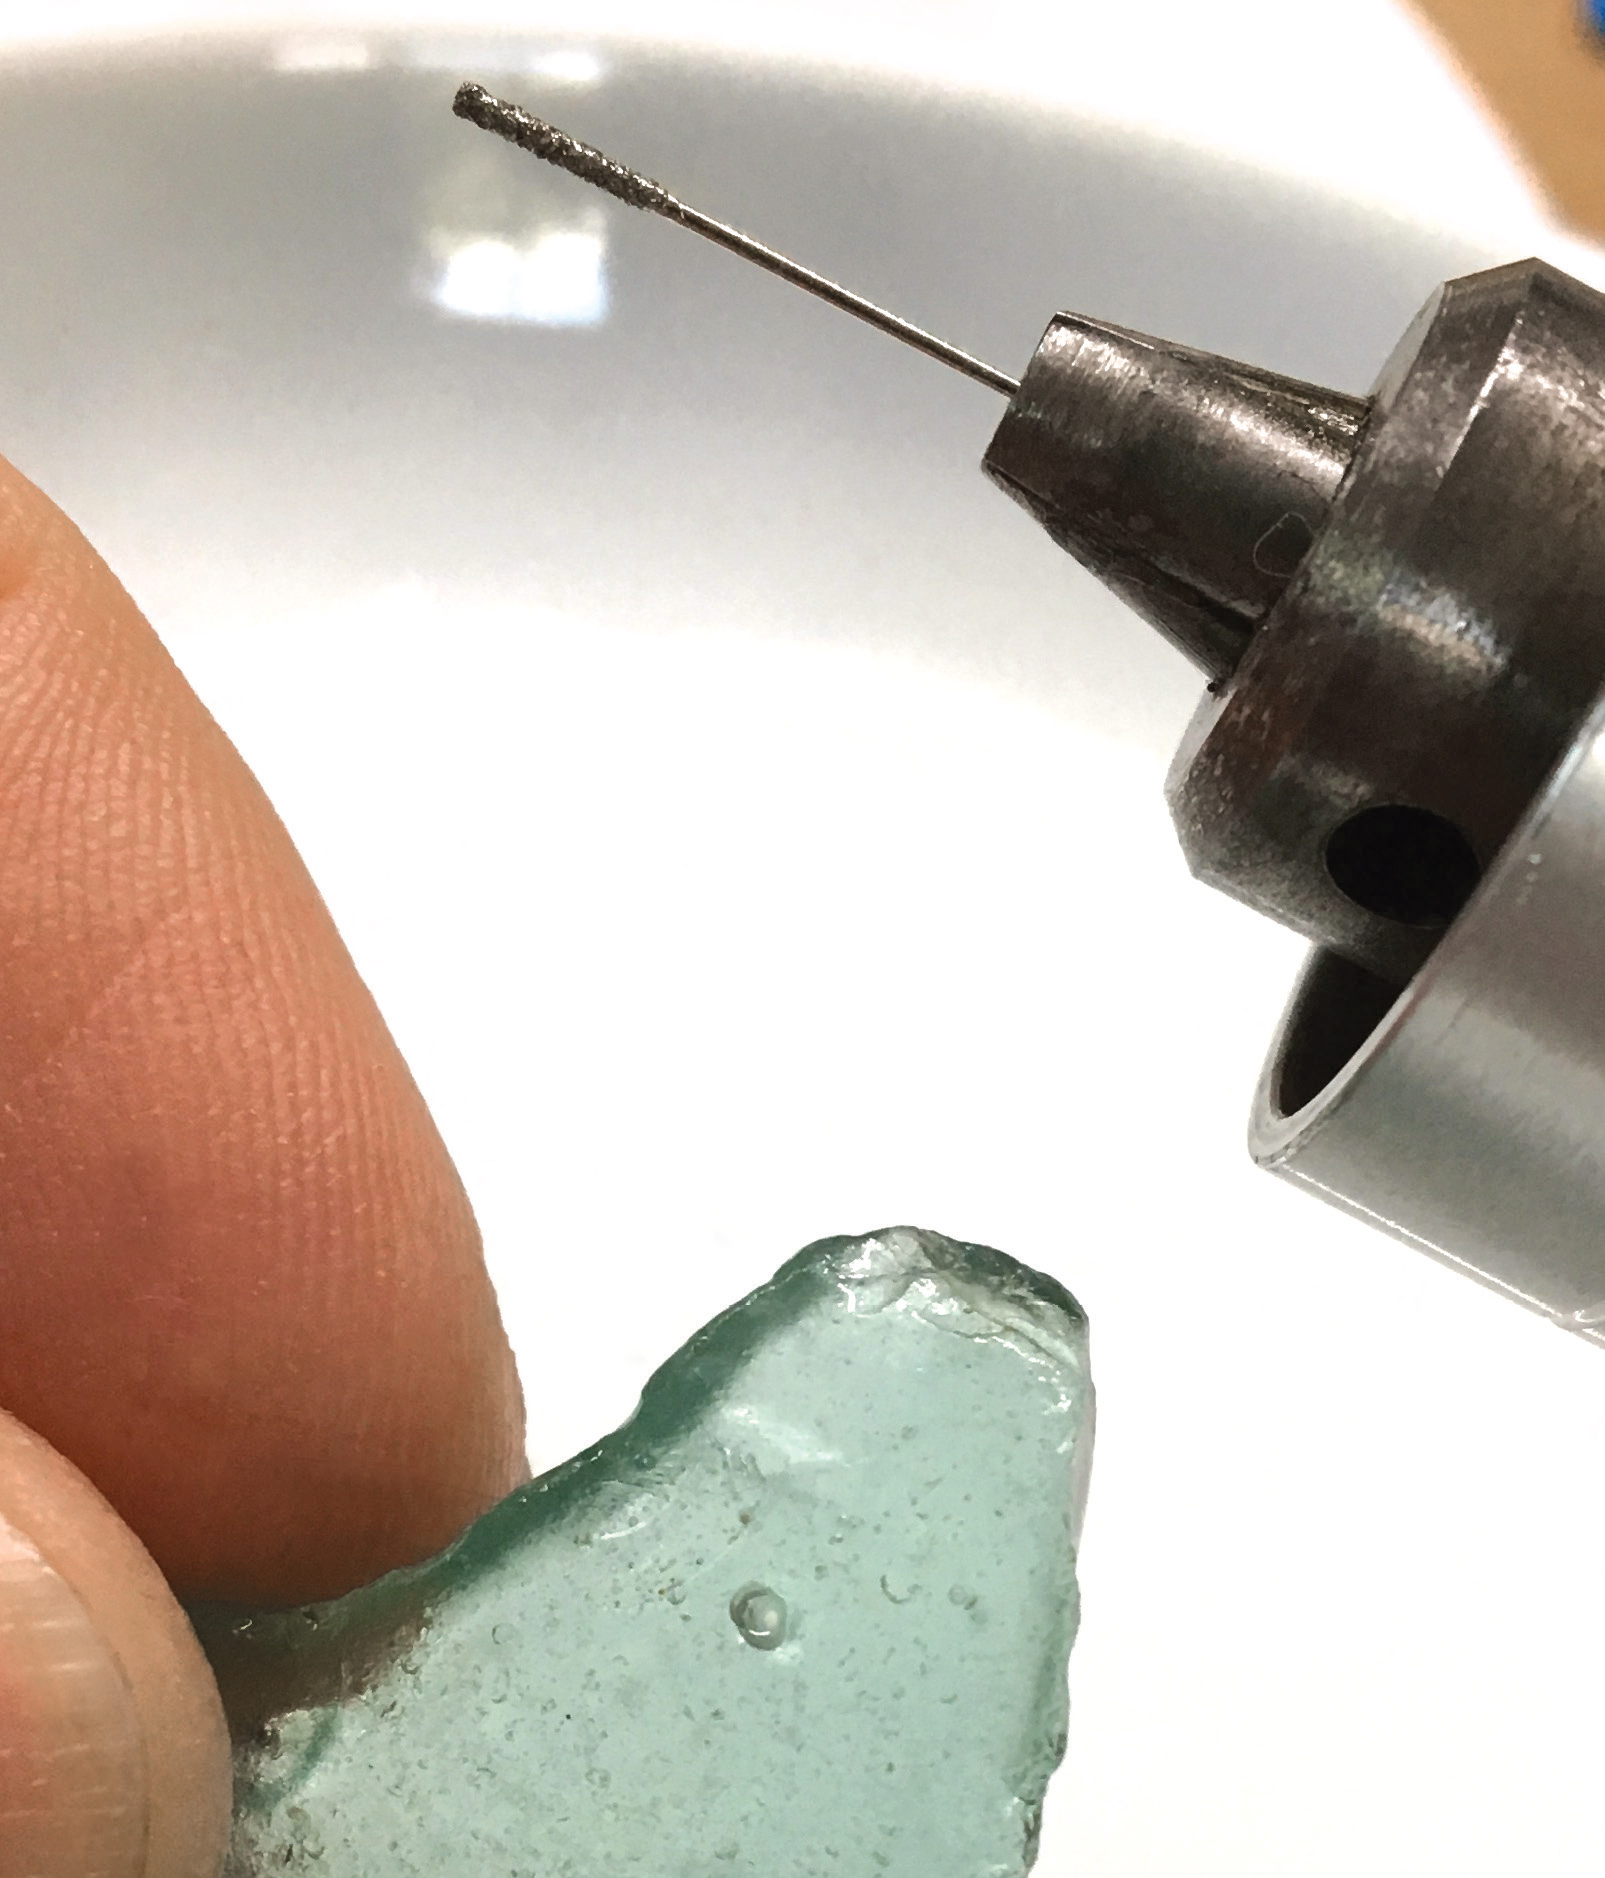
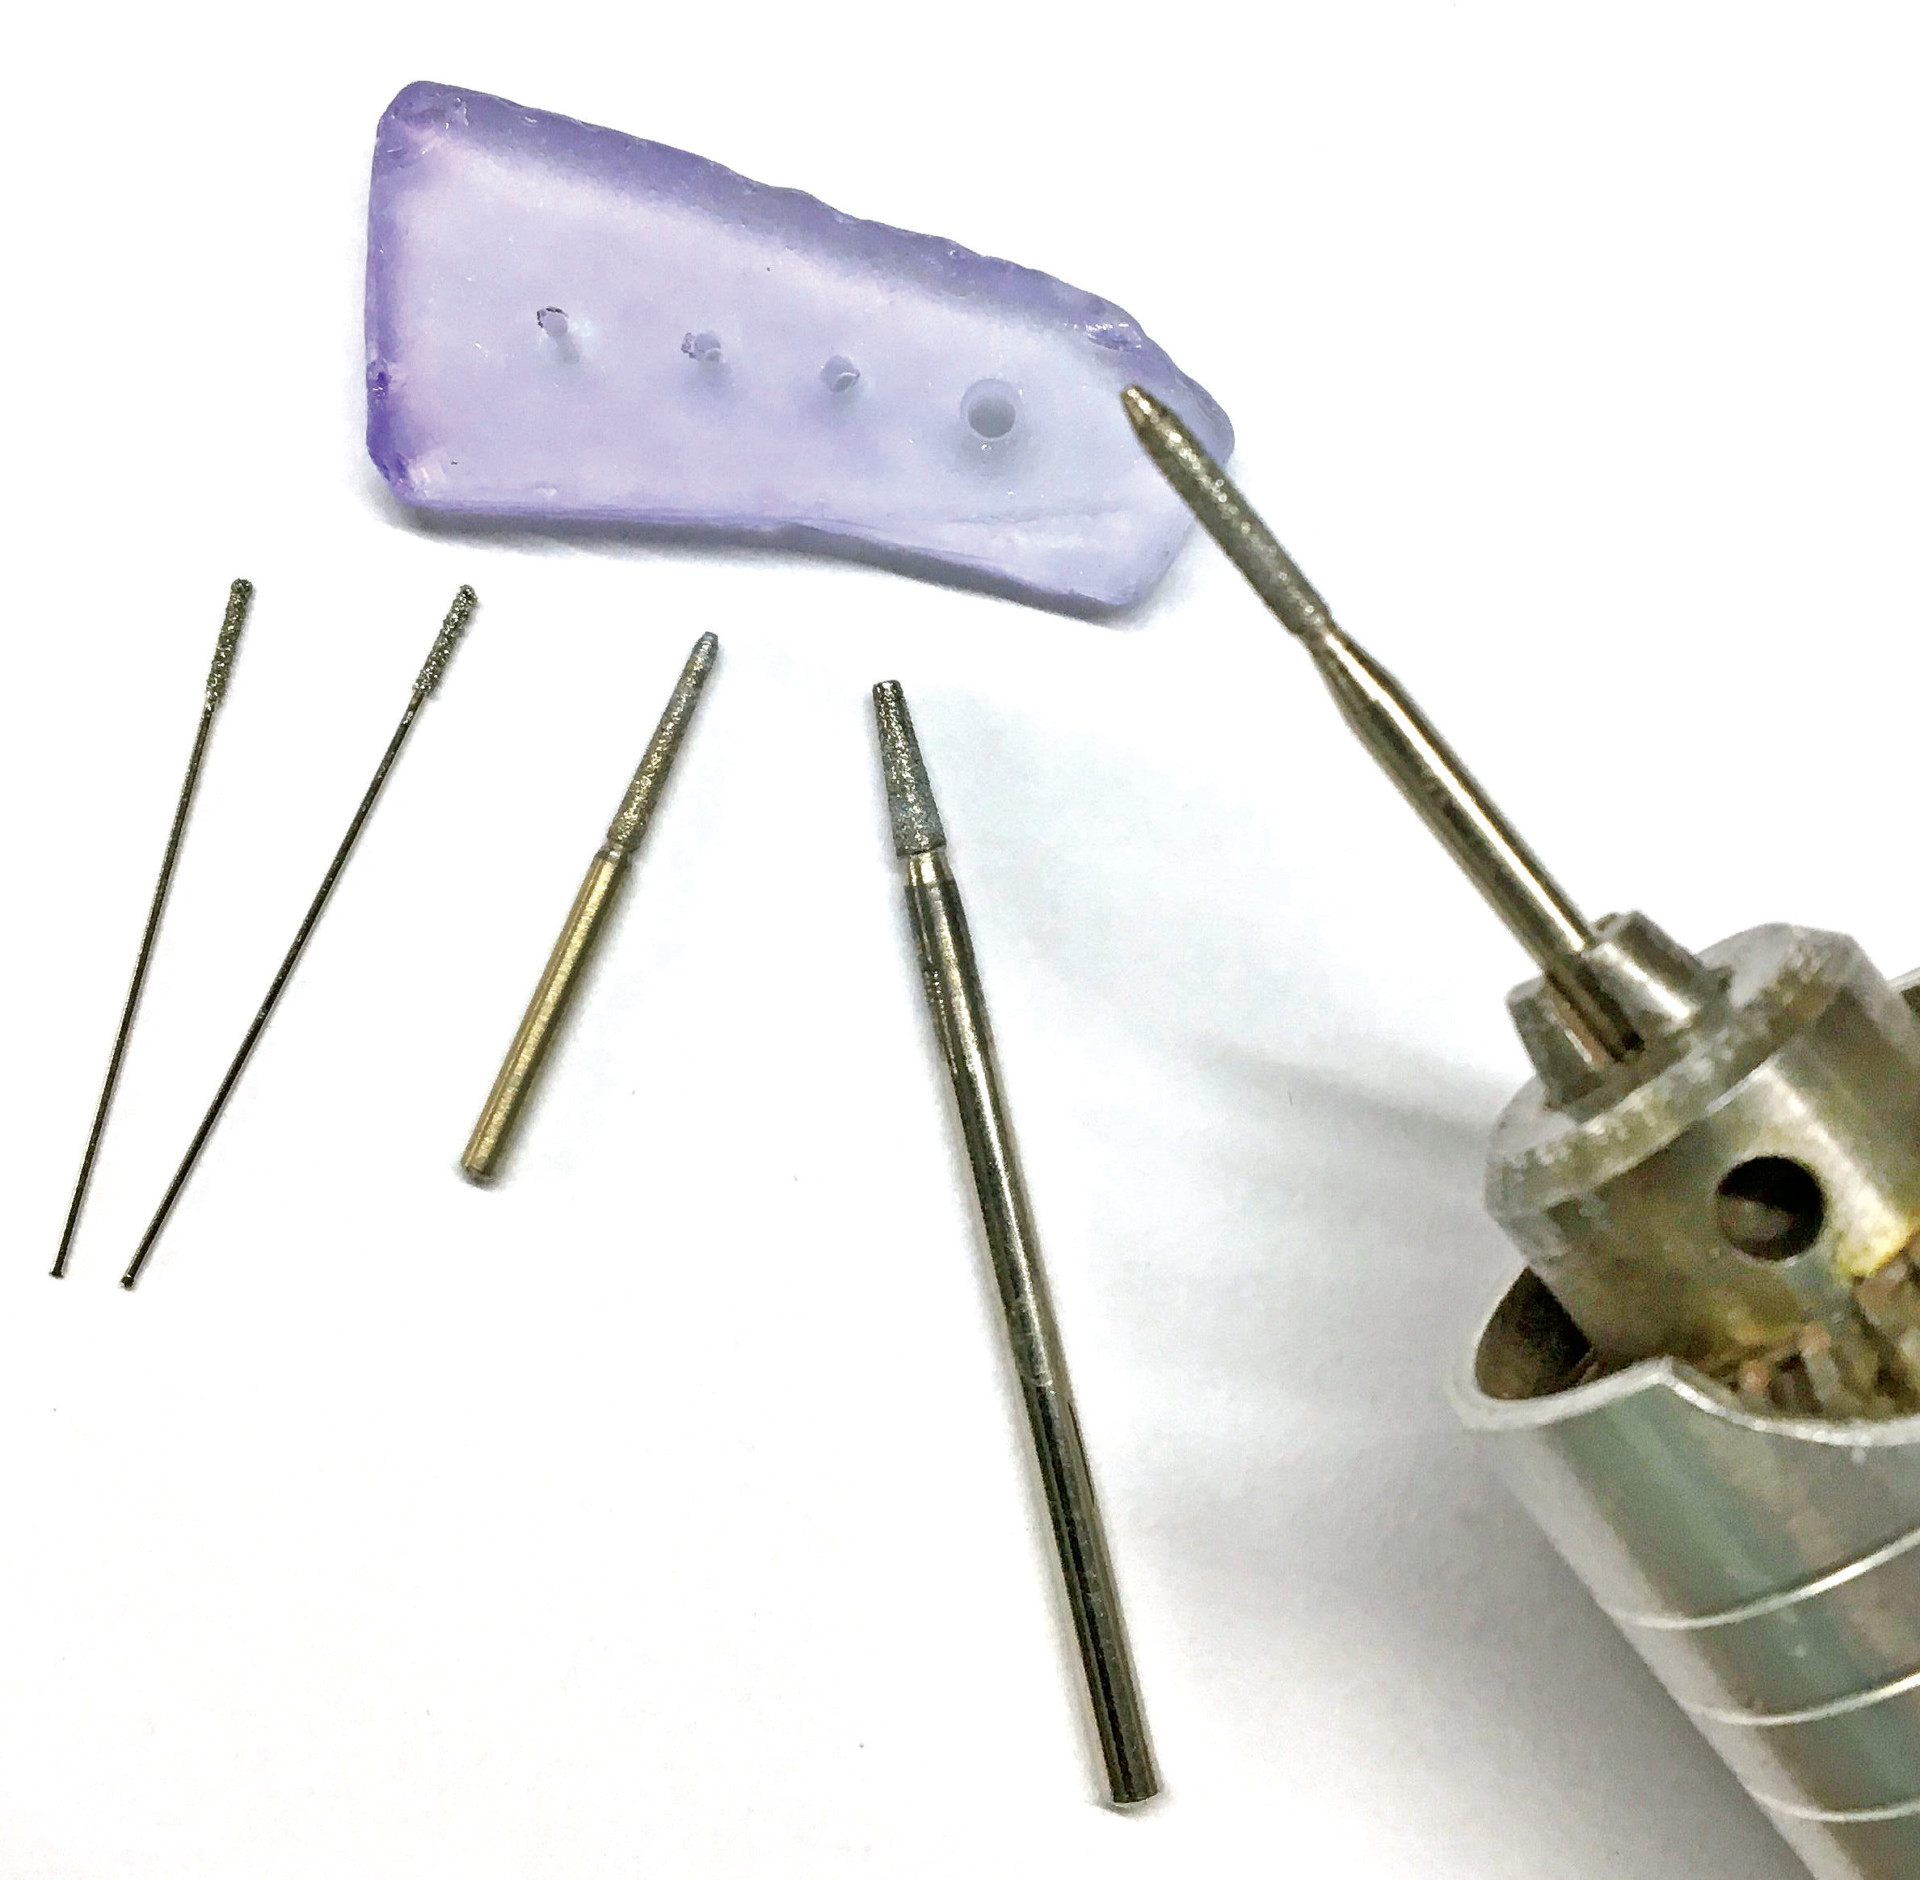 | Here are my most-used 120-grit diamond burs for creating the initial drilled holes in stones, ceramic, and glass. They range from a 1 mm drill bit, a tapered 2 mm cone, a 3 mm cone, and a long bud bur with a shaft the same diameter as my most-used 3 mm diameter silver tubing. I also use the identically shaped bud bur in 300-grit and 600-grit for final sanding. |
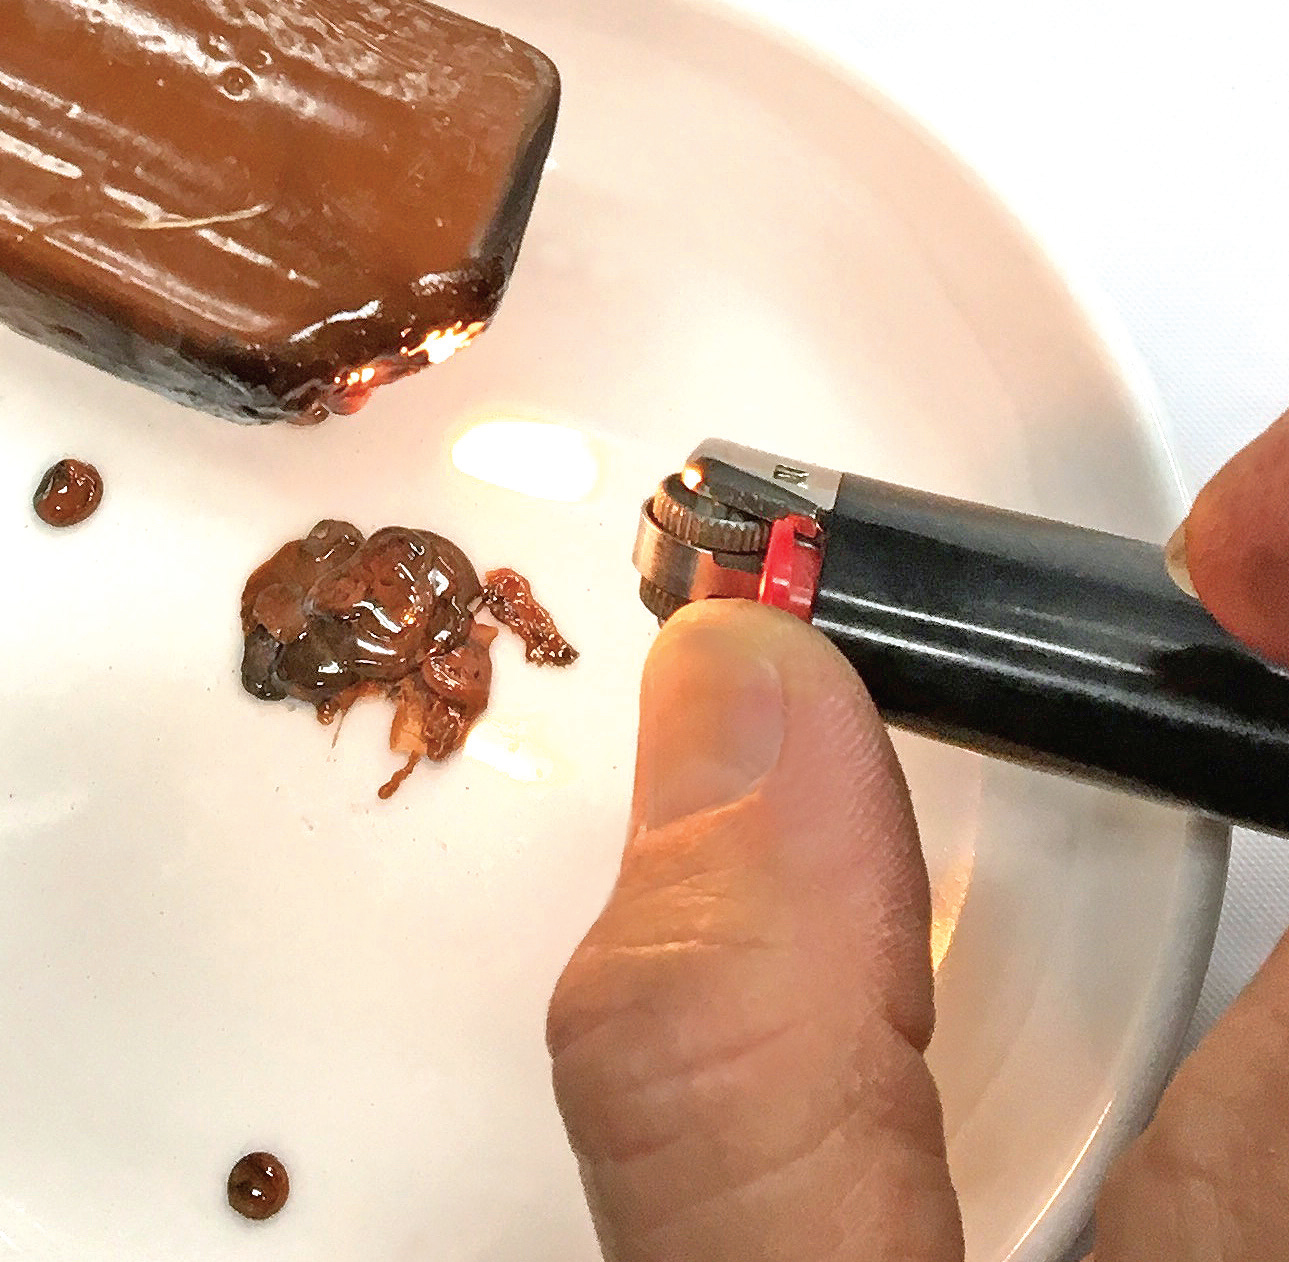 | In a ceramic or Pyrex glass dish, create a mound of molten to semi-molten wax and form a base for whatever object you intend to drill. Make sure the dish is very dry, otherwise the wax won't stick to it. You want a mound that is level and will fully support the object you are going to drill. I aim to create a mound that is equal to the thickness of the object. When in doubt, err on the side of more, rather than less, wax. |
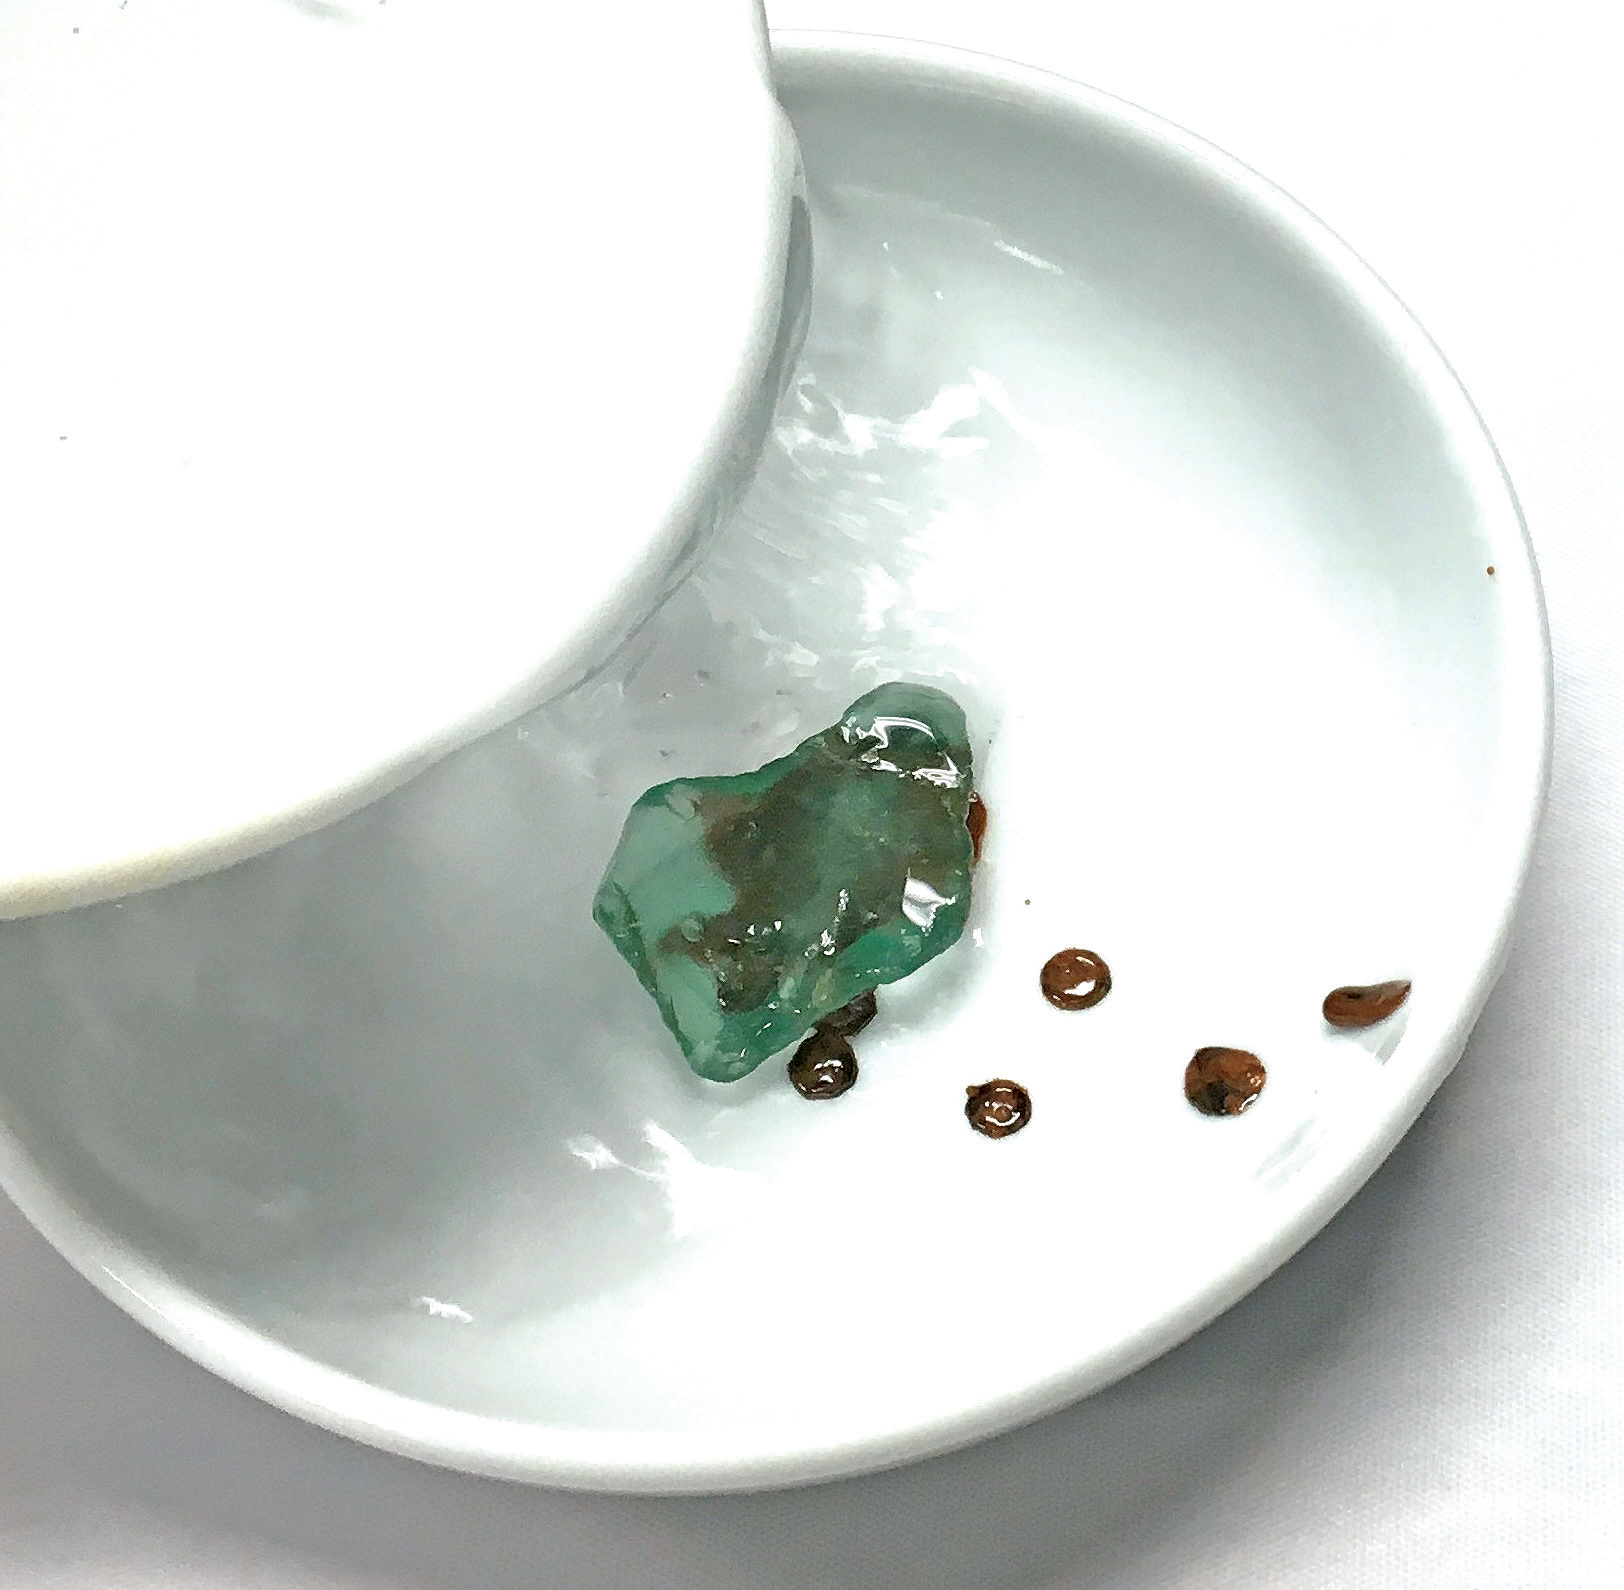
 | Once there is a thick enough base, melt another top coat of wax and quickly press the object you intend to drill into it. You can also "push" additional molten wax up and over the edges of the object using a popsicle stick. Allow the wax to cool completely. |
 | Pour water in the dish to slightly cover the surface of the object. You must drill wet when using diamond burs; otherwise, you can overheat or crack the object. The water cools both the object and the drill bit. Don't forget to wear goggles when you drill. |
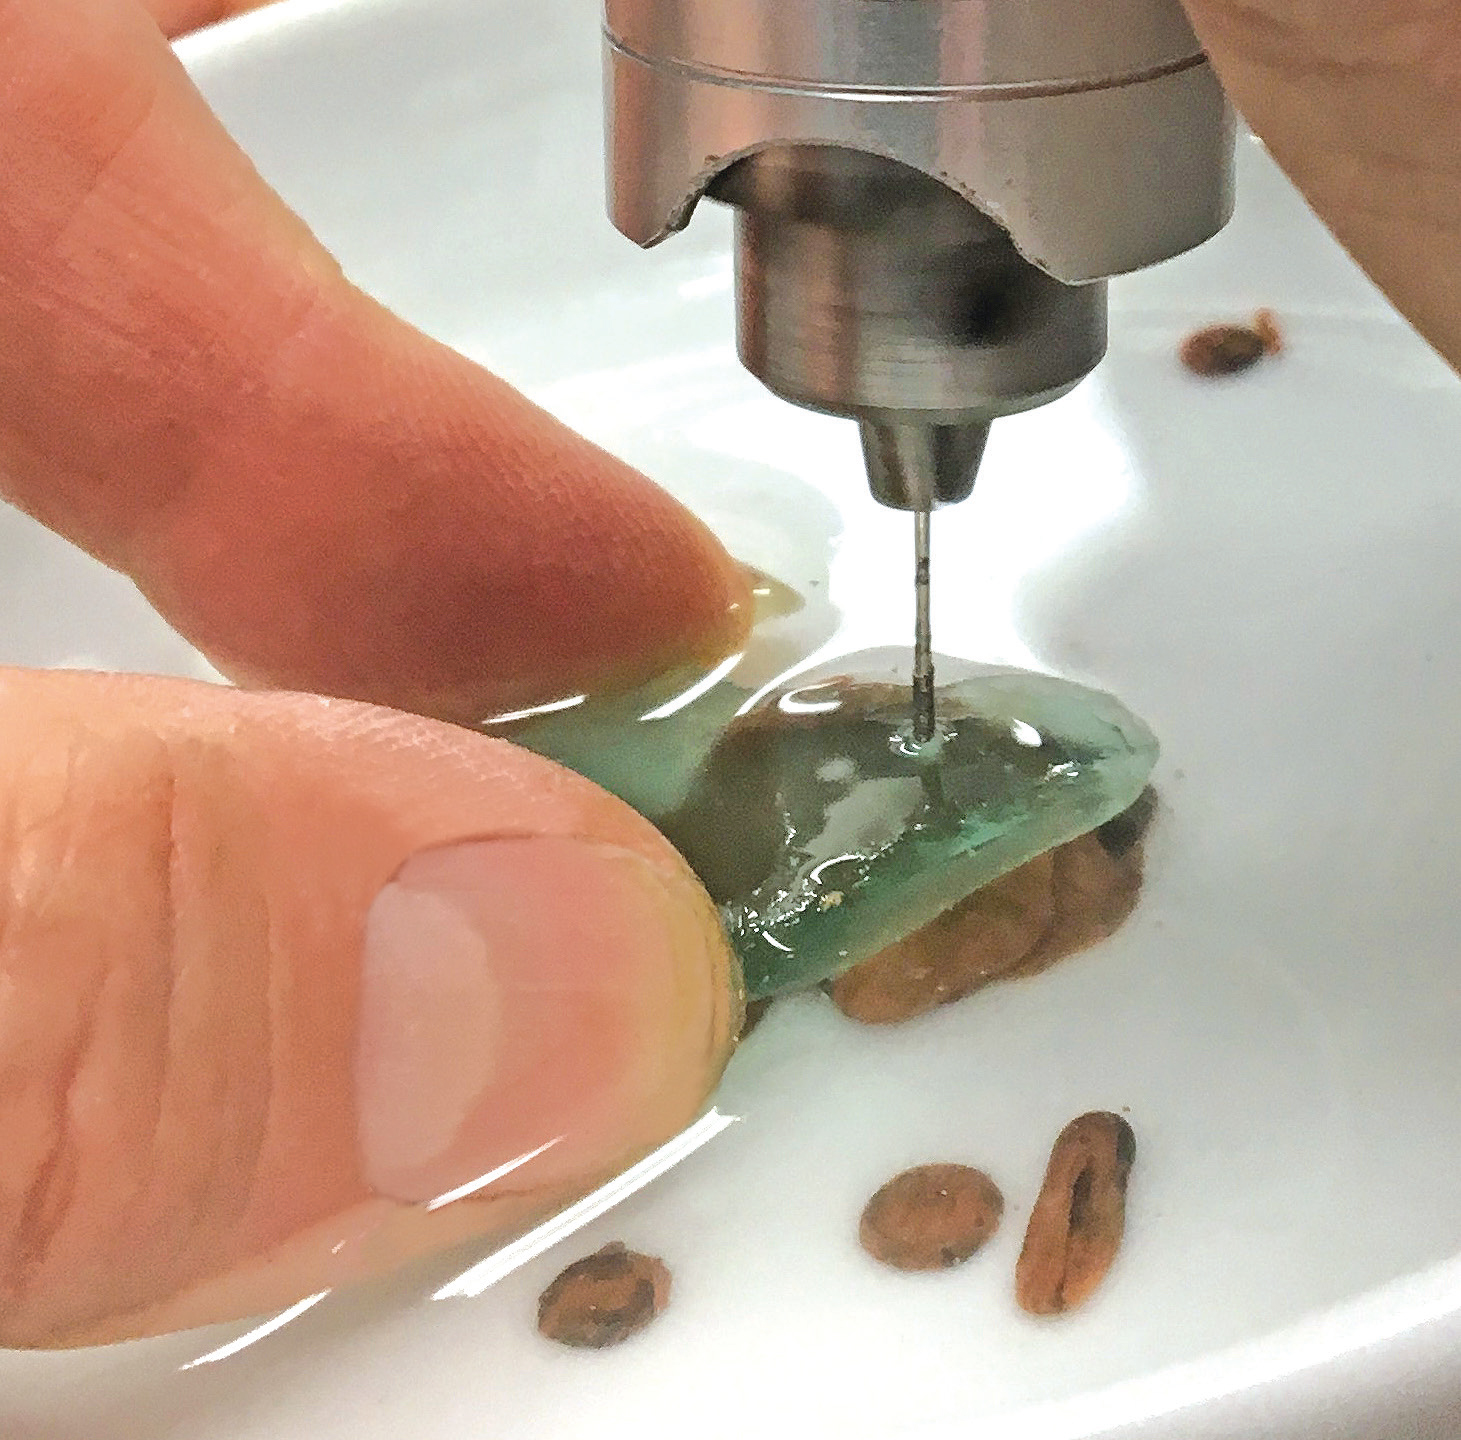 | Using the smallest diamond drill bit, drill a pilot hole all the way through the object. Get comfortable—you will be drilling for quite some time, especially on stones harder than about 6 on the Mohs scale. I drill for a few seconds, remove the bit from the hole to clear sludge, and then go back to drilling. I use a miniscule 1 mm drill bit for drilling pilot holes. It is inevitable that the hole will "blow out" on the back side (creating a crater or chipping off material near the exit hole, depending on how brittle or fragile the material is), so the small hole will need to be enlarged anyway. There will be less cleanup on the reverse side of the piece when using a small diameter bit. |
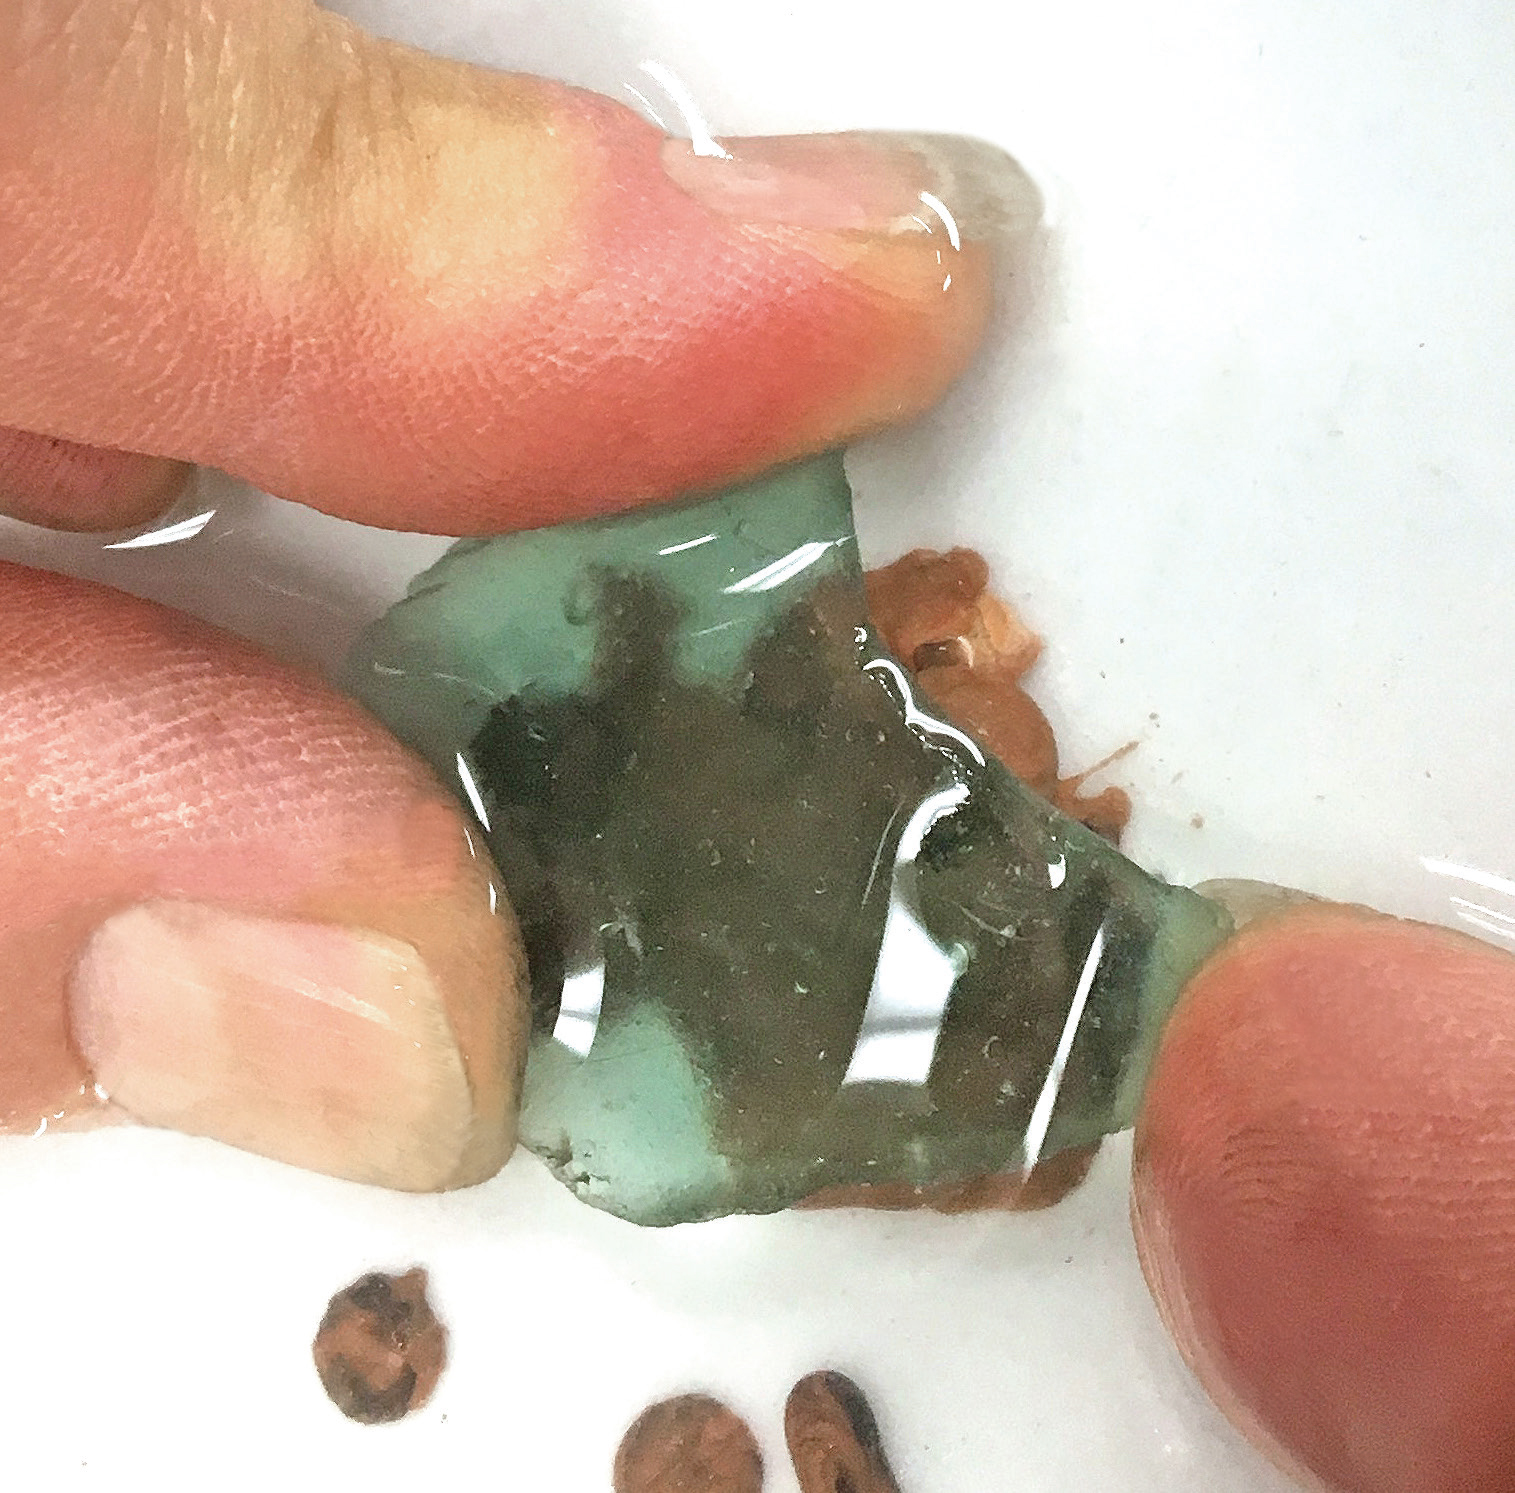 | Once you've drilled completely through, pop the shard off the wax. If it sticks, pour out the water, let everything dry, and put the dish in the freezer for a few minutes to chill and harden the wax. Most of the time, the cold wax will release the shard very cleanly. Any lingering wax can be cleaned up off the stone with a cotton swab dipped in acetone. |
 | Inspect the hole. If there are no cracks in the shard, continue to a larger drill bit and gradually enlarge the opening. (However, if there are cracks, it's best to abandon the piece, as the cracks will only get bigger and create a weak zone in the stone.) I like to alternate between drilling from the front and the back every time I switch to a larger drill bit, continuing until I have created a hole at the final diameter. At that point, I use a finer grit diamond bur to grind the openings completely smooth. Very often I will finish with a fine-grit ball bur to create a gentle taper at the top and bottom edges of the drilled hole to prevent chipping. |
![]()
In association with
![]()
The award-winning Journal is published monthly by MJSA, the trade association for professional jewelry makers, designers, and related suppliers. It offers design ideas, fabrication and production techniques, bench tips, business and marketing insights, and trend and technology updates—the information crucial for business success. “More than other publications, MJSA Journal is oriented toward people like me: those trying to earn a living by designing and making jewelry,” says Jim Binnion of James Binnion Metal Arts.
Click here to read our latest articles
Click here to get a FREE four-month trial subscription.
Related Articles

Jewelry Using a Microfold Brake

Guide to Fishtail Settings
Platinum Consideration Factors
Recent Sightings: Jewelry Teachers


The All-In-One Jewelry Making Solution At Your Fingertips
When you join the Ganoksin community, you get the tools you need to take your work to the next level.

