
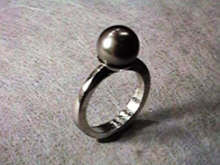
How to Make a Forged Platinum Pearl Ring
This project will teach welding, soldering and forging techniques. The ring is a handsome, plain design and can be applied to many applications. To make this ring, you will need.
9 Minute Read
This project will teach welding, soldering and forging techniques. The ring is a handsome, plain design and can be applied to many applications. To make this ring, you will need a torch, using either Propane/Oxygen , Natural Gas/Oxygen or Hydrogen/Oxygen. I was using a Hoke torch, with Natural Gas/ Oxygen for this project. Do not use Acetylene for working with platinum.
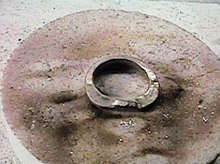
I use the back of a Wesco dish crucible as soldering surface, but any fused silica or alumina block will do. Be sure not to use a charcoal block. Carbon will contaminate your metal.
You will need a pair of safety goggles, with a #5 or #6 rating to protect your eyes. If you like to work with a soldering pick, be sure you are using one that is made of Tungsten.
You will also need a set of files, a sand paper stick, assorted silicon wheels, a jewelers saw with blades, a ring mandrel, a bench block or bench anvil and a hammer. I used a chasing hammer for this ring. A pair of bow-closing pliers are also required.
Assorted polishing wheels, like a brush, a felt, a buff, an inside ring buff will be needed. Be sure to include platinum polishing compounds. I use 800 for the first finishing after the sand paper, then 1500, followed by 4000 grit with a final polishing compound of 8000 for luster.
What you need to do this project:
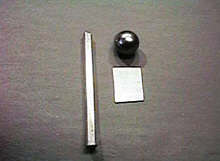
- Platinum is Pt900, Platinum/Iridium 50x3x3mm
- 10x15mm 24 gauge sheet,
- a small piece of 032 wire for the post (not shown)
- The Pearl is a 8mm Tahitian of fine Quality
- 1500 Platinum solder (not shown)
Tools:
|
|
Annealing the Platinum Stock | |
 | We begin by annealing the platinum stock. The stock is heated to about 900 C, which gives it a bright orange color. We are holding this temperature for one minute and then quench. Be sure not to over anneal, as that will cause grain growth. If you under anneal, the stock may not be dead soft. |
Begin the Shaping of the Pt Stock with the Rolling Mill | |
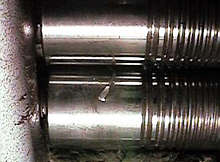 | Using a rolling mill, we can roll the center of the stock thinner and thus wider, to begin the shaping of the ring. We also roll the ends in the opposing direction, to make them wider vertically.Be sure your rollers have been cleaned, so that you can avoid contaminating the platinum.Contamination will happen, if small particle's of another metal, which may cling to the rollers, gets pressed into the platinum surface. If you then anneal, these particles will melt into the platinum and contaminate it . |
Forging the Platinum Stock in the Center and at the Ends | |
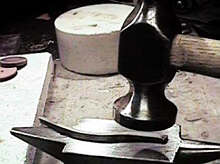 | Having started the shaping with the rolling mill gave us a good indication where to forge the stock to blend the shape into an attractive form. I am using a Chasing hammer for this. A hammer with a rounded plane would be the best choice here. We want to shape the metal as smoothly as possible, without doing too much damage to the stock Overlapping blows will do fine. We forge the center to a nice curve. Now we turn the piece by 90 degrees and forge the ends. |
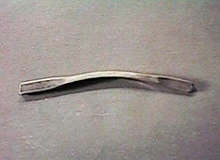 | This is what the stock should look like at this stage. It will now need to be annealed once more before bending |
Annealing the Platinum Stock | |
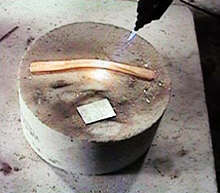 | At this time we need to anneal the piece again. We take the opportunity and anneal the small stock which will make the pearl cup also.As a rule of thumb you can say that it takes one minute at 900 Celsius (bright Orange) per one square inch of 1mm thick platinum to achieve softness through annealing |
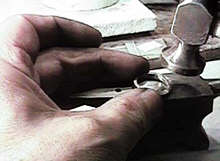
Bending the Platinum Stock with Bow-Closing Pliers | |
 | Using the bow-closing pliers, we bend the stock round. This will mar the surface of the platinum somewhat, but the marks can be easily removed with the file.It is helpful to modify the pliers by rounding the edges of the pliers with a Cratex wheel or a file. This will prevent deep marks on the stock as you bend. On some projects I actually place a small piece of leather or tape between the jaws as I bend the stock to prevent marring After the bending you will need to anneal the stock again. |
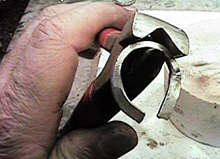
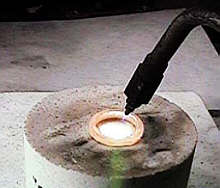
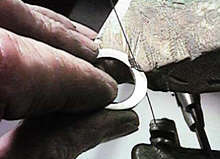
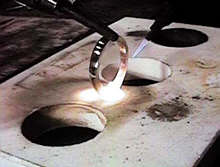
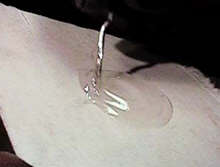
Welding the Ends of the Stock Together | |
 | After the ends are bend to slightly overlap, we use a sharp oxidizing flame and melt the ends together. This is actually a welding process. You may have to turn the ring over and do the same on the other side. Don't worry what it looks like. Just do it. |
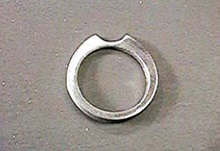
Ring with the Ends Welded Together | |
 | This is what the ring looks like at this point. It will need to be rounded and the end will need to be forged flat. Use your chasing hammer for that |
Forging the Tops of the Ring | |
 | Using the Chasing hammer, we forge the top of the ring. It is important to use a hammer with a slightly rounded bottom. Use overlapping strokes and thus taper the ring ( from a side view) while widening the top. |
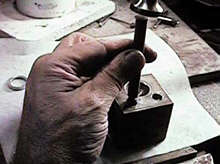
Rounding the Ring on the Mandrel | |
 | Rounding the ring. Use hard, even blows to round the ring. Concentrate more on the bottom of the shank , rather than the top. At this time it is also important to make the ring the proper size. This takes a little practice, but you will be able to control the height and the width through forging. |
Annealing the Forged Ring | |
 | Using a sharp oxidizing flame, heat the ring to about 900 degrees Celsius and hold it at that temperature for about 60 seconds. This will anneal the ring, and remove all stress that was created by the forging process. At this time you are done forging. |
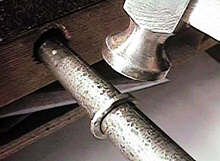
Sanding the Ring on a Sanding Board | |
 | Using a 220 grit sandpaper on a board, we sand the ring to remove the hammer marks of the forging process. You can also use a file for this process. |
Filing the Outline of the Ring | |
 | With a #4 Barrette file, we shape the outside of the ring. Remember when ever you are using a file for platinum , use it ONLY for platinum. Small pieces of another metal buried in the teeth of the file can contaminate platinum. This contamination will take place when you are annealing or welding or soldering. The small pieces will melt into the platinum and thus contaminate it. So use only dedicated files. |
Sanding the Inside of the Ring | |
 | Sanding the inside of the ring will remove any irregularities. Use a course sandpaper at first and then graduate to the Tri-Mite 400 and 600.At that time it is good practice to stamp the ring with the makers mark and the quality mark. In this case we are stamping the piece Pt900 for 90/10 Platinum/Iridium |
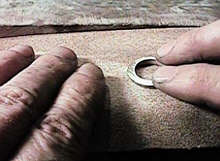
Marking of the Ring Top for the Pearl | |
 | After finding the center of the ring and marking it, we use a permanent marker to mark of the area where the pearl will be. |
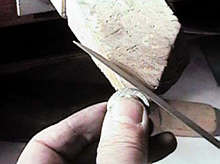
Cutting away Excess Metal with the Saw | |
 | With a jewelers saw using a 3/0 blade we cut the excess matal away. After the cutting, we smoothen the curve with either a barrel burr or a file. |
Trimming the Outside of the Shank with a File | |
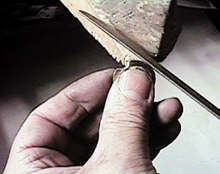 | Using a #4 Barrette file, we match both sides and file the ring to its final shape. Remember to cross file . This will prevent deep file marks and makes for an even surface. |
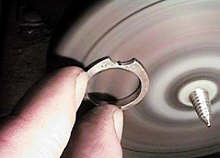
Pre-Finishing the Shank with an Abrasive Wheel | |
 | Using an abrasive wheel to pre-finish the ring, we remove all file marks from the surface. After this is done we use the Tri-mite sand paper and bring the entire ring to a 600 finish |
Using a Sponge File will save Time | |
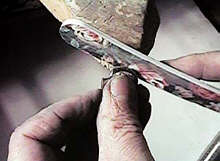 | A sponge file is a handy tool for fine finishing. These files are available through beauty supplies and are really not a jewelers item. They are , however, wonderful tools for the bench jeweler |
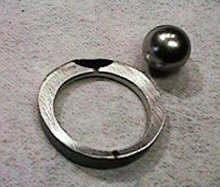
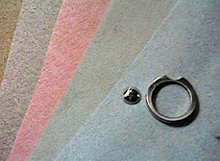
 | This is what your ring should look like by now. |
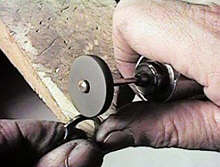
Making the Cup for the Pearl | |
 | Now it is time to make the cup that will hold the pearl. There are several options. You may use a disc cutter and cut the disc or use a jewelers saw. You then use a punch and dap set to shape it into a cup . Be sure that the pearl fits perfectly into that cup. |
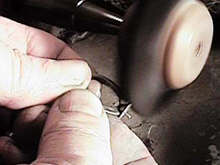
Drilling the Ring for the Pearl | |
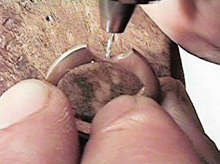 | Post We are drilling the top of the ring to make room for the pearl post. We are also drilling the center of the pearl cup. This will make it possible to solder the cup and the post to the ring simultaneously.When ever you are drilling platinum, be sure to use good lubrication ( such as Burlife or Oil of Wintergreen)and drill at a slow speed. Platinum tends to grab the drill and make it dull rapidly if you are using too high of a drilling speed. |
 | Polishing the inside of the ring will remove any burr created by the drilling. |
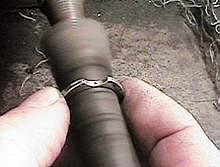
 | Lapping the sides of the ring on a hard felt wheel give us a great polish. This needs to be done now, as we will solder the pearl cup on top of the ring, making additional lapping difficult. Platinum can be heated for soldering or welding without loss of polish. When the bright heat goes away, the polishing luster is still here. |
 | Another polishing option is described below Using 3M WetNDry® Polishing paper we polish the ring and the cup to a high gloss finish. This can also be done at the polishing motor using platinum compounds. |
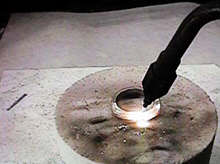
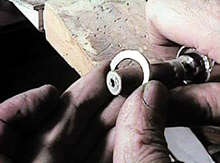
Soldering Pearl Cup and Post to the Ring | |
 | By drilling a small hole into the soldering surface, we can set up the ring in such a way that we can solder the cup and the post to the ring in one operation.We set the cup down flat, place the ring on top and insert the post through the cup and the ring into the hole in the soldering surface. This will keep everything lined up during soldering. We use 1500 platinum solder, no flux, no fire-coat. |
 | Polishing the assembled ring will finish the project. |
Mixing a two Component Epoxy to Glue in the Pearl | |
 | We are mixing a two component epoxy to fasten the pearl to the cup. The ring has been cleaned and it dry. We place a small about of this epoxy inside the hole , drilled in the pearl, and another small amount into the cup. The pearl is then pressed onto the post and held in place with slight pressure till the epoxy is hard. |
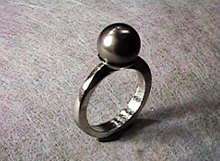 | This is the finished forged Platinum /Tahitian Pearl ring.This project teaches torch control, Annealing techniques, Forging techniques Polishing. |
Related Articles

Platinum Granulation Process
Platinum Durability vs Scratching

Richard Reinhardt: Discontinuous Continuity

Master Metalsmith Alan Adler


The All-In-One Jewelry Making Solution At Your Fingertips
When you join the Ganoksin community, you get the tools you need to take your work to the next level.
