
Jewelry Designs: Hope Pendant
6 Minute Read
Welcome to Stacey Rhodes Jewelry Designs, where we will detail all of the steps involved in adding a new piece of jewelry to our line. In this issue we will be working with our latest design. I'll take you through every phase of production, from the idea to the showcase.
The Idea
The Hope Pendant was de-signed as the signature piece for the annual Child Help USA fundraiser, held in Nashville,TN. My first couple of thoughts range from how am I going to suspend the pendant, to how am I going to cast it in a single casting. Sprueing is going to betricky, to say the least. Sometimes if I don't know where to begin, I just start somewhere, so here we go. Also, something I always forget to mention is to put on your optivisor before going any further. I try to photograph very minute details that can only be seen through magnification. So keep your optivisor handy for looking at the photographs and seeing the smallest details.
The "C's"
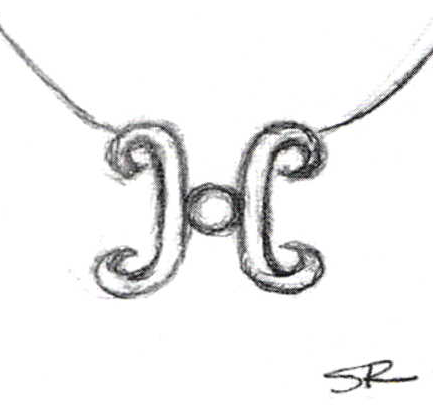
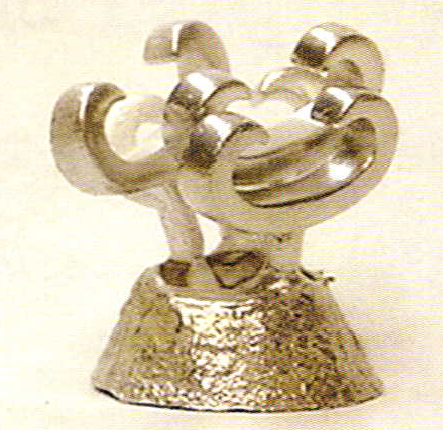
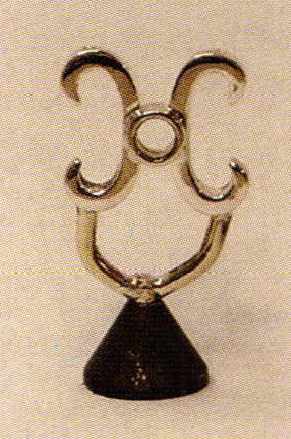
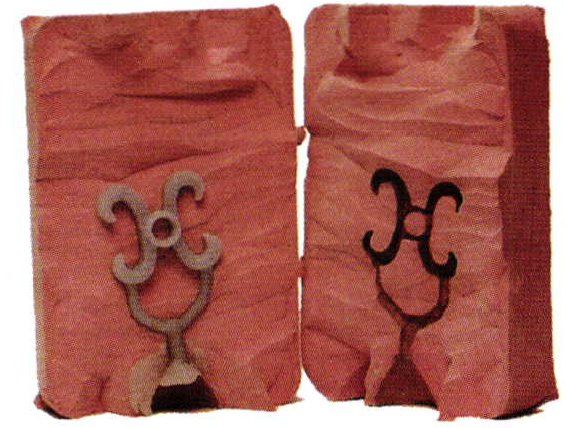
The overall pendant is in the shape of an "H", for hope, but the sides of the pendant are fashioned after a"C" for the children that Child Help USA works with. I always like to have Stacey draw a rough sketch on the wax to give me an idea of the overall scope of the piece. The photos show the rough sketch, and the rough wax carving. While I was carving he pendant, I realized that I would never be able to do it in one piece, so I decided to split it into three individual parts; the two C's, and the center bezel. Once I had the two C's carved, I realized my first dilemma.
The First Dilemma
Trying to carve two mirror images of anything is challenging enough. But, when you are trying to carve two pieces that are only three millimeters from each other, the differences become glaringly obvious. It was here Idecided to add a step to the initial modeling process, but hopefully it will make life easier down the line.
Making Two Out of One
I carved the two C's, and had Stacey pick the one she liked the best. After a few minor tweaks that Stacey felt needed to be done, I cast the piece in sterling silver. Next, I attached a sprue, and made a rubber mold. I can now generate two identical wax patterns to work with.
Next, I need to cast the two new patterns into metal and solder the bezel in place. I also am starting to think about the chain attachment. I don't have a clue at this point what I m going to do. So, I guess you'll get to figure it out with me as we go along.
The Next Dilemma
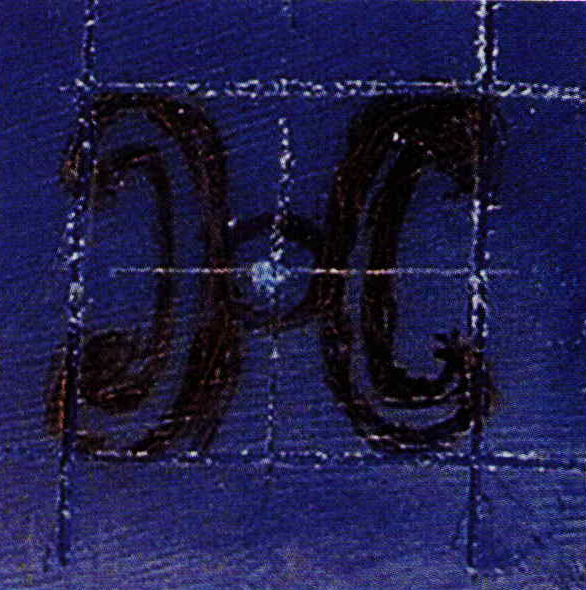
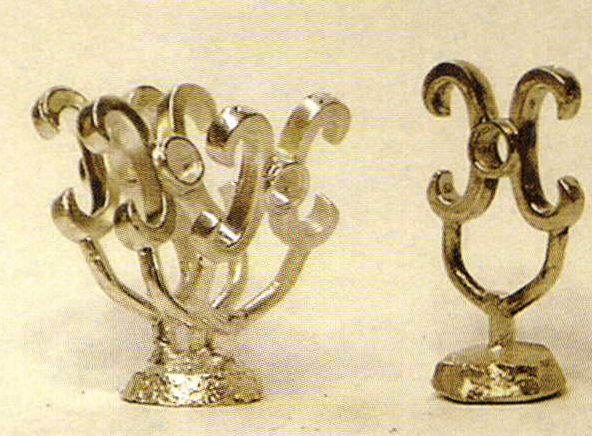
I decide to cast four of the pieces, instead of two, to have a margin of safety. I pick the two best castings and discover a big problem; it doesn't do what it's supposed to do. In order to make the two C's the correct distance from one another, the bezel holding the stone has a 3mm OD diameter. This means we can only set about a .05 ct. gemstone, which would be lost in the pendant.
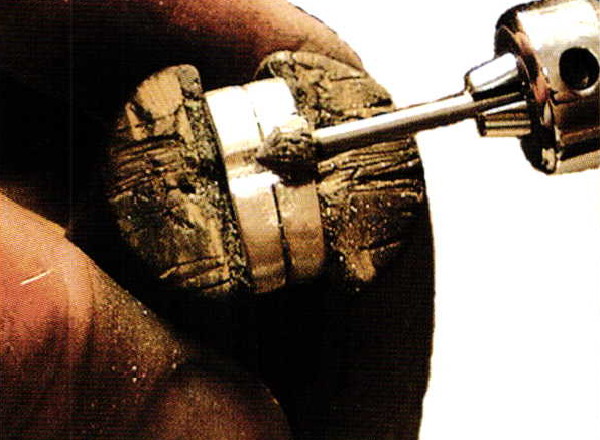
To overcome this problem, I decide to cut away part of the Ct and bury larger bezels deep into the piece. I line up the two pieces in my hand vise, and start cutting a groove with a round, stone setting bur. This way, I can keep the groove even and uniform between the two halves.
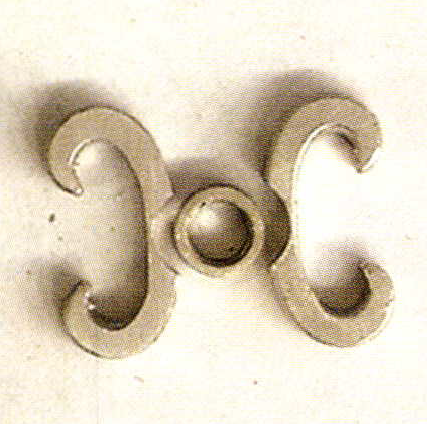
One photo shows how I cut the groove and one shows the three pieces ready to assemble. This method allowed us to put in a 6mm OD bezel, which will accommodate at least a 5mm stone. Much better!
The Chain Can't Wait
I now am at the point where I have to decide what to do with the chain. Stacey and I are always trying to come up with new ways to attach pendants to their chains. It's a pet peeve of both of ours how the clasp always rolls around and spends most of its time right beside the pendant. Since we want to keep the clasp in the back where it belongs, we need to keep the pendant from floating on the chain.
The first thing to decide is where the chain is going to attach the pendant. I hand Stacey the original model and a fine point sharpie and have her draw a line across the top, where she wants this to happen. I then find the center of the piece and place a small divot on the pendant. I don't like to drill too many holes in pieces because they can cause casting problems during multiple production runs. A small divot will work just fine, and it will mark where the chain is to be attached in all of the production pieces.
I also go behind the pendant and hollow out the backside where the chain will enter the pendant. My plan is to cut the chain in the center, and insert it about 1 mm into the pendant and solder it in place. This way, the chain has a better mechanical connection to the pendant instead of just a solder joint. The photo shows the divots and the hollowed area on the original model. In less than 24 hours we'll know if it works!
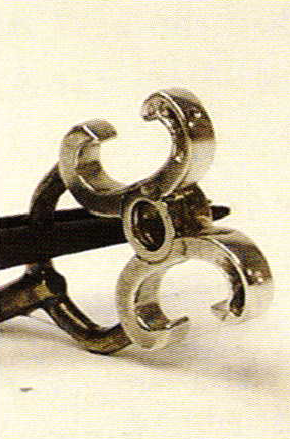
A Sprueing Lesson
First, let me provide you with a definition of a sprue. A sprue is a passage way. In jewelry terms, asprue allows wax to enter a rubber mold.It also allows wax to exit an invested flask,and metal to enter the hollow cavity left by the melted, "lost" wax. Sprueing is an art, more than a science in my opinion. There is no stead fast rule as it's more of a feel for how the different molten materials will flow through the various passage ways.
Since molten wax, and molten metal flow at different rates, it's a trick to design a single sprue system that will work for both. On a few occasions, I've had to sprue a metal model in order to make a rubber mold. And then, sprue the wax pattern differently in order to complete the casting. "Hope" I feel will allow me to use the same sprues for the rubber mold and the actual casting. I guess in a few hours we'll learn together if I'm right.
The photo shows what I came up with for the sprueing of this piece. I'm thinking, by using a split, double sprue, I'll send the materials up each half of the pendant. They should flow smoothly through the pendant, and fill the bezel in the center as well.
The Second Rubber Mold
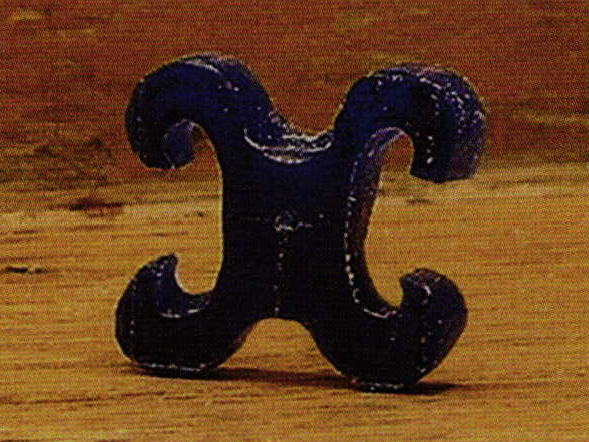
This rubber mold should be the working mold for this piece. Remember, I made a rubber mold of one half of the pendant in order to generate two identical halves. Now that that's no longer needed, I can dispose of that mold and make a mold of the finished model. As you can see the rubber mold came out fine. It's time to see if my plan worked.

As usual, I have Stacey do the ceremonial first injection to see if I got it right. Drum roll please……PERFECT! The photo shows that I got it right. It's about time, huh?
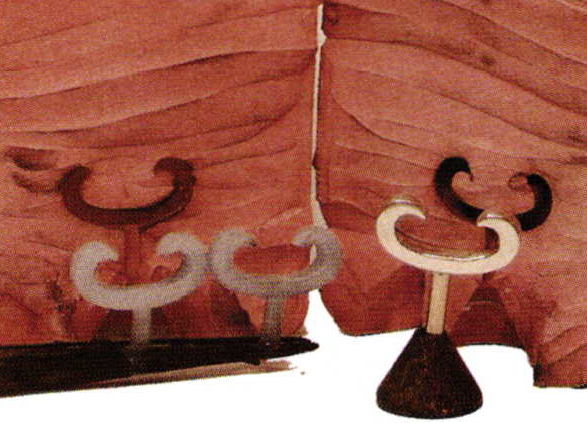
The First Production Run
For the first production run of "Hope", I have to cast one in 14K'W'C, and three in Sterling Silver. The white gold piece will be donated to Child Help USA. One of the sterling pieces will be Stacey's, and the other two will go in the showcase. The photo shows that all four pieces castjust fine. The sprueing system works just like I had planned. It's time to set the first stone.
The First One
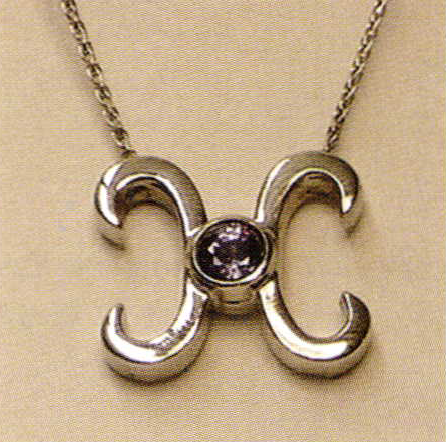
'[he plan is to set a beautiful, 6mm, Ceylon Sapphire into the 14K\7G pendant, with a 16″ White Gold wheat chain. I didn't run into anything unusual setting the stone into the bezel. Next, I cut the chain in the middle and ran it through the hole, and soldered it in place. The piece hangs very nicely. Just a final polish and a final photograph and this one is in the can.
Ladies and Gentlemen, I introduce to you, "Hope".
Related Articles

Novell Design Studio

Harold Hasselschwert: Materialization of the Exotic
Jewellers’ Objective Attitude Towards Designing

Metalsmith ’86 Winter: Exhibition Reviews


The All-In-One Jewelry Making Solution At Your Fingertips
When you join the Ganoksin community, you get the tools you need to take your work to the next level.
