
English Pictorial Enamels
11 Minute Read
English enamels made during the period 1750 to 1840 were chiefly ornamented with transfer printed images and mottos. While the most important innovations in this manufacture were connected with these transfer processes, other new working systems were needed to make this output profitable.
The Metal Forming
The bases of these wares were of copper foil, up to 0.6 mm (about 0.02 in.) in thickness. This kept material costs low and simplified the metal shaping.
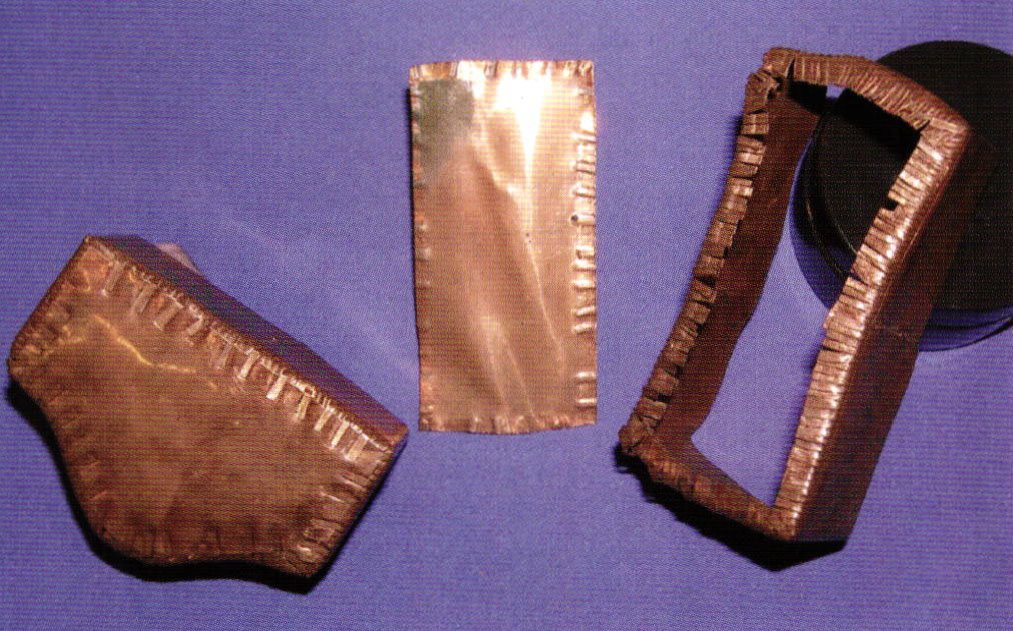
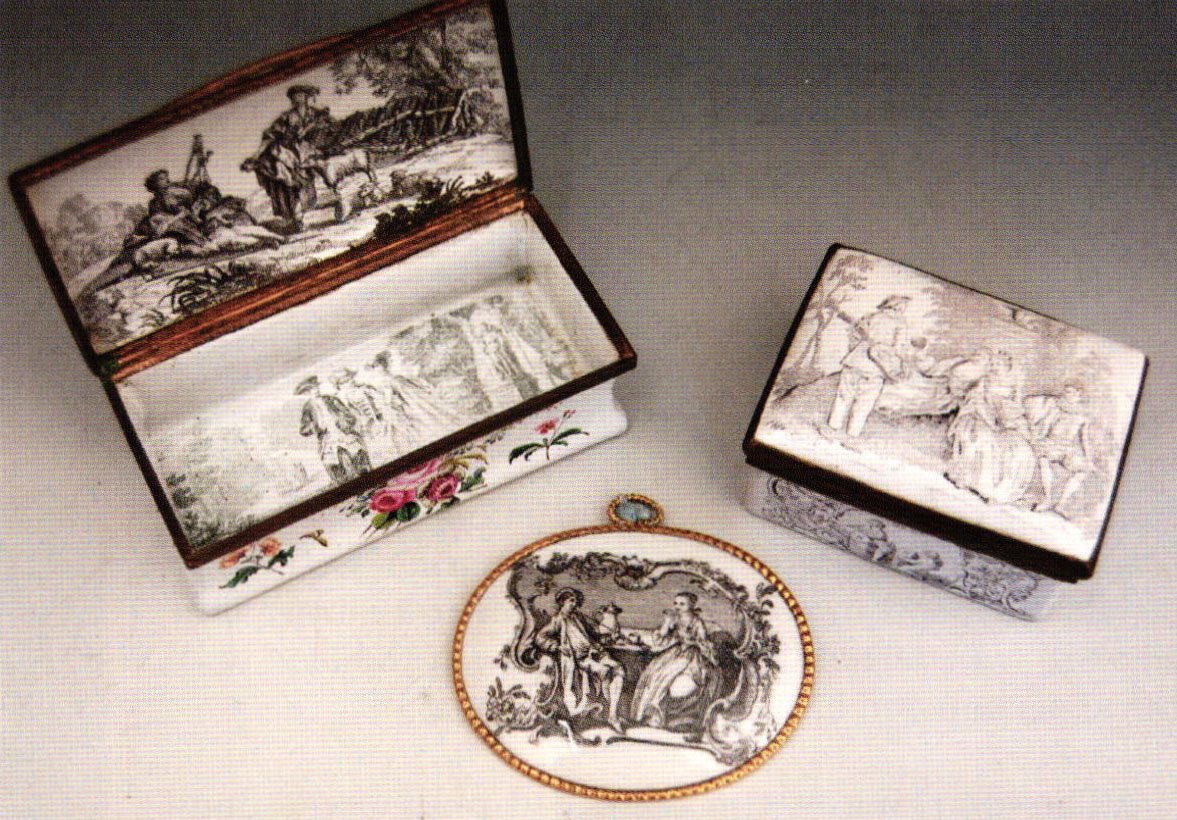
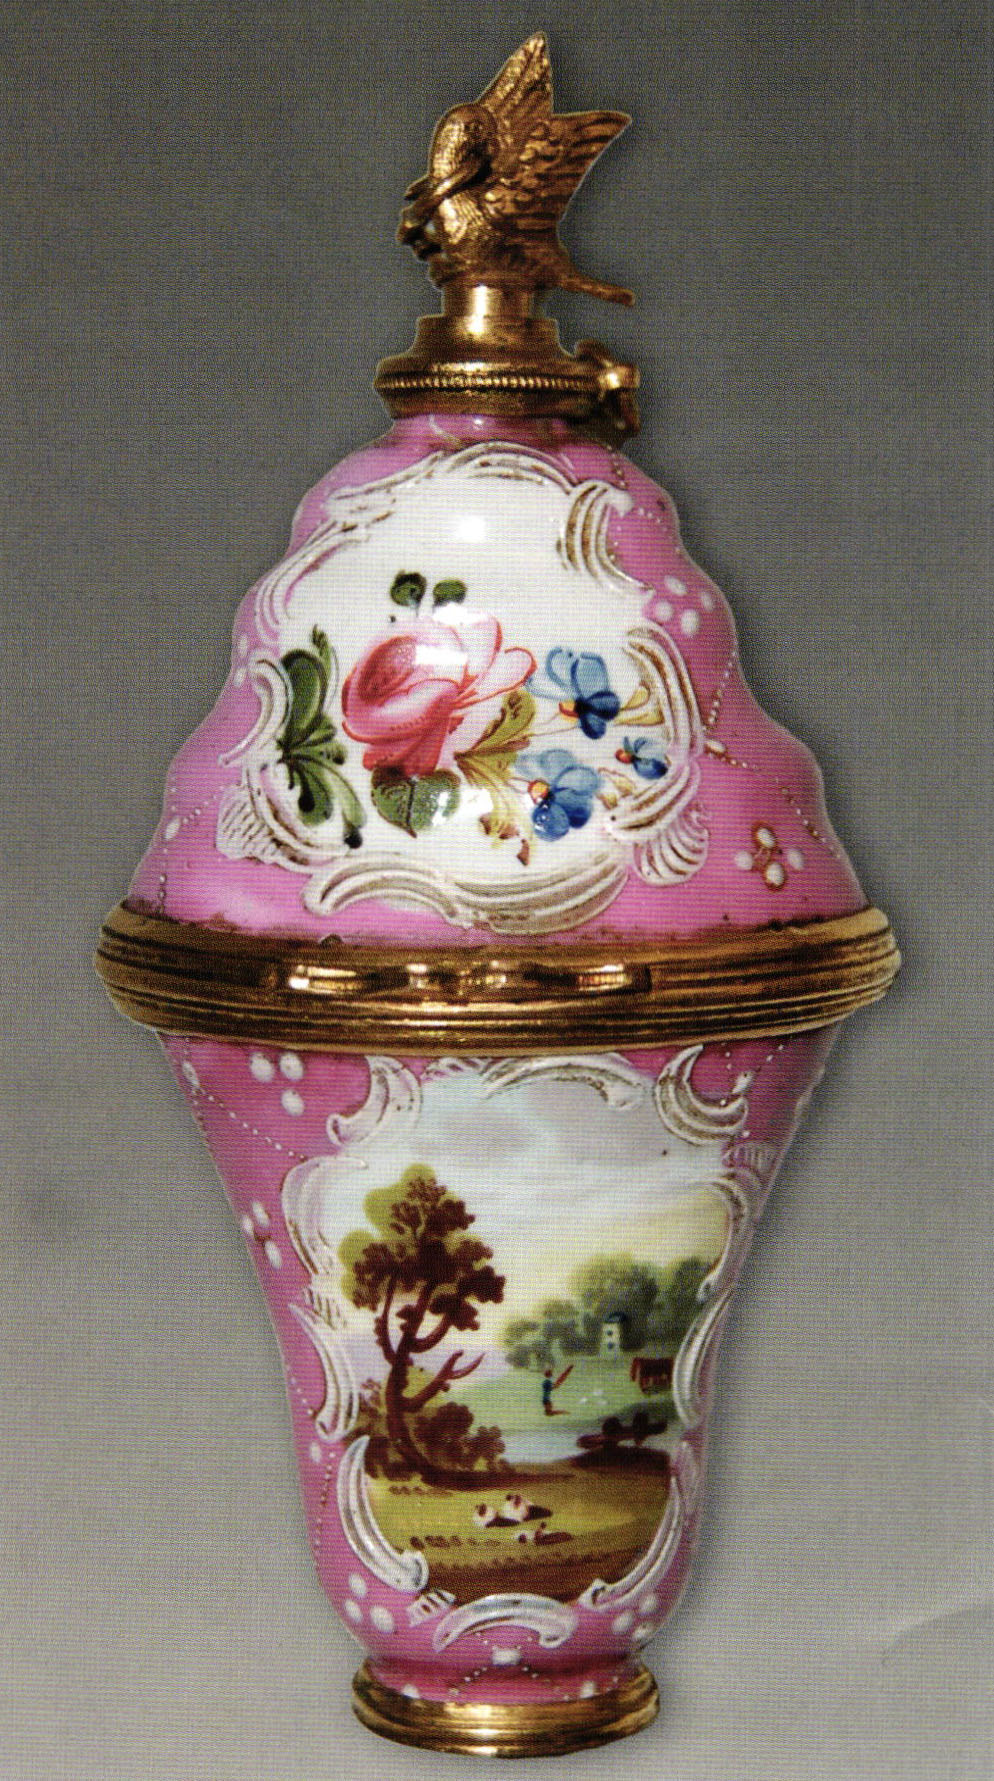
Slightly arched plaques and highly contoured surfaces were produced with moulds and presses. Boxes were made with the foil cut into strips, bent over templates, and the cut edges joined with slot-and-tab or lacing methods. For lacing the edges of the metal were slatted and interwoven, or bent over and under the base plate of such a box (Pic. 1). The joins were hammered smooth and were unseen after coating with enamel. The edges of the waves were masked by the well fitting mounts (Pic 3).
Coating and Ornamenting
A fundamental change in the large-scale production of the English enamels came with the adoption of dipping methods to quickly coat the metal blanks.
For other types of painting on enamel, the artists worked, by tradition and preference, over a grounding of Venetian white, laid over the metal as a paste, and fusing with a flawless, milky sheen. For the dipping method a different quality of white enamel was needed, to be prepared with other ingredients to make a slurry or slip. With this way of coating, plaques were held by their edges and passed through a shallow bath of the white slurry, then draining off surplus material. For cylindrical forms the slip was ladled over or swirled round the insides.
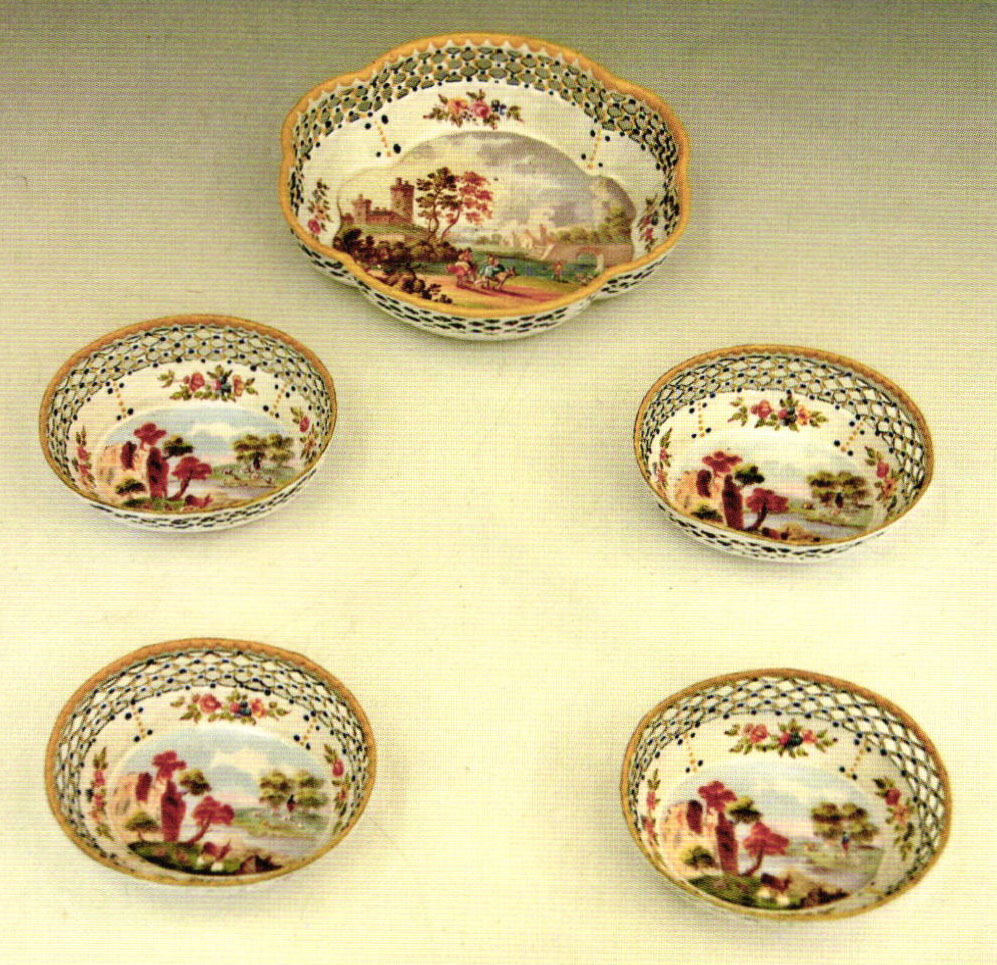
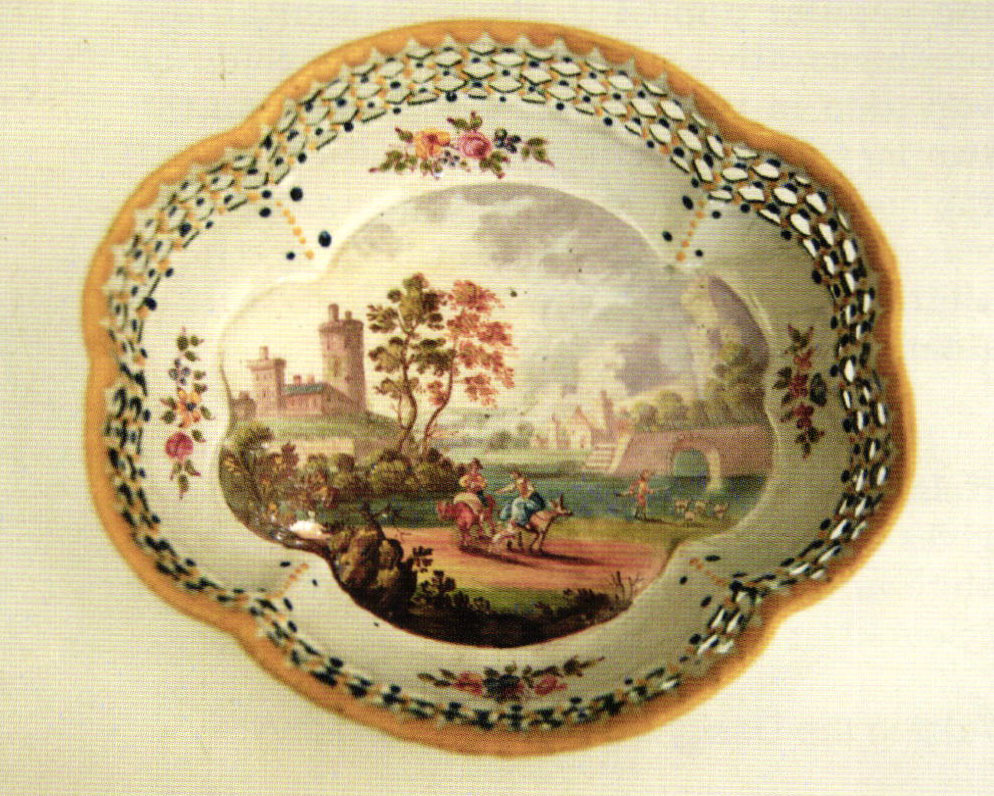
The wares coated so speedily by dipping could seldom match the grounding produced with traditionally laid enamels, but the ease of preparing shaped objects and the costing factors outweighed this. For ornate effects in any case only small areas of white were left showing, as much was masked with broad coloured borders surrounding the central transfer printed designs (Pic. 6). After the 1780s, thousands of very low cost trinkets and souvenir items were made that were given simple motifs, often with borders omitted.
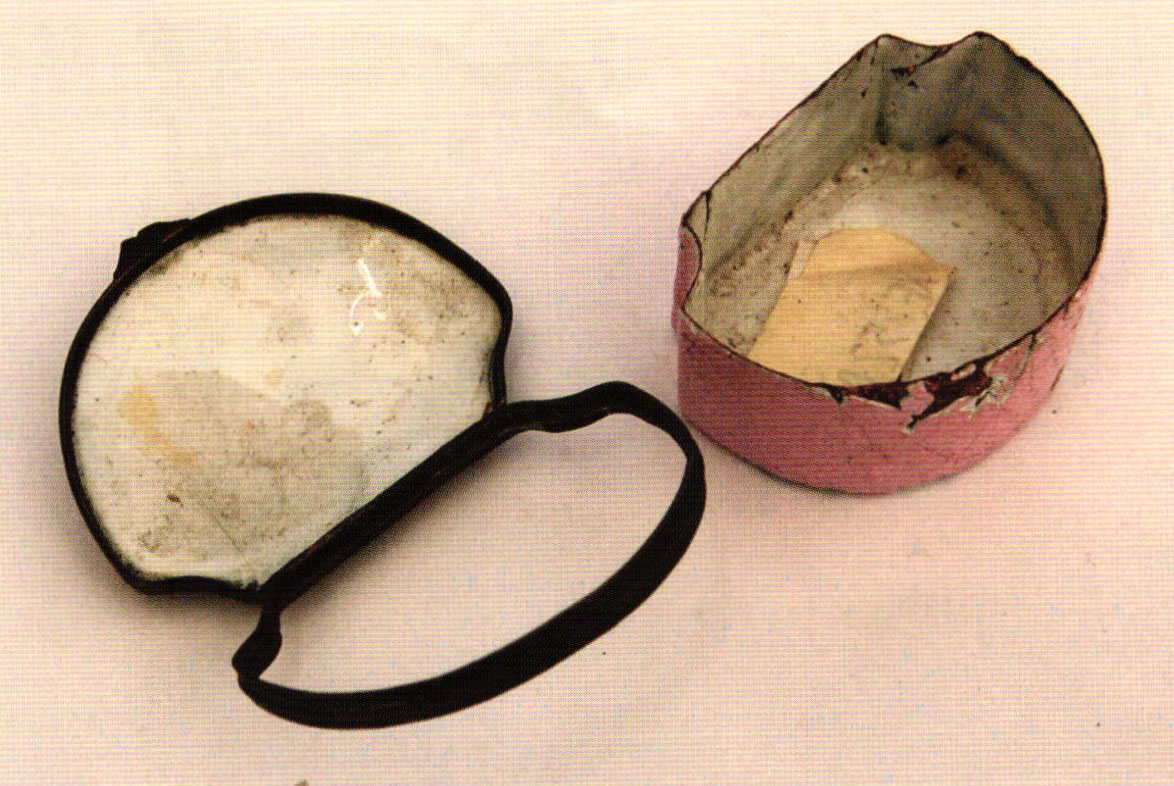
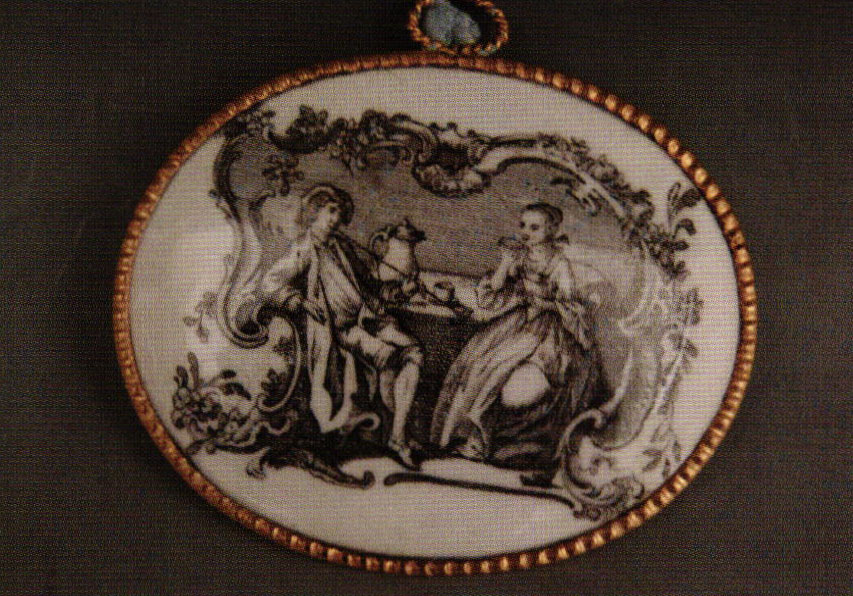
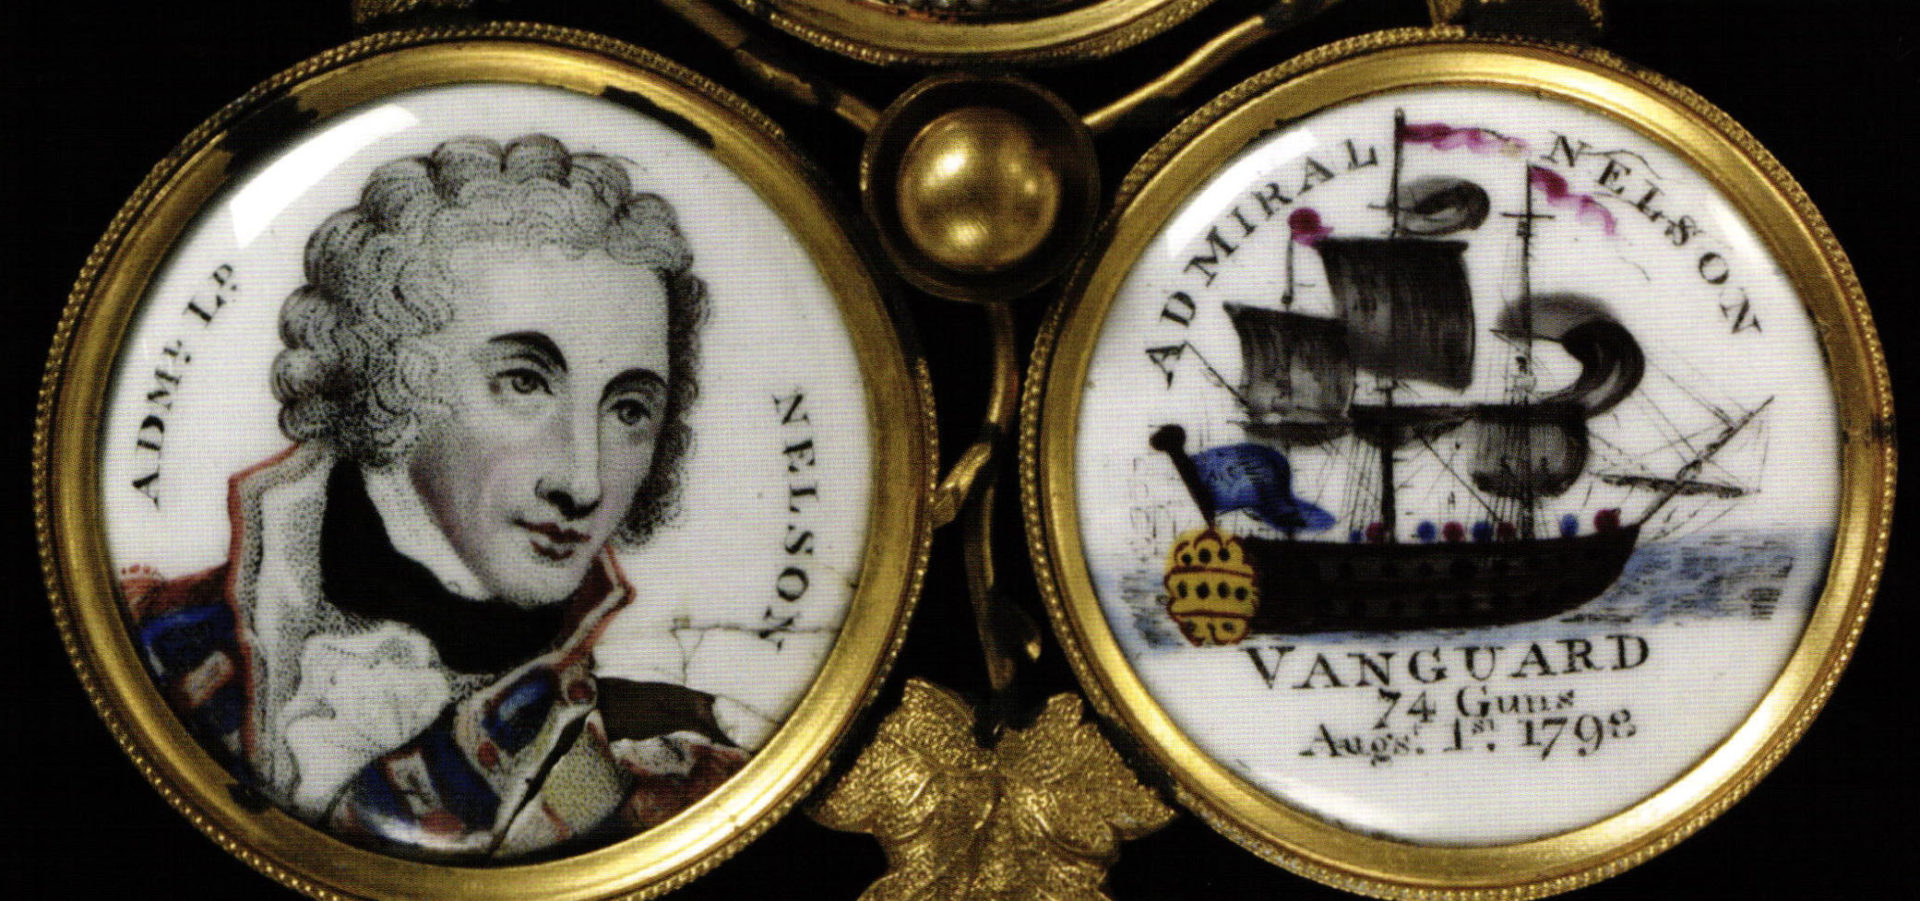
These little boxes and objects owed their continuing popular appeal to the sentimental and commemorative subjects, and there could be variation in treatment. For instance, on the two medallions set together shown in Pic. 7 the one on the left is quite sophisticated, and was made by using transfer from a stipple engraving, to show the stylised portrait of Admiral Nelson.
In contrast, the companion medallion of Nelson's Flagship with 74 guns, the Vanguard, gives emphasis to the transfer printed message and outlines, with sketchily applied colours.
Adding the Designs Over the Grounding
Small buttons and highly contoured forms could be wholly completed with free-hand brush painting, or by using stencils to guide outlines. Some portraits were obviously completed by artists trained in miniature painting.
However, for the great majority of objects in the genre of English enamels ornamentation depended on transfer printing processes, and the quality of the artwork depended on the expertise of the engravers and the condition of the plates from which the images were reproduced.
The designs to be printed were engraved to a shallow, even depth into flat, highly polished copper plates. The first 200 to 250 uses of each plate for printing gave superior results, after which the copper started to wear down progressively. Worn plates gave less sharp impressions as outlines deteriorated, paler prints resulted as less ink was taken up in the grooves and flaws or voids could appear (Pic. 4A). These effects, while apparent in monochrome images, were hidden when overpainted.
The suitable engraving styles were either in the stipple method, suitable for fine and flattering portraits, discussed below, or with the usual, standard techniques for the majority of the images and printed texts. Crosshatching and very closely set lines were avoided for the engravings, to reduce clogging of the ink. Shading was shown with closely set dots and parallel lines or fishnet patterning.
Charging (Inking) the Engraved Plates
Standard engraved plates were charged either with thickened linseed oil, or in the more usual manner, with prepared overglaze pigments (metal oxides).
For transfer with oil the design once applied to the enamel surface was completed by dusting over pulverized coloured oxides that adhered to the oil. An advantage of this method was that monochrome images could be completed with quite deep colours, such as purple or sepia. For transfer with coloured oxides, black looking effects were given for pictures to be left in monochrome, but those made to be overpainted were transferred with brown pigment to blend with the superimposed brushwork (Pic. 5A).
The charging of the engraved plates was done while everything was kept warm, to enable the oily medium or prepared oxides to remained semi-liquid and fill the grooves of the design. It was important to follow this by scraping off all surplus inking material, and rubbing clean the smooth polished areas of the plate.
The transfer material was a sheet of unsized (porous) linen tissue paper, first saturated with soft soap, and applied over the inked engraved plate. The plate with paper in place was next tightly wrapped in a double layer of flannel cloth, ready to pass through the simple press. The press was constructed with an iron framework fitted with two rollers, the top one also wrapped in flannel. The printing plate was placed on an iron platform or "table" which was passed between the rollers by working a handle that revolved the upper roller. The pressure of the rollers transferred the inked design to the paper, sometimes needing two or three passes for this.
The paper with the impression was then removed from the plate, trimmed as necessary, and applied to the enamel plate. Two methods were apparently followed to apply the transfer paper to the enamel surface. One process was to gum the paper carrying the image to the enamel surface, therefore with the paper against the glazed surface of the object. Apparently the burning off of the paper in the firing did not result in undue flaws in the finished piece. The standard method was to remove the paper prior to firing: for this the paper was laid image-side against the enamel surface, then rubbing the back of the paper to press down the design. The paper was then coated with essence of turpentine to loosen it and it was removed, leaving the image adhering to the white grounding. The transfer process was followed by the usual stages of warming and drying off of residual oil from the piece prior to firing.
Stipple Method
Alan Mudd, the British engraver-enameller records the following for stipple methods: the drawing (as for standard engraving) is fixed over the copper plate prepared with a thin coating of wax, and, using a finely pointed engraving needle, all the salient points are pricked through the paper and wax, to expose the copper. The paper is removed and the plate is quite briefly immersed into the etching bath (of moderately diluted nitric acid) and removed when the dots are bitten shallowly into the metal. After lifting from the acid bath and removal of the waxy resist coating, the washed and dried plate is completed by hand engraving. The stipple design has to be created by using a thin, sharp engraving needle in the manner of a fine drill, incising the precisely placed and delicate circlets to the required depth.
Keeping the materials warm, the plate with the stipple design is charged with thickened linseed oil. Traditionally, for the final stage the operator uses pressure of the palm (i.e. living flesh,) over the surface of the inked plate, ensuring perfect infill without trapped air bubbles in the recesses or any specks remaining on the polished parts of the plate.
The transfer of the stipple design requires the use of a bat: this is a layer composed of a mixture of warmed gelatine and treacle, which solidifies and holds to this surface the residuum of the oil in the engraving. For this, the drying of the copper plate and bat is by placing the plate at an incline against the sides of a warm oven, and as the gelatine bat dries it detaches and with this "popping off', it carries the oily design. The bat is then applied, image side down, on the enamel surface, and rubbed over with a cotton pad, to make the transfer. While still sticky the oily image is dusted over with finely powdered pigment, and the fine portraits that could be produced with this technique were seldom overpainted (Pic. 8).
Over-Painting
For the over painting of transfer printed images the colours were prepared in the traditional manner - mixing the pulverised oxide with a few drops of lavender oil and a small proportion of clear enamel. As bright hues were wanted, colours were not intermixed, but white enamel could be ground in for pale tints. For these pieces, the viscosity of the paint was adjusted usually to give thin mixtures for fast working and to add simple, broad sweeps of the brush. Deeper colour was produced with a second layer over the initial dried one. Pink was often used for flesh tones, and for delicate effects the pigment was very sparingly applied and well dispersed with a flat-ended paintbrush. For quick but sketchy results the pigments could be mixed with water and applied as a thin wash.
Borders
Borders were added to surround the painted motifs using coloured enamels prepared as pastes, fusing with good gloss and slight depth.
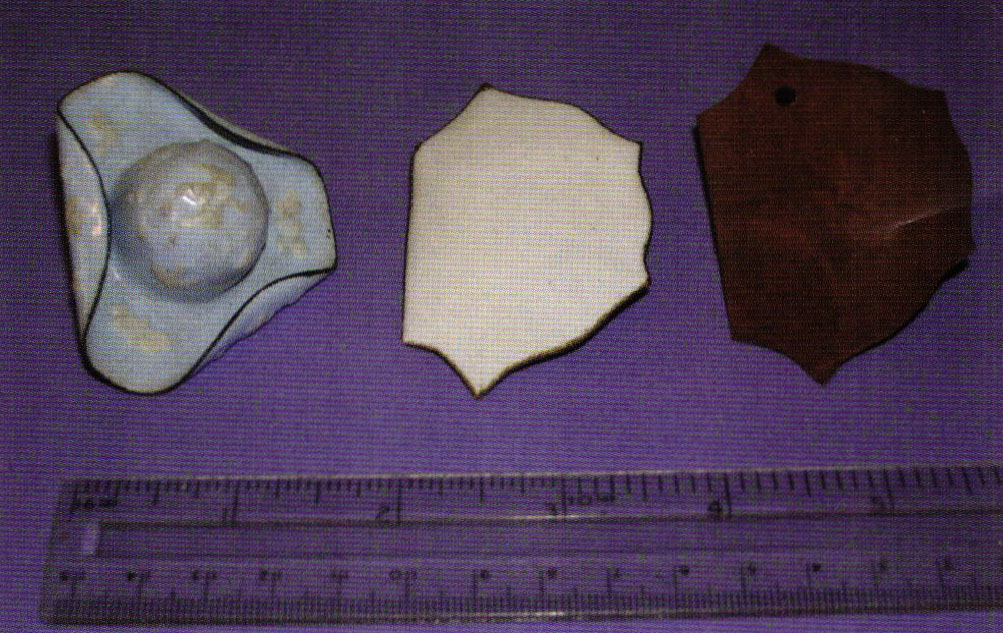
Relief patterning, popular to enhance borders was given with raised lines, dots or arabesques applied with high fusing white enamel. The white for this had to resist slumping or spreading out with refiring. Preparation of such white was in small batches, on a glass slab, and working in pure oil of turpentine (fat oil) drop by drop until the paste could coat the palette knife and remain stiffly in peaks without spreading out. This paste was applied one globule at a time, and spread or flattened with the brush zipped in the fat oil (Pic 2, for the hat-shaped etui on the left, shows the first stages of applying raised white spots). For arabesques and scrolls (Pic 6 - borders), a narrow pointed brush was used, pulling the droplet of paste towards the operator, ending the movement by raising the brush gradually. The clean, zily brush was then used to neaten the edges of the scrolls.
Gilding was sometimes added to heighten the borders, but there was a loose bond of gold to enamel, and these touches have usually worn off with time.
It seems that for the English enamels the gilding method was similar to the hazardous mercury gilding in standard use at the period for metal: for this mercury and gold dust were amalgamated and applied by brush where wanted, followed by gentle re-heating to fume off the mercury, leaving the film of gold dust attached to the enamel.
Firing
In the original period of manufacture of the English enamels, traditional firing in an enameling furnace may have been continued. For the great industrial manufacture that followed, firing had to be at an economic cost and to ensure similarity of results for hundreds of pieces. Large coal-fired furnaces were employed therefore for batch firing. For this the wares were placed into individual two-part containers of very high fusing clay (Stourbridge clay), shaped with flat tops and bottoms, to acting as moveable muffles, protecting the wares from flames and soot. All clay surfaces were coated with a chalky mixture (whiting) to avoid sticking, and when the ornamented article was placed inside, the edges were sealed with wet clay, but probably leaving a small air hole. These containers were placed in rows on a rack, with a second loaded rack above, and when all was dry the furnace was lit and brought to firing temperature, probably about 700°C [1292°F] maximum. A test plate was left in view inside the furnace to show when fusion was reached, so that heating could be stopped, and the pieces withdrawn from the furnace.
Related Articles
Enamel is Glass — But, What is Glass?

New Zealand Enameling Culture

Enameled Miniature Clock Cases
Etymology of Enamel


The All-In-One Jewelry Making Solution At Your Fingertips
When you join the Ganoksin community, you get the tools you need to take your work to the next level.
