
6 Basic Wire Skills to Make a Necklace
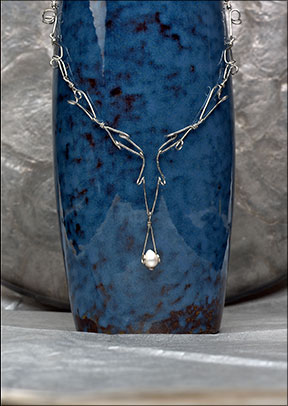
The links in this 16-in. (40.6cm) necklace are forged so they become flat and work-hardened. The pearl in the featured necklace is held in place merely by the tension between the wire loops in the pendant. Four styles of links define the spare and simple line of this necklace. Even the shape of the hook-and-eye clasp echoes the rhythm of the overall design.
6 Minute Read
This article lists the 6 basic wire skills it takes to make a necklace with four styles of links.
The links in this 16-in. (40.6cm) necklace are forged so they become flat and work-hardened.
The pearl in the featured necklace is held in place merely by the tension between the wire loops in the pendant. Four styles of links define the spare and simple line of this necklace. Even the shape of the hook-and-eye clasp echoes the rhythm of the overall design.
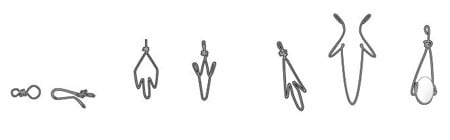
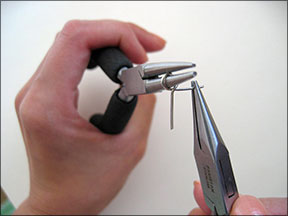
The different types of links, the pendant, and the Y-connector link shown below are shaped using roundnose, needlenose, and chainnose pliers. As you shape the links, expect to use the chainnose pliers between steps to remove kinks and to straighten wayward sections of wire.

Top-heavy diamonds
Cut the wire. Cut 20-gauge (0.8mm) silver-toned craft wire into 16 3 1/2-in. (89mm) pieces. Or, substitute 20-gauge (0.8mm) sterling silver wire for the craft wire.
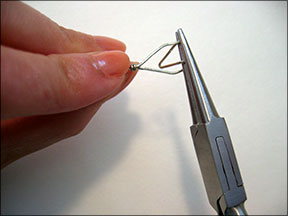
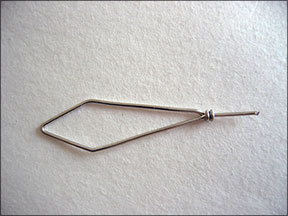
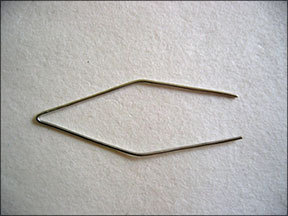
Shape the wire into a top-heavy diamond.
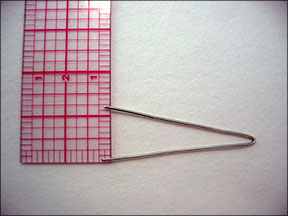
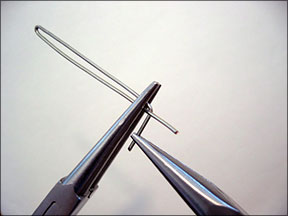
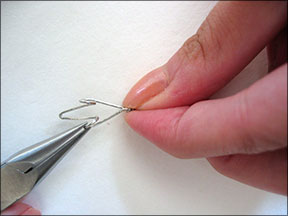
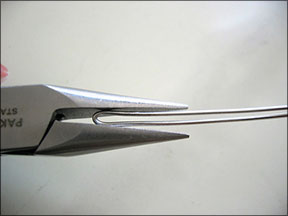 | Use needlenose pliers to bend a tight U at the midpoint of one wire. Then, open the ends until they are 5⁄8 in. (16mm) apart |
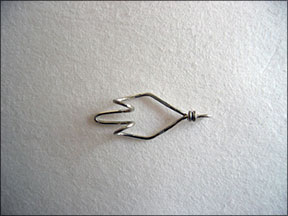
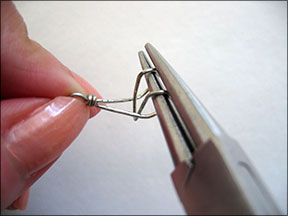
 | Measure 3/8 in. (9.5mm) from one end, and make a perpendicular bend. Using roundnose pliers, grasp both ends together just above the bend, and use chainnose pliers to wrap the bent end around the straight end |
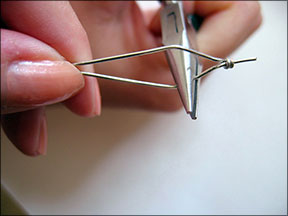
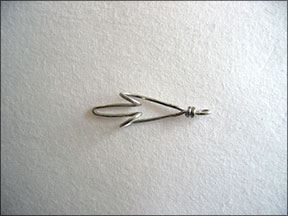
 | Insert chainnose pliers, positioning them one-third of the distance from the wrapped end, and then open them to spread the wires. Use chainnose pliers to grasp and pull the wires into a top-heavy diamond shape |
 | Repeat with the remaining pieces of wire to make a total of 13 top-heavy diamonds. Six of these diamonds will be bent into wide links and the other seven will be bent into slim links. |
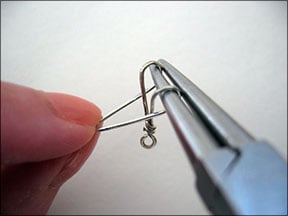
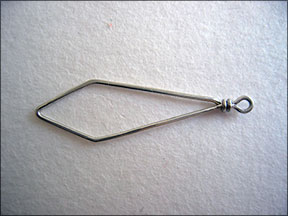
Make a connecting loop, and forge the wire.
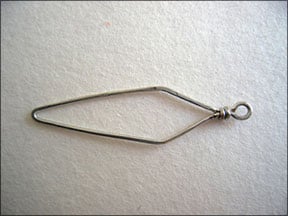 | Use roundnose pliers to bend the wire stem above the wrap into a connecting loop. . Do not hammer the wraps. Use chainnose pliers to rotate the loop 90˚ |
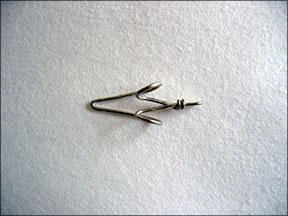
 | Put the diamond on a steel block, and use the flat end of a chasing hammer to hammer the wire and the loop to flatten and work-harden them |
 | Repeat for the remaining 12 top-heavy diamonds. |
Wide links
Make wide links out of six top-heavy diamonds.
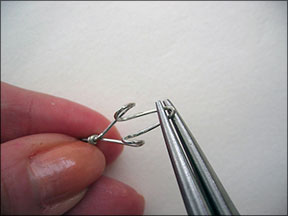
 | Use roundnose pliers to grasp a top-heavy diamond one-third of the distance from its non-loop end. Bend the point toward the wrapped loop and through the opening of the diamond, creating two parallel vertical loops. |
 | Continue rotating the point, repositioning your pliers as necessary, until the link lies flat. Bend the vertical loops 45˚ toward the center of the diamond. Repeat to make a total of six wide links. |
Slim links
Make slim links out of seven top-heavy diamonds.
 | Use roundnose pliers to grasp the parallel bends of a top-heavy diamond. Bend the loop end toward the non-loop end and through the opening of the diamond, creating two parallel vertical loops. |
 | Continue rotating the looped end through the opening of the diamond. Bend the vertical loops inward slightly so they fit through the opening. Continue rotating the looped end until the link lies flat. Bend the vertical loops 45˚ outward. Repeat to make a total of seven slim links. |
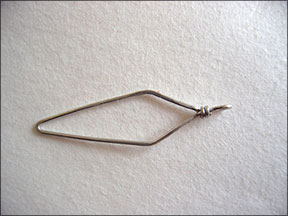
Bottom-heavy diamonds
Shape the bottom-heavy diamonds.
 | Using the remaining three wires, repeat steps 1-3. Insert your chainnose pliers, positioning them one-third of the distance from the unwrapped end, and then open the pliers to spread the wires apart. Use chainnose pliers to grasp and pull the wires to create a bottom-heavy diamond. |
 | Bend a connecting loop above the wrap in each diamond. Repeat step 6 to forge the diamonds, and then rotate each connecting loop 90˚ |
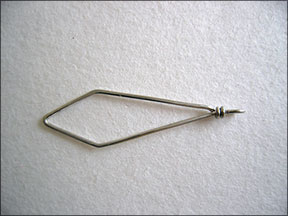 | Two of these bottom-heavy diamonds will be bent into transition links. The remaining diamond will be used to create a setting to hold the pearl. |
Transition links
Make two transition links out of bottom-heavy diamonds.
 | Use roundnose pliers to grasp a bottom-heavy diamond at its widest point. Bend the non-loop end toward the loop end of the diamond and through the opening of the diamond to create two parallel vertical loops. |
 | Continue rotating the non-loop end through the opening of the diamond. Bend the vertical loops inward slightly so they fit through the opening. Continue rotating the non-loop end until the link lies flat. Bend the vertical loops 45˚ inward. |
 | Repeat to make another transition link. |
Pendant
Make the pendant.
 | Follow steps 15 and 16, bending the vertical loops at an angle to create a shape to cradle a pearl. Use roundnose pliers to bend the non-loop end up slightly toward the loop end. |
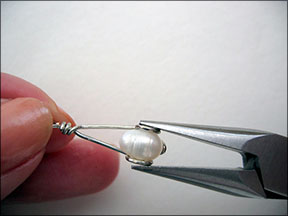 | Insert the pearl, and use needlenose pliers to tighten the vertical loops around the pearl. |
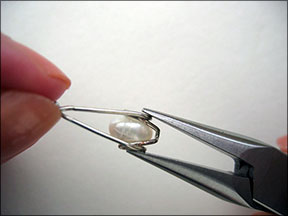 | Gently press the bottom of the wire against a firm surface to shape it tightly to the bottom of the pearl. Turn the pendant over, and use needlenose pliers to gently squeeze the vertical loops to secure the pearl. |
Y-connector link
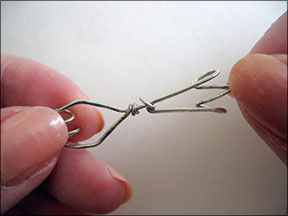
Make the Y-connector link.
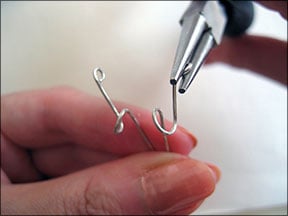
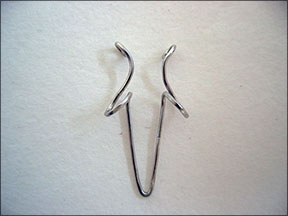
 | Cut a 4-in. (10.2cm) piece of wire. Bend the wire in half into a U shape, and then open it to form a V. Using needlenose pliers, grasp one end of the wire 1 in. (25.5mm) from the end, and bend it inward. Repeat with the other end. |
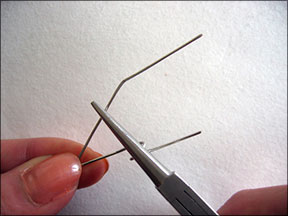 | Use the flat end of a chasing hammer to hammer the wire flat. Use roundnose pliers to make vertical loops at the bends. |
 | Bend the vertical loops outward at a 45˚ angle. |
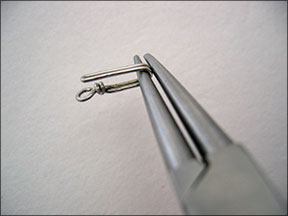
 | Use roundnose pliers to make a connecting loop at each end. |
 | Bend each connecting loop outward about 30˚to complete the Y link. |
Clasp
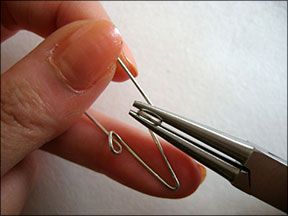
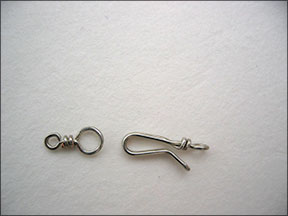
Make the hook of the clasp.
 | Cut a 2½-in. (64mm) piece of wire to make a hook. Repeat steps 1-3. Use roundnose pliers to make a loop with the wire stem. Avoiding the wraps, hammer the hook and loop. With roundnose pliers, grasp the center of the doubled wire, and then bend the doubled wire around one jaw of the pliers to form a hook. Bend the tip of the doubled wire up 45˚. Position the chainnose pliers at the bend you just made and squeeze the pliers to close the hook. |
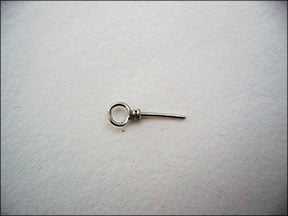
Make the eye of the clasp.
 | Cut a 1½-in. (38mm) piece of wire to make the eye. Place the center of the wire at the midpoint of your roundnose pliers, and make a loop. Use roundnose pliers to make two wraps below the loop. Use roundnose pliers to make a second, smaller loop on the opposite end of the wire. |
 | Hammer the loops, avoiding the wrapped section. |
 | Check the fit with the hook. |
Assemble the necklace.
 | Use chainnose and needlenose pliers to open the loop of the pendant. Attach the tip of the Y link, and close the loop. On each loop of the Y link, attach a transition link. On each end, attach an alternating pattern of slim and wide links, ending with a slim link. Attach the eye of the clasp to one end and the hook to the opposite end. |
Wire Savvy
- To make it easier to measure lengths of wire, secure a ruler to the end of a table, allowing the ruler to extend 5 in. (12.7cm) beyond the table.
- To form vertical loops that are the same diameter, move the wire along the jaws of the roundnose pliers as necessary.
- Experiment with making different-sized links or with changing the diameter of the link loops.
- To make matching earrings, shape two more pendant links, insert pearls, and attach the links to ear wires.
TMaterials
- Silver-toned craft wire: 20-gauge (0.8mm), round, half-hard, 64-71 in. (1.6-1.8m)
- Sterling silver wire: 20-gauge (0.8mm), round, half-hard, 64-71 in. (1.6m-1.8m) (optional)
- 1-3 freshwater pearls: 5 x 9mm, teardrop shape
- Pair of ear wires (optional)
Tools & Supplies
- Wire cutters
- Pliers: chainnose, needlenose, roundnose
- Steel block or anvil
- Chasing hammer
Related Articles

Soumak on Metal

How to Choose Silver Jewelry Wire

Cutting Jump Rings

How to Make a Carrick Mat Knot


The All-In-One Jewelry Making Solution At Your Fingertips
When you join the Ganoksin community, you get the tools you need to take your work to the next level.
