
Tube Setting Basics
Tube-setting is a stylish way to set round gemstones, and its a great first step toward more complex gemstone setting. Fabricating bezels to accommodate faceted gemstones of different shapes and sizes is an advanced skill to aspire to; however, tube-setting can more easily fulfill the desire to include faceted gemstones in your designs. Here you will learn how to tube-set a faceted gemstone using thick-walled tubing or using two telescoping tubes.
5 Minute Read
Tube setting is a stylish way to set round gemstones, and it's a great first step toward more complex gemstone setting. Fabricating bezels to accommodate faceted gemstones of different shapes and sizes is an advanced skill to aspire to; however, tube setting can more easily fulfill the desire to include faceted gemstones in your designs. Here you will learn how to tube set a faceted gemstone using thick-walled tubing or using two telescoping tubes.
Round, faceted gemstones come in many sizes, usually measured across the diameter in millimeters. Unlike gemstones, tubing is limited in size variations. Tubing can be reduced in diameter by following the same principles as drawing down wire.
Cut the Seat | |
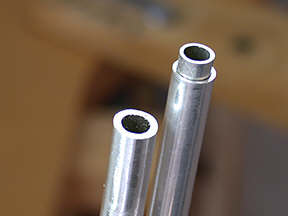 | Measure the diameter of the gemstone you wish to set. Make sure the outside diameter of the tubing is at least 0.5mm (1/64 in.) larger than the gemstone. |
 | If your gemstone is larger than the thick-walled tubing that is available, see the "Tube setting With Telescoping Tubes" sidebar. (Note: It's very important to get exact measurements. To accomplish this, use a brass slide-gauge or, for greater precision, a degree gauge. The slide-gauge will show whole millimeters; the degree gauge will provide accurate measurements to a tenth of a millimeter.) |
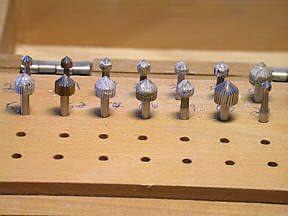 | Select a gemstone-setting bur that is only fractionally smaller than the diameter of the gemstone. |
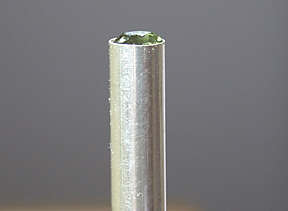
 | Cut the seat by drilling straight down into the thick-walled tubing to create a bezel.Be sure to lubricate the bur generously with beeswax or another bur-extending lubricant. Beeswax is a very versatile material and can also be used to hold the gemstone while testing the fit of the seat. As little metal as possible should be used to hold the gemstone. If the seat is cut too deep, the bezel lip will cover the crown facets, hiding the gemstone from view. However, if the seat is cut too shallow, there will not be enough metal to secure the gemstone, and it may fall out. If the seat is too small, use the next-larger bur until you have a seat in which the stone fits tightly. |
Cut the Bezel End of the Tubing to Size | |
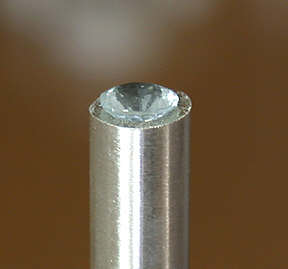
 | Before cutting off the bezel end of the tubing, you must consider the pointed bottom tip of the gemstone, or "culet." If you are using a back plate or setting the stone in a ring, the culet should not protrude beyond the bottom of the tubing. The correct positioning for the gemstone will allow the girdle to rest on the seat with a small amount of bezel lip rising above the girdle. |
 | If the bezel appears too thick, you may also sand the outside to reduce its thickness. |
 | Once you are satisfied with the fit of the seat and have measured the depth you will need for the culet, cut off that length of tubing with a jeweler's saw and a tube-cutting jig |
 | Carefully sand both ends to ensure that the tubing is level. |
 | Sandpaper that has been attached to acrylic sheet with spray adhesive creates a flat surface, which is great for truing-up metal edges. |
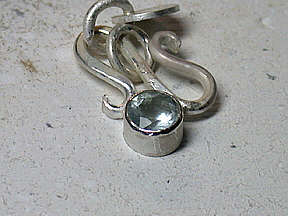
Solder the Tube Settings in Place | |
 | Prepare any other metal part of your project, including the pieces of tubing you have cut to use as bezels, and solder all the parts together. During soldering, it is best to focus the heat of the torch flame on larger pieces of metal to avoid melting the thin bezel lip. All soldering and finishing work should be done before setting any gemstones. If you have soldered the tubing to a back plate or other piece of metal, clean the interior of the tubing, and drill a hole through the back plate in the center of the tubing to allow for cleaning. |
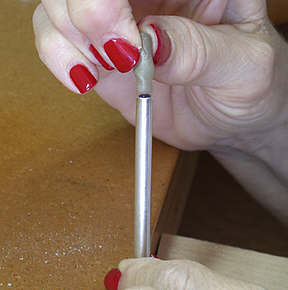
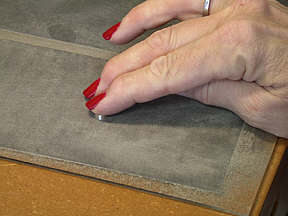
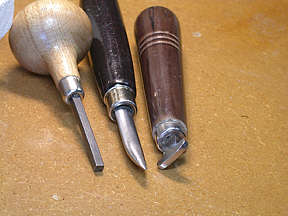 | A number of tools can be used to set the gemstone. A bezel pusher, burnisher, or bezel rocker will push the bezel down to hold the gemstone in place. |
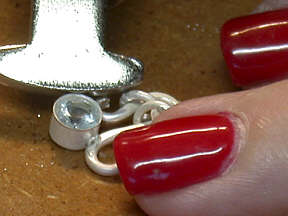 | Push or rock the bezel down onto the gemstone, alternating from opposing sides. |
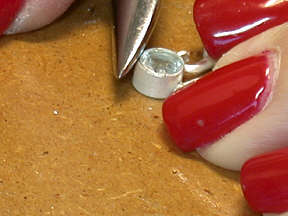 | Once the gemstone is tight, burnish the bezel smooth all the way around. |
 | Finish by hand-polishing using a polishing cloth or a buffing wheel. Tumble-polishing jewelry after faceted gemstones have been set is not advised, as the tumbling medium will chip the facets, making the gemstones look dull. |
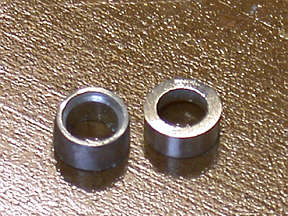
Tube Setting with Telescoping Tubes
Telescoping tubes describe a smaller piece of tubing sliding within a larger tube for a tight fit.
Make sure the gemstone fits properly — sitting tight and straight — in the larger tubing, with the smaller tubing supporting it from inside. Saw through both pieces of tubing, one inside the other, to get the height correct, leaving some height for sanding. Sand the inner tubing shorter if needed, checking the height until it allows the gemstone to sit in the tubing with the crown facets projecting above the bezel lip. As with thick-walled tubing, the goal is to use as little metal as possible to hold the stone.
Depending on the project you have selected, either solder the tubes to a back plate with one inside the other, or solder them together. Cut a seat with a setting bur to take off the flat edge on the inside tubing and provide the correct angle for the pavilion facets of the gemstone to sit without the risk of chipping them. Set the gemstone in the same way as shown in steps 3-13 for thick-walled tubing.
Custom Fit Tubing by Drawing it Down
If your tubing is too large for your purpose — either to hold a gemstone or to telescope inside another piece of tubing — use a draw plate to draw it down. Anneal the section of tubing you want to make smaller. Saw a 1-in. (25.5mm) slice of the wall away from one end of the tubing. Start a saw cut in the middle of the tubing end, and angle your cut to taper toward one wall.
Use roundnose pliers to crimp in the edges of the tubing.
Insert the crimped end of the tubing into the tapered side of a draw plate until it protrudes at least 1⁄2 in. (13mm) out of the narrow side. Grip the protrusion with draw tongs or heavy-duty pliers, and pull the tubing through the draw plate.
Check it for fit with your gemstone or with the other piece of tubing. Repeat this process, using progressively smaller holes on the draw plate, until your tubing is the size you want it. Be careful not to jump any holes in the draw plate; tubing draws down very quickly, and you can easily overshoot your goal.
Materials
- Faceted gemstones
- Silver tubing
Tools & Supplies
- Gauges: brass slide or degree
- Flex shaft, setting burs, drill bits
- Beeswax
- Jeweler's saw, 2/0 blades
- Tube-cutting jig
- Sandpaper, various grits
- Soldering materials: copper tongs, flux, pickle, soldering pad, solders, torch
- Bezel burnisher, pusher, and rocker
- Polishing equipment or equivalent flex shaft burs and mandrels
- Draw plates (optional)
- Roundnose pliers (optional)
- Draw tongs or heavy-duty pliers (optional)
Related Articles
Oval and Marquis Gemstone Layout Method

22K Gold Granulation on Turquoise Earrings
Re-tipping Platinum Prongs

Cabochon Stone Full Bezel Setting


The All-In-One Jewelry Making Solution At Your Fingertips
When you join the Ganoksin community, you get the tools you need to take your work to the next level.
