
Popular Textural Wax Patterns
Aside from the visual pleasure one derives from a textured surface, the biggest benefit is the ease in finishing the cast piece. No filing, no burs, no abrasive points, and no scratch removal compounds are necessary. Simply use a wire brush on the flexshaft for a soft satin finish. If a mirror finish is desired, then go on to the polishing wheel.
3 Minute Read
Aside from the visual pleasure one derives from a textured surface, the biggest benefit is the ease in finishing the cast piece. No filing, no burs, no abrasive points, and no scratch removal compounds are necessary. Simply use a wire brush on the flexshaft for a soft satin finish. If a mirror finish is desired, then go on to the polishing wheel.
The Knife Pattern | |
 | On top of your basic wax pattern, add any made of sheet wax, as they are lower in melting point and will give you better textures. The sheet maybe used as is by fusing the edge of the sheet to the base so they do not come apart. Another method is to melt spoonful of sheet wax and spread it on to the base. Texture can be cut directly into the build-up wax, but the result is not as attractive as the softer sheet wax. |
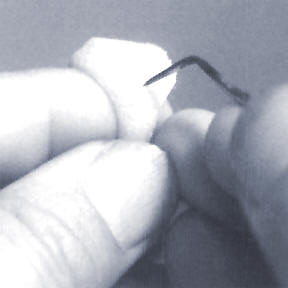
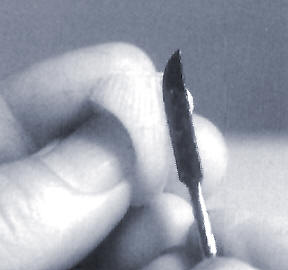 | Take a knife modeling tool, heat it lightly and holding at approximately 35°, slice into the wax to the depth of 1 mm. If the tool is too hot, it will only melt the area. You want it warm enough to cut into the wax and be able to push the cut up so the wax would be standing up. Repeat this cutting action in a series of rows to cover the designated area. |
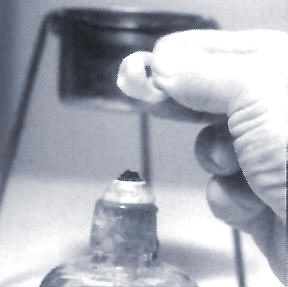 | Heat the textured pattern lightly over the flame. You want only the tip of the raised wax to melt…not the entire thing, so it is advisable to start from a distance and gradually work to a controllable level. |
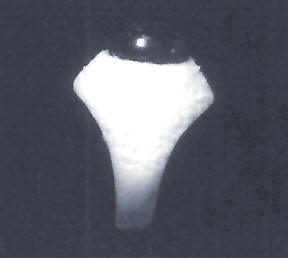
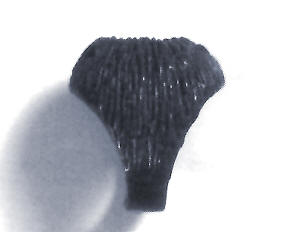 | Usually the tips of the row will have a nice soft melted effect, but at times the row will turn into a string of beads, which when polished will look like glittering gemstones. |
Granulation | |
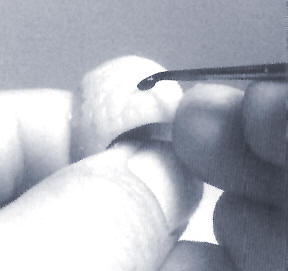
 | As in the knife pattern, melt sheet wax on the base pattern. Take a needle pointed tool and raise wax by inserting the point and pulling towards you. This will curl the wax upward. |
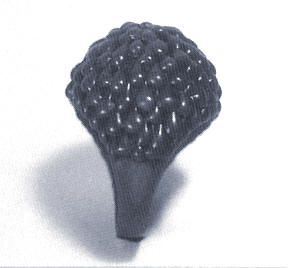
 | After the desired areas have been raised, heat over a flame and each curl will melt into a ball to give you the granulation effect. Heating it longer will make the balls melt into each other for a "melon" skin pattern. Heating it further will give you another pattern like a heavy moss garden. |
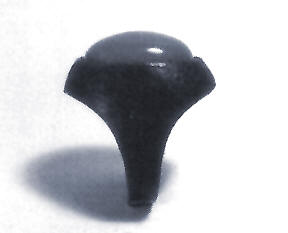
Tear Drops | |
 | Depending upon the size of teardrops, select appropriate size spoon shaped spatula. After heating the spoon, take up a load of wax; lightly reheat the tool and turning the spoon face down, place the hot wax onto the desired position. Just before the wax hardens, pull it upwards onto the pattern while slightly turning the tool so the thin edge is facing upwards to create the "teardrop". Add drops as desired. |
 | Small teardrops are started from the bottom of the ring and larger ones are added going up towards the top. Let each drop cool before adding another adjacent to it, otherwise they will flow into each other. It is a good idea to skip around, so that you would always be working near a cold teardrop. |
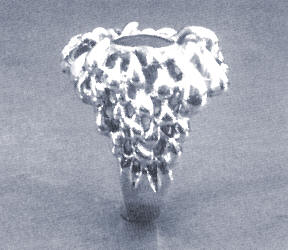 | Illustrated here are the spaced "teardrops" with openings between each drop, making it seem lighter as well as emphasizing each drop. |
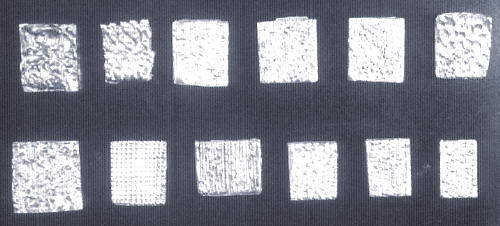 | A variety of textures are achieved through the above mentioned methods by utilizing other tools and varying the melting time. |
This article is an English excerpts from the book "Lost Wax Jewelry Making: The Build-up Technique" by Minoru Azama, printed in Japanese by Kashiwa Hobby Books. 1999, ISBN-4905588995.
The complete edition is available from Ganoksin in a digital format for only $34.95
 One of the few books available on wax modelmaking; "Lost Wax Jewelry Making: The Build-up Technique" by Minoru Azama, printed in Japanese by Kashiwa Hobby Books. 1999.
Azama process emphasizes building up wax as opposed to starting with a wax blank and carving away material. He uses this approach for organic as well as geometric subjects. The potential of this technique is unlimited!
Azama's work is outstanding, some of it so very precise and geometric that one would think it had been carved of hard wax. The book was written for students at the Japan Jewelry Academy, and Mr. Azama has been generous enough to write a complete English translation
Related Articles

Wax Build-Up Procedures

Manufacturing a Free-Form Pendant

Wax Build-Up Technique

Setting Stones in Wax


The All-In-One Jewelry Making Solution At Your Fingertips
When you join the Ganoksin community, you get the tools you need to take your work to the next level.
