Stone Setting Tools FAQs
Tim McCreight answers 13 of the questions about stone-setting tools most frequently asked by his metalsmithing students.
13 Minute Read
Here is a list of Stone Setting Tools FAQs as commonly asked by customers. Questions range from preparation of tools, kinds and types of stones to use, to the kinds of burs to use, and much, much more.
How important is it that I know the hardness of the stones I'm setting?
Well, you won't die from not knowing, but it's a great help to understand everything you can about the gems you're working with because this information will allow you to select the best tools for the job. Most agates test around 7 on the Mohs scale, while annealed steel is around 6. This means that if you slip with a steel tool, it won't absolutely for sure make a scratch on the stone. If you were setting a material like amber (hardness 2-1/2), you'd be better off using tools made of copper (hardness 3) or a plastic, most of which are soft enough that they won't scratch.
Perhaps more important than the hardness is the condition of the stone. Get in the habit of checking each stone under a loupe for hairline fractures, irregularities in the shape, inclusions, and any other factor that might come into play during setting. In some instances, you'll want to position the stone to hide a flaw, and in others you'll want to know where not to push.
Do I need to do anything to prepare a bezel pusher before I use it?
Most bezel pushers I've bought arrive with sharp edges that I think need to be sanded down. I use a medium grit abrasive paper to round off the corners gently, then follow up with a fine grit to smooth the edges. I rub the face of the tool with this same paper to create a fine tooth on the pusher. This will help the tool get a purchase (a little grip) on the bezel.
How do I hold on to an object so I can set a stone in it?
This is a huge question, first because each shape requires a slightly different answer, and second because there are many tools designed to do just this. Here are a few of the most popular solutions, starting at the top of the heap.
Perhaps the ultimate tool for setting, certainly the top choice among professionals, is a system called BenchMateT. This consists of a mechanical bench pin that attaches to the front of a bench. What makes the BenchMateT so popular are the many attachments that make it adapt to a wide range of needs. A rotating workholder resembles a ring clamp except that the traditional wood and leather clamp has been replaced with machined steel and Teflon. The holder rotates to make bezel work easy but can be anchored to secure the work for hammer setting. The basic unit costs about $150 and a stone-setting package adds another $85, but serious tool junkies will never regret the investment.
A similar tool that does not attach to the bench is a heavy steel sphere called a graver's block. It is divided at the equator into two halves with a ball bearing between the two parts so the top rotates easily. The top half contains a small vise that is operated with a removable key. Unlike most vises, the top of this one has a series of holes that can be outfitted with removable pins. These pins, the arrangements of the holes, and the fact that one side of the vise pivots all combine to create a device that can hold almost any shape.
The curve of the ball allows the base to be tilted at any angle, the weight of the tool keeps it from sliding around on the bench top, and the rotation makes it possible to bring the work to the worker instead of the other way around. Though it is most often associated with engraving, I use this tool whenever work needs to be held. The only drawback is cost: about $400.
A simpler (and cheaper) tool that looks a bit similar is a universal holding tool, a small version of the vise on the top of a graver's block fitted with a wooden handle below. In use, it is held against the bench pin. This is a handy tool, but be careful about quality: I'd prefer a brass or steel version to the aluminum ones that are far more prevalent. A nice feature of some models is a detachable handle. This makes it easy to grip the holding portion in a bench vise.
A traditional tool favored by stone setters for decades, called a shellac stick, is a handle topped with a platform of some sort that is covered with a layer of orange shellac. A bit of broomstick might suffice, though you can buy or make a fancier version by attaching a disk at the top. Shellac flakes (the size and shape of breakfast cereal flakes) are a caramel-colored natural resin that becomes soft when heated.
In use, the workpiece is warmed slightly and pressed into the shellac. It will cool in a minute or two into a rigid cement that will secure the jewelry to the handle. When the setting is complete, the piece is pried loose by levering it lightly with any small tool < an abrupt flick will break the piece free. Traces of remaining shellac are dissolved off by soaking the piece in denatured alcohol.
Many jewelers are experimenting with thermoplastics like Protoplast® and Friendly Plastic®. These plastics soften in hot water to a pliable substance that can be packed around a work to secure it for setting. The plastic can be molded into a grip all by itself or wrapped onto a wooden handle. For some shapes, I've found it useful to mold the plastic into a block that can be set into a vise.
When the setting is complete, the plastic is warmed with hot water or a hairdryer and the piece is pulled free. Most stones will not be damaged by the relatively low temperature involved, but caution is advised.
What's a millgrain tool?
This is a miniature roller (it resembles a pie crimper) that presses tiny ornamental dots around the edges of a setting. The term comes from the Italian word mille for thousand and refers to the trail of tiny domes or "granules" created when the hardened steel tool is dragged across a soft metal surface. Millgraining is most commonly associated with cut square settings (a.k.a. box settings), though it can be used to advantage on the edges of wide bezels, too. Millgrain tools are usually sold in sets, but for most people a single size will be sufficient.
 |
| Millgrain tools are used to press tiny dots around the edges of a setting; photo courtesy Stuller |
What bur can I use to trim around a bezel when the stone is set?
None! No sandpaper either! Burs are made of hardened steel and using them near a gem risks damage if the tool gets away from you. Most abrasives - and certainly the ubiquitous silicon carbide - are harder than many stones and will scratch them.
The one exception here is a wheel made of pumice powder and rubber. These are sold under several names and might appear as blue, beige, or pink. Get in the habit of testing the wheel on the underside of the stone before you set it to be certain the wheel will do no damage.
What's the difference between all those setting burs?
A quick look at a catalog is enough to confuse even experienced setters. Three shapes of burs are used most commonly to prepare a mounting for round faceted stones: setting, Hart, and 90° (or bearing). Each of these three shapes is available in at least three grades of steel, and since they can also be found from a range of suppliers as well, it quickly gets confusing. The choice of which tool to use probably depends on personal style more than anything. The setting bur is the most "foolproof" but offers the least flexibility. If you don't have exactly the size to match your stone or if the stone is asymmetrical, a setting bur's use is restricted. A Hart bur, on the other hand, is versatile but can make some nasty cuts in the wrong places if it gets away from you.
Once you've decided on the shape you want - and you'll probably need to experiment with each to figure this out - you'll need to decide which tool to buy. Let your wallet be your guide. The higher the cost, the better the bur in terms of the steel of which it's made, the precision of the cuts, the hardening treatment, and the quality control at the factory. Professional setters won't bother with anything less than the best where the higher cost is repaid by efficient operation and longer tool life. At the same time, if you're setting faceted stones once or twice a month, you can probably get along fine with a cheaper set.
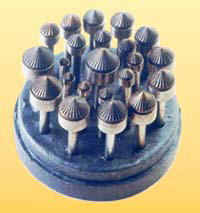 |
| This set of burs is designed to help keep stone seats level, but there are many kinds of burs available on the market. Courtesy Rio Grande. |
I have setting burs for round stones, but where can I get the oval burs to set oval stones?
Dream on! To set oval faceted stones in prongs, I use a round (a.k.a. spherical) bur to cut notches in each prong. Some setters prefer a Hart bur, and while this works, I like the rounded notch because it seems to allow the prong to bend over the stone gently.
How should I polish prong settings?
Carefully. First, I go over the whole setting with a rotary bristle brush with a little mild abrasive compound like ZAM or white diamond. Run the tool at a medium speed and be careful to keep the tool dancing lightly across the surface. If you pause in one area, it's possible that the brush will wear a groove. I follow this by rubbing the tip of each prong with a leather or felt buffing stick treated with rouge. I rub the stick firmly over the prong in the direction of the stone, polishing the prong as it is pressed down one more time.
What are polishing strings?
Polishing strings are used to polish inside small areas and are very handy to make the inside edges of prongs reflective. Traditionally, a cluster of cotton strings about a foot and a half long are tied together at one end and hung from the front of the bench. In use, a single strand is taken up in the fingers, pulled taut, and rubbed with a polishing compound such as tripoli or rouge. The string is held out straight from the bench and the setting is rubbed back and forth along it. As simple as it sounds, this process, called thrumming, is very effective.
How can I hold on to a stone while I'm testing it for size in a bezel?
Generations of stone setters have used beeswax to help them lift a stone into position. I use a lump of natural beeswax about the size of a walnut that I have molded into a blunt cone. The wax is just sticky enough to lift the stone but releases its grip with a tiny twist. The advantage of having a reasonably large lump is simply that it makes it easier to locate the beeswax on a crowded bench. Another version is to press a wad of wax onto the end of a dowel or graver handle.
Some beeswax is the correct consistency when you get it, but if it's not right, you'll be pleased to know it's not difficult to modify. If the wax is not sticky enough, melt it (I use an old can) and stir in a little turpentine. Even a few drops will be enough to alter the wax. Allow it to cool and mold it into shape. If the wax is so sticky it doesn't "let go" when you want and if it leaves a residue on the gem, thicken the wax by kneading in a little charcoal dust.
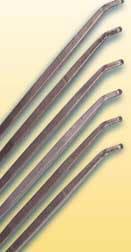
What gravers should I use for stone setting?
This is a little bit like asking a chef which knife to use: each professional will have a different answer, and each will probably be passionate about it. Let me offer some thoughts, but with this caveat: the correct tool is the one that gets the job done. If it works for you, it's the right tool!
To raise beads, I prefer a round graver, probably something around a #52, though of course the size will be in proportion to the gem. A person who only rarely uses bead settings can manage with a single tool sharpened to a compromise shape. In the first step of the process, we need a sharp tip that will dig into the sheet and shear off a curl. At the end of the process, we'll need to press the curl over like a prong, a process that puts a lot of stress on a thin tip. I sharpen the tool to a steeper face angle than usual to create a strong tip.
An even better solution is to buy three identical gravers and sharpen them to different angles. By using three tools with identical profiles, we are guaranteed that each graver sits neatly into place when it is laid into the groove. Use a low-angle "sharp" graver to slice into the metal around the stone and carve out a mass of material that will become the prong. As this curls up, shift to a second tool that has a steeper face angle. This will allow you to lift without fear of snapping off the point. When the prong is standing vertically, switch to the third tool, the same size graver sharpened to an almost vertical face. The tool resembles a bezel pusher and with good reason: the goal at this stage is to press the prong down over the stone.
To carve away material around a stone, for instance in a box setting, I use either a square or flat graver. In either case, the belly of the tool should be polished to a mirrorlike shine to make the setting highly reflective. To polish the tool, first sharpen as usual, then rub it firmly across a sheet of 4/0 crocus paper onto which you've rubbed some standard polishing rouge.
How can I hold a jewelry piece on my bench pin while I set a stone and still have both hands free to work?
A graver's block or BenchMateT would work, but here's a traditional trick that might catch your fancy. Take an old belt or a similar strip of leather or cloth and tie it in a loop that drapes over the bench pin and reaches almost to the floor. Set your jewelry piece under the strap and lay your foot into the loop. As you press your foot down, the strap grabs the work and clutches it to the pin. To rotate the work, just lift your foot, move the work, and drop your foot again.
I was taught to set a bezel with a burnisher, but then I heard about a bezel pusher. Which is best?
Again, this is a case of a choice between right answers: whatever works for you is the right choice. I prefer to use a bezel pusher first because it allows me to direct pressure squarely against the bezel to press it over the stone. When the bezel wall is securely laid against the gem, I use a burnisher to smooth and harden the metal.
A variation on a pushing tool can be made from a toothbrush or chopstick. When you are worried about using a steel pusher - as, for instance, when setting amber, shell, or coral - cut either tool to a convenient length and file/sand the end into a soft blunt shape. You'll still want to be careful about dragging the tool across the gem, but if you slip, the wood or plastic will do a lot less damage than a metal tool.
Related Articles

How to Make Foredom Handpiece Shield

Modified Super Tools

Modified Setting Bur with Safe Edge Tool

Graver Detailing and Sharpening


The All-In-One Jewelry Making Solution At Your Fingertips
When you join the Ganoksin community, you get the tools you need to take your work to the next level.
