
Small Bench Tools Descriptions
This selected list describes a number of small, easily made tools which can improve efficiency, speed and ease of working at the bench. While by no means a complete listing of the tools one has at one's bench or of vernacular goldsmiths tools it demonstrates examples of the kind of thinking required for ease of working at the bench. Remember, speed and efficiency give one more creative time. Each tool represents a useful production aid and involves skills applicable to other areas of metalworking in it's making and discussion.
21 Minute Read
This selected list describes a number of small, easily made tools which can improve efficiency, speed and ease of working at the bench. While by no means a complete listing of the tools one has at one's bench or of vernacular goldsmiths tools it demonstrates examples of the kind of thinking required for ease of working at the bench.
Remember, speed and efficiency give one more creative time. Each tool represents a useful production aid and involves skills applicable to other areas of metalworking in it's making and discussion.
Soldering Weights
Soldering weights are used to hold items down while soldering. Traditionally they are made with rectangular blocks of steel. 1/4″ steel plate and angle iron can be used. Even a sardine can filled with typemetal or lead will work. A 3mm (1/8″) round or square steel rod emerges from one end of the weight or is brazed in place using a white paste flux, silver, silver solder, brass or copper to fix it in place.
Sometimes one makes one out of a sardine can with the hold-down rod brazed in place and the can filled with lead or typemetal. This involves safety concerns when melting the lead or tin in place. (Warning-ventilation hazard) Old needle files serve well for the rod. They are much faster than any third arm as one has different sized soldering weights and they are rapidly swung onto the work to hold it in place. They are often used in combination with a nest.

Soldering Nest
 A soldering nest is a loosely wound bundle of fairly thin iron binding wire. One spreads one fingers slightly to wind the wire (.016 or thinner) so as not to trap them by binding them too tightly. Several sizes of nest are useful but in general three fingers will produce a good sized nest for most work. One winds at different angles to create a loosely interwoven pad about 4mm (3/16″) thick.
This gets the work being heated off the firebrick allowing heat reflected from the brick to work on it. Because iron is a poor conductor of heat it holds heat after the flame is removed elsewhere and acts like an electric burner under parts of the piece one is not heating with the torch because it glows while one moves the flame elsewhere on the piece.
It is most useful with broader flame torch types; those professionals working only with a mini-torch would not find it as useful. Such a nest emulates the action of soldering on a charcoal block and provides more all around heat, albeit without offering the reducing atmosphere conditions of the charcoal block. Thin iron wire is however much cheaper than a charcoal block and lasts for years. One can also create reflecting conditions by inserting pins or small pieces of stainless steel or titanium sheet into firebrick or charcoal.
Earring Post Tweezers
Self-locking tweezers may be bought and then reshaped to various useful forms such as clamps for holding heads on rings and holding stonesettings together while soldering. A pair of the cheaper, chrome plated steel self-locking tweezers with a triangular notch filed in place at each of the ends automatically grips and snaps earring posts to a right angle for quick earring post soldering. To use them one simply throws the earring posts onto the table and they are easily and quickly held at 90o no matter what angle they are gripped from.
Note that the ends have been filed so that when using them they smoothly grasp and guide the earring post into its groove. Again, other grooves, slots and holes can be installed to hold various kinds of assemblies together while soldering. If made of titanium or if titanium ends are attached to the self locking tweezers they cannot solder together or to the metals being assembled and so become a superb soldering jig.
Flex Shaft Emery Mandrel
This can be made from a nail but it is better to purchase one. Sometimes they are called split mandrels. The commercial one is better because it has a 2mm shank. This fits into collet type production flex shaft handpieces as well as requiring far less work to change bits in the standard #30 Foredom® handpiece which many people use.
As with all heavy or potentially heavy and large flex shaft tools the first thing one does is to cut one third of the back of the shank off to shorten it and have the tool butt up close to the jaws of the chuck. This prevents the tool from suddenly bending to a right angle when in use and taking out one's knuckle.
One uses emery belt sander material called shop roll to wind around the tool. If ordinary emery paper is used it disintegrates into a fine dust and the glue used on emery cloth melts with the heat of friction so the abrasive effect is lost too quickly.
Belt sander material on the other hand is designed to run hot and not fly apart easily. I suggest a fairly coarse grit, perhaps 150 or 180 as it wears, rapidly providing a series of grits on the same tool so that one has control over grit size by the position the work is held on the tool.
It can be used to replace certain filing needs, spot finishing, edges and in fact all finishing on a piece prior to polishing. As it wears one uses different parts; when worn through it is torn back and then rapidly across baring new material. It is nice to have several of these because then one has varying diameters and grits sizes available for different kinds of jobs.
To make it one uses 2.5cm or 1″ wide shop roll belting. One tears off a strip about 4″ or 10 cm long and places the end of it into the slit in the mandrel. The shaft of the mandrel is on the right of the emery strip as you begin to wind it on. Having the shaft in the other direction causes the strip to unwind with a flapping roar when used. Winding it on to the mandrel with the fingers looks something like someone rolling a cigarette. It is rolled as tightly as possible with the fingers and then one packs it further by repeatedly rolling the mandrel along the desk or on a piece of wood with a large flat file using a fair bit of pressure to completely pack it.
One uses an 18 g (1.2mm) iron binding wire to fasten the roll in place. Iron wire of this gauge stretches when tightened in such a way that one obtains good pressure on the emery roll. Other thicknesses or iron wire, brass, copper and other wires do not seem to work as well.
A three inch or 7-8cm long piece of wire is taken and bent around the roll on the mandrel which is kept tight with the fingers while wrapping it. Then one twists it with flat nose pliers, tugging away while gripping and tightening so that it is very snug. If you tighten too far the iron wire may snap off close to the roll so be careful as it tightens.
The twisted wire is cut off with snips about 1 cm (3/8″ or so) away from the mandrel. It is then bent down to the shaft of the mandrel as shown in the diagram with the pliers which burnish it down against the shaft of the mandrel over the end of the packed shop roll so that one cannot feel anything sharp when one touches it.
One can burnish the wire tight into a safe position and smooth it with the jaws of the flat nose pliers as shown in the diagram. This prevents damage to your fingers when using it. Last of all one takes the same pliers and one gives it a zigzag kink on the opposite side from the twisted wire. This completes the tightening of the roll. when it is worn tear it back and then sharply across to bare new abrasive materials.


Cardboard Disc Sander
A very useful tool is a cardboard disc sander. One uses the side or large flap of a fairly rigid corrugated cardboard box. Make sure it has not been bent or creased to damage its rigidity. One side should be smooth. The disc will be placed onto the tapered spindle (mandrel) of a polishing machine. One begins by measuring the distance from the middle of the tapered mandrel to the closest part of the polishing machine or its hood with dividers. The dividers are then closed slightly so that the disc clears all parts of the polishing machine and hood when rotating.
Remember that a cardboard disc will tend to ride up the mandrel in use so give sufficient room for this. One then scribes the appropriate sized circle onto the cardboard making sure that the center hole actually penetrates the cardboard. The disc is now cut out carefully with an X-acto® or similar knife.
Remember that most injuries in art schools are from X-acto® knives and therefore do this carefully. Then one takes a sheet of 220 grit emery paper, spreads rubber cement (not white glue-it dries in lumps and ruins the tool) onto the slightly corrugated side of the disc, places it on the back side of the emery paper and turns it with some pressure from the heel of your hand so as to evenly spread the rubber cement on all surfaces to be joined. The disc is then lifted off and fanned over the emery paper so that both surfaces become tacky, dull and mat. The two surfaces are then pressed firmly together and smoothed to effect a good join. One then trims the emery paper flush to the cardboard disc using knife or scissors. Keep it close to the cardboard.
Wearing safety glasses the disc is now placed onto the mandrel while it is spinning so that it rides up to the third or halfway level on the taper, piercing through the emery paper. Get your hand off and away from the rotating disc quickly as any emery paper sticking out past the cardboard can inflict what might feel like the worlds worst paper cut. One holds the back end of a steel file or another piece of steel onto the edge of disc and paper to trim off any overlap and make the edge safer. The motor is now turned off and the disc removed. The area around the center hole is now strengthened by melting a hard file-a-wax or other wax around the center. If one quickly places a torch onto it and removes it fast the wax may melt and run into the cardboard about the center making the hole last longer in use.
Better than wax is 5 minute epoxy which can make a very permanent strengthening support. If using epoxy let dry before replacing on the mandrel. If using wax make sure it is dry and set as otherwise a vertical spray of wax straight up ones body occurs when the motor is turned on. When in use there are a number of cutting speeds available depending upon how close one is to the spindle, further out is faster; closer in is slower. Within a very few minutes there are also a number of grits available as the more used parts of the disc become finer so that one has a lot of choices in speed and grit size all on the same tool and easily accessible with a minimum of hand movement. To stiffen the disc while it is running one can hold a piece of wood behind it on the paper side while it rotates so as to obtain a more rigid surface for faster flatter cutting.
The tool is used to sand flat surfaces onto jewellery and is unsurpassed for reshaping commercial and handmade chasing tools and hammers. One can go directly from this sanded surface to a polishing buff. On steel one uses Fabulustre® on a buff and the process of completely refinishing a hammer can be reduced to five minutes or less. It is absolutely essential that the air and dust intake on the polishing machine be completely blocked off with a piece of cardboard when using this disc as sparks can be produced which will set the cotton lint and dust in the filters on fire. This is a very real danger of fire with such flying sparks-I've seen it happen twice.
If one places a polishing compound such as tripoli or Fabulustre® onto the smooth paper side of the disc then one has an extremely fine polishing lap that can produce superb flat surfaces on jewellery that has flat surfaces. If one makes a traditional version of this disc one can rubber cement a piece of linen writing paper onto the paper side for an even smoother polishing effect. Plain paper would probably work well. Several discs with different starting grits are useful to have around. For a minimum cost and preparation time this type of disc sander offers a great deal in return for cost and preparation time.
Riveting Pliers
One obtains a pair of chain nose pliers either new and high quality or from a flea market and cheap and converts them into riveting pliers. To test for quality one squeezes the plier handles as hard as one can in the hand. If they feather then all is well. if they collapse and bend then they were not the best.
Note that at least one student I know has permanently bent a pair of pliers while testing them at a tool store; be careful if you might have to buy them - luckily he didn't. One should use box joint pliers (where one arm of the pliers is inserted through a hole in the other rather than next to the other arm) as they are far superior in strength and stability to side joint pliers. Most pliers will be soft enough to saw into and file. The pliers are cut off fairly close (8-12mm) to the joint as greater pressure is developed closer to the joint (the fulcrum) of the pliers than further out.
After cutting off the end of the chain nosed pliers the jaws are filed into as shown below, probably about five to six millimeters in. The width of the gap is dictated by the thickness of the commercial or hand made joint that one chooses to use. My favorites are the sterling (and gold) joint and catch systems from Fischer GMBH in Germany.
The order numbers for great quality heavy duty silver joints and catches from their catalog are:
| Order number | Description | |
| Page 251 | 210/N/70 | nickel silver pinstems |
| Page 253 | 278a | sterling silver catches |
| Page 253 | 286 | sterling silver joints |
The pliers made will be for only one size of joint or for one specific riveting problem. the gap filed in between the jaws should be just slightly less thick than the joint used.

The plier jaws are marked using dividers; measuring as shown from one edge of the jaw and from the back. This is done on both top and bottom jaws so as to locate the line intersections one each jaw directly above each other. When using the dividers make sure you use the same side of the jaws to measure from to ensure accuracy.
A center punch may be used on the intersecting lines scribed on the insides of the jaws to start an indentation. This is then followed by a round burr to create a hemispherical dent. This is now polished with a wooden matchstick mounted in the flex shaft and polishing compound and is done on both the top and bottom jaws.
The jaws are now filed and shaped so that they strongly support the riveting indentation and from the top view come pretty close to the curving outer surface of the jaws. This allows the pliers to be moved back and forth while gripping the rivet head in the joint without hitting anything. This is how they are used to rivet the hinge pin into the standardized commercial joints.
The riveting pliers are used at the end of the making of a pin, after polishing and setting; the very last thing except for final adjustments of the pinstem. The joint is opened, the pinstem inserted and if the rivet does not automatically stick out of the hole on each side of the joint it is pushed through so that it does. The joint is tightened over and under the rivet sticking out using normal chain nose pliers. Then one grips the rivet with the riveting pliers so that each end of it is trapped in the round indentation. Then one swings the pliers as far as one can about the joint while gripping them tightly.
This action rivets the rivet wire and burnishes it producing a polished round headed mushroom rivet. Usually to even things out one then flips the pliers over and does it again so that each end of the rivet is burnished by each side of the jaws. Following this operation the pinstem is cut flush with the far side of the catch, tapered to a point and then polished so that it slips easily though the cloth when in use.
Jump Ring Closer
One can create a concave domed hole in the end of a piece of steel rod which just fits over a closed jump ring when flat on a surface plate or anvil. Just as with making a bezel rocker (the following description) the end of a round rod is drilled into with a smallish drill bit (1-2mm). When the concavity is made with the round burr the burr automatically stays centered in the previously drilled hole and the concavity is then afterwards polished using a piece of wood and steel polishing compound set into the flex shaft. The jump ring size to be closed is chosen and one makes a jump ring. It is set into the concavity and the metal of the end of the rod is filed back until the jump ring lies flush within the end surface of the rod.
To close rings in quantity one throws them onto the surface plate or anvil and taps them closed with the punch. Because the punch was made relative to the size of the specific ring when flush with its end surface it closes them neatly, quickly and securely. This production tool is used in jewellery factories in Providence Rhode Island among other places.
Bezel Rocker
Bezel Rocker. The making of this tool is the same as was described above for the jump ring closer and is essentially a rod with a cup-shaped depression in the end into which the setting fits. A variety of sizes are needed as one ideally has a rocker which fits the stone one third of the way into the concave hemispherical cup. The cup is rocked north-south, east-west and rotated to set the stone.
The procedure is very fast and is a clean setting method, especially for smaller stones. The tool may be made by drilling into the center of a steel drill rod some 5 mm and then going in with a round burr (which follows the drill shaft) to cut the concave hemisphere. It is then polished using felt end buffs or a piece of soft wood in the flexible shaft with some polishing compound, hardened and tempered to a light yellow.
Cutaway view of bezel rocker on left and on the right showing how the tubing setting fits one third of the way into the polished hemispherical cup.
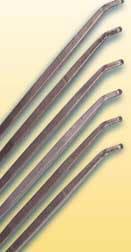
Railroad Spike Stake
Railroad spikes make good stakes. They may usually be obtained free by asking the local rail yard for some. Sometimes they are first heated up and the head bent over almost parallel to the shaft of the spike so that it can be clamped in a vise and provide a 'head' that is similar to the commercially available ones that are stuck into holders that are held in the vise.
So too do large bolts and trailer hitches when reground slightly. Dee Fontans and I use several Vitalium® and similar hard brightly polished metal replacement hip joints as stakes. Medical companies have salespeople who have samples of these which they show around and which are superseded and become available cheaply or free for use as stakes. Almost any piece of interesting metal junk may make a good stake if finished.
Copper Scoop
A copper scoop is an essential item if one has a leather or cloth bag hanging from the cutout in ones bench instead of a drawer. To remove filings one simply taps the bag at the center and then scoops up the filings to prepare the bag for the next metal type. to use with a drawer type bench one makes sure that one side of the scoop is flat so that one can use a bench brush or shaving brush to sweep the filings from the flat bottom of the drawer into the scoop. The scoop is also extremely useful for carrying hot items around the room on the way to pickle and in general for isolating specific parts while one is working on them.
Copper conducts heat well and so allows one to easily carry multiple items about. One cuts out an egg shaped piece of copper some 6-8″ (15 cm or so) long and then shapes it with hammers into wood and over a stake until it takes the shape shown. Such a scoop is also really useful for delivering metal into a crucible when alloying. We have several in different sizes around to allow for different alloy additions and various types of jobs.
Sometimes one wishes to have smooth even falls of powders such as solder filings fall onto surfaces. If one files a series of small notches into one side of the scoop one can rub a tool along them creating rhythmic vibrations which cause the powder or filings to fall evenly from the lip of the scoop.

Chuck Key in Handle
An old trick is to install a flex shaft chick key into a file handle. This cuts down on the time required to use a #30 Jacobs type chuck by at least 20-30%. One can place one's thumb on the cog teeth of the chuck and press the foot pedal to close the jaws quickly on a tool held in between them. The moment the cogs start moving slide your thumb off them to avoid friction burns on it. This combination of rapid jaw closing and use of the chuck key in the handle for the flex shaft make the #30 handpiece comparable in efficiency to the standard production lever-type hand piece.
The advantage of the Jacobs chuck is that one can put tools of various sizes into it, from various sizes of drill bit to toothpicks and match sticks. To make the tool one chooses a file handle comfortable for your hand and the axial rotation required of it in use. The cross bar of the T-shaped chuck key only comes out in one direction so when trying to knock it out if it doesn't move after a blow or two turn it over and knock it out in the other direction.
One usually grinds several rough notches into the shaft of the chuck key. Pilot drill the file handle making sure that one drills straight down the axis of the handle. Then one drills up to the correct size of the chuck key shaft. I usually then drill into the file handle at several slight angles through the hole previously drilled. This combination of a hole with wider parts inside the handle and a chuck key shaft with notches allow the epoxy glue used to function as a "castable rivet" mechanically locking the shaft in the hole as well as gluing it in place in the handle. It also gives any excess glue some place to go and so avoids accidental splitting of the handle from internal pressure when tightening the shaft in with a hammer. Daub the shaft with epoxy and push it in. If there is any glue which squeezes out let it set until like a hard gel or caulk: not set too hard.
When in this condition one can peel it off the tool. It tears easily off close to the opening in the handle and is quite clean; an earlier removal would have smeared the glue. 24 hour epoxy is better than five minute as five minute epoxy may be more brittle with time and may yellow, though this is not an issue in this case. On my own version I have used a large file handle which tapers down towards the front. This is placed just to the right of my bench pin and fits into a "holster" made of a metal rod. When I wish to use the tool I hold my palm open and draw it towards me. The back of the file handle brushes the heel of my hand and it is automatically in place in my hand ready for use. To put it away I literally throw the tool into its holster. Besides never having to look for the tool on the bench this procedure means not having to pick up and put down the tool which cuts the time required to use it.
Bench Brush/Burnisher
A very useful tool for stonesetting and general goldsmithing work is a bench brush. Often this is a shaving brush. A traditional German goldsmiths version is a rabbits foot. One can also take a brush intended for painting with acrylics or oil, cut the handle short and attach a tumbled agate or haematite stone from the rock shop to it.
This may easily be done with epoxy glue and perhaps as shown the use of a piece of metal tubing into which it is glued. A conical one works well but something with a bit of hook to it allows one to easily burnish edges of sheet metal. A stone burnisher will produce a better finish than a steel one and retain its polish longer as well.
Related Articles

Polishing and Finishing Aids
Stone Setting Tools FAQs

Green Bench Tips – Part 1

Customized Loose Head Holder


The All-In-One Jewelry Making Solution At Your Fingertips
When you join the Ganoksin community, you get the tools you need to take your work to the next level.
