
Wax Turning Technique
This paper will describe how to turn a block of wax into a pottery of approximately 1 1/4 inches in diameter and 2 inches tall. The pottery was turned in two pieces. The lower section below the ring below the inlaid stones and the portion above the ring. I have turned wax that is 3 inches thick..
8 Minute Read
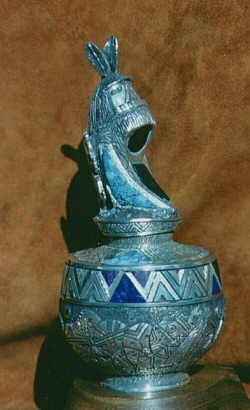
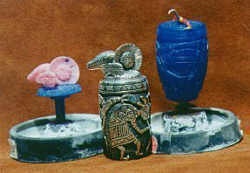
This paper will describe how to turn a block of wax into the shape shown below. The pottery is approximately 1 1/4 inches in diameter and 2 inches tall.
This is an example of how large piece may be turned using this process. This piece is 3 1/4 inches in diameter and pottery portion is 3 inches tall. The pottery was turned in two pieces. The lower section below the ring below the inlaid stones and the portion above the ring. I have turned wax that is 3 inches thick.
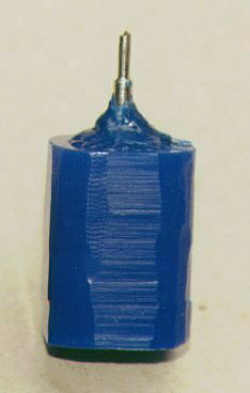
 | This photograph shows the pottery and the lid. Once the wax is turned the design can be engraved into the surface of the wax. |
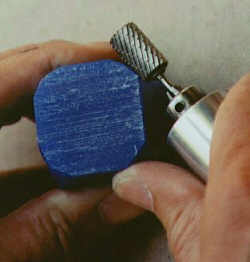
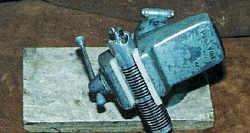 | This is a Pana Vise that will be used to hold the Foredom handpiece. It may be purchased in most any hardware or hobby store or through one of the Jewelry supply catalogs. |
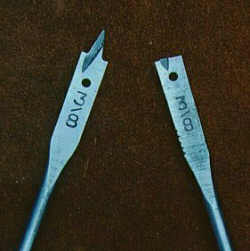
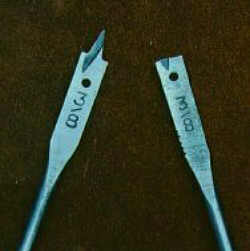 | These drill bits are called wood chisel drill bits. They are about 1/8 of an inch thick. Two bits are required. One must be modified as shown on the right side. The point is ground away and the lead edge must be sharpened so that the bit will shave wax. These tools are used to enlarge the mounting hole that is drilled through the wax. |
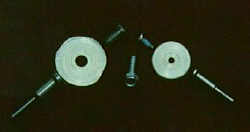 | Two sizes of mandrels may be used. The smaller size has a number 10 screw and is used for turning smaller blocks of wax. The larger one has 1/4 a inch screw and is used for turning larger pieces of wax. The washers were hand made with the hole just large enough to fit over the screw of the mandrill. The washer must have a tight fit around the screw.The screw shown in the center is a sheet metal screw with a hex head thatis used when the design must be solid without the mounting hole. |
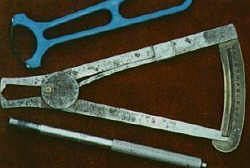 | The blue tool shown at the top of the photograph is used for doing the final scraping of the outside of the wax. It was purchased at a ceramic shop. It has a 1/8 inch steel band at the working end which can be used to smooth the tooling marks from the turned wax.The center tool is used to measure the thickness of the turned wax. The wall thickness of the project is between two and three mils. The tool on the bottom is a screw holding screwdriver purchased at a hardware store. It is not necessary to have this tool but it greatly helps in placing the screw in the mounting hole. The tools shown here are only a suggestion. Actual tools used is up to the discretion of the artist |
 | These tools are used to shape the outside of the wax. They are both silver engraving tools. The tool shown in the upper portion is about 1/8 of an inch thick. Neither is very sharp but they both have a zero radius on the cutting edge. |
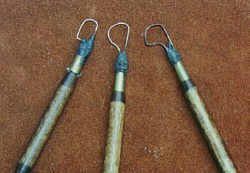 | These tools are used to scrape the wax away from the inside of the project. They were purchased at a ceramic shop. The working portion of the tool consists of an 1/8 inch band of steel which may be shaped by heating the band in an alcohol lamp before forming. The shape of the tool in the center is an original shape. The other tools were formed for specific scraping jobs. The joint between the band of steel and the handle was reinforced with epoxy. They are sharpened by running a file across the band of steel. The brightness of the band of steel on the tools on the left indicate that they have recently been sharpened. |
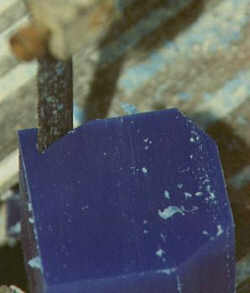 | The first step in the process will require cutting a block of carving wax into a square piece that encompasses the design that is to be created. Blocks of carving wax may be purchased in various sizes. Most jewelry supply stores carry a pound of carving wax that is approximately 6 x 3. 5 x 1. 5 inches.The wax can be cut with a regular wood saw or a special wax cutting saw blade mounted in a jewelers saw frame. The next step will be to remove the corners of the block of wax. This photograph shows the corners of the block of wax being trimmed by a band saw. Two of the corners have been removed. The corners, parallel to the axis of the wax that is to be turned, should be removed to make the initial start of the turning process easier. |
 | The corners can be removed by grinding them away with a large burr mounted in a Foredom hand piece. The wax is not stickyand will not gum up the burr unless too much pressure is placed by the burr on the wax. Let the burr do the work. |
 | These drill bits are called wood chisel drill bits. They are about 1/8 of an inch thick. Two bits are required. One must be modified as shown on the right side. The point is ground away and the lead edge must be sharpened so that the bit will shave wax. |
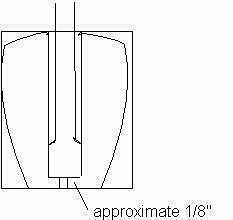 | These tools are used to enlarge the mounting hole that is drilled through the wax. The modified drill bit is used to flatten the bottom of the hole. Drill until the remaining wax is about 1/8 of an inch thick. |
 | The mandrill screw is mounted in the hole. If the hole was drill correctly the screw will have to be screwed into the hole. If the hole is too large the screw can move during the turning process. |
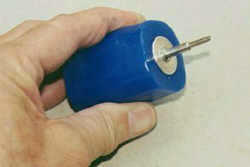 | The washer is placed on the screw and the screw is threaded into the mandrill. Tighten the assembly. |
 | This step will reinforce the joint between the block and mandrill. Melted carving wax is added, over the washer, to the mandrill and the block. A thirty watt soldering iron may be used to melt the wax. The added carving wax must be melted into the block. |
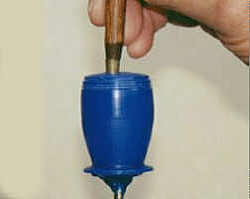
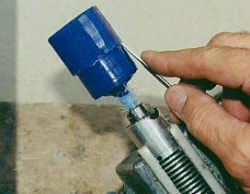 | The mandrill is mounted into the Foredom hand piece which is mounted in a hobby vise called a Pana Vice.This step is the most stressful to the joint between the mandrill and the block. The narrow engraving chisel is used to remove the rough edges of the block. Very small chips of wax are scraped off of the block as it is spun as fast as the assembly allows. Remember the block of wax at this stage is unbalanced and will vibrate severely and can break off the mandrill if the speed is too fast. Do not force the action. Let the tool do the work. |
 | The wider engraving chisel is used to shape the wax once it has been rough shaped with the narrow tool. The turning speed will depend upon the tool and the pressure it inserts on the wax. Normally it is turned at a rotation speed that allows the wax to be scraped smoothly. If the tool starts to chatter the speed is too great. Do not remove the wax that was added for reinforcement between the mandrill and block.Note the hand holding the chisel is resting on the Pana Vise. |
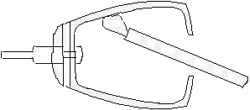
 | Do not attempt to cut the wax as shown in this photograph. The tool will catch in the wax and will be sent sailing across the room. The tool is used to scrap the wax not cut it. |
 | Concentric rings may be cut once the outside of the project is shaped. These type of cuts should be made prior to hollowing the project. |
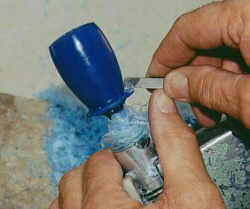
 | The project is hollowed with the ceramic scraping tools. Do not force the scraping. Let the tool do the work. Too much pressure of the tool against the wax at this stage may break the project off of the mandrill. The thickness gage may be used to measure the thickness of the wax.The desired thickness of the final wax will depend on what is planned for the surface. Normally the thickness should be about 3 mils with engraving that is about 1 mil deep.
|
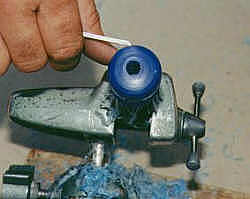
 | Carving wax becomes more translucent as it becomes thinner. A small flashlight held against the outside of the wax may be used to estimate the thickness of the walls. The thickness of the walls should be uniform in thickness and can be checked by looking at the color of the walls when illuminated by the flashlight. |
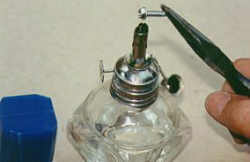 | There will be times when the project will not work if there is a mounting hole as described above through the center of the wax. In this case, another form of mounting must be applied.This mounting technique consists of heating a hex headed sheet metal screw and melting it into the block of wax. The hex head of the screw locks into the wax and prevent the wax from spinning on the mounting screw. The screw should be adjusted so that it is parallel to the axis of the block. |
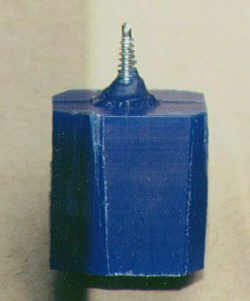 | Carving wax should be built up on the screw and the block of wax. |
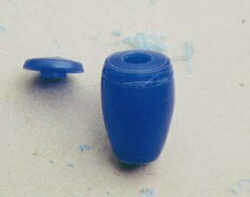
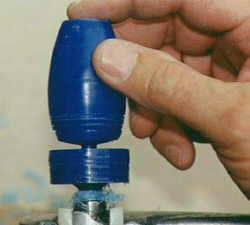 | The screw is mounted in the Foredom hand piece. The lid is turned in the same manner as the base and is made to fit into the opening of the pottery. |
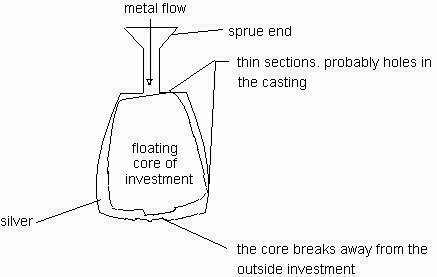
 | This photograph shows how the items are sprued in preparation for being cast. The pink wax and silver wire shown at the top of the pottery on the right is used to reinforce the connection of the investment between the inside and outside the design. If a method of reinforcement is not used the investment core inside the hollow wax can break loose from the outside investment and float when the metal is poured into the mold thereby destroying the casting. |
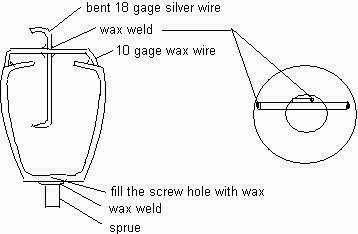
To prevent the core from breaking loose and destroying the casting a reinforcement rod must be installed between investment core and the outside investment. I use a 10 gage silver wire bent at both ends. I wax weld this to a 10 gage wax wire. The assembly is then wax welded to the wax project. The silver piece must extend into the hollow of the project and stick about 1/4 of an inch above the top of the project. The wax wire will be cast in silver. The assembly can be cut off the project and used as scrap in the next melt.
Related Articles

Wax Tools Update

Wax Model Carving

Foredom Milling Assembly for Wax Components

Jewelry Designs: Raindrops Pendant


The All-In-One Jewelry Making Solution At Your Fingertips
When you join the Ganoksin community, you get the tools you need to take your work to the next level.
