
Scoring and Bending Procedures
Silicon carbide separating discs are superb for scoring metal for bending, particularly when the metal sheet is less than 4 or 5 cm across. While I was originally taught to use discs for catch building which involves only straight lines I discovered that they are superb for curved line scoring. Advantages include no disturbance of a textured sheet metal front surface while gaining enormous changes in plane. This is how many of my own pieces are done.
5 Minute Read
Silicon carbide separating discs are superb for scoring metal for bending, particularly when the metal sheet is less than 4 or 5 cm across. While I was originally taught to use discs for catch building which involves only straight lines I discovered that they are superb for curved line scoring. Advantages include no disturbance of a textured sheet metal front surface while gaining enormous changes in plane. This is how many of my own pieces are done.
Basic tips for scoring with the disc include: anneal the metal before you begin.
Do not press hard; if the disc wears quickly you are pressing too hard. The disc is very hard (nine and a half-it will cut ruby and sapphire) but brittle. Let it cut its own way.
Wear safety glasses and breathing protection-the dust is not good for you. I like beeswax as a lubricant because it binds the dust into a paste on the surface of the metal instead of putting it in the air. The lubricant increases the cutting speed so go carefully when you start. Let the disc drift gently away from you (right handers), if you pull it towards you it will tend to sink rapidly through the metal. Go over the same area a number of times.
Because the disc wants to leap over the edge away from you and come back on the other side lift the disc off before you arrive at the far edge and turn the metal around so the part near the edge is towards you before continuing. When you see a distinct raised line on the other side it is time to stop. If you go through burnish it closed before soldering .Such scored lines, where metal has been removed, need soldering to gain strength.
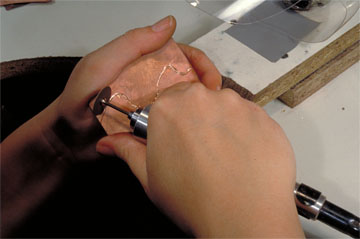 | This shows carving into the metal sheet with the silicon carbide separating disc. Notice that the sheet is held in the air, not against the bench pin, this is in order to be more sensitive to the pressure used (rather like working in wax) and incidentally, decreases the noise of using the disc. Again, I recomend using a sticky wax like beeswax, not a lubricant like Burrlife®. |
 | Here you can see a plastic hood I rigged up from a plastic spring water bottle. A vacuum cleaner (preferably with a HEPA filter installed) is installed into it to collect dust. if you use the beeswax the dust problem is significantly reduced. Remember not to press hard. If you find your disc wearing you are pressing too hard. |
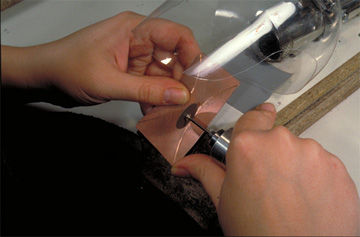
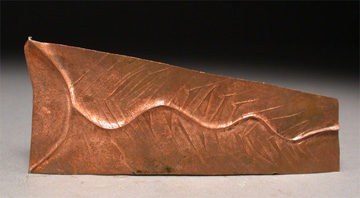
 | Here are the finished grooves. Multiple light passes with the disc are preferable to pressing hard and going through the metal. The sheet is continually turned over while working to see what the raised line on the front looks like. |
 | Here is what the raised line looks like when the metal is ready to be bent up. By this time you are most of the way through the metal, and the raised line represents where the disc has literally pushed the metal upwards. |
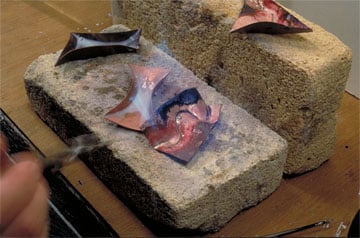
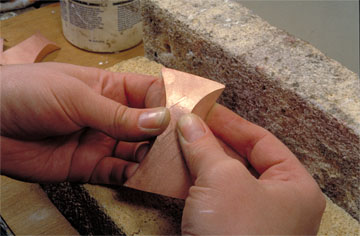
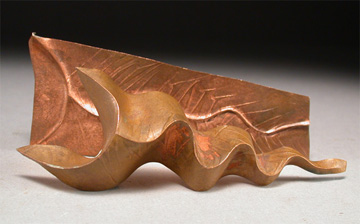
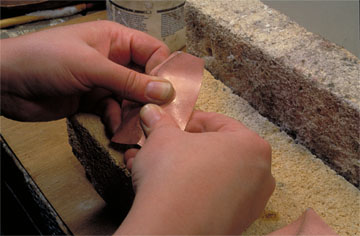 | The metal was annealed before the scoring was begun. At this point the piece is bent up gently with the fingers. If you are bending curves it is very important to begin each bend at the furthest, tightest inside of the curve, first one, then the next in order to avoid parts you did not bend yet kinking in the opposite direction to the bend you want. don't try and bend it too much at once, gently start each indentation and then go back and deepen them. |
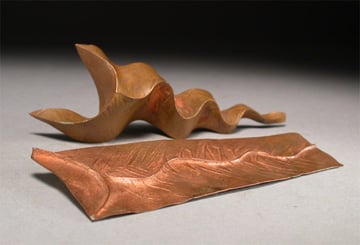
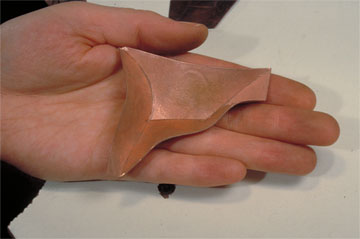 | Here is what a piece looks like after bending. In copper, fine silver and platinum one can bend it up in one go, gently. In sterling and gold alloys it may take several rounds of bending a bit, then annealing, then continuing to bend to reach the degree of bend you want. If you are going to anneal during bending flux the scored line to prevent it oxidizing and after annealing use hot water, not pickle, to remove the flux residues before continuing to bend. This will keep the scored metal clean and encourage the final solder to flow well. |
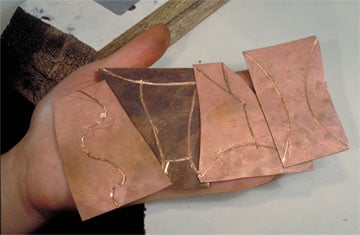
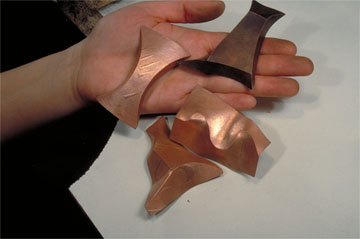 | A selection of scored and bent pieces. It is often a good idea to overbend a little before soldering to have a tight join. The final position can be slightly adjusted after soldering. |
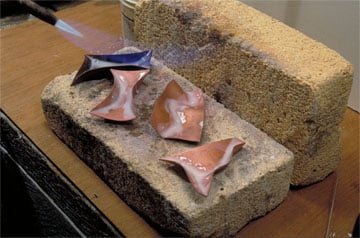 | As you can see, in 'dirty' metals like copper and even sterling I am a big believer in using lots of white paste flux to ensure a proper soldering. My experience is that when students fail at soldering most of the time it is because their flux burned out. If you use a lot of flux this problem is avoided. On fine silver and gold alloys the problem is not so acute and other, thinner, self-pickling type fluxes may be used. |
 | I usually use wire or stick solder to do this operation, in silver and gold I may carefully place individual balls (not chips) of solder instead to avoid accidental spillages. |
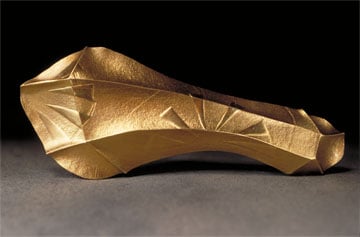
 | Once the soldering is complete, and the piece pickled clean it can be left as is as a finished form, or opened back out again in order to turn the sodlered fold edges into line folds. Here you can see how the piece is supported everywhere during the opening to get an even, uniform result. |
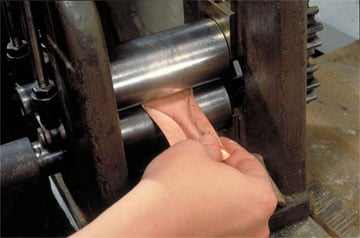 | While I often leave the sharp raised ridge alone after opening it can also be confirmed slightly with a rolling mill or gentle stroking with a planishing hammer to upset and thicken the visual look of the fold edge ridge. |
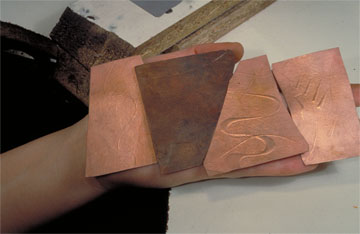
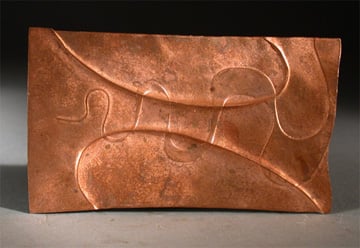 | Here is an example after opening up. The surface pattern under the scored and bent fold edges has been applied using a paper dis. |
 | A fold that has been opened up completely. At this point one can score again and repeat the same process to produce different lines, or to add three dimensional form to the sheet. You can again see the surface texture produced by the paper die technique. |
 | Here is an example of the same form after folding up and soldering and after opening up again and confirming to turn the fold edge into a line fold. |
 | Another view of the same two pieces. |
 | Here is a brooch I made using these methods. It is about 15 cm long. |
 | A brooch. The center marks were made as pinched extruded line folds. The circular mark was a completely circular scoring, when folded up before soldering the piece looked like a cup or shallow beaker |
 | A brooch, copper, gold plated, note how the scored line runs around the bend in the middle of the sheet. |
 | Hardcover: 160 pages Publisher: Brynmorgen Press; 1st edition (April 15, 2008) ISBN-10: 1929565267 ISBN-13: 978-1929565269 Product Dimensions: 10.7 x 8.3 x 0.7 inchesPurchase your own copy of "Foldforming (Hardcover)" today. |
Related Articles

Steps on Making a Leaf or Ruffle

How to Make a Heistad Cup

Steps on Making a Basic Wedge T-fold

Steps on Making a T-Fold with Table Insert


The All-In-One Jewelry Making Solution At Your Fingertips
When you join the Ganoksin community, you get the tools you need to take your work to the next level.
