
Royal Flush Stone Setting
A sign on the side of a plumbers truck read, In our business a Flush is better than a Full-House. Thankfully this is not the type of flush this article is about. Instead, this article is about a style of setting small stones that has become very popular in recent years.
3 Minute Read
A sign on the side of a plumber's truck read, "In our business a Flush is better than a Full-House." Thankfully this is not the type of 'flush' this article is about. Instead, this article is about a style of setting small stones that has become very popular in recent years.
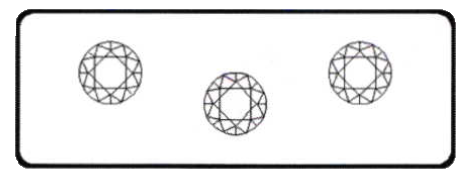
The stones are set down into the metal without beads or prongs as in this wedding band. The tables of the stones are set even with the metal surface in a modified bezel. This is where the name 'Flush Set' is derived from, as the stones are set flush with the metal.
Flush setting is an advanced setting procedure. Precise craftsmanship must be executed throughout the process to accomplish the desired look.
First, lay out the stones in the desired pattern, and mark the metal in the center of each stone. Rubbing beeswax over the metal surface and placing the stones table down will help in positioning the stones.
Next, drill a hole through the metal using a small drill bit (less than 1/2 the diameter of the stone) on each of your center marks. The more accurate you drill, the less work you will have to do later. Then, inspect your work to make certain the holes are all precisely drilled where the center of each stone is to be.
If any holes are off center, you will need to enlarge the hole to center it. Use a krause bur to cut the side of the hole towards the center of the stone. Once all the holes are centered, re-drill the hole with a larger drill bit. Use a drill bit 2/3 the diameter of the stone, and drill through the metal exactly where the center of the stone is to be.
Then cut azures on the backside of the metal to cleanup the holes. A simple cone shaped azure can be cut using a bud bur.
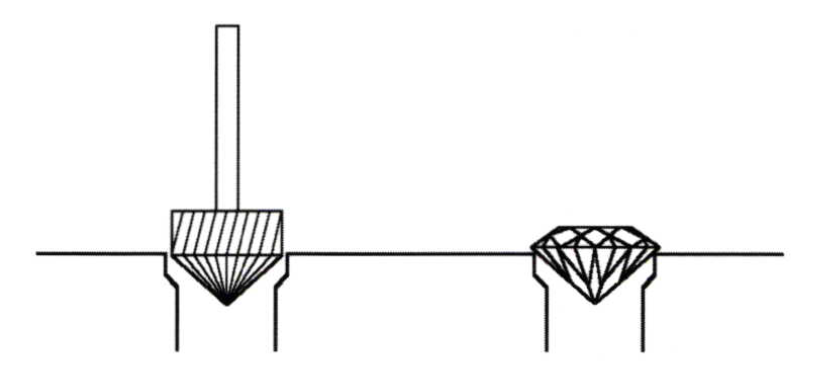
To cut the seat for the stones begin with a straight-sided setting bur one size smaller than the diameter of the stone. For example, if your stone is 2.5 mm in diameter select the 2.3 mm bur. Cut the seat to a depth that when set the stone's table will be even with the metal.

Then, use a hart bur the same diameter or slightly smaller than the stone. Carefully undercut the seat to allow the stone to snuggly fit into the seat. Begin by holding the bur at a 45-degree angle and cut into one side of the seat. Then with a steady hand, straighten the bur to a 90-degree angle undercutting the opposite side of the seat. The shank of the of the bur must be held precisely at a 90-degree angle to the metal surface or else the seat will be cut on an angle and the stone cannot be set straight. Undercutting the seat in this manner allows you to leave extra metal above the girdle of the stone to use in tightening it.
Cutting the seat is the most important part of this setting procedure. Cut the seat too large and you will not be able to tighten the stone without marring the surface of the metal. Cut the seat too small and you may chip the stone trying to force it into its seat.

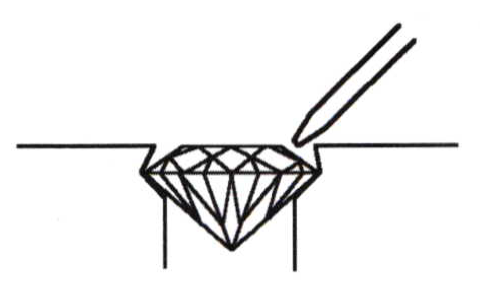
Next, lay the stone into its seat and press it into place with a brass pusher. The stone should fit snuggly in its seat.
Using a small highly polished burnisher rub metal down and over the edge of the stone. Hold the burnisher at a 45-degree angle and rub around the top edge of the hole. Due to the process of tightening the stone, some setters refer to this setting technique as 'Rub Down Setting' instead of "Flush Setting".
Some jewelers use a hammer and punch or a hammer handpiece with their flex-shaft to hammer the metal down over the stone. As a result, this setting technique is sometimes referred to as 'Hammer Set'. If you use this technique be certain to hold the punch at a 45 degree angle to the metal surface and tap lightly ONLY on the edge of the metal until it is worked down over the stone.
Do not attempt to tighten the stone by hammering on the metal surface forcing metal over the stone.
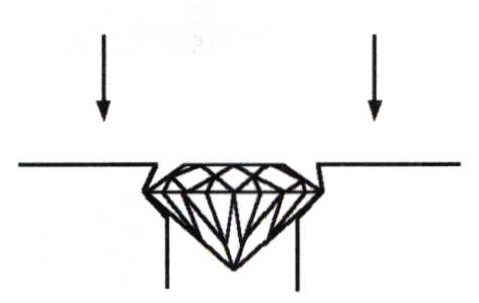
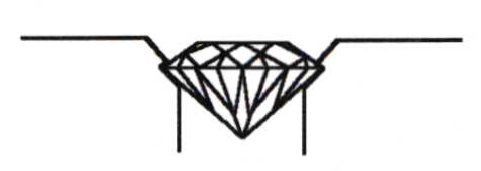
This causes a dip in the surface surrounding the stone, resulting in an unsatisfactory appearance. Burnishing the metal over the stone is the preferred method of tightening the stone. If you cut the seat properly, you will not need to use a hammer.
This setting procedure should result in the stone set down in the metal with a highly polished beveled rim surrounding the stone. If you play your hand right, you can trump this technique and deal yourself a truly Royal Flush Set Stone.
Related Articles

Giving New Life to Old Burs

Technical Briefs: Dealing with Firescale

Organize Bench Workflow with Trays

3 Top Challenges for Jewelry Makers in 2014


The All-In-One Jewelry Making Solution At Your Fingertips
When you join the Ganoksin community, you get the tools you need to take your work to the next level.
