Fit to be Sized
Before sizing any ring, examine it carefully and compare it to the information on the job envelope. If you see any damage or potential problems that are not marked clearly on the envelope, inform the store manager or sales clerk who took in the job so that they can notify the customer. It is extremely important that you inform them now, before any work is performed, rather than wait until later to inform them.
9 Minute Read
Before sizing any ring, examine it carefully and compare it to the information on the job envelope. If you see any damage or potential problems that are not marked clearly on the envelope, inform the store manager or sales clerk who took in the job so that they can notify the customer. It is extremely important that you inform them now, before any work is performed, rather than wait until later to inform them.
Measure the thickness and width of the ring shank and record these measurements on the job envelope. Having these measurements may save you from doing a half-shank later if the customer complains that you thinned the shank too much during sizing.
While examining the ring, measure the ring's current size and determine if you need to size it up or down. Divide your sizing jobs into four groups: rings to be sized down, rings to hammer up (1/2 size or less), rings to size up, and wedding bands to stretch. By organizing your ring sizings in this manner and working on all the rings in each group together will increase your productivity.
To begin, anneal all the wedding bands needing stretching or compressing. Die struck seamless bands are work hardened during the manufacturing process. This hardened gold is difficult to stretch or compress. Annealing the band before you begin will reduce the amount of physical force that you will need to apply to accomplish the task. A ring stretcher is not designed to double as a nautilus machine. In addition, if the metal is not annealed the stretching or compressing process may cause the metal to crack.
While the wedding bands are in the pickle, take all the rings to be sized down. Then one at a time mark the back of the shank for the amount of gold to be removed from each shank. The difference in one size is l/10 of an inch or 2.54 millimeters. For simplicity 2.5 millimeters is used in actual practice. If a ring is to be sized up or down one size 2.5 mm is either added or removed from the shank.
The curvature of rings creates problems when down sizing a substantial amount. Your measurement on a flat ruler cannot be accurately transferred to the curved surface of the ring shank. As the distance increases the inaccuracy multiplies. To compensate, when sizing down 3 or more sizes cut the back of the shank at one side of center. Then straighten the back of the shank. Mark the amount to remove on this straightened portion. Then, cut off the excess amount with your saw and re-shape the ring closing the gap.
When sizing purposely make the ring 1/8 size too small. You can later hammer across the solder joint until the ring reaches the correct size. This will help you to be more accurate in your sizing (if you are a little too large you will need to resize). In addition, this will work-harden the sizing area making a stronger joint, plus finishing and polishing will be easier.
When all the rings are marked, then pick up your saw. Saw through all the rings without putting down the saw.
When finished sawing, pickup your ring bending pliers and bend all the shanks closed. Make sure there is no visible gap; hold the ring up to a light to see that there is a precise fit. If there is a gap, true the seam with an equaling needle file. Grinding a knife-edge on the end of the file will make it easier to insert it into the seam. Another method to true a seam before soldering is to saw through the seam with a saw blade, trimming a little metal from each side of the seam.
Next, group the rings on your bench as to metal content and color, 14k yellow together, 14k white together, l8k yellow together, etc. Then place enough solder on your soldering pad to solder all of the rings closed. Make a small pile of solder for each metal type.
Then begin the soldering process. Hold the torch in one hand and with the other hand pick up a ring with locking tweezers, and dip the ring in boric acid and alcohol. Set the ring down on your soldering pad and light it with your torch. Arrange several rings across your soldering pad in this manner. Then, with the solder pick in your free hand, pick up the solder and solder the ring shanks closed.
Place the rings aside on your soldering pad to cool, and pick up another group of rings as before. As the alcohol is burning off, pick up the solder with a pick, and solder the shanks of this group. Lay them aside to cool, and move on to the next group.
With this process, you can solder all the rings closed without ever placing the torch down. You light the torch once and do not have to re-light it for each separate job. When you are finished soldering all the rings, turn your torch off.
While the down sizings are cooling, remove the wedding bands from the pickle, and rinse and dry them off. Place down sizings in the pickle and begin stretching the wedding bands.
To stretch a wedding band that is larger than your ring stretcher mandrel, slip a copper sleeve over the mandrel and place the ring over the sleeve. The mandrel will press out on the copper sleeve, which in turn will press out on the wedding band stretching it to a larger size. To make the sleeve purchase a 3/4 inch copper pipe coupling from a plumbing supply store. Then, using a hacksaw cut slits down the length of the coupling. Make four or six cuts to line up with the slits on the mandrel on your stretcher. Make all the cuts from the same end and cut 3/4 of the length of the coupling. This will allow it to expand easier and will make it easier to remove the ring when finished.
Next begin work on the up sizings. Cut each shank through with the saw. Then open the shanks, either with pliers or by sliding it down on the ring mandrel. Then cut pieces to add to the shanks from your gold stock and lay on your bench next to each ring. Lay out across your bench each ring with the corresponding piece to add to the shank.
Ifyou do not have the correct size of metal stock available for up sizing, reduce the size of stock with a rolling mill before marking the amount needed. This will eliminate waste and will save time over filing away the excess. Ideally the stock should be 1 tenth of a millimeter and no more than 2 tenths wider and thicker than the shank.
With two pairs of locking tweezers, hold the ring in one pair of tweezers, the piece to be added in the other. Solder the piece you are adding to one side of the ring and lay it aside to cool. When each ring is soldered on one side turn your torch off. Using pliers, close the gap on each ring making sure you have a tight fit. Then solder the rings closed using the same manner that you used sizing rings down.
When they are all soldered, place them in the pickle and take out the rings you sized down. Rinse and dry them off and begin to file with your half-round ring file. File each ring on the inside until it is smooth. File off excess solder only on the inside of the rings at this time.
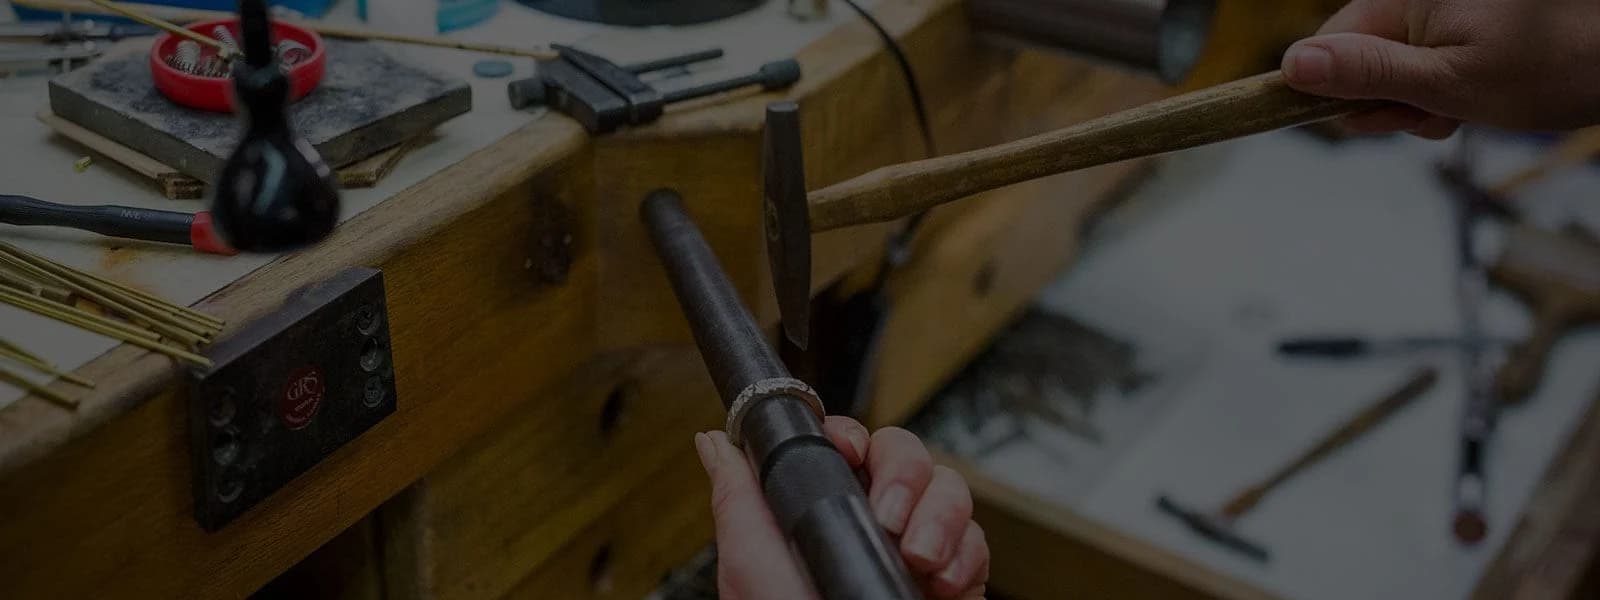
Then lay the file down and pick up your ring mandrel and mallet. Taking one ring at a time, slide it onto the ring mandrel and straighten it out; check to make certain you have reached the right size.
When rounding out the rings from sizing use a double face mallet - brass on one side and nylon on the other. Use the nylon side to straighten out the ring shank. Like a rawhide mallet, it will bend the shank but not stretch it. Then if the ring is a little too small turn the hammer around in your hand and tap up with the brass side. This saves time from putting down the rawhide mallet and picking up a steel hammer then going back to the rawhide mallet.
After you have straightened each ring, pick up your file again. File the sides and back of the shank, removing the excess solder and hammer marks on the outside of all the rings.
You should always take great care when filing that you do not remove too much metal. It is impossible to replace the metal removed. When filing to remove excess solder, often the mistake is made of filing too much resulting in thinning the metal. Stop filing when the outline of the solder is just barely visible. Sanding to prepare the metal for polishing will remove the remaining solder. If you continue to file until all evidence of the solder is removed the sanded metal will be thinned more than necessary.
When you have finished filing each ring, take the rings that you sized up out of the pickle rinse and dry them off. Add any rings that are to be sized up ll2 size or less. They can be hammered up along with straightening the rest of the up sizings.
Repeat the filing/straightening process. File the inside of the rings first, then straighten each ring and then file the outsides of the rings. When all rings needing to be sized are filed, sand all of the shanks, polish, and place them in the cleaner.
If you only have a few rings to size, you can size the down sizings and up sizings together. Solder the piece on one side of the up sizings. While they cool, solder the down sizings. Then bend and solder the second side of the up sizes.
Sizing heavy gent's rings creates additional problems because of the metal thickness in the shank.
Straightening the ring on a ring mandrel can be particularly challenging. Using a Lead-filled weight draw hide mallet or a dead-blow mallet will provide the extra force needed to make this job easier. In addition, one of these mallets can be used to force the ring down on a ring mandrel when opening a shank up after sawing through the shank.
Heavy duty "Bow Pliers" available from most jewelry tool suppliers are indispensable in closing the gap in down sizing heavy gent's rings. Be certain to cover the jaws with leather or copper to avoid marring the outside of the ring. Sometimes it is necessary to use a rawhide mallet to hammer the shank into position. A bench mounted ring shank bender is a welcome asset in shaping pieces for up sizing and half-shanks.
When soldering heavy gents rings avoid the temptation to use a pick to smear the solder around the joint. This will result in a weak solder joint, known as a cold solder joint, as the solder flowed only at the surface and not through the seam. Make certain you have a tight fitting seam and apply solder to only one side of the joint. Then, with the heat of your torch pull the solder through the seam to the other side. Then you will be certain the seam is completely soldered.
By following these procedures your shop will become more productive, and you will be Fit To Be Sized.
Related Articles

New Efficient Bench Applications

950 Palladium: Superior White Color
North American Sources for Equipment, Materials, etc.

How to Set Baguettes


The All-In-One Jewelry Making Solution At Your Fingertips
When you join the Ganoksin community, you get the tools you need to take your work to the next level.
