
Pulse-Arc-Welder: Ring Prong Replacement
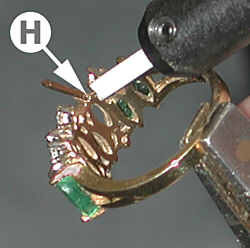
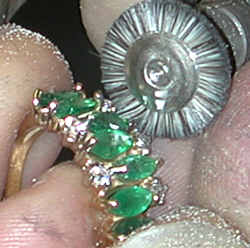
This 14-karat yellow gold, emerald and diamond ring has a broken prong requiring prong replacement. Steece Hermanson will replace the prong and reset the displaced emerald without un-mounting any of the gemstones. For this, he uses the ABI Tack II and Pulse-Arc Welders.
2 Minute Read
Updated on
This 14-karat yellow gold, emerald and diamond ring has a broken prong requiring prong replacement. Steece Hermanson will replace the prong and reset the displaced emerald without un-mounting any of the gemstones. For this, he uses the ABI Tack II and Pulse-Arc Welders.
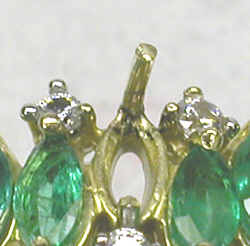
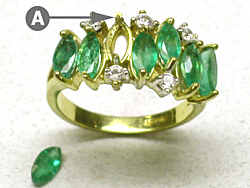 | The prong was broken just above gallery wire (A). Hermanson uses files and a cut off wheel to remove the prongs metal below the gallery wire. The cut off wheel also leaves an indentation for use with the next step and the prong. |
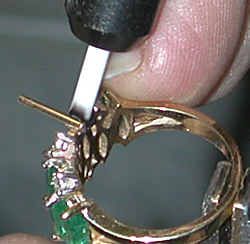
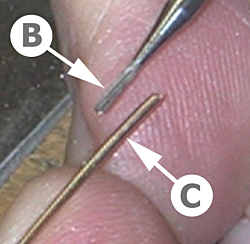 | Next he selects a cylinder square bur (B) the same diameter as the new prong (C) and creates an indentation in the side of the gallery wire and ring for a new 14-karat yellow prong. |
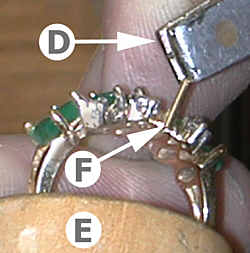 | Using his Tack II tack welder with the pliers (D) and ring clamp leads (E), he tack welds the new prong (F) in place. He set the Tack II tack welder to 45 volts on the low-energy setting. To make a proper weld, the joint is clean and free of metal fragments. He uses moderately firm pressure between the two parts. Depressing the foot pedal releases a pulse of energy and the tack weld is complete. It temporarily holds the new prong wire to the ring. |
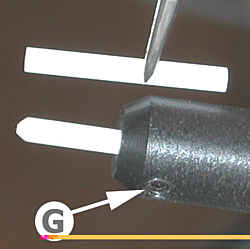 | The weld pencil for the Tack III Pulse-arc welder contains a # 2 diameter electrode and that's covered by a # 2 diameter ceramic tip. Hermanson removes the ceramic tip (top) by loosening the set screw (G) and replaces it with one he's modified for prong work in a tight area. The electrode is recessed inside the ceramic tip about one millimeter. |
 | Using the weld pencil and pliers lead, Hermanson first pulse-arc welds the joint of the new prong and the ring at the bottom. Remember, it's currently tacked, so pulse-arc welding will finish the welding process. After pulse-arc welding the joint, he inspects the overall joint to insure it's properly aligned. |
 | For the pulse-arc welding of the prong onto the ring, Hermanson has set his Pulse-Arc-Welder on the high energy setting and 35 volts. In this photo, he's pulse-arc-welding the sides of the prong. Each depression of the foot pedal releases an instantaneous pulse of electrical energy that is discharged through the electrode and completes a small weld joint. The job requires several weld hits on each side of the prong. |
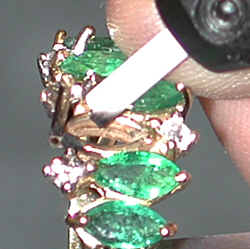 | Next he pulse-arc welds the new prong at the joint of the top portion of the gallery wire and the face of the prong. He inspects the newly welded prong, adjacent stones and overall condition and determines that some fill is needed in a few locations. |
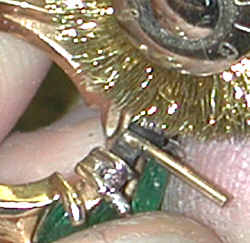
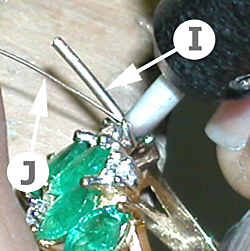 | Hermanson uses 29 gauge 14-karat yellow gold wire (J) and fills small voided areas around the prong (I). He continues to use the same equipment settings for the final steps. He places the tip of the wire directly over the void and the electrode over the wire and welds to fill the void. |
 | After he's completed welding the new prong in place, he uses a small brass wire wheel brush on his flexible shaft to remove the surface residue caused by the welding process. |
 | He inspects the joint for openings or other imperfections and insures a good strong seam. Notice the adjacent stones are unaffected by the tack and pulse-arc welding process. |
 | All that's left is minor pre-finishing, re-setting the loose stone and a minor amount of final polishing. |
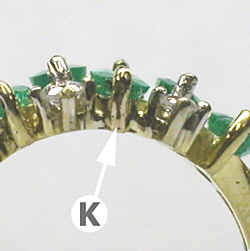 | (K) indicates the prong that was replaced. The overall process from start to finish took 25 minutes and did not require the un-mounting of other gems through the process. |
By Mark Mann – 2005
Technical contributions by JA Certified Master’s Steece Hermanson, Galloway and Moseley, Sumter, SC
All rights reserved internationally. Copyright © Mark Mann. Users have permission to download the information and share it as long as no money is made. No commercial use of this information is allowed without permission in writing from Mark Mann
________________________________
This content is published in a handbook along with other welding applications. To get a copy of the ABI Handbook of Welding Applications for Jewelry Design and Repair, contact Janet Kirk at 401-461-4140
Related Articles

Welding Technology Tool Modifications Part 1
Proper holding and firm contact between parts during tack-, fusion- and pulse-arc-welding is essential. Aside from pieces not meeting properly,...
Read More

Laser Welding Full Prong Replacement
One of the most frequent repair jobs involving the laser is prong repair. This is the first in a series...
Read More

Jewelry Designs: Titan Pendant
Welcome to Stacey Rhodes Jewelry Designs, where we will detail all of the steps involved in adding a new piece...
Read More

Pulse-Arc-Welder: Pearl and Diamond Pendant
This karat gold pendant design calls for several solder joints in close proximity. To facilitate the assembly, I tack and/or...
Read More


The All-In-One Jewelry Making Solution At Your Fingertips
When you join the Ganoksin community, you get the tools you need to take your work to the next level.
