
Steps on Making a Plunkett Fold
One of the most intriguing, and fastest ways to make fold-forms are in the Rolled fold part of the system. Rolled folds use the special, even pressure of the rolling mill to work the metal. They are either a package folded up and put through the mill like a Heistad Cup or are set up so that one side of the fold has more layers than the other when it is put through the mill. These travel further than the side with less layers when rolled, and, restrained by them, the whole fold curves as a result. This page describes the steps to making a Plunkett fold. The Good fold is derived from a Plunkett fold. These kinds of folds work well when forged as well as in the mill.
2 Minute Read
This page describes the steps to making a Plunkett fold. The Good fold is derived from a Plunkett fold. These kinds of folds work well when forged as well as in the mill.
One of the most intriguing, and fastest ways to make fold-forms are in the Rolled fold part of the system. Rolled folds use the special, even pressure of the rolling mill to work the metal. They are either a package folded up and put through the mill like a Heistad Cup or are set up so that one side of the fold has more layers than the other when it is put through the mill. These travel further than the side with less layers when rolled, and, restrained by them, the whole fold curves as a result.
 |  |
 | |
Steps on Making a Plunkett Fold
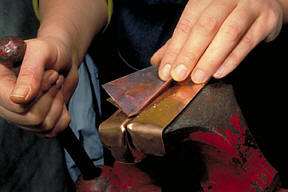
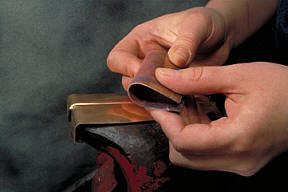 | To begin with a loop is made from a rectangular piece of sheet metal. |
 | The loop is placed into the vise and the jaws clinched tight onto the loop. The amount projecting from the top determines the width of the table. |
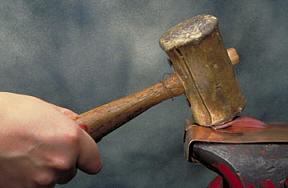 | The end of the loop is now malleted down, 'confirming' the position of the table relative to the legs. Clinching the end first leaves a hollow pillow on top of the vise. |
 | This is what the resulting wedge T-fold looks like on top of the vise jaws. |
 | Remove the Wedge T-fold and turn it sideways. Then clinch the vise jaws onto one side of the table. |
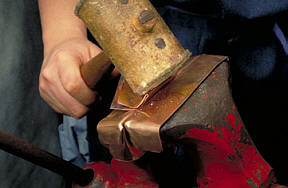 | Now mallet the protruding side of the table towards the vise jaws, folding it up. It is important to knock it over only to about forty-five degrees. |
 | Take it out of the vise and repeat this for the other side of the table. |
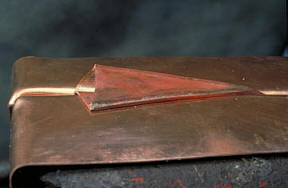
 | Here the result has been taken out of the vise so you can see the Y-shaped cross section. |
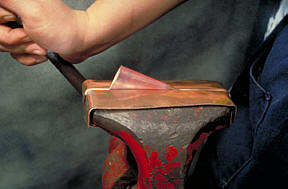
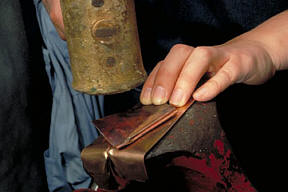 | The two sides are now flattened with a mallet onto an anvil or flat surface. You may have to turn it over, back and forth, while flattening it to get both sides of the table to come down evenly. |
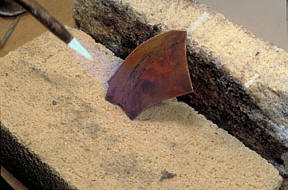
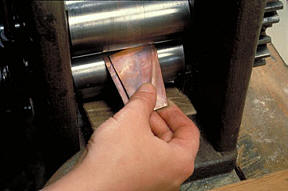 | The fold is placed in between the slightly opened rolls. They are then tightened just so they touch the metal. This is called a 'dead pass', and gives us a starting point from which we can tighten the rolls to compress the metal. Notice that the narrow end of the pleated layers enters the mill first. |
 | It is annealed, turning it over while doing so to ensure that the entire fold is fully annealed. When quenching it keep it under water until it is fully cooled as if you take it out too soon scalding water can squirt out of its crevices across the room, endangering you and others. |
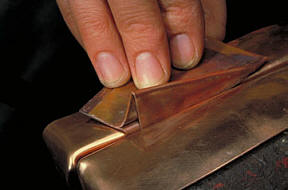
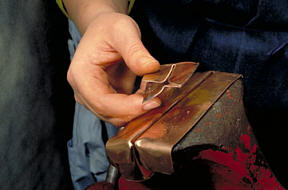
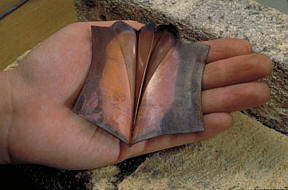
 | When opening the Plunkett fold begin at the widest part of the fold, and push your fingers up inside it as you do so. Rather than levering on the legs pull them sideways, which ensures a smooth opening without kinks. |
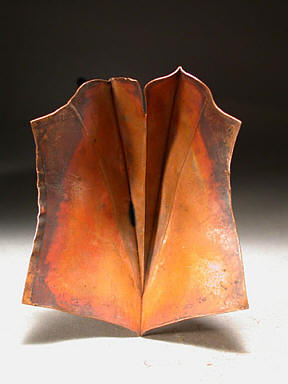
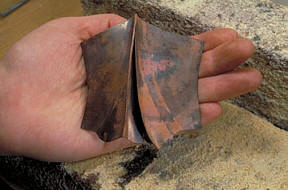 | Here is what it looks like after opening. |
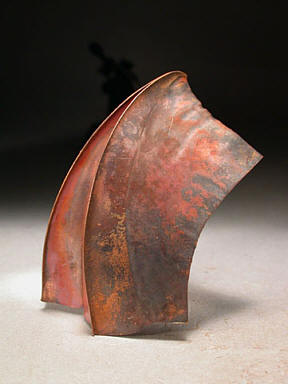
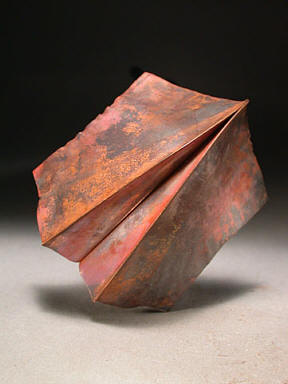
 | This is a back view of a Plunkett Fold. Below are some examples, from different views. |
| |
 | |
 |
Purchase your own copy of “Foldforming (Hardcover)” today. |
Related Articles

Steps on Making a Chased Wedge T-fold

The Origins of Fold Forming

Steps on Making a T-Fold with Table Insert

The Different Kinds of Line-Folds


The All-In-One Jewelry Making Solution At Your Fingertips
When you join the Ganoksin community, you get the tools you need to take your work to the next level.
