
Repairing a Sterling Silver Shell Cameo Pin
Repairs and alterations of jewelry that has been in families for generations is an ongoing request at retail service departments. These pieces are not of high value, but they have sentimental value to the owner. Often these pieces were not made properly, excessively worn or broken. To keep your customers happy, repairs to these pieces are inevitable and this article covers procedures for simplifying the process, minimizing risk and maximizing profit margins for the service department.
2 Minute Read
Repairs and alterations of jewelry that has been in families for generations is an ongoing request at retail service departments. These pieces are not of high value, but they have sentimental value to the owner. Often these pieces were not made properly, excessively worn or broken.
To keep your customers happy, repairs to these pieces are inevitable and this article covers procedures for simplifying the process, minimizing risk and maximizing profit margins for the service department.

This sterling silver shell cameo pin had a hook at the top on the back side. It was used to make wearing the pin possible as a pendant with a chain or a strand of pearls.
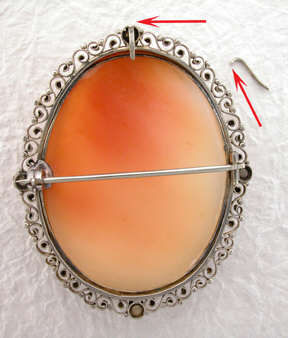 | The hook has broken from years of repetitive bending (red arrows). The repair request is to install a simple bail so it can be worn on a chain. |
 | For a torch free repair for the cameo pin, I filed the joints of the new bail and the back of the cameo mounting where the hook had broken off. I tacked the new sterling bail using the ABI Pulse-arc-Welder. After it was tacked, I then permanently attached it by pulse-arc-welding around the base of the joint. I set the pulse-arc-welder on the high energy setting and I used 60 volts with the # 2 tip. I fashioned the tip of the weld pencil at a 45 degree angle on both sides so I could get close to the joint to perform permanent seamless welding. |
 | I cleaned up the joints using 3M radial bristle discs and then I lightly polished the general area. |
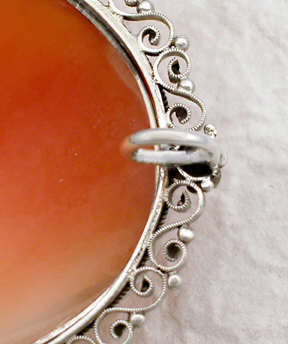 | Removing the cameo was not necessary and no damage occurred to it or the surrounding sterling silver filigree wire pattern. By using the pulse-arc-welder, this alteration took minutes to complete and potential for damage was eliminated. |
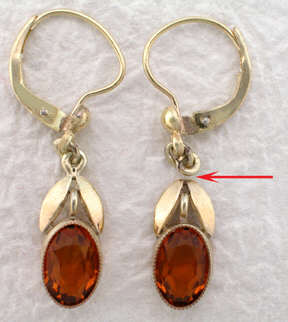 | These karat gold earrings have been altered over the years and currently dangle from ear wires. The jump ring (red arrow) has broken and the earring needs to be reassembled. |
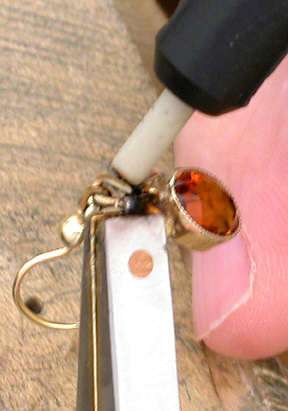 | I prepared a new jump ring and then tacked the assembly using the ABI Pulse-arc Welder. I finished it by pulse-arc welding both sides of the joint. I set the unit on the high-energy setting and at 40 volts. I used the # 2 weld pencil with the flat ceramic tip. |
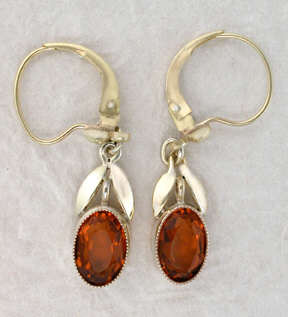 | Finishing this job required light rubber wheeling and light polishing. |
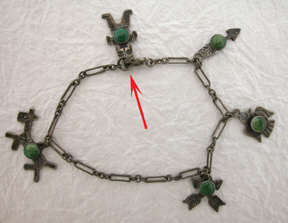 | This sterling bracelet was heavily tarnished and one of the charms was dangling from the old worn out spring ring (red arrow). |
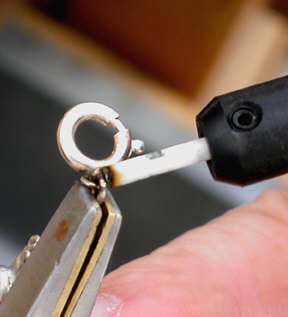 | I removed the heavy oxidation from the bracelet by using a Speed Brite unit with Gem Sparkle solution. I installed a new spring ring. To insure a long-lasting installation, I pulse-arc-welded the jump ring on the spring ring closed. I set the unit to 50 volts on the medium-energy setting and used the #1 pencil tip with the pliers lead. |
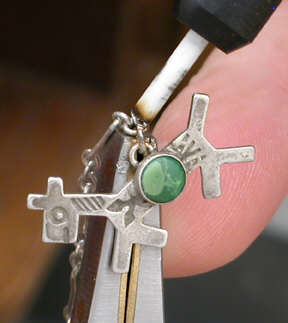 | I installed the charm that was dangling from the old spring ring and pulse-arc-welded it and all charm jump rings permanently closed. For welding these small jump rings, I set the pulse-arc welder on the medium energy setting at 40 volts and used the #1 tip. |
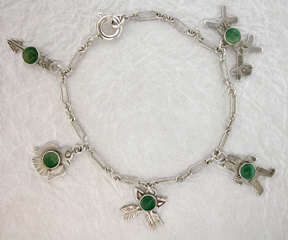 | To finish this job, I used a small rubber wheel at each joint and lightly polished the bracelet. It took minutes to complete and there are no jump rings or links with open seams. |
Important
All tack-, fusion- and pulse-arc equipment settings will differ and are based upon the volume, amount of contact and alloy of the material you are assembling. Working with like materials will give you a parameter for the settings required for your application. Keep a record of settings and tasks for future reference.
Related Articles

Jewelry Repairs with ABI Mini Pulse Arc III

950 Palladium: Fabricating Custom Earrings

Beam Path Check

950 Palladium Bridal Jewelry Manufacturing


The All-In-One Jewelry Making Solution At Your Fingertips
When you join the Ganoksin community, you get the tools you need to take your work to the next level.
