
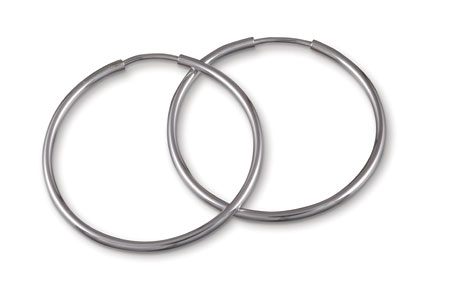
How to Make Hoop Earrings
Tom Dougherty of Studio 2015 in Woodstock, Illinois, had an interesting process to share about making hoop earrings from tubing. He learned the process from Kenneth Guth, a neighboring goldsmith and acclaimed knife maker. By all accounts, Guth has always enjoyed sharing his knowledge with other people, and he has taught workshops on jewelry, metal work, and knife making, both at the college level and to the general public. The process is incredibly simple, and I'm delighted to share it with you here.
3 Minute Read
During the social hour prior to an evening dinner at last year's Santa Fe Symposium on Jewelry Manufacturing Technology (SFS), I was speaking with an interesting fellow about the snacks and the upcoming menu. We discovered that we had a lot in common about our love of good food and our cooking habits, so we stood and talked through at least a couple rounds of drinks.
The conversation eventually drifted — as most SFS conversations do — to some aspect of jewelry making. As it turned out, the fellow, Tom Dougherty of Studio 2015 in Woodstock, Illinois, had an interesting process to share about making hoop earrings from tubing. He learned the process from Kenneth Guth, a neighboring goldsmith and acclaimed knife maker. By all accounts, Guth has always enjoyed sharing his knowledge with other people, and he has taught workshops on jewelry, metal work, and knife making, both at the college level and to the general public. The process is incredibly simple, and I'm delighted to share it with you here.
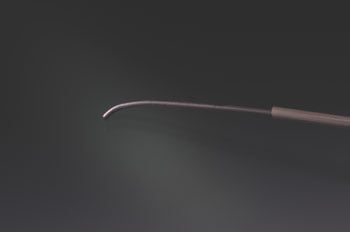
1. Begin by acquiring some tubing. In this example, I am using some sterling silver tubing that I had in my safe from a long-ago purchase from a retiring craftsperson. The outside diameter measures 1.64 mm (14 gauge) and it has a wall thickness of about 0.41 mm.
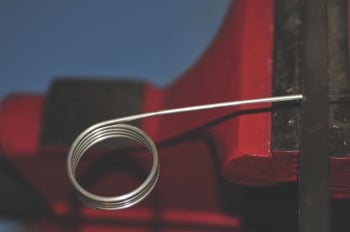
2. Next, get some piano wire. I happened to have several leftover lengths of piano wire that I was using to make torsion springs for a hinged box. If you don't have any piano wire hanging around, locate a piano tuner in your area. He or she will likely be able to sell you some.
Dougherty suggests that the piano wire should just fit inside the tubing. What I had on hand wasn't that precise. My closet fit was 1 mm diameter wire (18 gauge), which left some slop in the fit given that the inner diameter of the tubing was approximately 1.23 mm. But as you will see it still worked perfectly.
3. Cut the piano wire to a length of about 6 to 8 inches longer than the tubing that you want to curl. Put a smooth bend in the end of the wire and polish the end. The bend in the wire should be only about one quarter (or a little less) of the circumference you wish to create. I used ring-bending pliers to accomplish this.
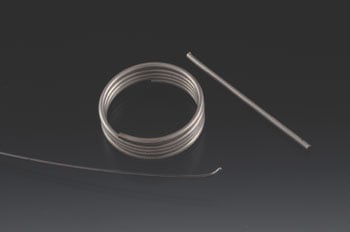
4. Thread the tubing on to the piano wire from the straight end. Then thread another short piece of the same size tubing to act as a "pusher," which will allow you to utilize the entire length of the main tube. The pusher should be a little longer than the desired diameter of the finished hoop to prevent the last curl from becoming distorted by bumping against the drawplate at the end of the pull sequence.
5. Insert the straight end of wire into a drawplate hole that will easily allow the wire to pull through but not allow the tubing to pass or bind in the hole. I found it helpful to turn my drawplate around and pull through backwards, which gives the pusher tube a flat purchase. Using standard draw tongs, pull the wire through the tubing with one even stroke. The tubing will curl evenly as the wire is pulled through it. Lubricating the wire may help, but I didn't find it necessary.
You may find that practicing with copper tubing available at your local hardware or hobby store is an economical way to perfect the process before you try it with precious metal.
6. To finish, I simply cut the curl into hoops, soldered a post to one end of each, and polished them in my tumbler. I now have inventory in my safe instead of unused tubing — thanks to a neat trick that I learned from a new friend at SFS!
![]()
In association with
![]()
The award-winning Journal is published monthly by MJSA, the trade association for professional jewelry makers, designers, and related suppliers. It offers design ideas, fabrication and production techniques, bench tips, business and marketing insights, and trend and technology updates—the information crucial for business success. “More than other publications, MJSA Journal is oriented toward people like me: those trying to earn a living by designing and making jewelry,” says Jim Binnion of James Binnion Metal Arts.
Click here to read our latest articles
Click here to get a FREE four-month trial subscription.
Related Articles

Hints on Making Tubing

Using Coils To Bend Tubing

Making Your Own Tubing

Methods to Effectively Bend Tubing


The All-In-One Jewelry Making Solution At Your Fingertips
When you join the Ganoksin community, you get the tools you need to take your work to the next level.

