
Low-Cost Press Forming Technique
I first saw this technique in a work-shop held at West Dean College, Cich-ester, Great Britain, presented by Louise O'Neill and Bonnie Macintosh. I was immediately filled with enthusiasm by this technology, but the high cost for the press disturbed me. I only occasionally do such work. When back at home I began to experiment with less expensive tools and came up with a 'low cost' press forming technique.
7 Minute Read
With interest I studied the article "Hydraulic Die Forming for Enamelists" by Carol Holiday in the April 1999 (Vol. 18, No.1) issue of Glass on Metal. I first saw this technique in a work-shop held at West Dean College, Cich-ester, Great Britain, presented by Louise O'Neill and Bonnie Macintosh.
I was immediately filled with enthusiasm by this technology, but the high cost for the press disturbed me. I only occasionally do such work. When back at home I began to experiment with less expensive tools and came up with a "low cost" press forming technique.
First, I should say that you won't be able to do all the types of works described in Carol Holiday's article or from the informative book by Susan Kingsley "Hydraulic Die Forming For Jewelers & Metalsmiths", 20-Ton Press, Carmel, USA. For small scale and occasional work it is very usable.
You will need:
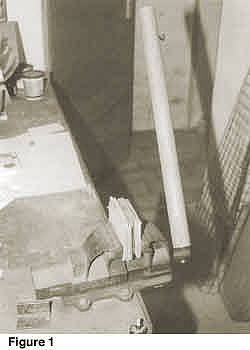
- A robust, stable vice, with a jaw-breadth of 120-150 mm (4-6 inches) or more (fig. 1) .
- A robust iron pipe with a length of about 30 inches .
- Plastic sheets about 0.2 inches thick; hard and tough .
- Rubber sheets about 0.15 - 0.25″ thick with varying elasticity and very importantly, without any fabric inlay .
- Your goldsmith tools like a saw, soldering equipment, files etc
With these tools you can form objects like a hemisphere from flat sheet copper up to a thickness of 1 mm (B&S Gauge 18 or about 0.04″) and a diameter of 2 cm (0.8″) or larger if you use fine silver.
To get enough pressure, you must double or triple the length of the vice handle. If the handle (the bar that opens and closes the vice) is 30 cm (12 inches) long, you can lengthen it with a pipe up to nearly one meter (three times, about 40 inches). If it is a good vice, the bar shouldn't bend.
The disadvantage of this method compared to those mentioned above is that you must put the matrix-block sandwich vertically in the vice instead of horizontally as in the hydraulic press. With a bit of skill it is not really a problem.
In most literature on "pressforming" acrylic sheet (Plexiglas, Masonite) is recommended as material for the matrix. I prefer plastic sheets which are available in a wide range of hardness and softness from "glass hard" to soft and flexible. Look for a Company or small workshop which makes neon signs or who make other products from plastic or plastic sheet. Many times they will have a wide range of plastic sheet with a variety of qualities. Look for a hard but tough sheet with a thickness between 5-10 mm (0.2- 0.4″). Thicker plastic sheets are hard to saw.
Often these workshops have ample scrap which they might offer to give to you or to trade for a cup of coffee. The first time I went to one of these shops I picked out as many different types of plastic sheet that was available and then went about testing each type to figure out which was best for this technique.
As an example I'll describe how to make two hemispheres with a diameter of 1 inch which I will solder together to make a sphere. Read Carol Holiday's very informative article for more details.
Low-Cost Press Forming Technique
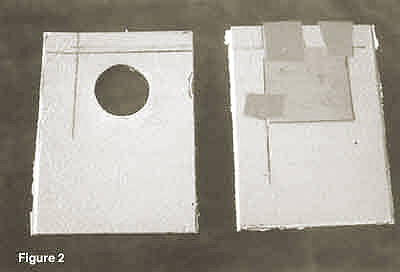
- Saw a 1 inch diameter hole in a plastic sheet about 0.2″ thick and 2 to 2.5 inches square. It is important that you retain at least 0.5″ of plastic sheet around the hole (fig. 2).
- So that the silver sheet will later lie over the center of the hole in the plastic sheet, make a mark of 1.5″ square around the center of the hole (see fig. 2). You should have a minimum of 0.5″ of solid plastic sheet around the hole.
- Anneal a 0.04″ thick and 1.5″ square piece of fine silver.
- Align the silver sheet along the marks on the plastic sheet and attach it on two sides with Scotch tape (fig. 2).
- Depending on the metal thickness, put one or two rubber sheets above the silver sheet. (I wasn't able to obtain Urethane sheets so I searched around until I found various thicknesses of different kinds of rubber sheet which worked successfully).
- Place an iron plate (about 0.4″ thick by 1.5″ square) above the rubber sheet and a similar size iron plate on the opposite side of the sandwich. The iron plate should not be much larger than the silver sheet in order to utilize the full pressure generated. Explanation: 1.5 x 1.5 = 2.25 square inches. If a force or pressure of l00 pounds is applied to the iron pipe the pressure on the silver piece will be 44.44 pounds/square inch. If iron plates 2.5 x 2.5 " (size of plastic sheet) had been used the calculation is 2.5 x 2.5 = 6.25 square inches. The same 100 pounds of pressure divided by 6.25 results in 16 pounds/square inch which is 64% less pressure/square inch.
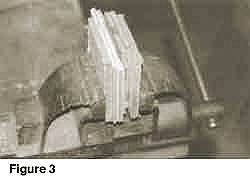
- Place the sand-wich vertically in your vice and press it care-fully. It is better to start with less pressure than too much pressure (see fig. 3)

- Open the vice and control the doming. In one stage you should not dome more than about 0.2-0.25 inches. If the piece is not domed enough, press again. Otherwise, remove the domed silver sheet from the sandwich, anneal it and put it back into the plastic sheet hole. Good annealing is very important during the whole process!
- Adhere the metal to the matrix again with Scotch tape. Place a second and if necessary, a third plastic sheet with a one inch hole under the mother-matrix so that you have enough space for the arch. (See sketch in Glass on Metal, Vol. 18, No.1, page 134).
- Put the rest of the sandwich together as before and press again.
- Remove the silver sheet and anneal again.
- Cut out around piece of rubber sheet about 1 inch in diameter.
- Place the 1 inch dia. rubber piece inside of the arch in the silver sheet and put the sandwich together as before. Press again
- Measure the height of the dome. If you want to make a ball of 1 inch in diameter, the height must be about 0.5 inches.

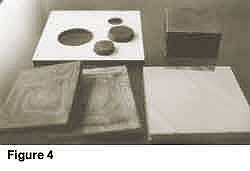
- If you have achieved the proper height, remove the domed sheet. Otherwise, anneal and press again. You may have to inlay another round rubber sheet with a smaller diameter than before (fig. 4, foreground). First place the smaller round rubber sheet inside the arch and then the larger one on top of the square rubber sheet. Set the sandwich together and press again.
- Make the second hemisphere as described above. Now you have two hemispheres in two square silver sheets, which will be soldered together to form a ball. It is wise to flatten the sheet outside of the hemispheres for a better fit during soldering.
- Place one of the hemispheres into the hole of the matrix. Put two or three other plastic sheets with the same hole size on the top of the first, so that the arch lies in a "tunnel". The arched silver must be lower than the bottom of the last plastic sheet.

- Make a sandwich in the following order: iron plate - "tunnel-block" - iron plate. (fig. 5)
- Put this sandwich in the vice and press it tight. This will flatten the silver sheet outside of the hemisphere. Remove the domed sheet.
- Repeat with the other silver sheet.

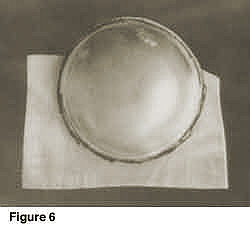
- With a fine permanent mar- ker make an outline around the hemispheres. (fig. 6.)
- With your jewelry saw, saw slightly outside of the marked line so that you get nearly a 0.04″ rim around the arch.
- Clean the underside of the small rim very well and cover it with soldering flux. Heat slightly with a torch to dry the flux.
- Place little bits of hard silver solder (IT-solder) on the rim. Heat with the torch until the solder flows. Let it cool down.
- File the solder down a bit. This will expose fresh solder which will flow better in the next soldering step.
- Cover the rims of both hemispheres with soldering flux. Don't forget: If you solder together two exact hollow pieces, one on top of the other, you must make a little hole in one of the hollow pieces. A 0.02″ diameter hole is enough. If you don't the hollow body will collapse after soldering. During soldering, the air inside the hollow body is heated and expands. As the piece cools, the air will cool and decrease in volume. The outside pressure will collapse the sphere.
- With iron binding wire, bind together both hemispheres. Make sure the small rims fit perfectly together.
- With the torch, heat up the ball until the solder flows. You should see the shiny solder flow around the rim.
- Let cool and file away the rim. You should now have an exact round ball which can now be enameled.

I make use of press forming if I want to make many domed pieces of the same shape such as irregular forms like hearts, pillows, ovals, polygonals etc. which are hard to make with a dapping block. If you make irregular forms, you must make the first dome from the top of the matrix, the second from the bottom, because you need two reflected halves.
Related Articles

The Rush Job From Hell

Full eBook: Doming Silver Beads

Cold Forging of Karat Gold Findings

Live And Let Die (Struck)


The All-In-One Jewelry Making Solution At Your Fingertips
When you join the Ganoksin community, you get the tools you need to take your work to the next level.
