
Easy Etching Step by Step
This technique involves the transfer of an image to metal using a material that will "resist" the dissolving action of acid. Where you apply a resist the metal will be protected; everywhere else, the acid (ferric chloride) will etch the metal, resulting in a raised image or pattern. To illustrate the etching technique, one of the more versatile resists, a type of blue acetate film known as PnP ("press 'n' peel") paper, will be used. One side of this paper is shiny and the other is matte. It is the matte side that is used to transfer a pattern onto the metal. The pattern will transfer as a mirror image, so if the direction of the pattern is important or includes lettering, it may be necessary to copy the pattern to clear acetate first and flip it so that it will be reversed on the PnP paper.
6 Minute Read
Easy Etching Step by Step - This technique involves the transfer of an image to metal using a material that will "resist" the dissolving action of acid. Where you apply a resist the metal will be protected; everywhere else, the acid (ferric chloride) will etch the metal, resulting in a raised image or pattern. To illustrate the etching technique, one of the more versatile resists, a type of blue acetate film known as PnP ("press 'n' peel") paper, will be used. One side of this paper is shiny and the other is matte. It is the matte side that is used to transfer a pattern onto the metal. The pattern will transfer as a mirror image, so if the direction of the pattern is important or includes lettering, it may be necessary to copy the pattern to clear acetate first and flip it so that it will be reversed on the PnP paper.
A variety of other materials can be used as resists — even a black permanent marker can be used to draw original art directly on the metal. Rubber stamps using permanent ink, press-on letters, and lace stickers from craft supply stores will all work as resists. More traditional resists include lacquer, shellac, nail polish, rubber cement, asphaltum, electrical tape, contact paper, and paint. The creative applications are almost limitless.
Materials
- Brass, copper, or nickel for etching in 18, 20, or 22 gauge
- Ferric chloride
- PnP paper
Tools & Supplies[/su_spacer]
- Metal shear
- Jeweler's saw
- Scouring pads
- Sandpaper
- Laser printer or carbon-based toner photocopier
- Alcohol
- Iron
- Heat-resistant surface
- Black permanent marker
- Nail polish
- Contact paper
- Styrofoam, 1-in. thick
- Double-sided tape
- Safety glasses
- Dust mask
- Nitrile gloves
- Apron
- Glass dish or disposable plastic container, minimum 6 in. (15.2cm) square
- Baking soda
- Acetate
- Brass brush (optional)
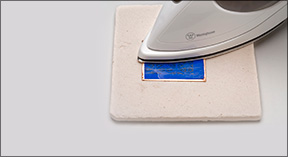
Transfer your artwork to the PnP paper | |
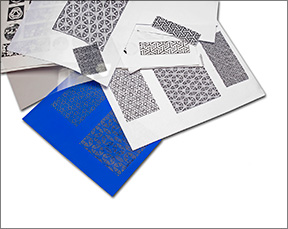 | Use a photocopier to transfer copyright-free artwork or original designs from plain paper onto the matte side of the PnP paper. The copier should be set to give the darkest image possible without smudging clear areas. The photocopied image on the PnP paper will act as a resist on the metal. Photocopiers with a carbon-based toner will work best to transfer your image from the PnP paper to the metal. The inks used in ink-jet printers generally do not work for transferring images with PnP paper.Pretest your iron. |
| The optimal heat for transferring images with PnP paper is just below the temperature at which the backing film on the PnP paper begins to buckle. Since irons vary in temperature it is critical to pretest your iron. Use an iron set one or two settings below maximum when transferring the image from the PnP paper to the metal. | |
Cut and prepare the metal | |
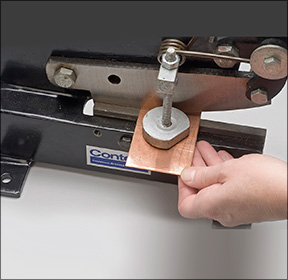 | Use a metal shears or a jeweler's saw to cut a piece of metal that is slightly larger than your image or pattern. The metal must be flat. If the metal is not flat use a rawhide mallet to flatten it on a bench anvil. Use a scouring pad or sandpaper to clean the surface of the metal. Rinse with water and dry, taking care to handle the metal by the edges to keep skin oils off the surface. Wipe the metal surface with alcohol immediately before attaching the PnP paper. |
Apply the PnP as a resist to the metal | |
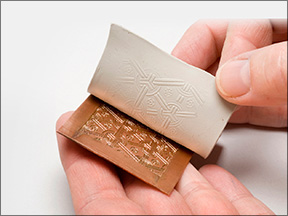
 | Cut your image or pattern from the PnP paper, leaving a metal border at least 1/4 in. (6.5mm) wide around the image. Place the metal on a heat-resistant surface; place the PnP paper on the metal, matte (image)-side down. Use a circular motion with the iron to apply heat evenly across the surface of the PnP paper. The copper plate will become very hot and the image will become more pronounced through the PnP paper's film backing as the transfer takes place. |
Peel the PnP paper from the metal | |
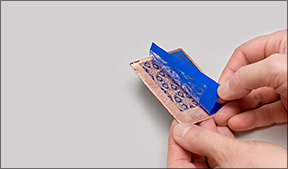 | When the metal has cooled, lift one corner of the PnP paper, observing the transfer closely to make sure the image has completely transferred. If it has not, apply the iron again until you are satisfied with the transfer. If there are any areas of the design that did not transfer, fill in and touch up the image with black permanent marker or nail polish. |
Prepare for etching | |
 | Cover the back of the metal sheet with contact paper, coating the edges with nail polish or another resist to protect them from etching. |
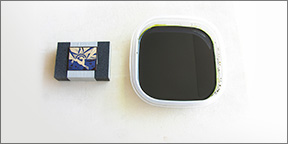 | Cut a piece of scrap styrofoam that is slightly smaller than your metal and at least one inch thick. Use double-sided tape to adhere the styrofoam to the back of the metal. The styrofoam will keep the metal afloat, image-side down, in the ferric chloride solution during the etching process. Put on eye protection, an apron, and nitrile gloves before handling any acids. Make sure there is adequate ventilation in the area where you will be etching. See "Safety Notes," page XX, for more information on handling ferric chloride. |
Etch the metal | |
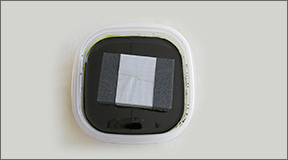 | Pour enough ferric chloride into a glass dish or plastic container to allow the metal to float easily. Gently agitate the container to remove air bubbles from the surface of your metal. Cover the container and leave the metal for approximately 1 1/2 hours. A shallow etch can be achieved in 30 to 45 minutes. See "Etching Tips," for resist endurance times. |
Clean the metal and remove the PnP resist | |
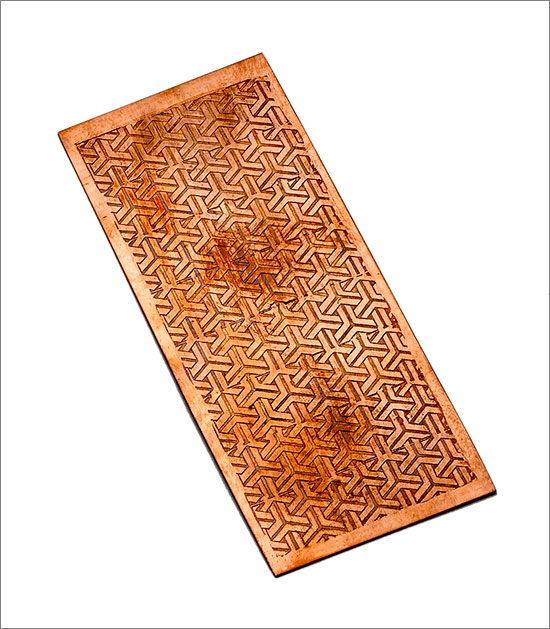
 | Wear nitrile gloves, or use plastic tongs to remove the metal from the ferric chloride. Submerge the metal plate in a solution of 2 cups (473.2ml) water to 1/4 cup (59ml) baking soda to neutralize the ferric chloride. Rinse in clear water and remove the tape. Remove the PnP with acetone and a scouring pad; finish with a brass brush and soapy water. This should remove all traces of the resist and any other stains. It will also polish and burnish the metal, giving it a smooth, attractive finish. |
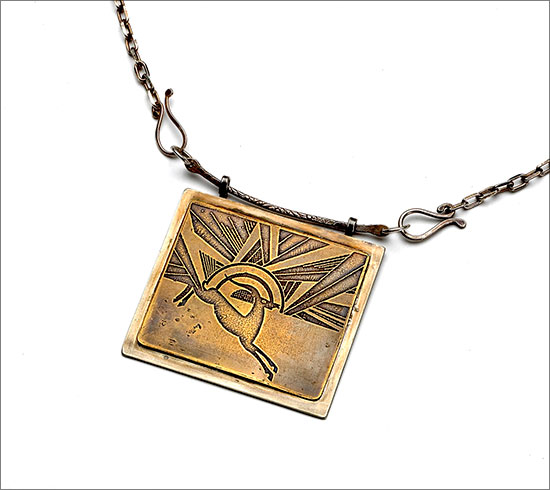
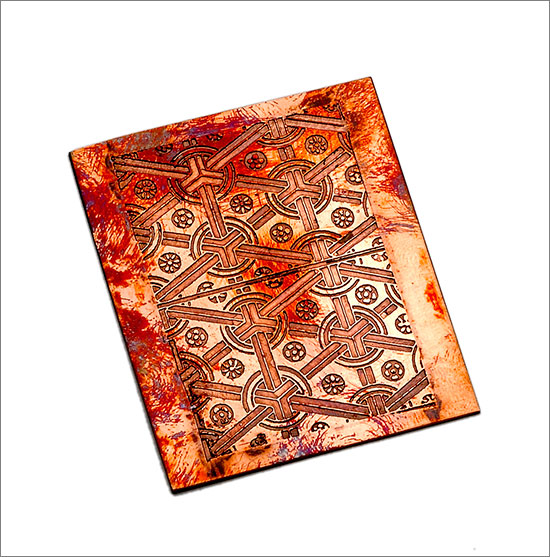
| The finished etching can be made into a jewelry item or you can use an etched pattern as a texture plate for metal clay or polymer clay. If you have etched into brass or nickel, you can use the plate to roll-print the texture onto sterling silver. | |
Etching Tips
Wear an apron and eye protection when working with acids. Use nitrile gloves or plastic tongs to lift the metal out of the acid-filled container. To reduce your risk of an acid spill, do not repeatedly check the progress of the etching. Etch small test panels using a timer to know how long to leave the metal in the acid to achieve the depth of etching you desire. Rubber cement will stand up to the ferric chloride solution for 5 hours, PnP paper for over 2 hours, but felt tip permanent marker begins to break down after an hour and a half. A batch of ferric chloride is usually good for 5 hours-worth of etching; after that, the etching process dramatically slows.
Safety Notes: Do not allow the ferric chloride to touch your skin or your eyes. Do not touch your eyes with your fingers if you have been handling ferric chloride. Do not inhale any vapors that may be given off by the ferric chloride. If skin or eye exposure occurs, rinse with water for 15 minutes and seek immediate medical attention. When you have used up a bottle of ferric chloride, take it to the nearest official hazardous waste disposal site.
Ferric chloride will stain everything it touches. Be sure to cover your work area with several layers of newspaper to protect the surface from staining. Wear an apron to protect your clothes. If you rinse the ferric chloride into a sink, scrub the sink afterward with abrasive powder to remove any stains and residue.
The following is a link to the Household Products Database on the Web site maintained by the National Institutes of Health, describing the properties and hazards of ferric chloride. Read the information on the health effects of ferric chloride thoroughly before undertaking any etching project using ferric chloride.
Related Articles

Champleve – Photo Etching with PnP Paper

Etching Options for Champleve

Photographic Images on Refractory Metals

Damascus and Pattern Welding


The All-In-One Jewelry Making Solution At Your Fingertips
When you join the Ganoksin community, you get the tools you need to take your work to the next level.
