
Conversion of Dental Tools Into Wax Engraving Tools
This paper describes the conversion of dental tools into wax engraving tools, how they are held and how they are used.
4 Minute Read
This paper describes the conversion of dental tools into wax engraving tools, how they are held and how they are used.
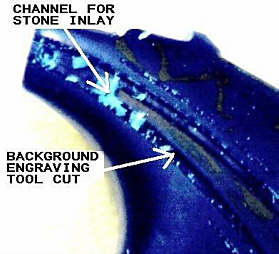
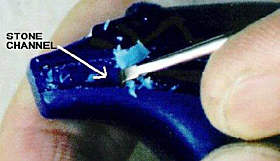
Here are the results of using the engraving and background tools. The project is created in blue carving wax.The channel through the center of the bear will be inlaid with stones once the wax is cast and finished.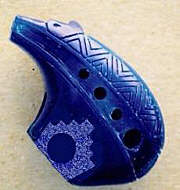
The holes in the channel were drilled in order to aid in hollowing the bear.
The saw tooth design on the back of the bear was engraved by the line engraving tool. The boundary of the stone channel was engraved first, with the line engraving tool. The wax in the channel was then recessed with the background engraving tool.
Tool Modification
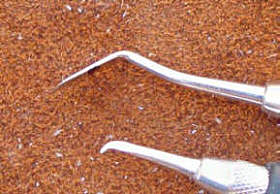
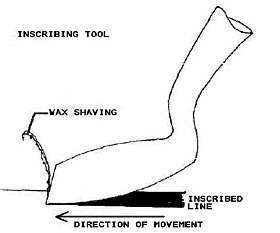
Line inscribing toolThe basic dental tool used to engrave wax is called a "Woodson." One end of the unmodified Woodson tool is shown at the top of the photograph. | |
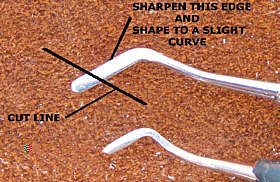 | The end is modified to look like the tool at the bottom of the photograph. This end of the tool will be used to inscribe the design into the wax. The dental tool is cut and ground as this photo indicates. |
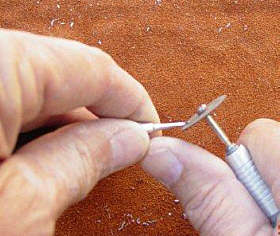
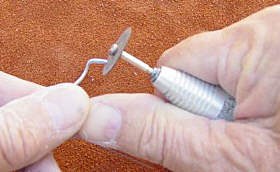 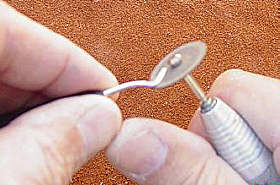 | The tool may be modified with a silicone carbide-separating disc on a mandrill mounted in a flexible shaft driven hand piece. |
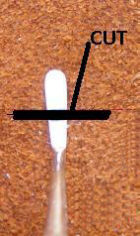
 | The other end of the Woodson tool is modified to look like the tool in the bottom of the photograph. This tool will be used to engrave the line in the wax. |
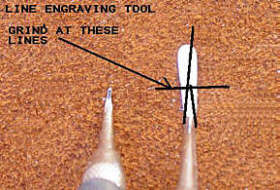 | The dental tool is cut and ground as this photo indicates. |
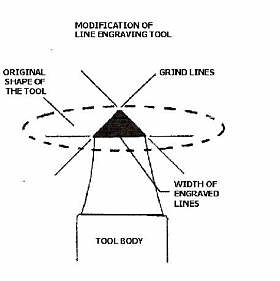 | |
 | Care must be taken to grind the base of the triangle perpendicular to the shaft of the tool. If it is ground at an angle, the tool will have a tendency to track incorrectly when engraving a line. |
Background engraving tool | |
 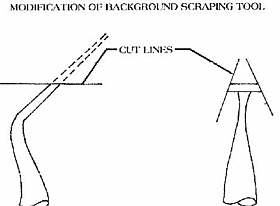 | Another Woodson tool is modified as shown.
This tool will be used to scrape away the wax from the background of the design. |
Holding the Tools
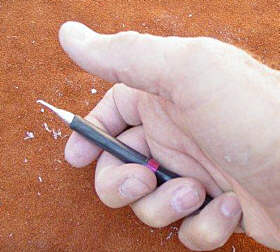 | The scraping tools are pressed against the palm of the hand by the little finger and ring finger.The tool is then held between the thumb and index finger. Once the tool is held this way, move the thumb back and forth along the axis of the tool. |
 | To engrave wax, the thumb is placed against the wax. Attempting to move the thumb will cause the tool to move back and forth. The thumb acts as a guide for the tool. |
Use of the Tools
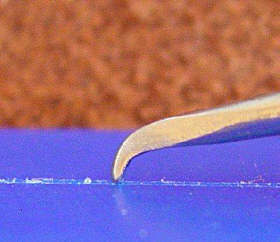
Line inscribing toolThe line drawing tool is used to inscribe the design into the wax. | |
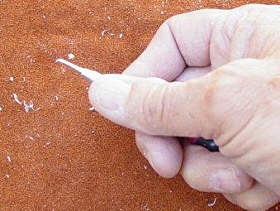
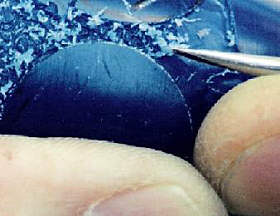
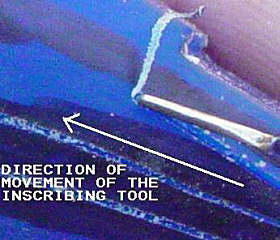 | The tip of the tool is pressed into the wax at the end of the line that is to be inscribed. The line is inscribed by moving the tool forward. The tool will ride in the inscribed line as it is moved forward. The line will be inscribed in the direction the tool is moved. This allows the tool to inscribe a very straight or smooth curved line. The wax or the tool may be rotated as the tool is pushed forward when inscribing a curved line. Note in the photograph there is a curl of wax at the tool tip that has been removed from the inscribed line. |
 | The tool should be rocked back and forth until you develop this curl of wax. If the tool is rocked too far forward, the tip will imbed itself into the wax and will not move. If the tool is rocked back too far, the line will not be inscribed as it should be. This inscribed line will be used as a track for the engraving tool. |
Line engraving tool | |
| The inscribed lines are engraved by placing the engraving tool tip in the inscribed line and pulling it toward the hand while using the inscribed line as a track. |
 | The tip of the line engraving tool must be held on the wax as shown in this photo, in order to get a proper line engraved. |
 | If the tip of the line engraving tool is held as shown in this photo the tool tip will dig into the wax and become immobile. |
Background engraving tool | |
 | Once all the border lines of the design are engraved, the wax from the stone inlaying channel and the background of the design will be removed with the background engraving tool. The modified background tool will be used first to remove the unwanted wax from the channel boundary line. |
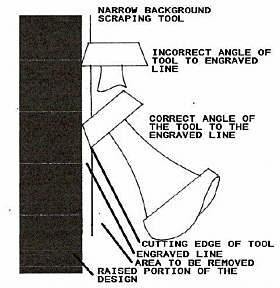
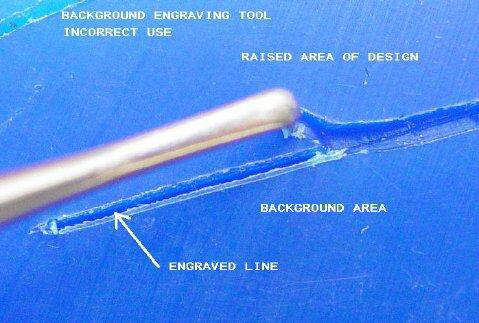 | The background engraving tool is used to remove wax from the stone channel or the background of the design. >When the background engraving tool is pulled parallel to the design line, the chances are great that it will break into the design as shown |
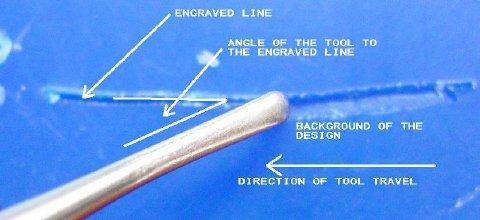 | The correct way to move this tool is at an angle to the line of the design as shown. This way the leading cutting edge of the tool will not break into the design. |
 | |
 | Once the boundary lines of the stone channel are engraved, the center of the channel will be removed with the background tool. |
 | The recessed background areas are textured with the line engraving tool. The texture is produced by making small circles with the tip of the tool. |
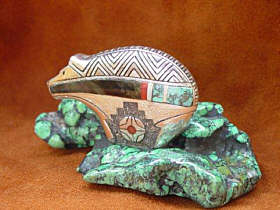 | The project cast in sterling with stones inlaid in the channel. The bear is approximately 3 inches long. |
Related Articles

Channel Setting Tools Designed For Wax
Modified Split Mandrel for Finishing Round Bezels

Tru-Seat Setting System

Giving New Life to Old Burs


The All-In-One Jewelry Making Solution At Your Fingertips
When you join the Ganoksin community, you get the tools you need to take your work to the next level.
