Channel Setting – Set ‘Em Straight
Over the past decade, channel setting has grown in popularity. Setting small diamonds, rubies, sapphires, and even emeralds into channels has become commonplace in most shops. Hardly a week goes by without some form of repair being preformed on a channel set piece. The following tips will hopefully make this work a little easier.
5 Minute Read
Over the past decade, channel setting has grown in popularity. Setting small diamonds, rubies, sapphires, and even emeralds into channels has become commonplace in most shops. Hardly a week goes by without some form of repair being preformed on a channel set piece. The following tips will hopefully make this work a little easier.
When channel setting it is of utmost importance to cut a precise seat. If the stone fits loosely in the seat it will be difficult to tighten and problems will develop during the setting process.
When channel setting it is best to intentionally cut the seat too small. Then, gradually enlarge the seat to fit the stone. This will help keep you from over cutting too large a seat.
A closed back channel is most secure. If an open back channel is used, make certain there are support bars between the channel walls or support circles under the stones. Without these the walls of an open backed channel can spread apart over time causing the stones to come loose or fall out.
Before setting, color the inside of the channel with a felt tip marker. With the dark color as a background it will be easier to see the diamonds and to keep their spacing even. When finished setting dip in alcohol to remove the ink.
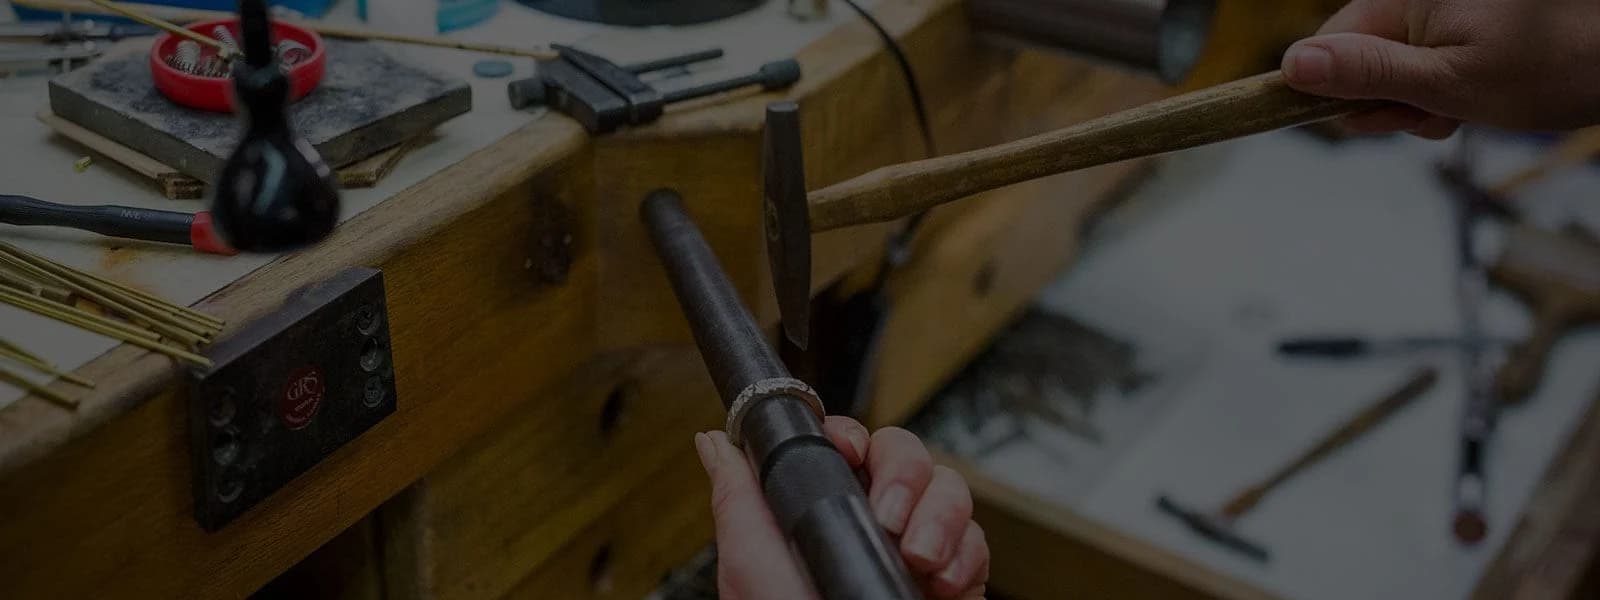
When channel setting file the tops of the channel wall at a 30-degree angle. Then, hammer the channel wall at this angle and the metal will form down and out over the stones.
When channel setting always undercut the same side of the channel on each stone. Alternating the undercut side may cause the stones to set unevenly when finished. Before cutting the seats mark one of the walls of the channel with a felt tip maker. Then you will be certain to always undercut the same side of the channel. This is particularly important if you are interrupted while cutting the seats.
When setting a straight row channel set band, place the ring on a ring mandrel and tap the sidewall over the stones with a hammer handpiece on your flex-shaft. Rest the mandrel on your bench pin and slowly rotate it while hammering the channel edge down. This will help keep the channel wall even and smooth. Placing cellophane tape over the stones will hold them in place while hammering.
When channel setting square stones, a tapered square hole must be cut to accommodate the pavilion of the stone. This can be accomplished by first using a heart bur held perpendicular to the mounting to cut the four-corners. Then, use a small wheel bur to remove the metal between the corner cuts.
When setting stones into a curved channel undercut the wall on the outside of the curve. Then, secure the stones by hammering or bending the inside channel wall over the stones. Although some mounting designs will not allow you to set in this manner it is more efficient than trying to secure the stones with the metal from the outside wall. Remember, it is always easier to stretch metal than compress it. By hammering the inside curve you are stretching then metal outward over the stones rather than trying to compress the outside curve inward to secure the stones. In addition, pressing in on the stones to tighten them may force the stones together causing them to chip.
When channel setting stones in a channel that is next to, or circles a center crown you have no option but to under cut the channel on the center crown side. Then, carefully hammer the outside wall down to secure the stones.
If a channel is too wide for the stones you are setting tap down on the top of the channel wall without the stones in place. This will spread the metal closing the channel. Then, anneal the mounting to soften the channel wall before setting the stones.
To channel set stones in a solid plate first lay out the stones on the plate. Then cut a seat slightly smaller than the stones into the plate. Next, remove the metal from between the stones with a wheel bur forming the channel in the plate. Polish the inside of the channel and set the stones using normal channel setting procedures.
To tighten stones in a channel set band, use a pair of pliers with one 1/2 round jaw and one flat jaw. Place the 1/2 round jaw on the inside of the ring and squeeze down on the top of the channel with the flat jaw. Using the ? round jaw on the inside will prevent nicking and marring the inside of the ring.
To smooth the channel walls on small channel set stones a roller can be made from an old milligram wheel. Carefully grind away the metal ridges that form the beads, leaving a smooth channel around the outside of the wheel. Then polish to a high shine. Place this modified wheel in its handle and roll it over the top of the channel wall in the same manner you would use to milligram an edge. The result is a smooth edge of metal burnished tight against the stones.
You can use a ring roller designed to enlarge rings to tighten stones in a channel set wedding band. Select a half-round die larger than the width of the band; making certain the die will contact the tops of the channel without hitting the stones. Apply gentle pressure and roll across the entire channel, compressing the metal down tight onto the stones. Then, remove the ring and check the stones. Repeat as necessary. DO NOT Over Tighten The Die Against The Ring. This process will leave the channel smooth and even.
To re-build the top of a worn channel, solder a thin strip of gold matching the color and karat of the jewelry to the top of the channel. Then, file to shape. An easy method to make the small strip for re-building a channel is to roll a piece of round wire through a rolling mill once or twice.
Before re-building a worn channel top, examine the mounting carefully. Often the sides of the channel are just as worn as the top. To only re-build the top will result in an unsatisfactory repair. Rather than soldering a strip to the top, you may need to solder an "L" shaped piece of gold to the channel. Sometimes the only remedy is to replace the channel section or the entire mounting.
Related Articles

Kinds of Alloys

A Metalworking Hand Tool List For Beginners In Jewelry-Making

Basic Spiral Braiding
Gemstone Exploration Techniques


The All-In-One Jewelry Making Solution At Your Fingertips
When you join the Ganoksin community, you get the tools you need to take your work to the next level.
