
Retracing Steps to Solve Casting Problems
A design riddled with undercuts and sharp little details just screams casting nightmare the moment the CAD file shows up. But sometimes even the most straightforward looking designs can cause real headaches for the caster. Take for example this three-stone palladium ring design that recently arrived at Jewel-Craft in Erlanger, Kentucky, for casting. It's a bit unusual, particularly the center setting, which features eight prongs and a raised lip of metal where the stone sits. However, nothing about the design caused alarm.
3 Minute Read
A design riddled with undercuts and sharp little details just screams casting nightmare the moment the CAD file shows up. But sometimes even the most straightforward looking designs can cause real headaches for the caster.
Take for example this three-stone palladium ring design that recently arrived at Jewel-Craft in Erlanger, Kentucky, for casting. It's a bit unusual, particularly the center setting, which features eight prongs and a raised lip of metal where the stone sits. However, nothing about the design caused alarm.
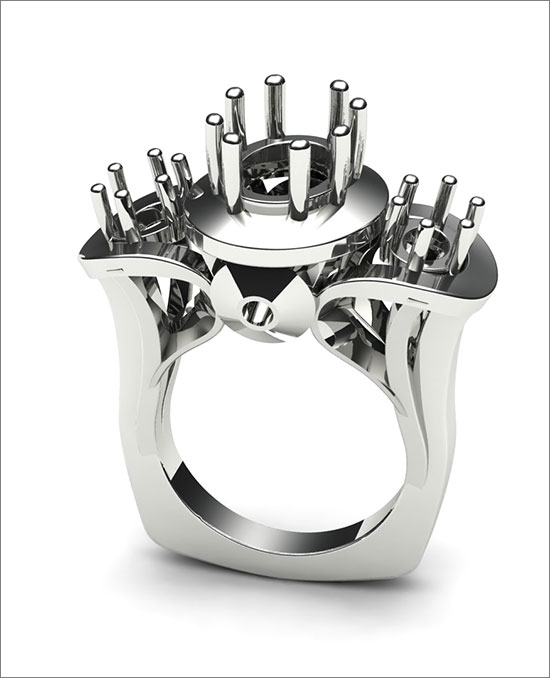
"It looked like a clear-cut casting when we grew the file on our Envisiontec machine," says Angie Chesnut, head of casting for Jewel-Craft. "It had some sections that went from thick to thin, which can pose issues with turbulent metal flow [and] lead to investment breakdown, but this piece didn't raise any red flags.
"But when we cast the model, the lip of metal that encircles the center stone on the inside of the prongs was full of holes," she continues. "There was no obvious reason why this would have happened."
Chesnut had approached the casting as she would any piece with a thick European shank that swirls into thinner sections of metal: She placed a split 4.5 mm sprue at each corner of the bottom of the shank, aiming to feed the thickest sections of the ring first and then flow the metal into the smaller details at the top of the ring. When the first casting failed, she had the CAD department grow a second model and tried again. This time she used a smaller 3 mm split sprue in the same position, but added two 2 mm feeder sprues to the rim of the center stone setting in an effort to feed more metal into the section that had failed in the first attempt. Again, the same problem resulted.
They say the third time is a charm, but Chesnut wasn't content to continue moving sprues around in hopes that the inner section of the main setting would fill. This time, she approached the project as if she were looking at it for the first time. "I studied the model carefully," she explains. "I knew there had to be a reason why we were having so many problems with the main setting, and when I held it up to the light, it hit me."
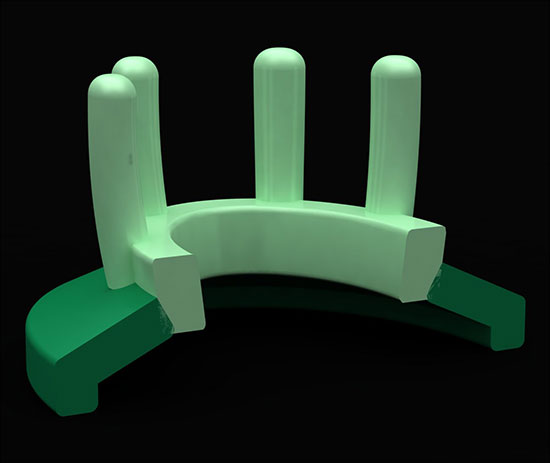
When creating the central setting, the designer failed to consistently join the raised lip area to the main part of the setting. "The lip was creating an undercut," says Chesnut. "Because it wasn't properly joined to the outer part of the setting, there was no way the metal could flow in and fill it."

By modifying the CAD file to ensure that the outside and inside of the setting were level and clearly joined with no undercuts, the Jewel-Craft team was confident that it had solved the problem. But just to be sure, they made another major change to their approach.
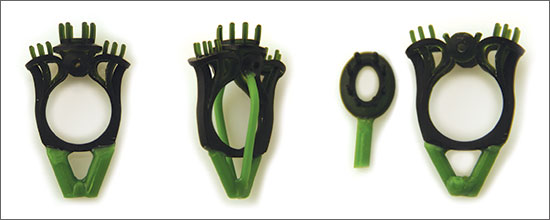
"Instead of casting the ring as one piece, as we had tried to do twice, we decided that it would be best to break it apart into two components — the center setting and the shank with side stones — and cast them separately," says Chesnut. "Once we had pinpointed the design flaw, we felt that it would be best to remove the area that had been giving us problems and cast it alone."
They cast the shank using the original 4.5 mm split sprue at each corner, and used a 2 mm sprue on the edge of the setting. The result, finally, was success.
If there's a lesson to be learned from this project, it's to always be willing to retrace your steps. "When modifying the sprue system didn't do the trick, I went back to square one," says Chesnut. "I could have kept trying to cast it and kept getting failures, but by stepping back in the process, I was able to solve the problem."
![]()
In association with
![]()
The award-winning Journal is published monthly by MJSA, the trade association for professional jewelry makers, designers, and related suppliers. It offers design ideas, fabrication and production techniques, bench tips, business and marketing insights, and trend and technology updates—the information crucial for business success. “More than other publications, MJSA Journal is oriented toward people like me: those trying to earn a living by designing and making jewelry,” says Jim Binnion of James Binnion Metal Arts.
Click here to read our latest articles
Click here to get a FREE four-month trial subscription.
Related Articles

Cracks in Jewelry Manufacturing

Overcoming Lightweight Casting Challenges

Causes & Prevention of Defects in Wrought Alloys

Identification & Correction of Platinum Casting Defects


The All-In-One Jewelry Making Solution At Your Fingertips
When you join the Ganoksin community, you get the tools you need to take your work to the next level.

