
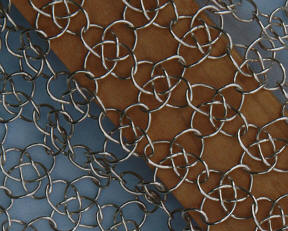
How to Make a Carrick Mat Knot
Step by Step Tutorial - Making Three-lead Four-bight Turks-head. The Turks-Head is a general class of three-dimensional knot that lends itself well to decorative uses. Materials required: 18ga Silver wire...
5 Minute Read
This article describes the steps on how to make aCarrick Mat Knot, a Three-lead Four-bight Turks-head, and how to connect them together.
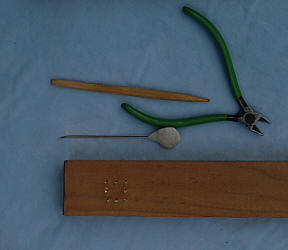
Materials required:
- Silver wire (18ga used in this example)
- brass nails (16ga wire cut to uniform lengths, in this example)
- a needle or spike of some sort (large doll-needle with Jett-Sett handle)
- a bamboo chopstick,
- side-cutters
- a hemostat clamp or other means of pulling on the end of the wire. Fingers will not be adequate.
Steps on How to Make a Carrick Mat Knot
 | Materials to start out with for the fixture consist of a grid pattern (here, some graph paper) a piece of reasonably soft wood (poplar 1″x2″x8″) and at least eight brass pegs. |
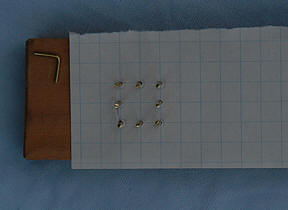 | The pegs are driven into the intersections of the graph paper in a square, with four of the pegs equidistant between the corners, one on each side. |
 | After they are all correctly placed, you may remove the paper if desired. |
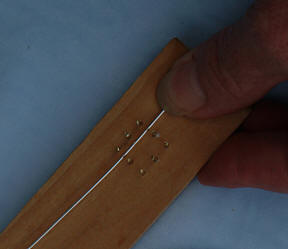 | A short length of wire is placed along one side of the square, parallel to it and between those three pegs in a row and the other five. It's good to start with more wire than necessary, the first time, but measure it carefully and try to use just enough. At best, I have a scrap rate of 25%, and using longer pieces of wire will waste more. |
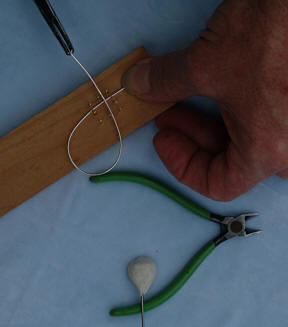 | The end of the wire must be brought around to encircle three corner pegs, and will cross the pattern at right angles to the first placement. |
 | Bring it around and grab it with the hemostat, pull on it until the loop of wire barely touches the three pegs. |
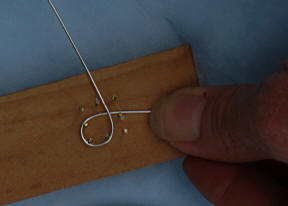
 | Keeping tension on the wire, slip the needle under the loop, and parallel to the wire just pulled through. Lay the chopstick across it and use it to push the loop of wire down to either side. This chopstick has a notch in one side, corresponding with the black dot on the other side, so that it can push the wire closer to the wood. This arches the loops in preparation for a later step |
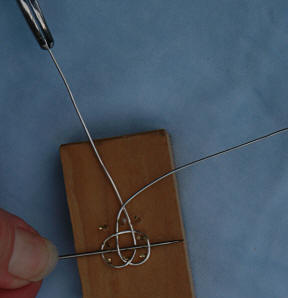
 | Take the end of the wire around the next corner of three pegs, over the first loop, and under the original beginning of the wire. This is important, it is the first time the wire goes below instead of above previous passes. Sieze it with the hemostat clamp and draw it away, as shown… the tip of the chopstick holds the loop down against the surface of the fixture and prevents it from getting out of place. |
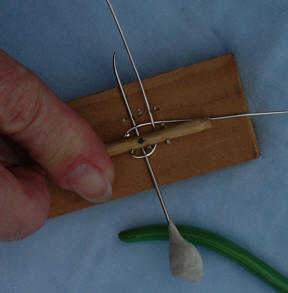
 | Use the needle to open a path across the two loops formed in the previous steps. It's a standard weave, over one, under one, over one, under one. |
 | I bent the end of the needle to make it easier to thread it through. The needle is used to make the path straight and even so the wire will pass through easily, in the next step… |
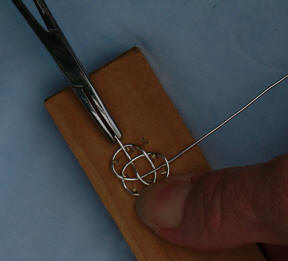
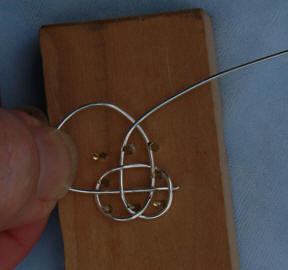 | Thread the end of the wire (again, around the three corner pegs) through the path made by the needle, and grab it with the hemostat clamp. |
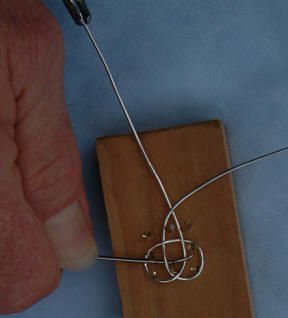
 | After pulling it through, just hard enough to bring the loop down against the pegs, use the back end of the chopstick to push down on the loops that are on top, to even the pattern up a bit. |
 | At this point you may trim the wire from the beginning of the knot. Trim it close, but not so close that you can't grab it with the hemostat later. I normally work with an entire coil of wire next to me and just pull enough through the fixture to tie it, then trim it off. This is why my scrap rate is only 25% instead of being much higher. |
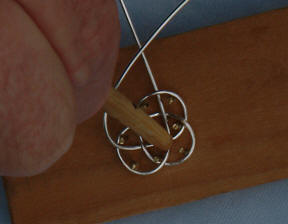
 | Only pull hard enough on it to shape the knot evenly. You can use the back of the chopstick again to work that section of wire into place. |
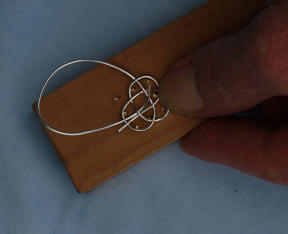 | Now bring the first end around and feed it in where the other end (that you just cut and pulled on) comes out. It is only necessary to get it under the first crossing. The example shows a loop that is much larger than I would ordinarily have at this point — generally you would only want it long enough that when you tucked it under the crossing and curled the end up, the hemostat could pull it out the rest of the way. This is something that will come with experience. |
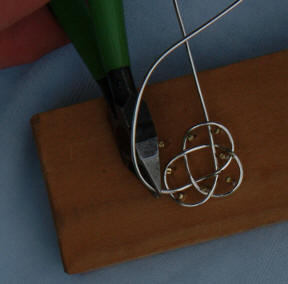
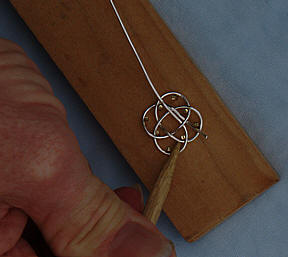 | As you pull it through, use the chopstick to hold the loop down against the fixture, then use the back end of the chopstick to work the wire into place. It's a lot easier if they are stacked up instead of being side by side, because that lets the side-cutters reach them both more easily. |
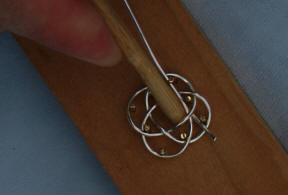 | |
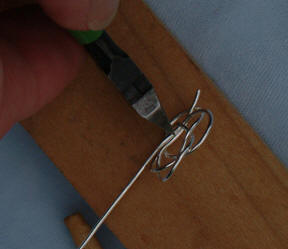 | After cutting the first one, about in the center, turn the knot around and cut from the other side, to get the ends even. |
 | Semi-flush cutters are best, you want nice square ends to make a good solder joint later. |
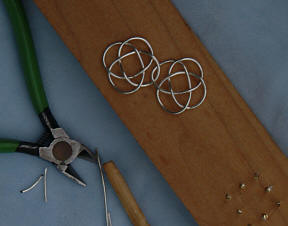
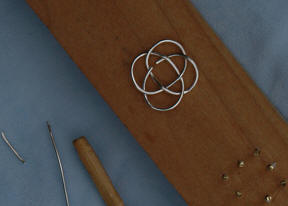 | As you can see, there are four loops, two of which have an open end of the wire on one side. |
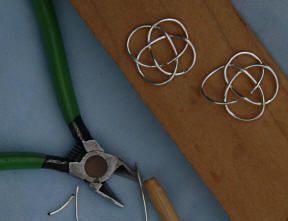 | Pull one of the loops out to make a hook. Pictured here are two knots, aligned with the openings on the same side; one of them is opened up to connect to the other, then threaded through (use one of the loops that doesn't have an opening) so as to connect them. Tuck the end back in. |
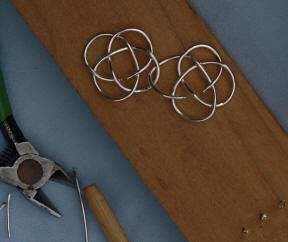 | |
 | Here are two knots forming the beginning of a chain. Note that the knots are in the same orientation, both openings lined up. |
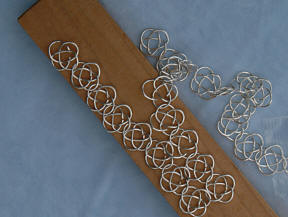 | After you've made several lengths of chain, line them all up with their openings in the same direction and start using the side hooks to "zip" them together. |
| When you have enough knots, and they are all interconnected, use your preferred method of soldering the joints in each knot closed. As you can see, the knots will stretch out a bit if you pull on the mesh. Any weak solder joints may pop, so be ready to go back over your work at least once, perhaps several times, to ensure all closures are well soldered. |
Related Articles

How to Choose Silver Jewelry Wire

Textile Techniques in Jewelry Making

6 Basic Wire Skills to Make a Necklace
Methods of Closing Jump Rings


The All-In-One Jewelry Making Solution At Your Fingertips
When you join the Ganoksin community, you get the tools you need to take your work to the next level.
