
Bracelet Tongue Replacement
With the popularity of tennis bracelets over the last 20 years, replacing broken tongues has become a common repair in the jewelry shop. Typically, these are replaced by soldering a new tongue in place. However, using a torch to solder a tongue onto a bracelet creates two problems.
5 Minute Read
With the popularity of tennis bracelets over the last 20 years, replacing broken tongues has become a common repair in the jewelry shop. Typically, these are replaced by soldering a new tongue in place. However, using a torch to solder a tongue onto a bracelet creates two problems.
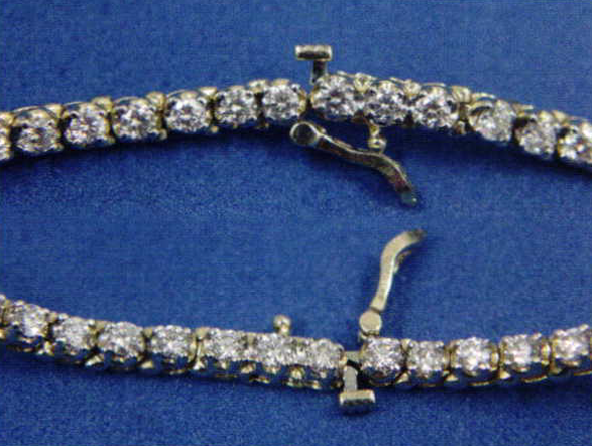
The first problem is alignment. Generally alignment is done by the trial and error method. The tongue is held in place in what is believed to be the proper alignment and soldered. Once cooled it is tested in the clasp. Often the alignment is off slightly and the two ends of the bracelet do not meet exactly either side to side or up and down, or the tongue depth is off slightly. If it is out too far when it snaps into the box there is a slight gap between the two ends, or if it is in too far the ends meet before the tongue locks into place. This all requires going back to the soldering bench, reheating the solder and making the necessary adjustments. This is not seen as a great problem, but it does take time for the jeweler to perform, and depending on the skill level of the jeweler may need to be done more than once. This extra time spent working on this eats into the shops profit, and often the repair is made with a good but not perfect fit.
The second problem is metal hardness. In order for the tongue to work properly it needs to have spring to it so that it will snap into place in the box end of the clasp. This tension is achieved through the manufacturing process in making the tongue by work hardening the white gold. The metal becomes annealed when heated with the torch to flow the solder. The softened metal in the tongue no longer has the tension needed to work properly. This can be overcome to some degree by using tweezers clamped to the tongue as a heat sink to keep from over heating, quenching the white gold while still hot to harden the metal, and by holding the tongue on an anvil and hammering the surface to work harden the metal. However, none ofthese procedures achieve the same tension in the metal as it was originally.
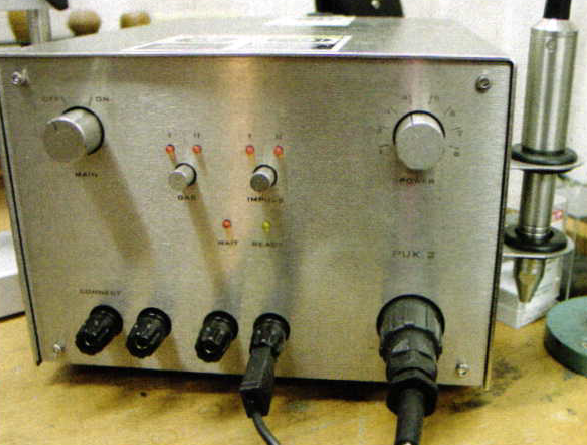
Both of these problems are overcome by welding the new tongue in place using an Arc Welder. For this repair I chose the PUK 2 Welder manufactured by Lampert Tools.
To begin you need to remove any remaining portions of the old tongue. I clip off any protruding portions with end cutters flush with the end of the bracelet. I then use a krause bur to remove the stem of the tongue, which is soldered in the bracelet link. I like the krause bur for this operation as I can use the thicker body of the bur to remove the bulk of the metal and then use the fine tip of the bur to cut into the corners creating a square pocket to match the square profile of the end of the tongue. This pocket must be cut precisely so that the tongue fits tightly. Turn the bur slowly and let the teeth of the bur do the work. pressing too hard on krause burs can easily break them.
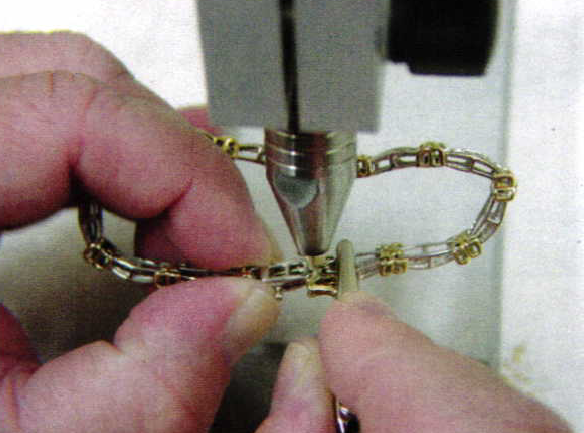
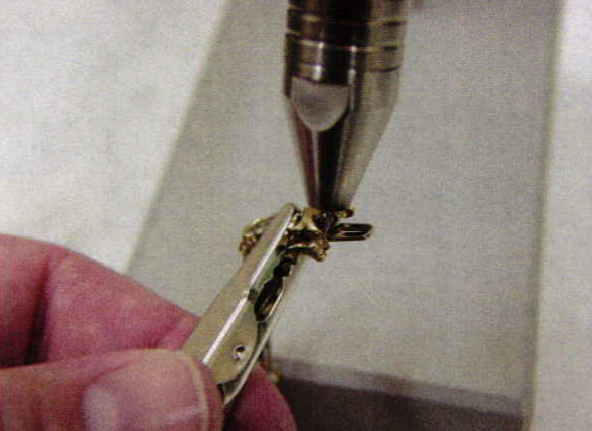
Next insert the tongue into the box end of the clasp until it snaps into place. Clip the lead wire to the bracelet and hold the two ends together firmly. The stem of the tongue should fit tightly in the pocket you created. Brace your hands firmly so that there is no movement between the parts and insert the needle electrode into the gap between the links and tack the tongue to the bracelet link. The fine needle tip electrode of the PUK Welder allows you precise placement of the weld. Tack the tongue two or three times so that it will stay securely in place as you remove it from the box end ofthe bracelet. Tacking the tongue in place while it is inserted in the box end will guarantee you that the tongue is in perfect alignment.
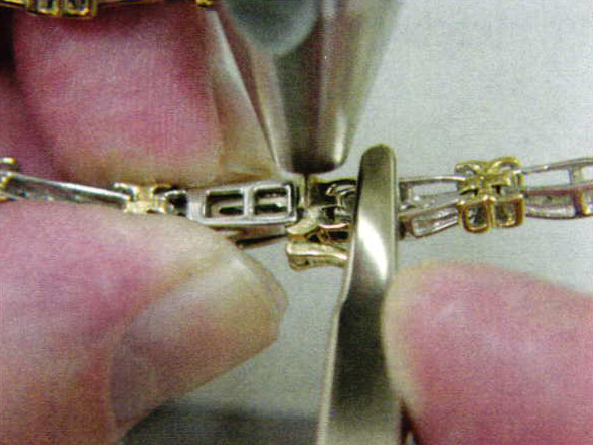
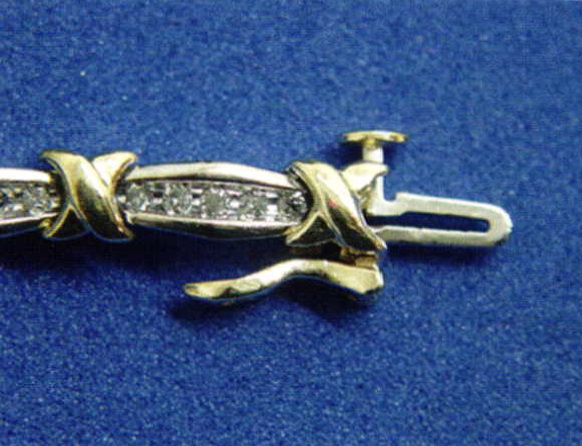
If the links fit tightly together all the way around so that there is no opening for you to insert the electrode, you will have to cut a small opening on the back side of one of the bracelet links. In the picture you can see where I cut a small opening with the krause bur. When cutting out the old portion ofthe tongue you can easily cut this opening also.
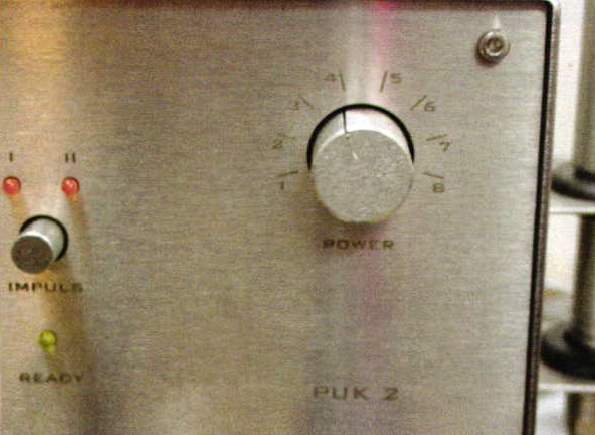
Power Settings
There are many variables involved in determining the correct power setting. If the power setting is too low the only thing that will happen is the weld will not be complete. However, if the setting is too high you can bum a hole through the piece you are working on or even melt andblow away small parts. Because of this ALWAYS set the power setting much lower than you think is needed and increase the setting a step higher with each pulse until the proper setting is achieved.
Next remove the tongue from the box and continue welding completely around the stem of the tongue. When a pulse is made the electric current will radiate out and will melt the metal in a small radius around the tip of the needle. However, deepest penetration is achieved in a straight line from the needle. Therefore it is always best to hold the needle in a straight line down the seam. Because the tongue is joined to the link at a 90o angle this is not possible.
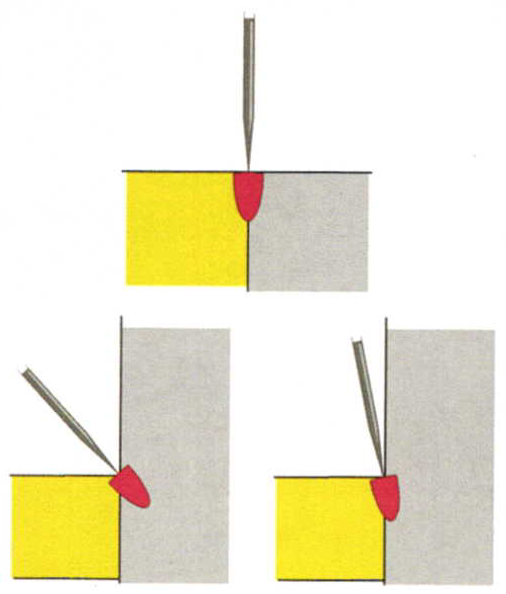
However, if you hold the needle on too much of an angle the deepest penetration is melting into the tongue and not down the seam where it is needed. Although you cannot hold the needle in a straight line with the seam, hold it as close as you can to achieve the strongest seam possible.
Once you have welded completely around the tongue and it is securely welded in place, clean and polish the area with a bristle brush in your flex-shaft. Very little clean up is needed as there is no fire coat or discoloration in the metal as there is when torch soldering. By using the PUK 2 Welder the total time for this repair is less than 5 minutes and a better repair is achieved than using traditional torch solder methods.
Related Articles

Making a Platinum Wire Setting

Bracelet Shortening and Reassembling

Pulse-Arc-Welder: Creating Jewelry

Jewelry Designs: Athena Pendant


The All-In-One Jewelry Making Solution At Your Fingertips
When you join the Ganoksin community, you get the tools you need to take your work to the next level.
