
Steps on Making a T-Fold Boat Fold
The boat fold branch of T-folds is an interesting avenue. It permits you to have a curving, concave table, and to produce shaped tables as well as other complex derivations. The basic boat is begun by making a wedge T-fold. After the first angle is made the loop is tipped inthe other direction and pinched again to produce the boat pillow form.
2 Minute Read
Updated on
This article shows the steps on making a T-fold boat fold. The boat fold branch of T-folds is an interesting avenue. It permits you to have a curving, concave table, and to produce shaped tables as well as other complex derivations.
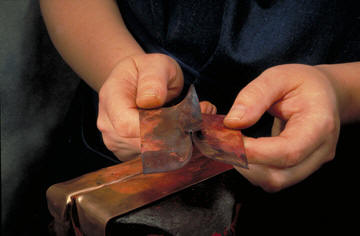
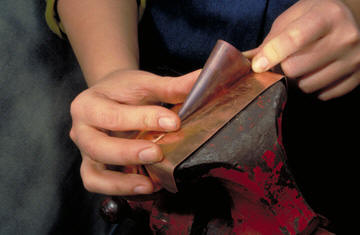 | The basic boat is begun by making a wedge T-fold. |
 | After the first angle is made the loop is tipped inthe other direction and pinched again to produce the boat pillow form. |
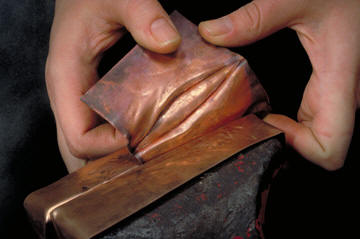
 | The bottom of the pillow is pinched off flat slightly. |
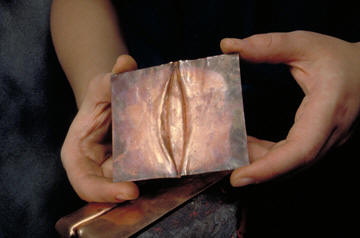
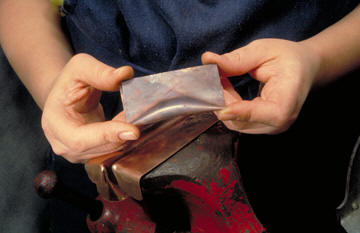 | Here is a view of what the pillow looks like, you can see the two angles and the last pinch that blunts the shape at the bottom of the pillow. |
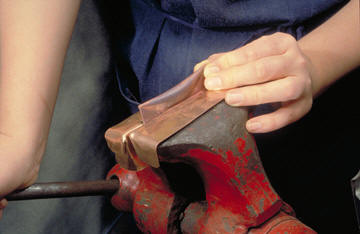
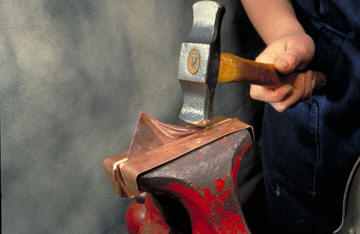 | The fold is placed in the vise with the legs pinched a little loosely. If the fold is struck it will move slightly. The vise handle can be used at the same time to open and close the vise jaws as one hammers. |
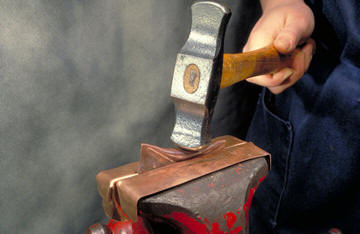 | The hammering is continued while it rocks. Opening and closing the jaws slightly while hammering from one side to the other on the table will help. |
 | The correct tension is important. You want it to move a little when struck. |
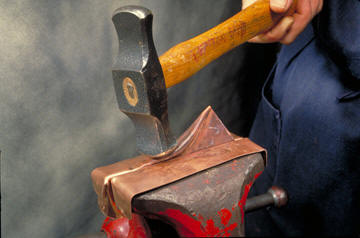
 | The pillow is gently brought down to the top of the vise. |
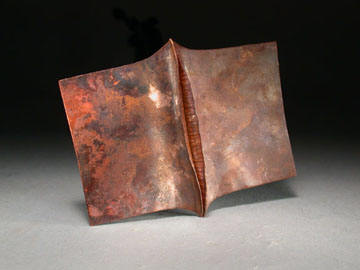
 | Here is a side view of the basic boat fold. |
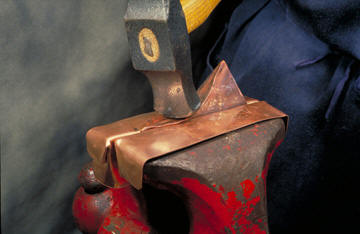
 | Here is an end view of the fold. It can be tricky to hit evenly enough that the table is equal on each side of the legs. |
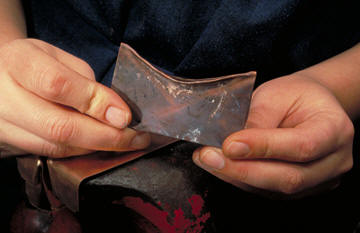
 | Even a difficult shape like this curved table can be unfolded by placing a leg in the vise, levering the sheet down towards the vise. |
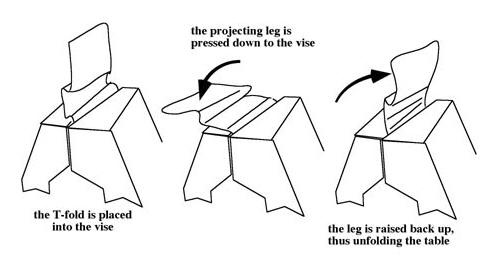 | |
Here is a Diagram of the Unfolding Steps | |
 | Here it is bent down as much as possible. It is then bent back up to vertical. |
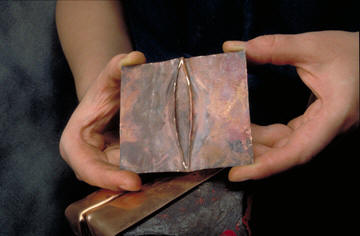 | Even a difficult shape like a boat can be opened, can have the table returns unfolded by repeating this procedure a number of times. |
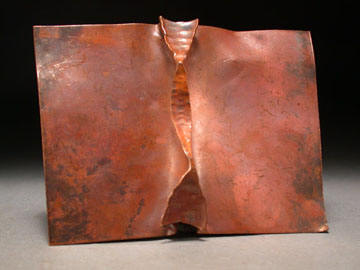
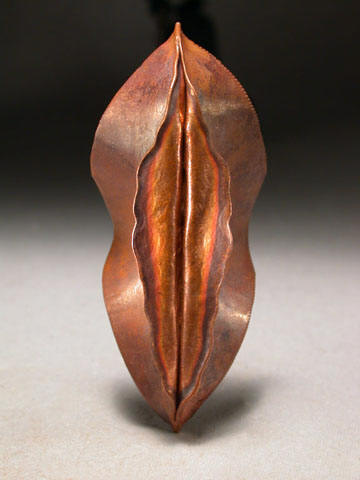
 | Here is a back view of the unfolded boat. |
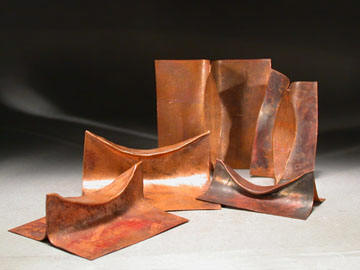 | A selection of basic boat folds. Note the very high one on the left, which is a result of opening the boat without annealing and the much lower one to its right that demonstrates the difference after annealing. |
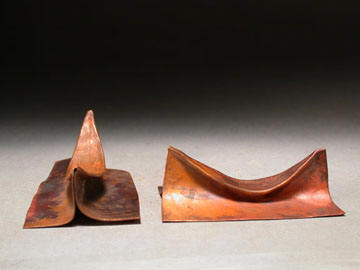 | A side and end view of a basic boat fold. |
 | This shape has been made by repeatedly pinching the fold with the vise to obtain a small boat shape combined with two wedge-T folds. |
 | Here is a Tomlin fold, where the boat table has been folded in half upwards, and then forged at right angles to its axis. In this case the final hammering was done with a planishing hammer. You can however still see the marks of the forging hammer where they transfered to the inside of the fold. |
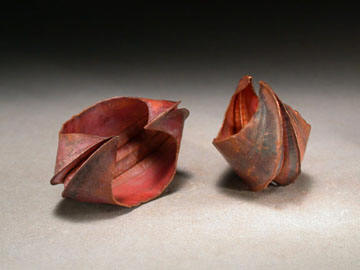 | Here are two more complex folds derived from a basic boat. The boat table was folded in half upwards and flattened, then the legs were trimmed much like a Good Fold and the thickest area (four layers) of metal are forged. |
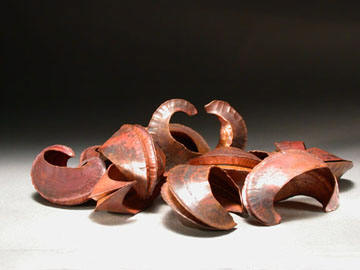 | Here is a pile of this type of fold. |
 | Here a boat fold with the table folded up (as if for a Tomlin fold) has been forged outwards with a 'thumb-like' raising hammer instead of at right angles to the fold as happens in the Tomlin fold. The legs were short on this example. |
Extract from Charles Lewton-Brain‘s Fold-Forming CDROM project.
Copyright © Charles Lewton-Brain 2005
Photos: Charles Lewton-Brain, Model: Dee Fontans
All rights reserved internationally. Copyright © Charles Lewton-Brain. Users have permission to download the information and share it as long as no money is made. No commercial use of this information is allowed without permission in writing from Charles Lewton-Brain.
Related Articles

Steps on Making a Basic T-fold
This article describes the steps to making a basic T-fold, one of the main categories of fold-forming. Numerous variations are...
Read More

Metal Corrugation Vocabulary
Metal corrugation is a unique roll-formed process whereby a precise and specific repetitive surface pattern is achieved when processing thin...
Read More

Steps on Making a Basic Wedge T-fold
This page describes the steps to making a basic wedge T-fold
Read More

Steps on Making a Leaf or Ruffle
This fold is an example of forging on the open side, and introduces how to use hardness dams in foldforming....
Read More


The All-In-One Jewelry Making Solution At Your Fingertips
When you join the Ganoksin community, you get the tools you need to take your work to the next level.
