
The Invisible Setting Process
This column is from the At the Bench column that appears every month in AJM. For this project, it is assumed that you have prepared the mounting and acquired the grooved stones for invisible setting. The use of a microscope or 10x eye loupe can be crucial when working with the tight tolerances involved in the invisible setting process.
2 Minute Read
For this project, it is assumed that you have prepared the mounting and acquired the grooved stones for invisible setting. The use of a microscope or 10x eye loupe can be crucial when working with the tight tolerances involved in the invisible setting process.
The Invisible Setting Process | |
 | Inspect the mounting for structural or casting defects. Size and pre-finish. |
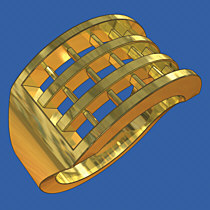
 | Examine the stones with a 10x eye loupe or microscope, paying attention to the parallel grooves cut into the pavilions. |
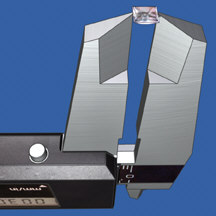 | Using a digital micrometer, measure each stone's width from girdle to girdle. In this illustration, the width is 3 mm. |
 | Measure from the center of each rail to ensure that the stones will fit. In this example, it should measure approximately 3.1 mm. If the mounting is domed in all directions, you will have to calculate additional space between each row, since stones will draw closer together as they are pressed into the mounting during tightening. |
 | Make precise measurements of the parallel grooves. This will determine the approximate inside width that you will cut the channel. |
 | Using a ball burr or other appropriately shaped burr, enlarge the inside of the channel walls, starting with the center channel. Enlarge the channel opening to measure 0.01 mm less than the width of the parallel grooves on the stone. |
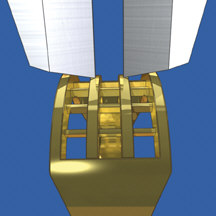
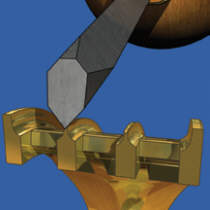 | Cut the tops of the rails with a 90 degree square graver, so they resemble the letter V. Extreme caution must be taken to maintain a straight cut in the center of each rail. |
 | Use a round graver to soften the V shape that was cut by the square graver. This makes it easier for the metal to expand into the grooves of the stones as they are tapped downward and set. |
 | Begin to trial fit the stones into the center row. Adjust the inside width of the rails with a ball burr or round graver until the grooves on the stone clear the rails and snap into place. |
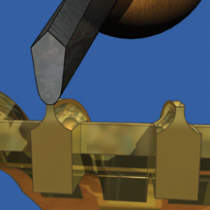
 | Undercut the outside channel walls using a hart burr that has had its pavilion ground off. Removing the pavilion portion of the hart burr allows for the necessary clearance to make these undercuts without distorting the tips of the rails. |
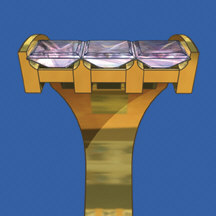 | Trial fit the stones into each row, starting with the center row. Make any necessary adjustments needed to maintain an orderly fit. Keep track of each stone's location while trial fitting. |
 | Inspect all stones for fit using a 10x loupe or microscope to make sure that they do not overlap or touch in any way. |
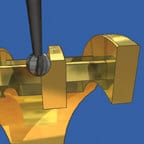
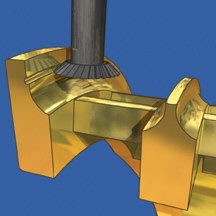
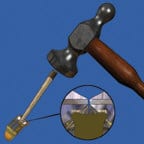 | Using a chopstick or small wooden dowel as a punch, tap the punch lightly with a chasing hammer. Taper the punch to ensure that it covers only one stone at a time. The downward force causes the thin tips of the rails to flare outward, filling the grooves and locking the stone in place. Tap the outer channel wall as necessary with a channel setting punch. |
 | Check the security of each stone. |
![]()
In association with
![]()
The award-winning Journal is published monthly by MJSA, the trade association for professional jewelry makers, designers, and related suppliers. It offers design ideas, fabrication and production techniques, bench tips, business and marketing insights, and trend and technology updates—the information crucial for business success. “More than other publications, MJSA Journal is oriented toward people like me: those trying to earn a living by designing and making jewelry,” says Jim Binnion of James Binnion Metal Arts.
Click here to read our latest articles
Click here to get a FREE four-month trial subscription.
Related Articles

John Iversen: Carved Color

Jewellery in Transition

The Work of Jay Song

Charles Loloma: Spirit of the New


The All-In-One Jewelry Making Solution At Your Fingertips
When you join the Ganoksin community, you get the tools you need to take your work to the next level.

