Contemporary Applications of Area Inlay
9 Minute Read

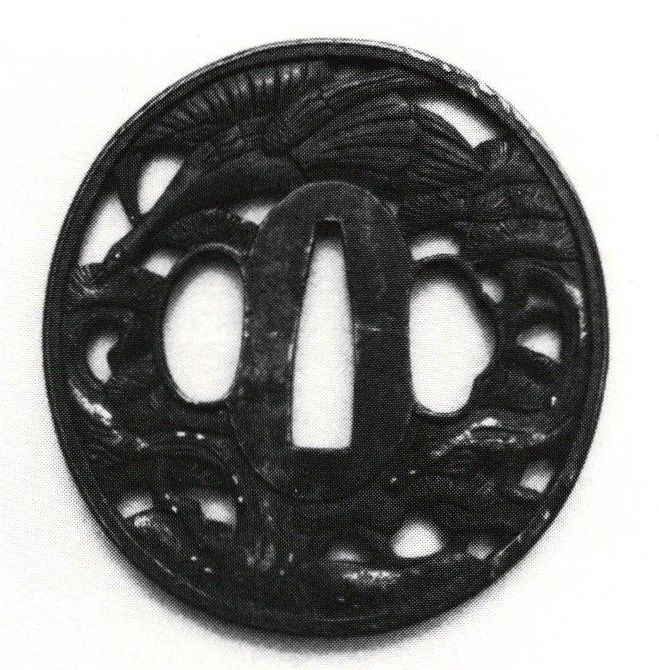
The use of area inlay, called damascening or woven inlay, is common in the ancient metalwork of Iran, India, Japan, Spain and other countries. Since most applications require the use of ferrous metals as base materials, area inlay is not often found in the fine jewelry of these cultures. Instead, it is found as ornamentation applied to objects such as swords and hardware that must be made of durable metal.

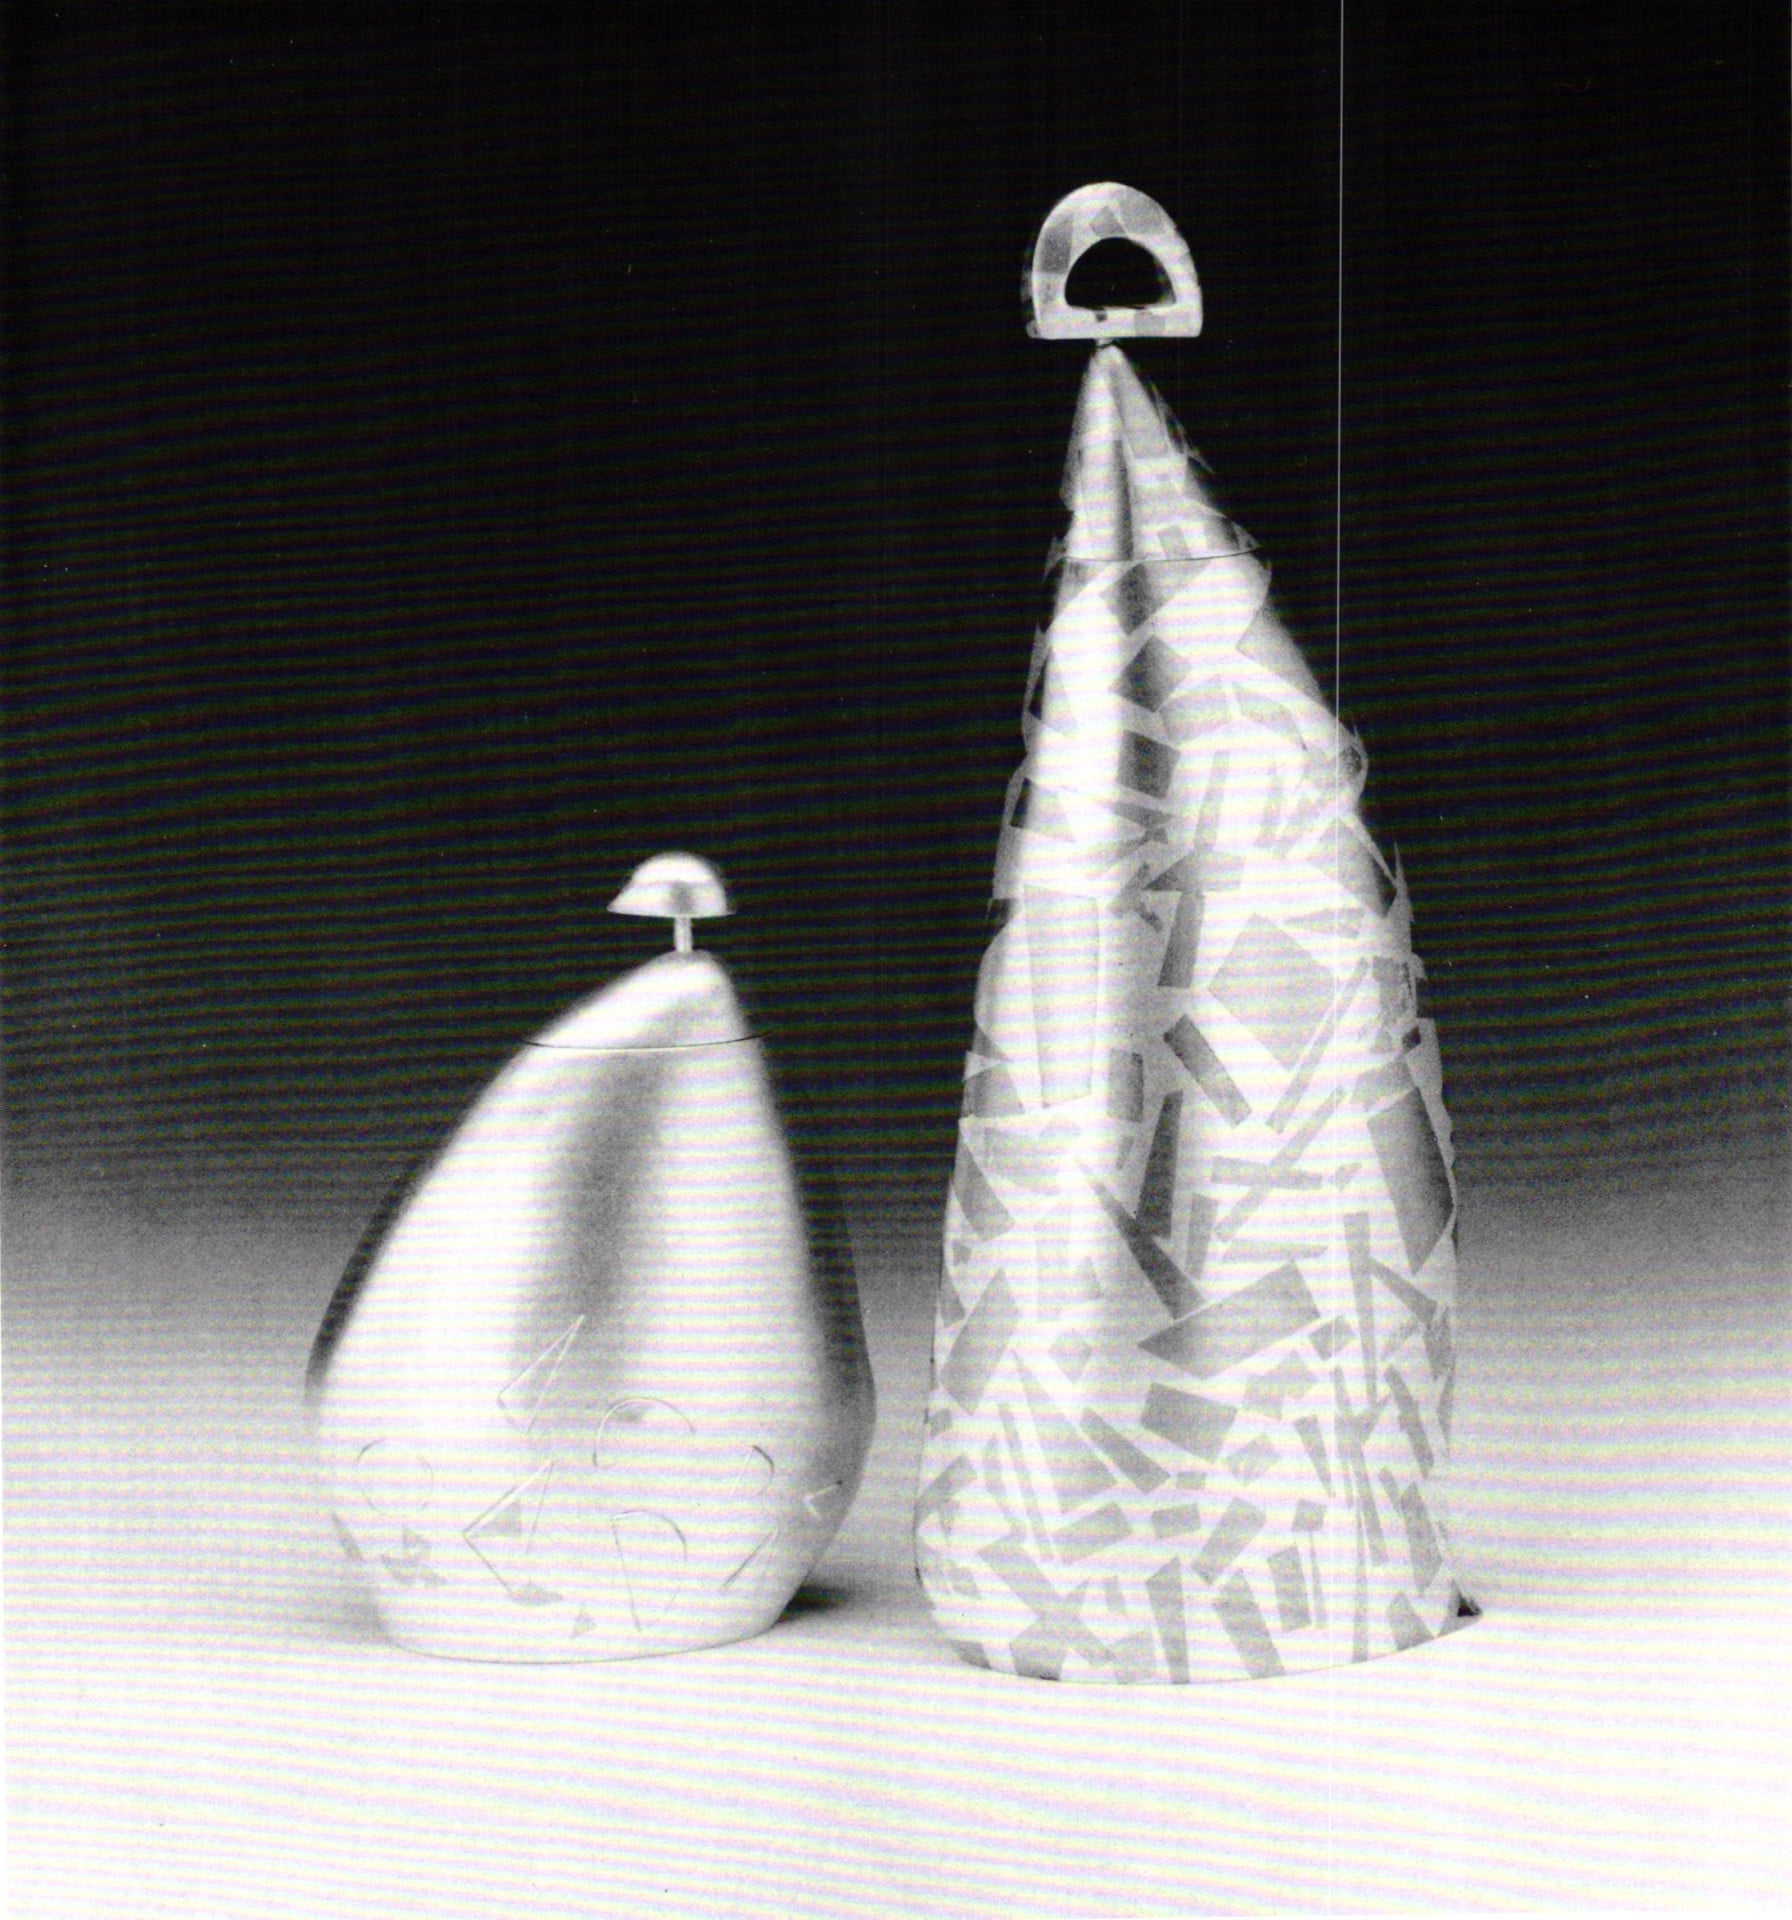
In contemporary applications, area inlay can greatly expand the range of textures and colors available to the metalsmith. In addition, the modern metalsmith is not limited to using traditional ferrous metals as base materials. Metals such as nickel, titanium, stainless steel, tool steels, sterling silver and bronze alloys may also be used. The process divides itself into four major elements: tool making, preparation of the metals, application and finishing.
Area Inlay or Damascening Tools
The inlay is accomplished by the mechanical application of a thin sheet of annealed metal to the surface of a harder metal base with a burred texture. The inlay technique requires simple chisels capable of cutting into the metal base. The chisels and setting tools are fashioned of tool steel shaped, polished, hardened and tempered in the traditional manner. A tool blank of 0-1 steel stock measuring ¼ to ⅜ inches square is cut to a comfortable length, about 3 to 4 inches. Square stock is preferable to round. This makes a chisel which is easier to control. The tools are rough ground on a bench grinder or a belt sander and then the shape is refined by further hand sanding Finish work is done with sandpaper and sanding sticks. The final finish is applied with a buffing wheel and emery compound.

Figures 1 and 2 illustrate the chisel shapes required. It is important to retain as much of the thickness of the tool as possible. A slender tool may break. Using the belt sander, a more acute angle—30 to 40 degrees—is applied to the last ⅛ to ¼ inch from the cutting edge. Nearly all inlays may be executed using chisels of three sizes: 1/16 inch, ⅛ inch and ¼ inch. The tip of the tool is brought to an edge with a whetstone. The striking end of the tool is beveled to protect against chipping. A commercial rubberizing grip compound such as Tool Dip will cushion the shaft and increase control of the tool.
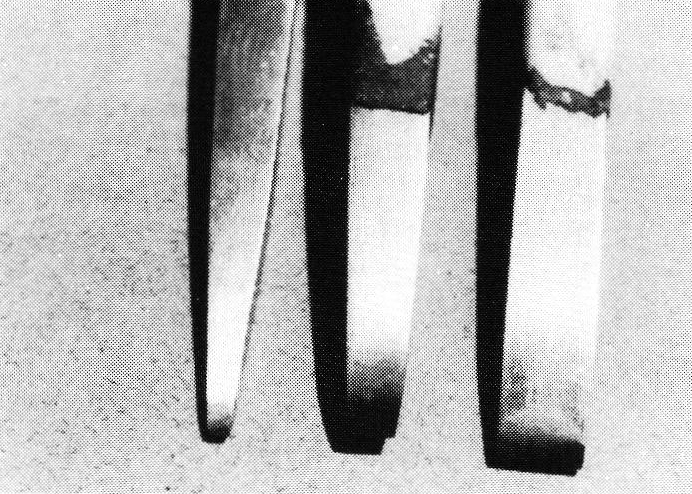
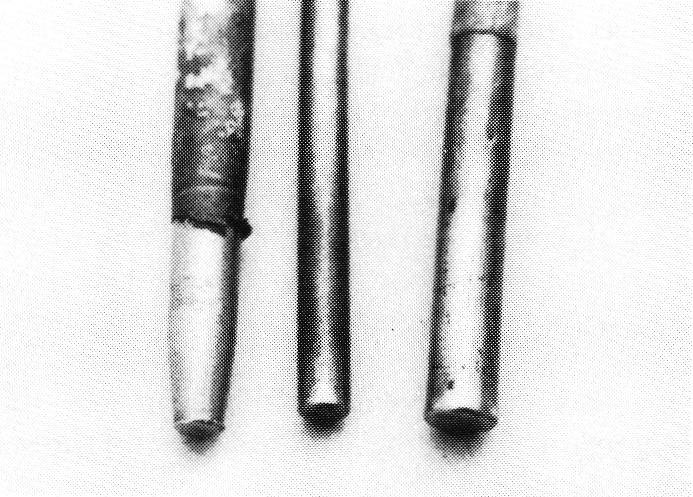
"Setting tools" are used to press the inlay metal into the textured base. Figure 3 illustrates their basic form. The setting tools are made of 3/16 to ⅜ inch tool steel or brass stock. Unlike the chisels, the setting tools are made of round stock. This eases the task of making an even surface.
The steel tools must be hardened and tempered. The 0-1 steel is an oil-quenching stock. To harden the tool, the edge of the chisel is brought to a cherry red glow with an acetylene torch and plunged into a room temperature bath of motor oil. Swirling the tool ensures even cooling. The tool is cleaned and sanded. It is tempered by heating from the center of the shank. As the steel heats up, various oxide colors appear, indicating the temperature of the tool body. When a straw yellow (about 440°F) is seen on the tip of the chisel or setting tool, it is immediately quenched in oil. If you accidentally go past the straw color and cause a dark bronze or peacock blue, the metal will be too soft. If this happens, it will be necessary to reharden and retemper the tool. Cosmetic cleaning and polishing are optional.
Preparation of Metals for Inlay
Most soft metals may be used for inlay, provided they are in thin sheets. The inherent softness of a metal is less important than its softness relative to the metal that will serve as a base. For instance, bronze is too hard to be inlaid easily into mild steel but may be inlaid into stainless steel.
The table below lists various metals for inlays and bases. The minimum thickness for the base metal is usually 16 gauge. Titanium or stainless steel may be used in thicknesses of 20 gauge or less.
Metals for Inlay Hardest to Softest | Metals for Bases Hardest to Softest |
|
|
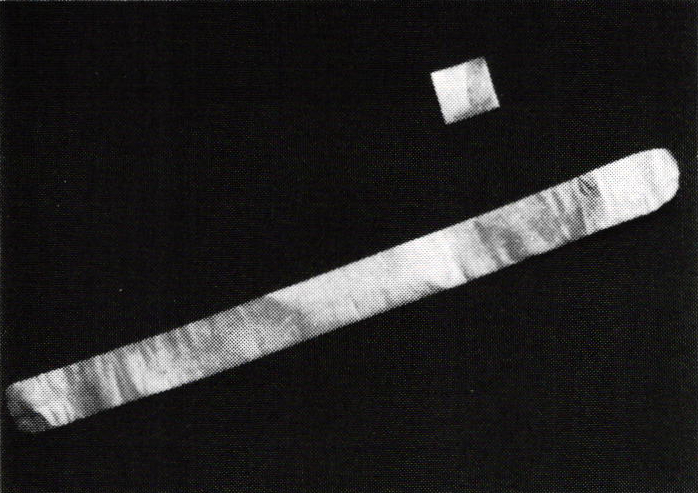
In most cases, a rolling mill must be used to reduce the inlay metal to a thin sheet. The thickness of the line silver and copper used in the example is 0.0025 inches. This material was obtained by rolling a 1-inch-square of 20-gauge fine silver into a ribbon roughly 1 inch wide by 13 inches long. During the rolling process, the metal must be annealed. Annealing the metal in a coil protects the edges of the strip from melting. Pickling the metal after ea.ch annealing will prevent oxides from being rolled into the material.
Application
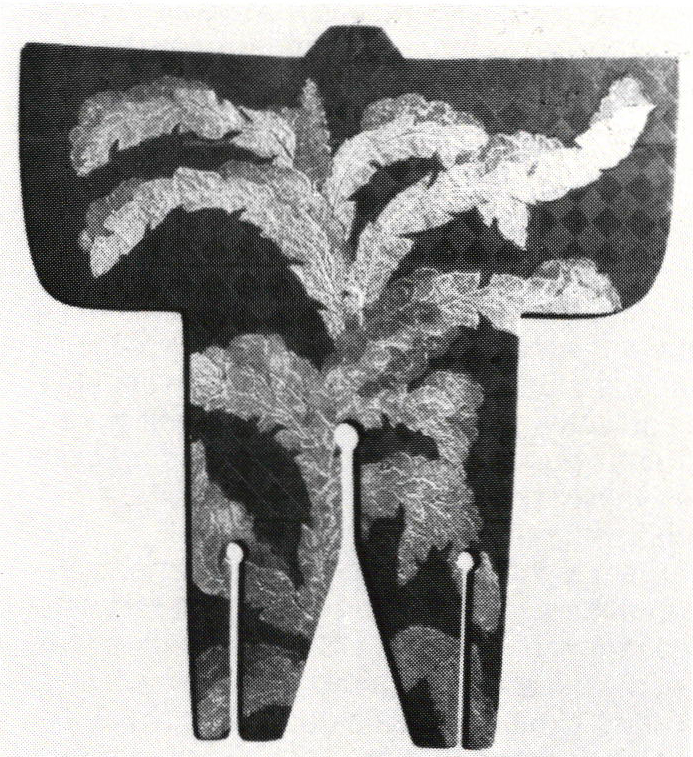
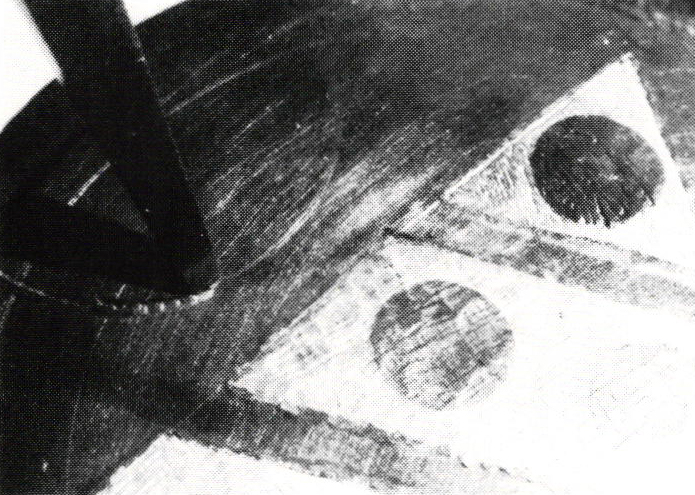
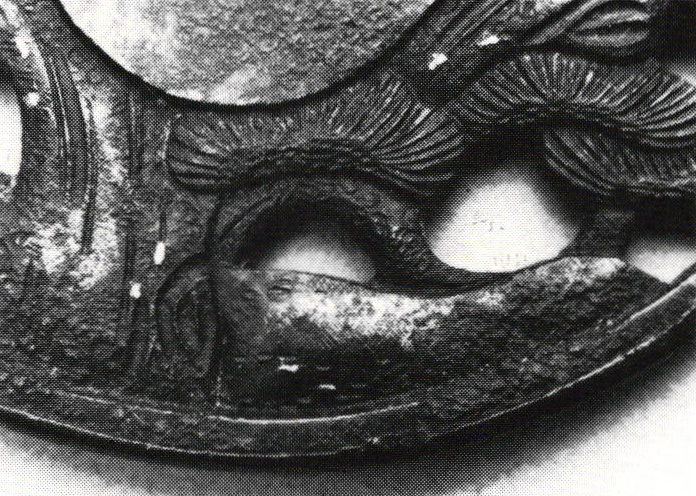
The metal must be thoroughly cleaned of oils, oxidation and other contaminants. After transferring the desired image to the metal, a scribe is used to scratch the image onto the surface. One of the inlay chisels is used to outline and raise a burr defining the inlay area. The complexity of the outline dictates the width of the chisel blade used. During outlining, the chisel is held at about a 70-degree angle, slanted in such a way that the chisel's cut is directed away from the interior of the inlay region. Figure 5 illustrates this step.
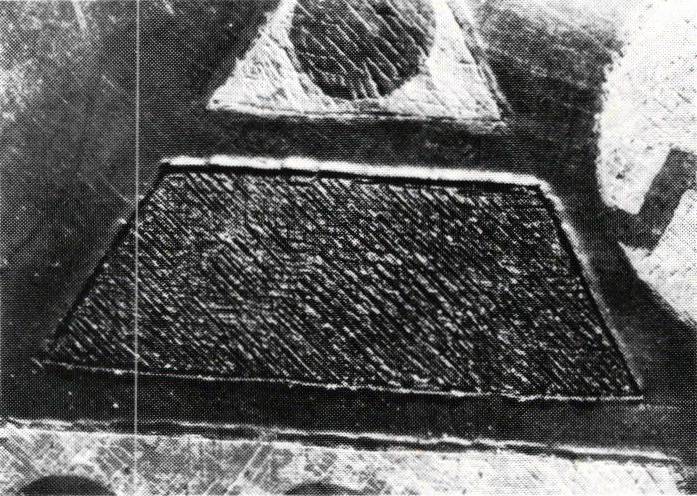
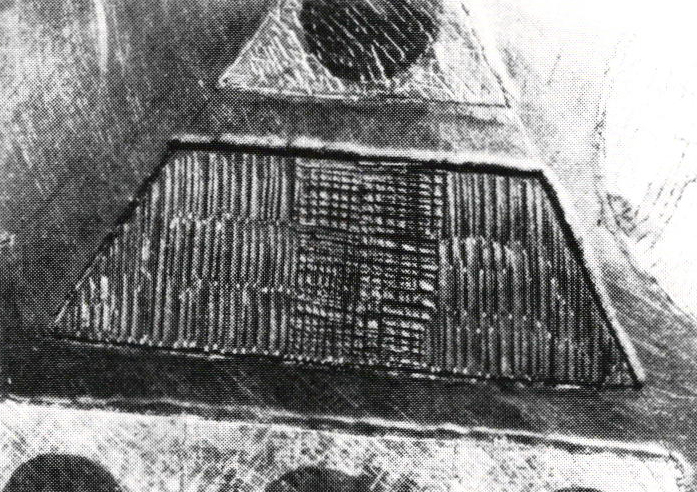
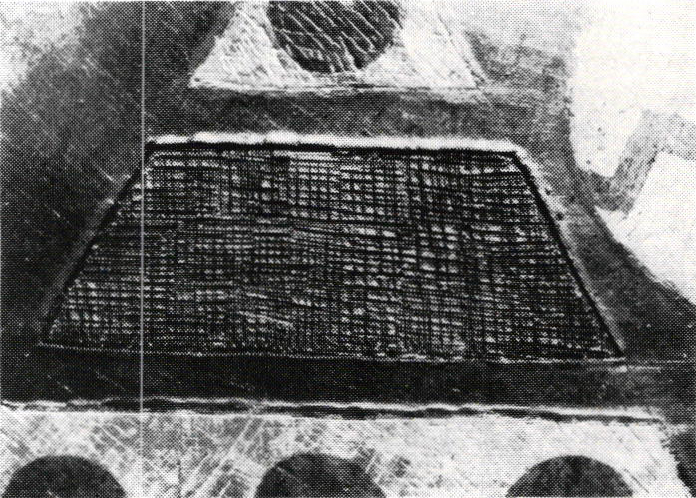
The next step is to cut a crosshatch pattern into the base metal. This pattern is created with four sets of lines cut horizontally, vertically and on the diagonals. During this process, the piece must be firmly held and backed. A steel bench block is adequate for flat pieces. Hollow objects should be filled with either hard pitch or lead. In my experience, lead is the more desirable. It's harder and doesn't crack. Naturally, adequate safety precaution should be observed when working with these materials.
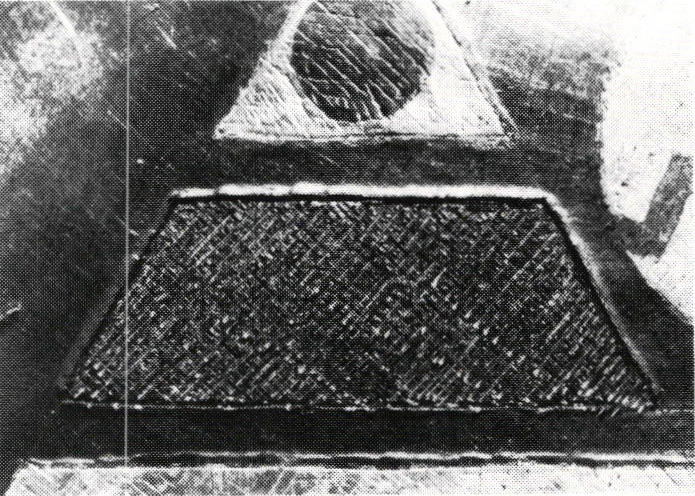
The chisel is held nearly vertical, slightly above the surface of the metal (⅛ inch or less). A chasing hammer is used to drive the chisel into the base material with rapid blows. The chisel is allowed to bounce off the surface, as if it was a small jackhammer. Hammering is continued until the metal surface is completely covered with cuts. The depth of the cuts is determined by the weight of the chasing hammer.
In general, the harder and thicker the inlay metal, the deeper the cuts in the metal base. Cast iron, stainless steel and titanium will chip and wear the chisels down. It may be necessary to stop occasionally to sharpen the chisels on a fine whetstone. Figure 6 shows the pattern with cuts in one direction and the beginning of the second set. Safety glasses should be worn when working with cast iron due to its brittle nature.
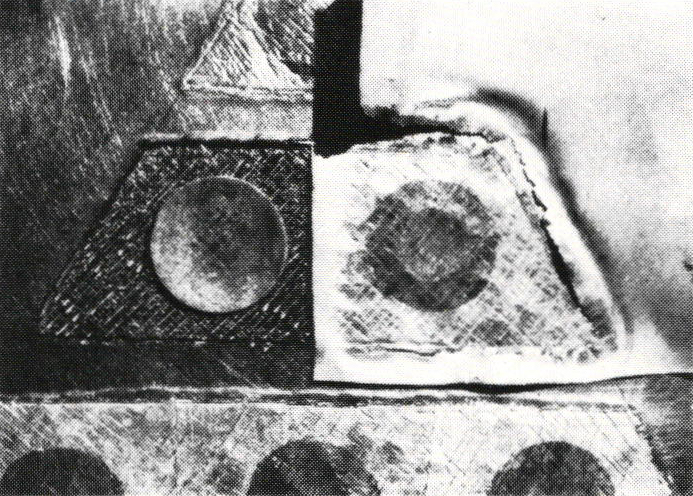
It is not advisable to texture an area larger than you can inlay at a single sitting. Oxides can build up in burrs that are left exposed. These make setting the inlay more difficult. It is best to apply the metal in single pieces no larger than a postage stamp. Larger pieces are prone to stretching, which tends to pull out areas that have not been permanently set. Because of the lightness and delicacy of the inlay, tweezers are used to handle the metal. Fine scissors or snips are used to cut the sheet to match the shape desired. Near the outline inlay material is cut somewhat oversize. Once positioned, the soft inlay metal is pressed into the hard burrs of the base using a chasing hammer with the setting tool. On thinner or more delicate metals, a brass setting tool is less likely to cut through the metal.

The inlay sequence is determined by the shape of the pattern. The inlay material will constantly stretch. If the inlay will completely fill the area with one piece of metal, or if it is the first of several contiguous pieces, hammering is started in the middle and worked toward the outside edge. The hammering sequence of subsequent pieces begins next to the edges of the previous inlay and proceeds outward. Setting a piece of inlay by hammering toward an area already set is not desirable. It may result in the new section stretching over existing inlay and not bonding to the base metal. The soft inlay material will be cut off by the outline burr, yielding a near, finished border. lf there are gaps where the individual sheets of inlay material fail to meet, cut a small piece to fit and set as previously explained.
Finishing
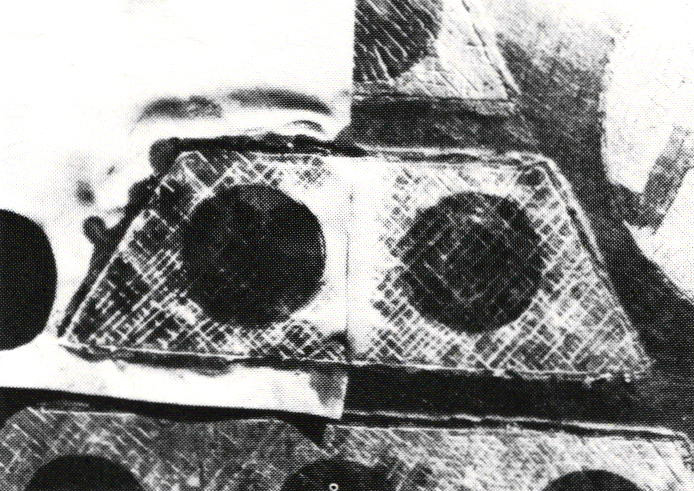
The next step of the process is planishing the entire surface. This is done with a planishing tool (a flat, polished chasing tool). On larger pieces, a planishing hammer may be used. After this step, the entire piece can be annealed and then planished or burnished again to ensure the setting of the inlay. The piece may be annealed a second time if you plan to chase a pattern into the surface of the inlay. Other forms of surface treatment may be applied. The inlay can be enameled, sandblasted, scribed, partially abraded and/or oxidized. However, it cannot be etched, since the acid may eat away the thin skin of the inlay. Soldering is a problem, as this effectively creates a handle to pull the inlay away from the base.
At this point, the annealings have oxidized the base metal. The oxide should be removed with the appropriate acids (naval jelly works well with steel). After stripping, the base metal is treated to create whatever surface embellishment is preferred. The piece is now ready for patination, which can include either heat or chemical treatment. Finally, the surface should be sealed with a hard wax.
Bruce Clark is an associate faculty member at Pima Community College in Tucson, Arizona.

You assume all responsibility and risk for the use of the safety resources available on or through this web page. The International Gem Society LLC does not assume any liability for the materials, information and opinions provided on, or available through, this web page. No advice or information provided by this website shall create any warranty. Reliance on such advice, information or the content of this web page is solely at your own risk, including without limitation any safety guidelines, resources or precautions, or any other information related to safety that may be available on or through this web page. The International Gem Society LLC disclaims any liability for injury, death or damages resulting from the use thereof.
Related Articles
“Tools for a Princess”
Optimising Gold Alloys for Manufacturing

Choosing the Right White Gold
The Secret Life of Solder


The All-In-One Jewelry Making Solution At Your Fingertips
When you join the Ganoksin community, you get the tools you need to take your work to the next level.

Trusted Jewelry Making Information & Techniques
Sign up to receive the latest articles, techniques, and inspirations with our free newsletter.