This, via social media
Designer’s seamless metal furniture is frozen, not welded
Is freezing metal for large scale projects and not practical for
jewelry? Would love to hear James Binnion comment on this.
Amazed and dazed, MA
Nifty looking connections. I am not an engineer, but I think that
joining metals in this way would have limitations depending on the
scale of the objects.
Certainly the dimensional tolerances for joining larger pieces would
be more easily achieved than for jewelry size pieces. These
limitations would also restrict what shapes could be effectively
manufactured/joined. Swaging might be a better alternative for small
scale work.
j
Hi Gang,
I didn’t really want to rain on anybody’s parade, but “thermal
expansion”, otherwise known as interference fits, or shrink fits,
are one of the oldest tricks in the book. Hell, I’d bet they predate
a bunch of the books. I can show you cannons from the 1400’s with
shrink fit reinforcement hoops, and slightly later cannons with
expansion sleeved barrels. Using differential expansion is one of
the oldest and most common tricks that blacksmiths have up their
sleeves. Typically, you do it by getting something hot, rather
than cold, but either works. (Hot’s the easier choice because you
can get things a lot hotter than you can cold, and heat is easier to
generate than cold.)
I’ve done it in jewelry and small-to-mid-scale metalwork for. as
long as I’ve done anything. The trick with it is that you need to be
very precise in your hole sizes. You need to be able to hit your
size target to within a thou or so. (0.001-0.002") Which is why you
typically see it in machined applications where that’s normal. It’s
also normally done with round things, so you can bore out the holes
either with a lathe, or a boring head on a mill, and then lathe turn
the mating slug to whatever size you decide you need.
With modern CNC gear, you can do it with non-round things, but
measuring and gauging the parts before fitup gets to be a whole
lot more interesting. The problem with an interference fit that
doesn’t quite fit right is that you only have one shot at it, and
then you’re stuck. If one part is frozen to shrink it, and the other
is heated to expand it, and they only clear when there are several
hundred degrees difference between them, once they get into contact,
you’re done. You can’t ever get enough difference between them to
unlock them while they’re touching. So you’d better make sure
they’re right before you try it and discover that that they’re too
tight.
The ‘anvil’ version of the Knew Concepts bench clamp is done this
way: the anvils are turned, and then I bore out the aluminum clamp
section to hold them, based on the average measurement of that
particular batch of steel anvils. But the fits are critical enough
that I can’t do the clamps until I have the anvils physically in
hand, and finished, so I can measure them and set up the mill to
match. Just going by a blueprint isn’t good enough. Then we dump the
aluminum bits into my old burnout kiln with a new digital kilnmider
to get them to exactly the right temp, and then shrink the anvils
into place. Put it this way: the fit is critical enough that
the.002"thickness of the anodization on the clamps is enough to make
a difference between “good”, “falls out"and"smash home with 100
tonne hydraulic press”. (ask me how I know this…)
Regards,
Brian
Hey Brian - totally agree - not new. and yes, tolerances for small
scale work - probably not realistic nor would the forces involved be
sufficient.
(though I’ve seen some amazing high precision work using electronic
discharge machining…)
I didn't really want to rain on anybody's parade, but "thermal
expansion", otherwise known as interference fits, or shrink fits,
are one of the oldest tricks in the book.
I seem to recall that the bi-metal canadian coins are made this way
to produce the two color blanks. could be wrong, but that’s my
recollection…
Morning Brian,
Its good to see that theres another applied art smith? here on
Ganoksin, as sometimes I feel im the only one that comes from an
engineering background!! Bit lonely sometimes.
Re your last para, 100 ton press, have you tried a 250 ton? its
amazing to see metal flow cold once you put up the tonnage to that
sort of no. A die breaker if your not careful.
Mine runs at 10,000 psi hyd pressure,. Use it for coining. Slow tho.
A bit like hammers the bigger the better.
Th biggest ive made weighs 450lbs and drops some 4 ft onto a 2 ton
drop stamp/anvil base. work is done in a second!. its fast! Havnt
sorted out the lift control yet, have to catch it on the rebound
otherwise it double strikes and spoils the work. The 275 lb hammer
on another press works fine all day. use it for hot striking a bronze
plaque. Production run is 2500. Heat the metal in a reducing
atmosphere to prevent oxidation. Propane fired.
Daily production run 100 from cutting the metal till its boxed. Nice
steady work.
Regret no cnc works tho, all eye ball mk 1.
Ted.
When I worked at MLW (Montreal locomotive works) this is how we used
to assemble the drive wheels to the drive axle the axles would spend
24 hours or so in a Styrofoam lined crate which was filled with dry
ice chips and the wheels were heated red hot in an oven. Then at
ShowTime two teams would chuck their respective pieces in a custom
made tool which looked like a modified drop hammer and the shaft
would be rammed in the wheel in a fraction of a second.
Kay
Hi Kay,
At one point in my travels, I spent a couple of years in Lima, OH.
Best known as the home of the Lima Locomotive works. They made some
of the biggest (and best, just ask them) steam engines ever made.
(Now they make tanks for the army. Go figure.) (Which explains why I
can list “Unindicted Tanknapper” on my resume.) (Looooooong story,
that.) (I didn’t actually boost a tank, I just helped “acquire” one
for the local museum.)
Anyway, one of the ways they did (and still do) get the steel tires
onto loco wheels is to use a giant round “ring of blowtorches” to
heat the bejesus out of the tire to expand it enough to slip onto
the wheel. The tires are still shrunk on like that, even on modern
diesels. What’s even funnier about it is that it’s a trick they
picked up from horse wagon wheel makers. All those steel rims on
buggy wheels? They’re shrunk into place on the wood. The pressure
helps hold the spokes in place, and keeps the whole thing from
shattering.
Meanwhile, Peter: Yes, I think the Canadian cored coins are.
effectively shrunk into place. I think I remember hearing that the
central section goes in undersized, but blank, and part of the
coining operation slams it hard enough to force it to expand to lock
into the brass ring. Same mechanical effect, but different way to
get there, and the tolerances aren’t quite as fussy. (It’s basically
a giant flush rivet at that stage.)
You want real fun, my understanding of the way they do the
nickel/copper/nickel sandwich sheet that US quarters are made out of
is explosive welding.
Dig a 4x8 foot pit. Put a thick steel plate at the bottom of it. Put
the nickel/copper/nickel sandwich on the plate, and then put a sheet
of C4 explosive across the top. Fill pit with water, (as a tamper)
and then fire the C4. Presto Boomo! Instant giant sheet of not-quite
mokume.
On the scary side, I’ve got a book on numismatic forgery that shows
a guy who modified a 12ga shotgun into a die press. Loaded up custom
shells with one side of the coin die as the 'bullet’and then fired
it into a female die-holder welded across the muzzle. (For anybody
reading this DO NOT, FOR THE LOVE OF GHU, EVEN THINK OF TRYING
THIS YOURSELF. It’s so spectacularly dangerous (stupid) even I
wouldn’t think of it.) I mention it as an example of just how far
out there people can get.
As far as doing it on jewelry scale things, it is possible. The
longer an area you have in contact, the stronger a joint will be.
For example: a piece of wire at right angles through a piece of
.75mm sheet wouldn’t be all that strong, as there’s only that one
.75mm thick contact area. But a wire grabbed in the long axis of a
tube, or set deeply into a thicker block, so the contact area is a
length of the wire 2-3-4mm long, that’d have a lot more strength.
Regards,
Brian
Morning Peter,
I didn't really want to rain on anybody's parade, but "thermal
expansion", otherwise known as interference fits, or shrink fits,
are one of the oldest tricks in the book.
I seem to recall that the bi-metal canadian coins are made this
way to produce the two color blanks. could be wrong, but that's my
recollection...
The Canadian coin might be, but the european 2 metal coins are not.
the inner metal is a thicker slug and the outer is thinned to make
the tongue of a tongue and socket joint. There pressed together with
the thicker metal flowing over the tongue to make the 2 metals lock
together in a collar between the 2 coining dies. Done at room temp.
no seperate heating or cooling.
Need a lot of tonnage tho. in excess of 200. Could do it here but
uneconomic for the sort of kit I use. Have the tonnage!! but not the
special tooling, all my minting is single metal blanks. Silver,
copper bronze etc. Had a 5000 off production run of pewter coins some
yrs ago. Drop stamped these direct into a collar… 1in dia by 3/32in
thick.
Ted.
I've got a book on numismatic forgery that shows a guy who modified
a 12ga shotgun into a die press. Loaded up custom shells with one
side of the coin die as the 'bullet'and then fired it into a female
die-holder welded across the muzzle.
Let me ruin my reputation a bit more.
I did that as well, back in the 90’s A buddy and I used a 12 gauge
shotgun and shot a solid slug at a die we had made that was filled
with powdered gold and aluminium.
We didn’t weld anything to the shotgun, but we shot the die at about
four feet away with the shotgun clamped and a long length of string
tied to the trigger.
We figured that the force would flow the metal and make purple gold.
We did it in a field on Saturday afternoon and there was a giant
bang from the shotgun and the die and that was all she wrote.
We never figured out what actually happened.
Did the die explode because of pressure or did the aluminium ignite.
We searched the whole afternoon and the next morning and we never
found anything, not even one little piece.
That was ten grams of gold gone so we figured maybe it wasn’t such a
good method to try and make purple gold.
There pressed together with the thicker metal flowing over the
tongue to make the 2 metals lock together in a collar between the 2
coining dies. Done at room temp. no seperate heating or cooling.
Need a lot of tonnage tho. in excess of 200
Not really.
I often take a couple of euro coins and smack the center out and
then turn them around and smack them back in again.
Been doing it for years, just for fun, and because I’m a jerk like
that.
I’ve never found one back though.
Listed under “weird hobbies people have.”
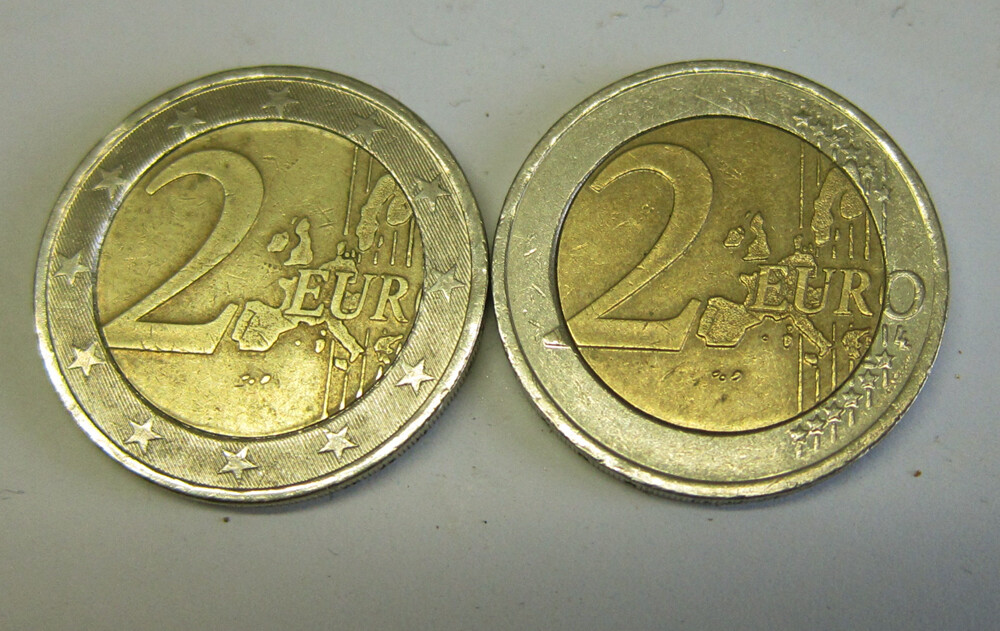
The one on the left has been modified.
so this should indicate the sort of interests I want to have…
speaking of shrunk coins. magnetically shrunk coins are a thing…
Hi Hans,
Art and craft of coin making page 230 by Dennis Cooper, master of
the Royal Mint UK shows the tongue of the outer ready for the thicker
inner to be swaged during the minting process. Based my comments on
this. Have yet to destroy a 2 pound coin to see how there made!!.
Ted.