
Setting Square Shaped Diamonds
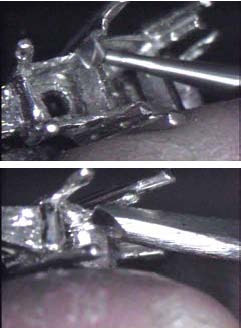
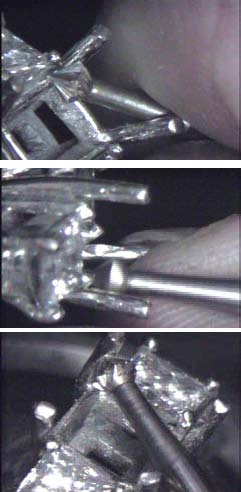
In this article we will set the baguettes and princess cut diamonds in the platinum mounting. Begin cutting the seat for the baguettes use a 45 degree hart bur and undercut each of the end caps. Be certain to hold the bur at the correct depth. Generally in this type of crown you want the girdle of the stone just above the cross bars. Cut just far enough into each end cap so that the length of the baguette will fit tightly into the crown. You need to be careful not to cut too far under the end caps because then the stone would be loose in the crown and difficult to tighten.
10 Minute Read
In this article we will set the baguettes and princess cut diamonds in the platinum mounting.
Baguettes | |
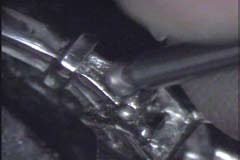 | To begin cutting the seat for the baguettes use a 45 degree hart bur and undercut each of the end caps. Be certain to hold the bur at the correct depth. Generally in this type of crown you want the girdle of the stone just above the cross bars. Cut just far enough into each end cap so that the length of the baguette will fit tightly into the crown. You need to be careful not to cut too far under the end caps because then the stone would be loose in the crown and difficult to tighten. |
 | Then use a bud bur to cut straight into the corners. The hart bur cuts a round seat and you now need to cut the corners to create the straight seat needed for the baguette. Clean out the corner of the end cap and then cut down to create the line for the pavilion corner. Using the point of the bur, trim out the corner of the crown so that no metal will touch the corner of the diamond. Then use the bud bur straight up-and-down and cut along the insides of the crown on an angle to remove some of the metal to make room for the pavilion of the baguette. |
 | Next, use a flat bottom graver to trim the inside of the crown. With the bur rough cut the seat to remove most of the metal. We could have used a graver to cut everything but that just makes more work with the graver and it's easier to do the rough cut with the bur and then go back over it with a flat graver to clean it up. |
| Once the sides are cleaned up, clean the undercut in the end caps. The seat needs to be nice and smooth with no protrusions of metal sticking up that would hit the bottom of the stone and cause the stone to break when tightened. Use the point of the graver to get into the corner to clean them out so that nothing will be hitting the stone on the pavilion. You want the stone to fit snuggly into the seat cut in the end caps, but not touch the metal anywhere else on the mounting. | |
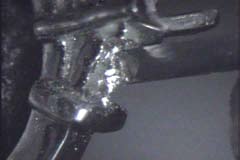
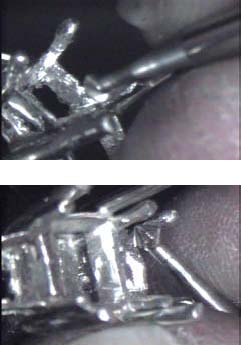
 | Using a pair of chain nose pliers bend one of the end caps out to make room to place the stone into the crown. Then place the stone into the mounting by sticking the small end into the undercut in the end cap and then pushing down on the stone to see if it fits into the seat. Make any corrections needed with a graver before proceeding. With the stone in place take your chain nose pliers and begin to pull the end cap that was lifted up, back into place by pulling it over the end of the stone to secure it. |
 | Once it is in place, use a punch and hammer or a hammer handpiece on your flex-shaft and hammer the metal down over the end of the baguette. This will smooth out the metal and form it down tight over the stone to keep the stone tight. Hold the stone with your fingernail to keep it from bouncing out as you hammer. Just keep working the metal down, 3 working back and forth, so that the metal will be moved over the stone evenly. Keep hammering until the stone is tight and there's no movement in the stone from the hammering. |
| Then go to the end cap on the shank side and hammer it down. You don't need to do much hammering here, you just want to close any gaps in the undercut seat and get the metal down tight onto the stone. | |
Princess Cut Stones | |
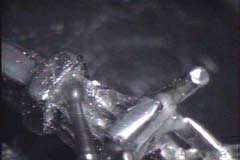
 | To begin cutting the seat for the princess cuts use a 90 degree hart bur and cut a line down the length of the prong creating a miniature V-tip prong to pull over the stone. Cut approximately half way into prong, and go around the mounting cutting all eight prongs to hold the two side diamonds. Then using a wax stick place the stone into the crown to see how it fits. It will not fit all the way into the crown at this point because the seat is not completely cut. We are just looking to see if we have cut into the prongs far enough, and the cuts all line up with the corners of the diamond. |
| Then using a flat graver continue this cut down into the crown. The hart bur will only cut so far so we need to finish the cut with a flat graver. Then use the flat graver to trim the insides of the under-bezel to make sure that no part of the under bezel touches the pavilion of the diamond when it is set. | |
 | Next go back to the 90 degree hart bur and cut the seat for the diamond. Be certain to cut into the prong at the exact same height on all four prongs. Just cut straight into the prong creating a round seat. Do not cut all the way across the prong creating a straight seat, as then there will not be any metal on the sides of the point of the diamond to keep if from slipping out of the prong. |
| Then I use just the point of the hart bur to cut a little divot where the two lines intersect, right where the point of the diamond will be, so that the point of the diamond does not touch the metal. This also cleans up the metal between the two cuts that we made. We actually cut a cross shape cut into the prong and we now want to clean that metal out for the stone to fit in. You could use a bud bur here but since the hart bur is already in your flex-shaft handpiece it is quicker to just use it. Examine the setting and make sure your seat is cleanly cut. | |
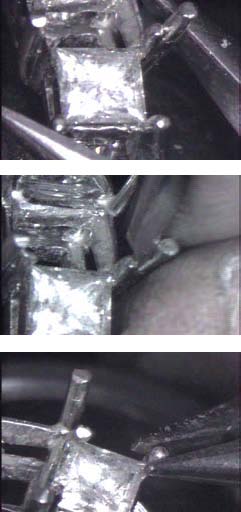 | Once the stone is in place, use a pair of chain nose pliers to begin pulling the outside prongs over the stone. If the stone slips out of the seat be sure to straighten it and get it back in place before continuing. Bend the outside prongs on both side diamonds over just a little bit to start tightening the stone. |
| Then go to the inside prongs and, using a flat graver, slide between the center prong and the side prong pushing the side prongs over the diamond. Make sure the prongs are bending straight over the stone. You want the prong to point directly towards the center of the stone, use your chain nose pliers to make any adjustment needed. | |
| Then grasp the top of the prong and start to push the prong over the stone as you wiggle the prong back and forth a little bit. A slight side to side movement on the prong will help you in pushing the prong over the stone. We left the prongs long when we made the mounting so that we have the extra leverage to push them over the stone without a lot of force. | |
| Check to make sure that all the prongs are down on the stone. Because the prongs are long, they do not need be in contact with the stone the entire length of the prong. Then, using a pair of clippers, cut the extra length off of the prong. You could use a fine saw blade to cut these off, but if you're careful it's quicker to use a pair of fine tip end cutters or side cutters and clip the prongs off. | |
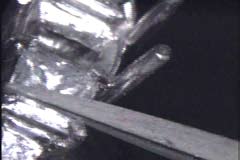 | Next use a number six cut needle file to shape the prongs. I use a three square file that has a safety edge; it has been rubbed on a sharpening stone to remove the teeth from the edge so that it will not damage the diamond. Take a little bit off the height and then round off the ends of the prongs. Go around the four prongs on both of the side stones and file each of the eight prongs a little bit at a time. If you work around, doing each prong a little bit at a time it's easier to keep the prongs even and uniform. If you would completely file one prong before you move onto the next it would be easy to get the prongs uneven and not shaped the same. |
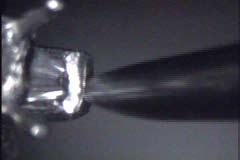
 | The last step in cleaning up the prongs is to use a cup bur. Use a cup bur that will fit over the top of the prongs but not so large that it hits the diamond. Then, using a slow speed and a lot of lubricant, just roll the cup bur around on the end of the prong. This rounds off the prong and assures us that all eight prongs are exactly the same size. |
| Next we need to set the center stone. We use the same procedures to set the center stone as we did the side stones. We use a little bit larger hart bur because the stone is larger and also the prongs are larger in diameter. We again cut up and down the each prong creating a 90 degree V shape, cutting about halfway into the prong. | |
| Then use the hart bur to cut across the prong. Be certain you're cutting the same height on all four of the prongs and at an equal distance above the side diamond on each of the prongs. Cut straight into the prong providing a little ledge for the girdle of the diamond to set on and to weaken the prong to make it easier to bend over. | |
| Then use the point of the hart bur to cut a little divot for the point of the stone right where the two lines cross, as well as to finish cutting the seat. | |
 | Then place the diamond into the seat and, using chain nose pliers, start to bend each of the prongs over. Next grab the prong at the top and just slightly rock the prong back and forth, just a little bit of side to side movement as we push forward on the pliers. As you begin to get the stone tightened you need to stop and check and make sure that the stone is straight and all four prongs are square to the mounting and make any little adjustments needed at this time before the prongs are down on the stone and the stone is tight. |
| If necessary we can reach across the mounting with our pliers. Placing one jaw below the girdle on the one prong and the other at the top of the opposite prong and squeeze in on the pliers. This will bend the one prong over the girdle of the stone. | |
| Once the prongs are down onto the stone and it is tight, clip off the excess prong. Then using our No. 6 cut needle file, shape the prongs. Work each prong a little bit at a time and go around the mounting cleaning up each of the four prongs, rounding them off, smoothing them out, and getting them to the proper height. Then use a cup bur to finish them off. | |
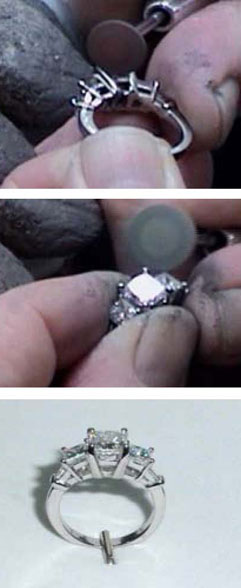 | Now we need to clean up all of our setting work. Use a brown knife edge rubber silicone wheel, which is about as abrasive as a pumice wheel. I like the silicon wheels a little better than pumice wheels because they seem to last longer. Go around the mounting and remove all of the file marks and any of the nicks that may be left from the pliers or any of the other tools that were used. |
| Then use a green silicon wheel which will leave a nice polish on the prongs. Go over all the prongs and smooth them off. Polish down in between the prongs and the edge of the prongs along the stone. | |
| Then go to a hard felt wheel and polish with Platinum Tripoli. Polish and clean up the entire ring and then put it in the ultrasonic to remove the Tripoli. Then polish the ring on the polishing machine with carrot rouge and then back to the ultrasonic for final cleaning and the finished ring is ready to be delivered to the customer | |
Related Articles

3 Designers on a Pearl Challenge
Gem-Setting Tools: A Practical Guide To All The Hand Tools & Bench Supplies You’ll Need
Fabricating a Crown to Fit a Stone

Setting a Pear Shape Emerald in a Full Bezel


The All-In-One Jewelry Making Solution At Your Fingertips
When you join the Ganoksin community, you get the tools you need to take your work to the next level.
