
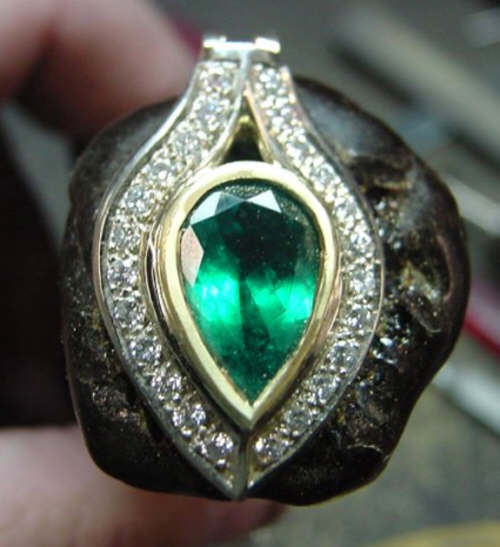
Cabochon Stone Full Bezel Setting
One of the most basic designs in stone setting is "Bezel Setting". It is so rudimentary in its concept. It is very pleasing to the eye also in its simplicity. This concept blends with the smooth vertical shape of the stone. There are no sharp corners, only gradual flowing lines to conform to the stone. So now let us delve into this different style of setting. A round bur that is re-shaped to have the same contours of the "Cab" stone will enable you to perform and overcome any difficult bezel setting procedure.
6 Minute Read
One of the most basic designs in stone setting is "Bezel Setting". It is so rudimentary in its concept. It is very pleasing to the eye also in its simplicity. This concept blends with the smooth vertical shape of the stone. There are no sharp corners, only gradual flowing lines to conform to the stone. So now let us delve into this different style of setting.
In my AJM article in April 2004, I showed how a round bur that is re-shaped to have the same contours of the "Cab" stone. This particular half-round, round bur along with a proper execution, will enable you to perform and overcome any difficult bezel setting procedure.
Just what kind of tools do 'we' need?
- Very secure ring clamp, steel ring-mandrel,
- 3 ounce hammer with a 10 inch length handle,
- Steel hand held punch of 3 inches in total length.
- Copper or Brass hand pusher!
Why am I detailing such minute measurements? The hammer handle should be light enough as not to cause rapid onset of "hand and arm" strain while during the "hammering" process. The "not to exceed 3 inches length" of the punch, that is while you are hitting, you won't have to time after time, judge where the hammer is hitting, or missing.
Did we not mention files?
Pillar file of #2 and #4 cuts. Flat edged Pumice wheels of #180 grit and Flat graver of #39 or a #40 (maximum). We will work now with the simplest version of a Cabochon setting. This will entail using a stone of 5×7 mms or a 9×7 mm. Why would I be using these two sizes? Just one basic answer, this is so we can see what we are working with, simple?
Tightly secure the ring in to your ring-clamp. I use a hammer to hit the clamp-peg tighter into the clamp. This will ensure a tight fitting, non-moving ring as we start this setting process! With your Pillar file of #2 cut, ascertain that the bezel walls are flat and not too high on one side than the other. Overall and equal bezel height is very important at this juncture.
Briefly examine the internal areas of the bezel base for any little extra bits of gold that might be a miscast or defect. Remove them with a small round bur of #006. Place your ready to be set Cabochon stone on the top of the bezel wall. Is it over shadowing the metal in width and length? If so, this is the next stage in preparation. I will use a rounded surface of a metal punch and ream open the bezel walls as to allow the stone to gently fall into place. With your finger on the stone, turn over the ring with a loupe and view if the stone is fitting against the base of the bezel. There should be no space between the base of the stone and the bezel frame. This is very important!

If there is, you might have a stone that is crooked or held up by a little bur of gold. If there is a little bur of gold when hammering, there will be lots of stress on this stone and then you might then have a chipped stone.
Now using my half-round round shaped bur with the same overall equal dimensions or nearly the same contour as the "Cab" stone starting at the base of the bezel wall. I would initially scrape the surface at equal increments.
At each 1/4 turn dig into the gold a tad deeper. I will at my disposal, have many sizes of these modified burs. I will gauge each bur as the correct angle of the stone. This bur should not be used at a high rate of motor speed. Please note at all times how you are progressing. You should at all times, be using your 10x power loupe. Please avoid any gold dust hitting your eyes!
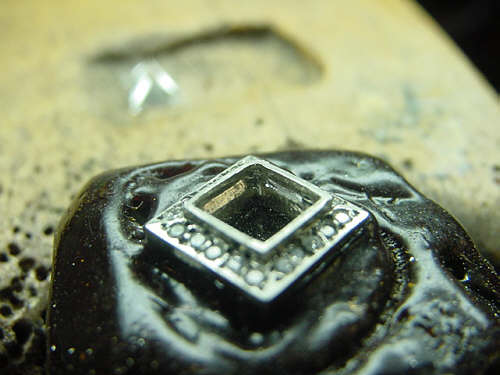
Place the stone into this bezel, in this picture, Bright-Cutting is done after!
Here are some questions for you, now!
- Is the stone secure in the bezel?
- Are the walls of equal height?
- Are the walls of equal thickness?
- Is the stone properly aligned to the overall shape of bezel opening?
If these 4 basic questions are answered favourably, you can now and only now proceed to the next stage of setting.
I would like to underscore the reason of using a Copper or Brass metal pusher, why? If you are going to full bezel an Opal or soft Stone, you shouldn't be having any movement of that stone. I would have you to use these two selected pushers to carefully just 'press over the tip' of the bezel. This way you will 'secure" the metal to the surface. In case of slipping on the gold, you will definitely scratch the surface of 'that' stone by using a steel pusher. Copper or Brass is a lot softer and do not mark the stone.
If you are not sure of using a softer metal pusher, I have two other approved methods; an elastic band around the ring mandrel and the stone. I also would let you to use a touch of "fast acting" glue. This "glue method" will be used only as a 'stop-gap' measure and not to be intended as the best way of Cabochon setting. These three methods are only used to prevent any other movement of the stone, while starting the "hammer" setting.
With your 3 inch metal punch held firmly in your hand now using your hand held hammer on the steel ring mandrel. Proceed to hit this punch with great care. Do not hit hard, but only tap! Hold your punch at a 45° angle AWAY from the stone. When you see the metal start to press against the stone, STOP! Turn the ring around and start the hammering of the other side of the bezel. You are now starting to have the walls "grip to secure" the vertical sides of the stone.
Once this is now done and the stone is feeling tight, remove the elastic band and with total confidence so far, initiate the setting of the ends of the oval bezel setting.
Again, as this is completed, carefully making sure all of the walls are nicely holding the surface and no spaces between the metal and the stone. You can now just tap to "even-off" the walls to make a smooth, even surface on the hammered section of the bezel wall.
I will only now use my "Flat" Graver to give a Bright-Cut to the very inside of the bezel wall. This gives the ring a clean and professional appearance of this kind of setting… who wants a mediocre setting job? You should make sure that your graver is sharp and bright. This will leave a smooth inner surface cut, against the stone, attesting to your higher setting abilities.
As this cutting is now completed, we will use either a Triangular #4 cut or your Pillar file #4 and smooth file the areas where your hammer touched. In a smooth flow of filing, rotate or file in a semi-circular fashion on the bezel wall tips only. Keeping in mind that you should be having two surfaces to be considered. The vertical wall and the 45 degree angle and the hammered facet. I will impress upon you the reader and setter, to acquaint yourself with the Pumice wheel of #180 grit, Flat faced wheel.
Holding the ring in your hand, allow the slow rotating wheel to only remove the marks left by your Pillar file. Do not let this Pumice wheel touch your soft stone, as an abrasive wheel, it will mark or destroy the surface you are so diligently trying to keep fresh!
If you are happy with your results, I'll send you all of my setting work! Remember, that after 1,000's of rings and bezels, you will soon get to be very proficient, trust me!
Related Articles
Sapphire Retail Sales Back with a Twist

Feldspars: Moonstones and Labradorite

Vietnam’s Quy Chau Ruby Mine
How Gemstones Get Their Colors


The All-In-One Jewelry Making Solution At Your Fingertips
When you join the Ganoksin community, you get the tools you need to take your work to the next level.
